
How to use SaveAs command in Excel through VBA
 By
SpreadCheaters
By
SpreadCheaters
VBA can also be used to simulate the function of pressing the standard file menu buttons such as Save, SaveAs etc. In this tutorial we’ll learn how to call the SaveAs method from VBA to save Excel files and learn what are the required parameters. The “Save As” function in VBA for Excel saves the workbook as a new file, which can be accomplished in the same manner as clicking the “Save As” button or using the keyboard shortcut (Alt > F > A).
The behavior of “Save As” is similar to “Save”, with the exception of specifying the name for the new file. There are several parameters that can be defined when using the “Save As” function in VBA for Excel.
VBA (Visual Basic for Applications) is a programming language built into Microsoft Excel that allows you to automate tasks, create custom functions, and interact with other Office applications. With VBA, you can write code to perform actions such as manipulating data, formatting cells, generating charts, and much more. This can save time and increase efficiency by eliminating the need for repetitive manual tasks.
Step 1 – Open VBA Editor through Developer Tab or Shortcut key
– From the list of main tabs, click on the Developer Tab.
– If you can’t see the Developer tab in your list of tabs then follow this to enable developer tab in Excel.
– From the Developer tab, click on the Visual Basic action button to open VBA Editor.
– The same can be done by pressing the ALT+F11 shortcut key.
The SaveAs method in VBA for Microsoft Excel has several parameters that allow you to customize the saving process. Follow along the steps below to understand how to use parameters of the SaveAs method.
Step 2 – Use the Filename Parameter for a new file name
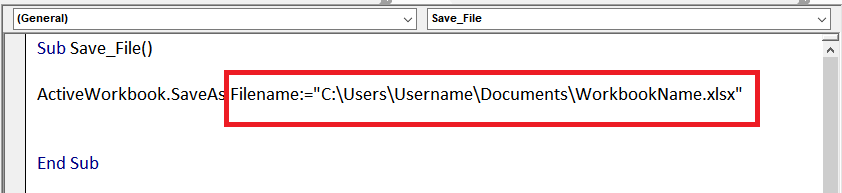
– This parameter specifies the file name and path of the workbook to be saved. For example, in the VBA Editor above, write the following code to save the file with the name of your choice.
Step 3 – Use the Fileformat parameter to save file with new format
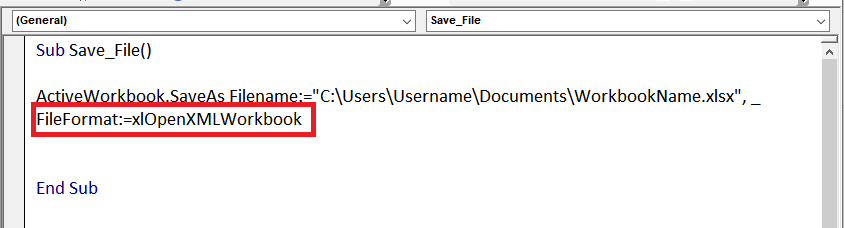
– This parameter specifies the file format of the saved workbook. For example, to save the workbook as an Excel 2007 and later format, you would use the following code above.
Step 4 – Use CreateBackup to save file with backup
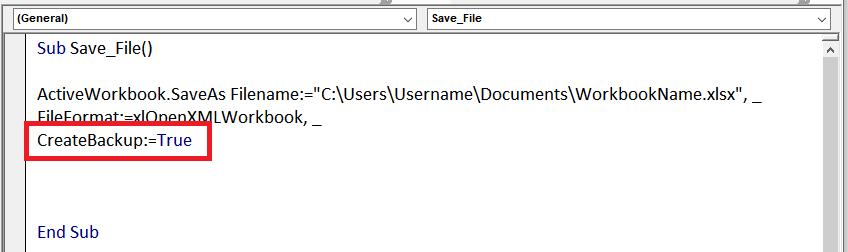
– This parameter determines whether or not a backup copy of the workbook should be created before saving. The default value is False. See example above;
Step 5 – Use AccessMode to save file with shared or exclusive mode
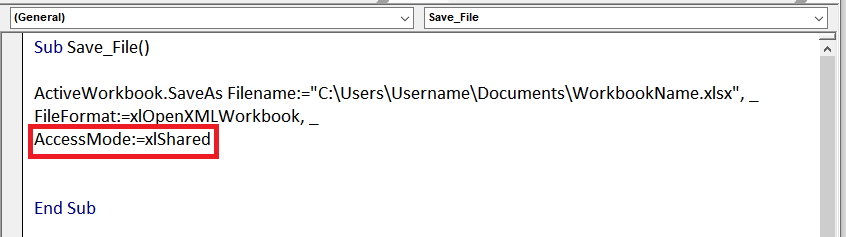
– This parameter specifies the access mode for the workbook when it is opened. The possible values for AccessMode are xlShared and xlExclusive. For example see above:
Step 6 – Use Password to save file with a password
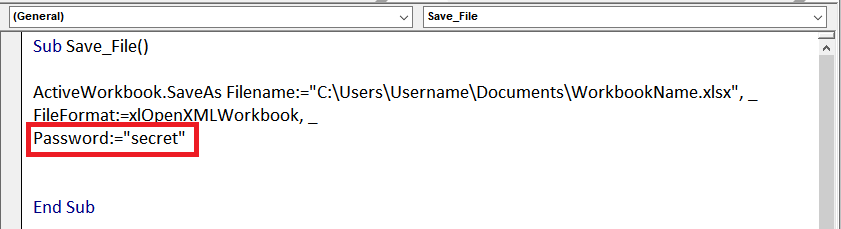
– This parameter specifies a password that is required to open the saved workbook. For example see above:
Step 7 – Use WriteResPassword to save file with a password for modification in workbook
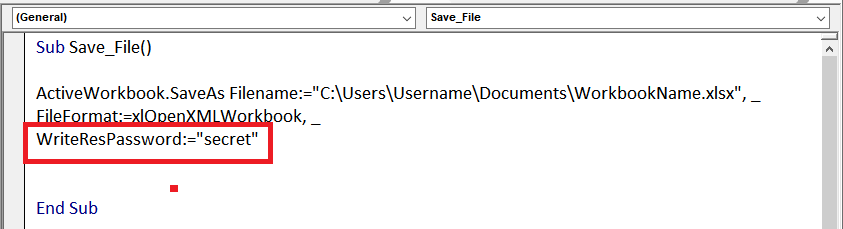
– This parameter specifies a password that is required to modify the saved workbook. For example above:
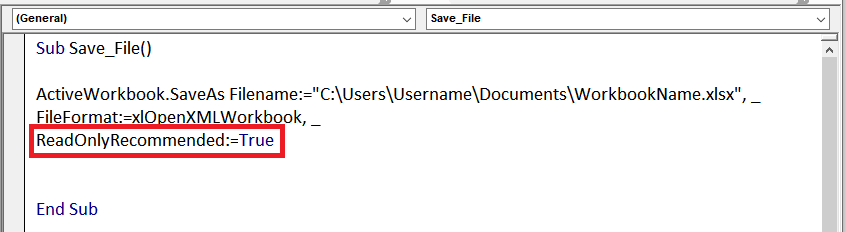
Step 8 – Use ReadOnlyRecommended to save file as ReadOnly

– This parameter determines whether or not the saved workbook should be opened as read-only by default. The default value is False. For example see image above:


