How to unhide an Excel file
In this tutorial, you will learn how to reveal a hidden Excel file so that you can work on it effectively. As you can see, we have a folder that consists of a hidden file. To work on it we need to unhide it. To accomplish this, follow the steps below

Unhiding refers to the action of revealing and displaying hidden elements. Unhiding allows you to make the hidden elements visible again, enabling you to view or edit them as needed. Unhiding is beneficial when you want to access or work with hidden information that was intentionally concealed for organization, formatting, or data privacy purposes.
Step 1 – Navigate to the folder containing Hidden File

– To unhide an Excel it is really important to know that in which folder that file is located. Navigate to that known folder which contains that hidden file
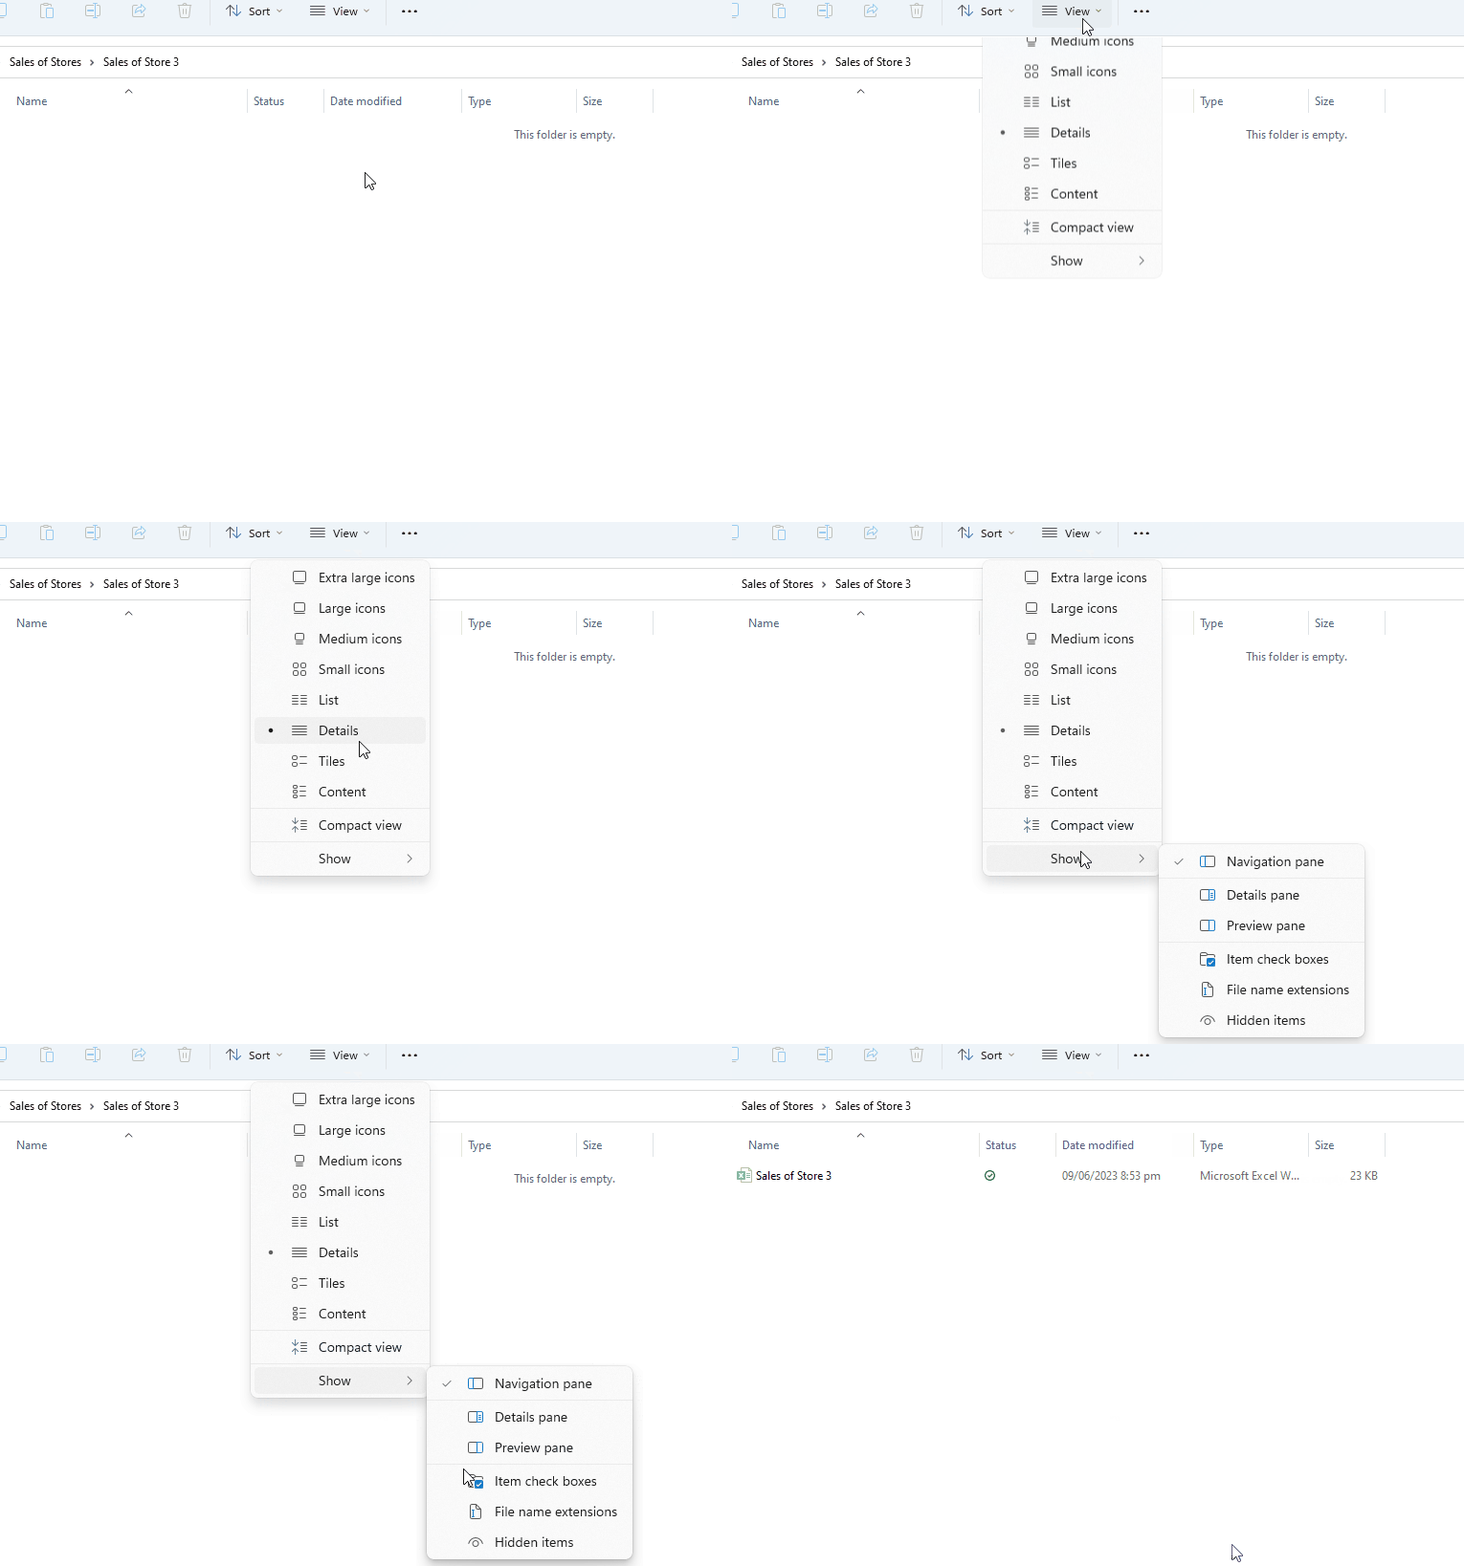
Step 2 – Select Hidden items

– Click on the View tab in the top menu bar.
– Select Show from the drop-down menu.
– Select Hidden item.
– A translucent file will appear.
Step 3 – Unhide the Excel file

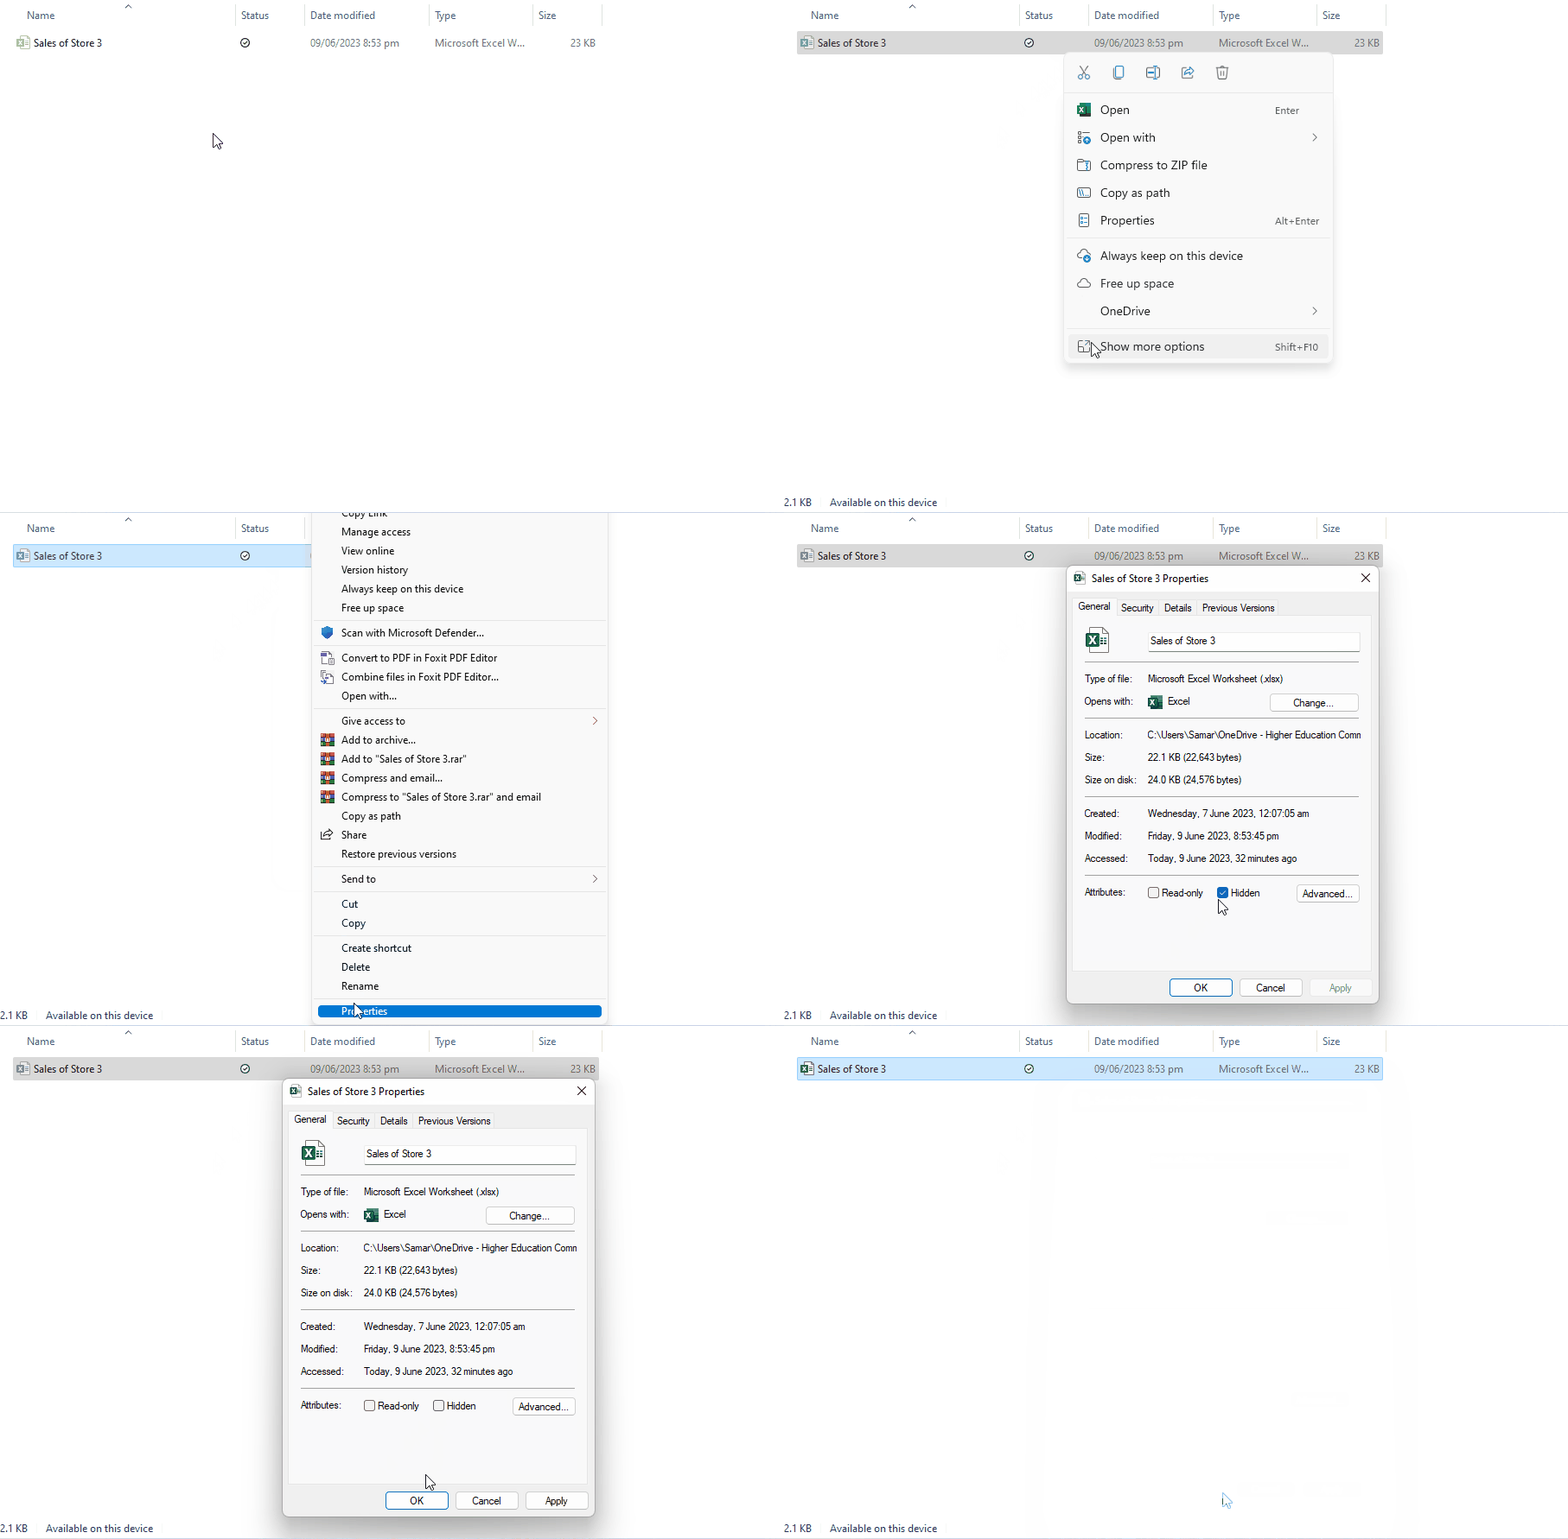
– Select the translucent-looking file. This is the file that was initially hidden.
– Right-click on that file.
– Select Show More Options or press “Shift + F10”.
– Select Properties from the context menu.
– Uncheck the hidden option in the attribute section.
– Select OK or Apply to unhide the file.


