
How to see changes made in Excel
 By
SpreadCheaters
By
SpreadCheaters
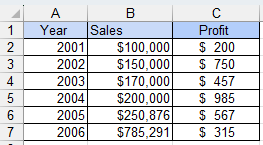
In this tutorial, you will learn how to view changes made in Excel. We are using yearly sales and profit as a dataset. Microsoft has expanded the availability of the ‘Show Changes’ feature, which was initially exclusive to Excel Online, the web-based version of Excel. According to Microsoft, users can now find this feature in Excel 365 for both Windows and Mac operating systems.
The feature that allows users to see the changes they have made in a workbook is important for several reasons. It provides a clear audit trail, helping users track their modifications, correct errors, and revert to previous versions if necessary. It also enables collaboration by highlighting who made specific changes, facilitating teamwork and accountability. Additionally, the feature promotes transparency, and accuracy, and ensures data integrity, which is crucial for quality control and compliance purposes in various industries.
Step 1 – Locate the Review Tab
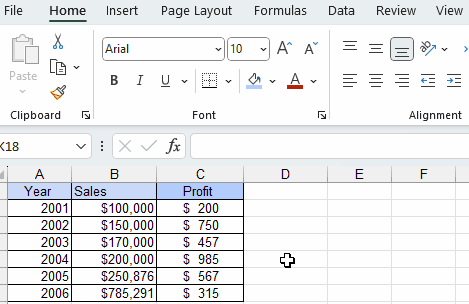
– Click on the review tab from the list of main tabs.
Step 2 – Select the “Show changes” option from the ribbon
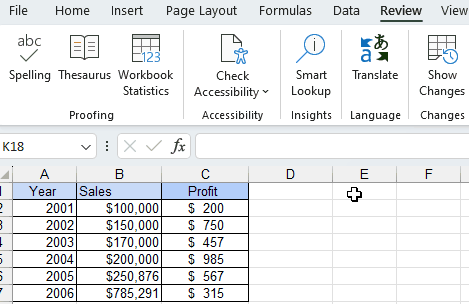
– Locate the “Show changes” option in the “Changes” group.
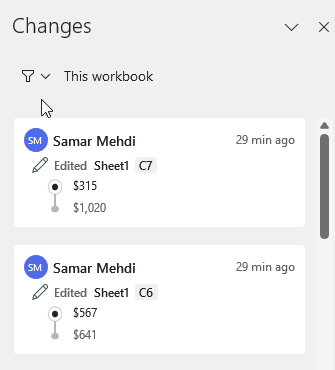
Step 3 – Track Workbook Changes
– A task pane on the right side of the worksheet displays a running list of all workbook changes. In collaborative work, you can identify the person responsible for each specific change made. When values are updated, the entry displays both the old and new values, facilitating reversions if needed.
Step 4 – Filter the changes
– You can also filter the changes made within the workbook
– Click on the funnel option
– A drop-down menu will appear
– It will show 3 options Range, Sheet, and Clear filters
– The range option helps you to filter changes made in a range of cells
– Select cells to view changes: drag or enter the range.
– The sheet option helps you to see changes made within a sheet
– The Clear Filters option will clear all the filters you searched


