
How To Organize Bank Statements In Excel
 By
SpreadCheaters
By
SpreadCheaters
Keeping track of your financial transactions is crucial for managing your money effectively. One popular tool for organizing bank statements is Microsoft Excel. With its versatile features and spreadsheet capabilities, Excel allows you to create a well-structured and easily accessible record of your transactions. In this article, we’ll guide you through the process of organizing your bank statements in Excel, empowering you to take control of your finances and make informed financial decisions.
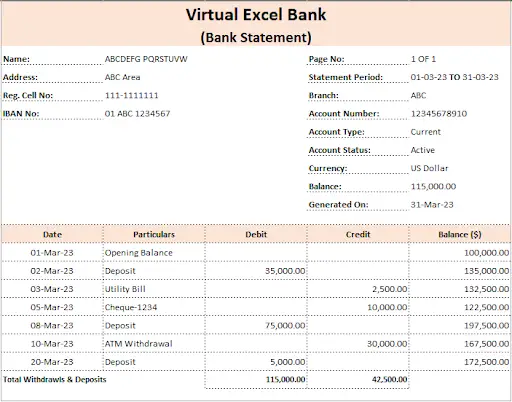
Suppose we have the following bank statement in excel and we want to organize it.
Method 1 – Sort According To Particular Details
In this first method, we will do only one level sorting by arranging the bank statement details with respect to the particulars only.
Step 1 – Select Data
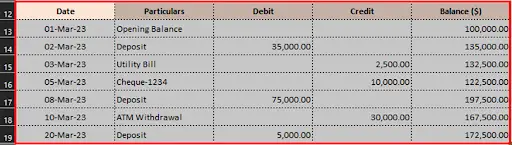
- Select data.
Step 2 – Go To The Data Tab

- Go to the Data Tab under the Sort & Filter group click Sort button.
Step 3 – Sort Dialog Box
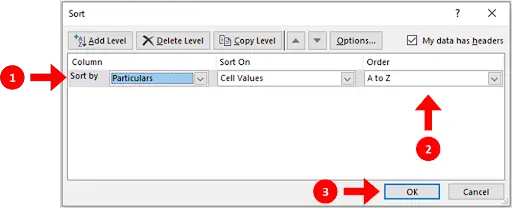
- Select Particulars from the sort by column drop down & order A to Z from the order drop down.
- Click the OK button.
Step 4 – Data Sorted With Particular

- Bank statement sorted through particulars.
Method 2 – Sort According To Debit Amount & Date
In the second method, we’ll arrange the details of the bank statement by doing a two level sort. We’ll first sort the data by the debits and then by dates. Let’s learn how to do it by following the steps shown below.
Step 1 – Select Data

- Select data.
Step 2 – Go To The Data Tab

- Go to the Data Tab under the Sort & Filter group click Sort button.
Step 3 – Sort Dialog Box
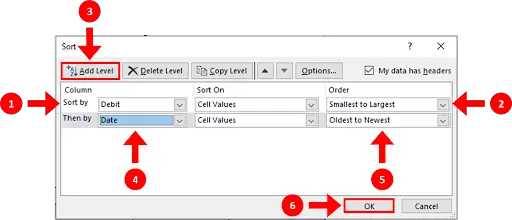
- Select Debit from the sort by column drop down & order Smallest To Largest from the order drop down.
- Click on the Add Level button.
- Select Date from the sort by column drop down & order Oldest To Newest from the order drop down.
- Click the OK button.
Step 4 – Data Sorted With Debit Amount & Date
- Bank statement will be sorted.


