How to link rows in Excel so they will stay together during sort
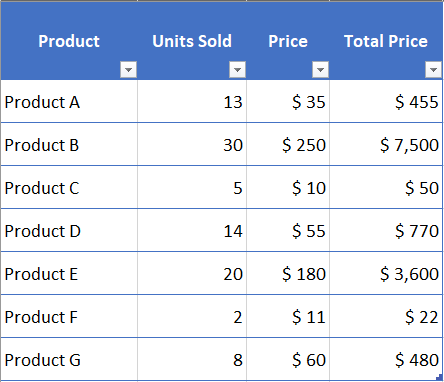
Excel is an incredibly powerful tool for organizing and analyzing data, but it can be frustrating when you need to sort your data by a specific column while also keeping your rows together. This is a common issue for anyone working with large datasets or complex spreadsheets, but fortunately, there are several ways to sort data by column in Excel while maintaining the integrity of your data. In this article, we’ll explore sorting data by column in Excel that will help you to work more efficiently and effectively with your data.
Let’s understand this with the following example by sorting the above dataset.
Method 1 – Sort From Data Tab
Step 1 – Select The Column
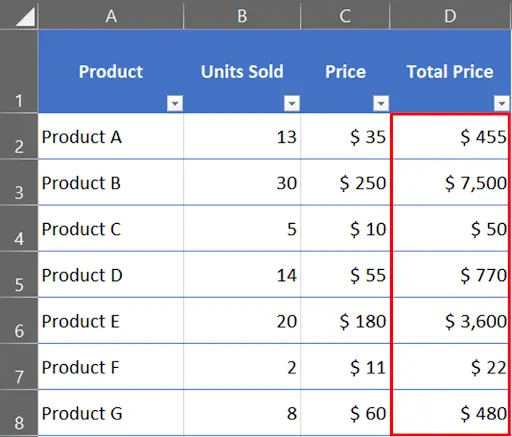
- Select the column through which you want to sort your data.
- For our example, we will sort our data with column D i.e Total price.
Step 2 – Select Data Tab

- Click on the Data Tab.
- Under the Sort & Filter group, click on the Sort button.
Step 3 – Sort Warning Dialog Box
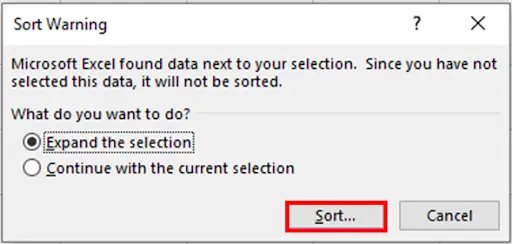
- When you click on the Sort button, the sort warning dialog box will appear on your screen.
- That’s the tricky part. The sort warning dialog box will give you two options. Either to expand your selection or continue with the current selection.
- Expand selection means that it will keep the rows together with the column while sorting whereas if you go with the second option it will only sort the column, not the whole data.
- Select the first option & click the sort button (it will be selected by default).
Step 4 – Sort Dialog Box
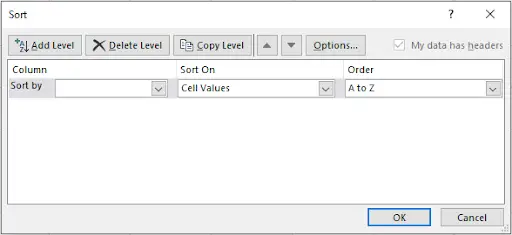
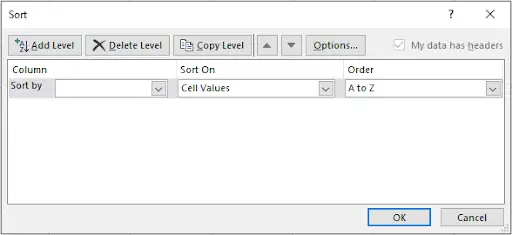
- When you click on the sort button, the sort dialog box will appear on your screen.
Step 5 – Choose Sort By Column
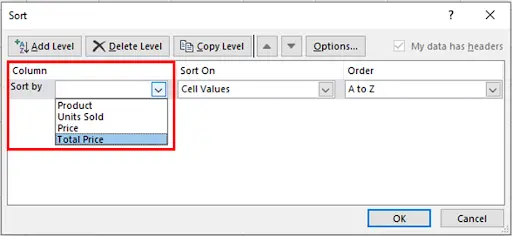
- Under column, in the sort by box, select the column that you want to sort. For our example, we want to sort our data by Total Price.
- From the drop down list select Total Price.
Step 6 – Choose Sort Order
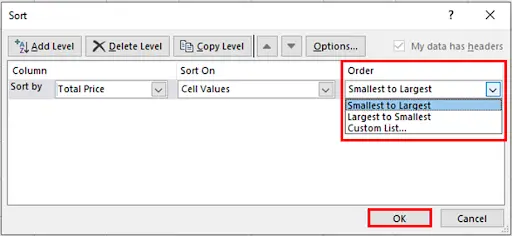
- Now we will choose sort order.
- Under Order, select how you want to sort the data. For our example, we will select the smallest to largest sort order.
- Click OK.
Step 7 – Data Sorted
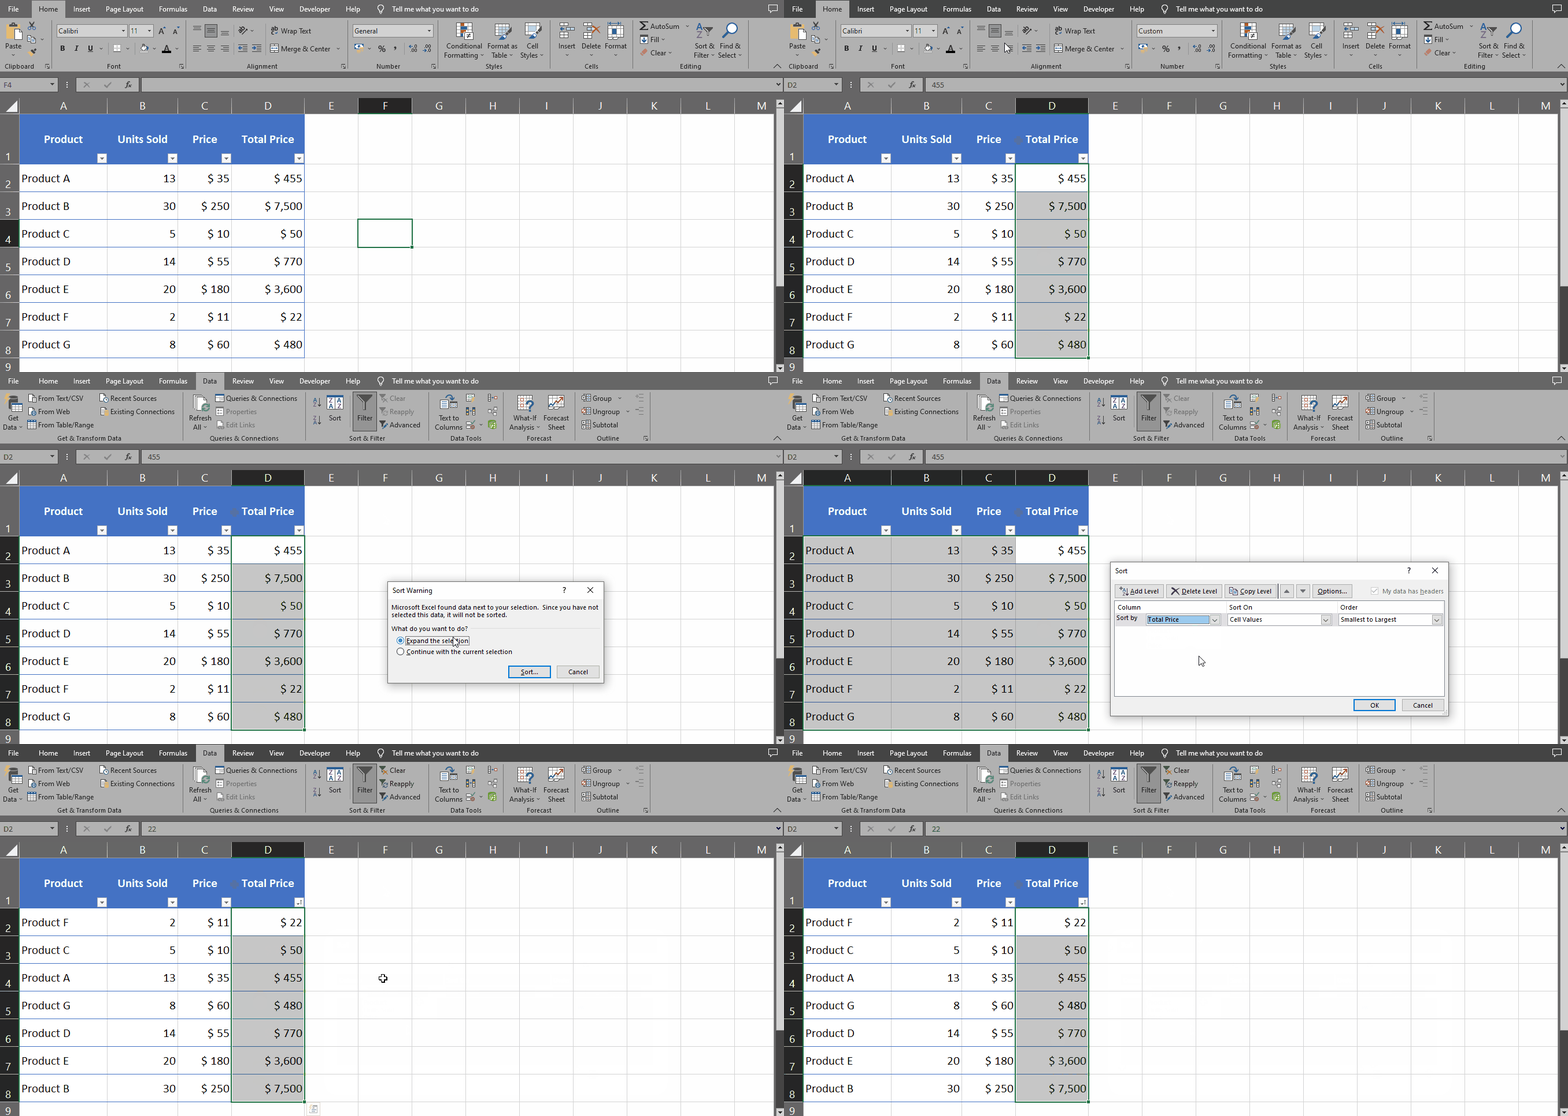
- Data will be sorted according to the Total price column in smallest to largest order.
Method 2 – Sort From Editing Group
Step 1 – Select The Column
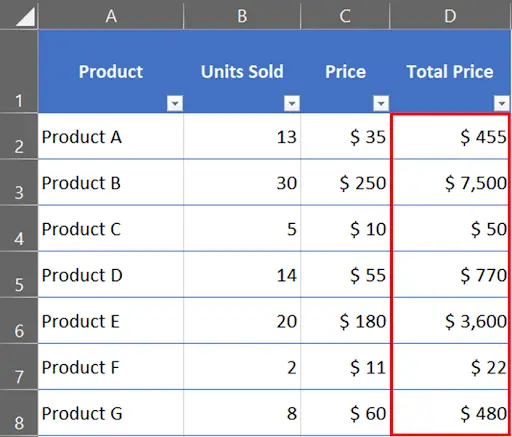
- Select the column through which you want to sort your data.
- We will sort our data with Total price.
Step 2 – Select Home Tab

- Go to the Home Tab, in the Editing group click the Sort & Filter Button.
Step 3 – Select Sort Option
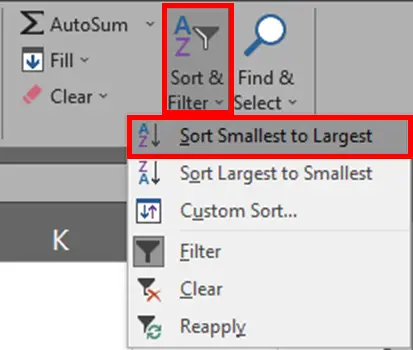
- Here you will see different sort options. We will select Sort Smallest to Largest.
Step 4 – Sort Warning Dialog Box
- When you click on the Sort button, the sort warning dialog box will appear on your screen.
- You will see two options. Either to expand your selection or continue with the current selection.
- Expand selection means that it will keep the rows together with the column while sorting whereas if you go with the second option it will only sort the column, not the whole data.
- Select the first option & click the sort button (it will be selected by default).
Step 5 – Data Sorted With Total Price
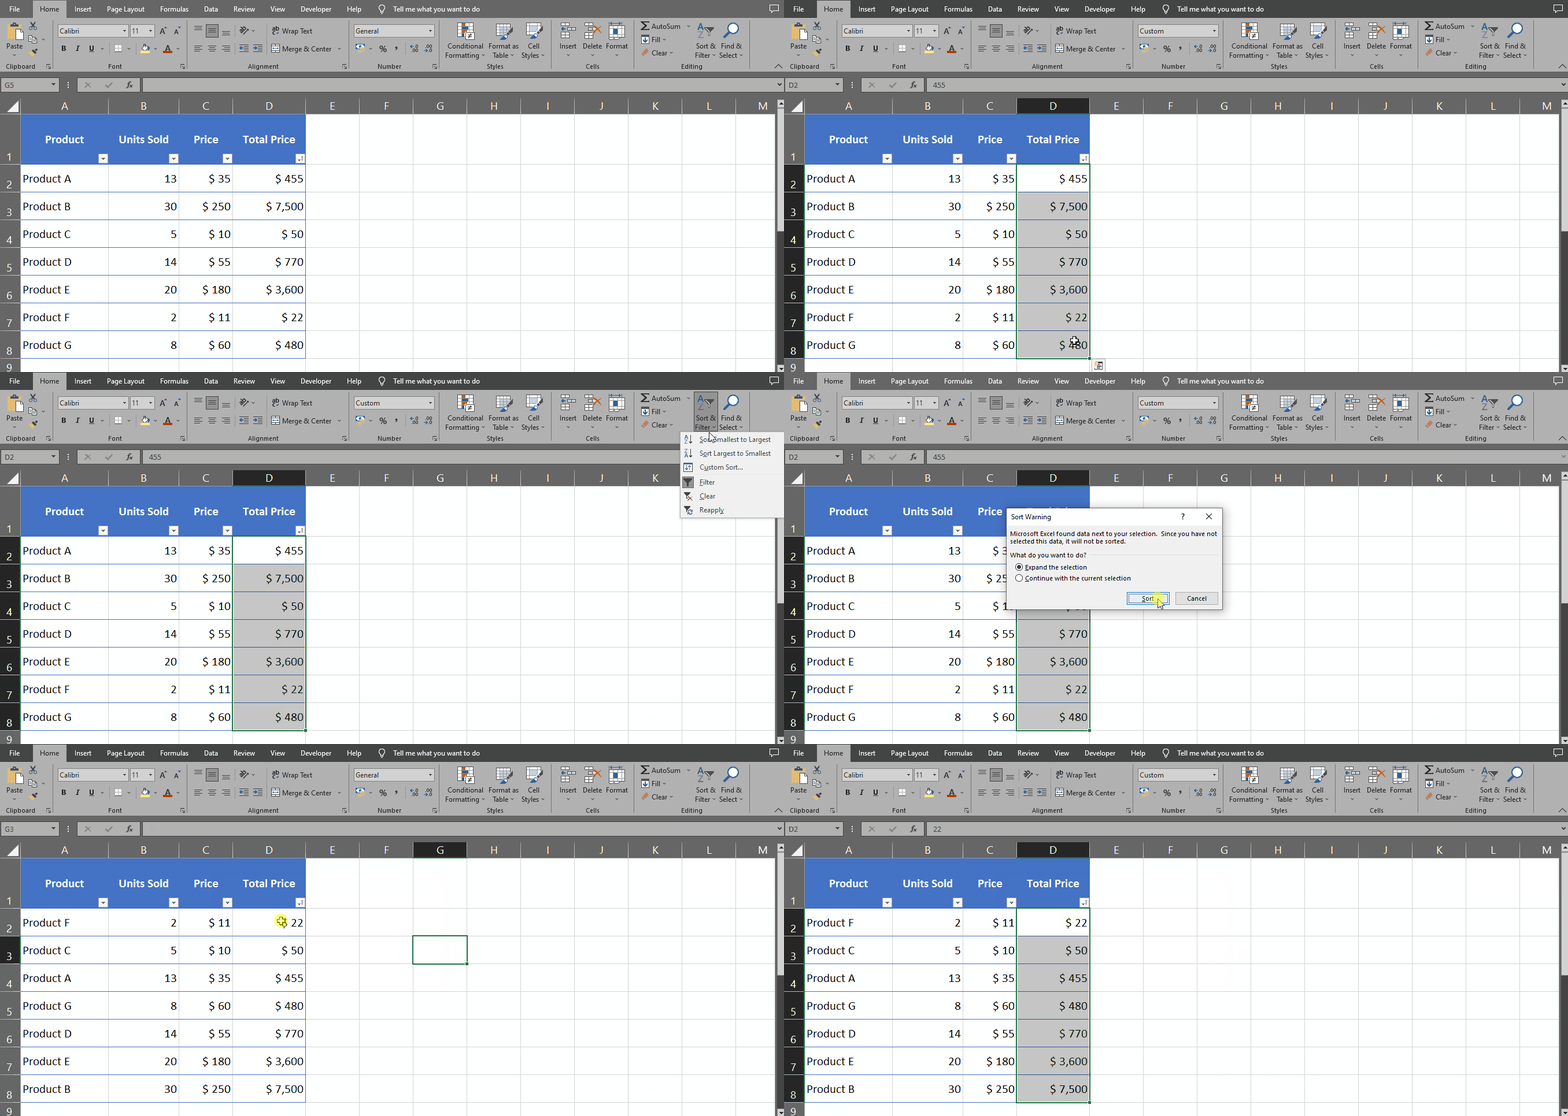
- When you click on the Sort button, all of your data will be sorted according to Total Price column.
Method 3 – Sort From Context Menu
Step 1 – Select The Column
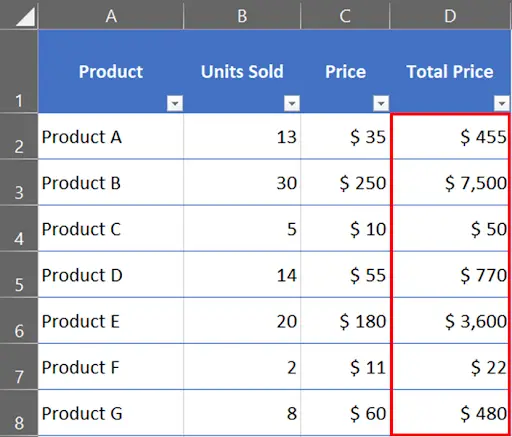
- Select the column through which you want to sort your data.
- We will sort our data with Total price.
Step 2 – Go To The Context Menu
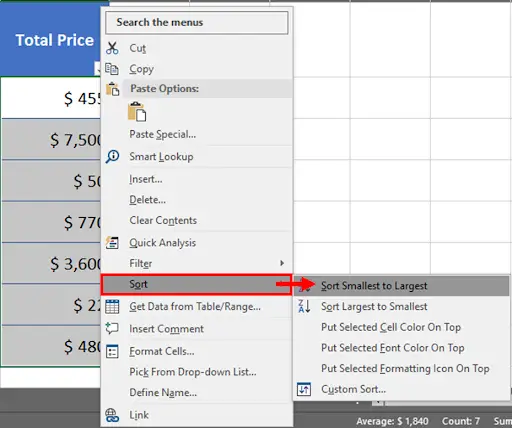
- Right click on the selected column, the context menu will be displayed.
- Go to the sort menu & select the desired option.
Step 3 – Sort Warning Dialog Box
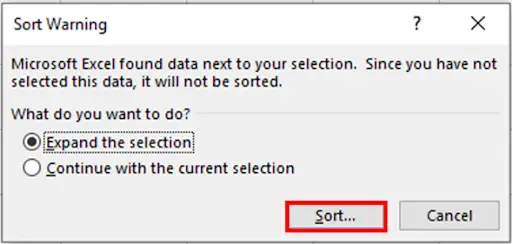
- When you click on the Sort button, the sort warning dialog box will appear on your screen.
- You will see two options i.e Expand the selection or continue with the current selection.
- Expand selection will keep the rows together with the column while sorting whereas the second option will only sort the column, not the whole data.
- Select the first option & click the sort button (it will be selected by default).
Step 4 – Data Sorted
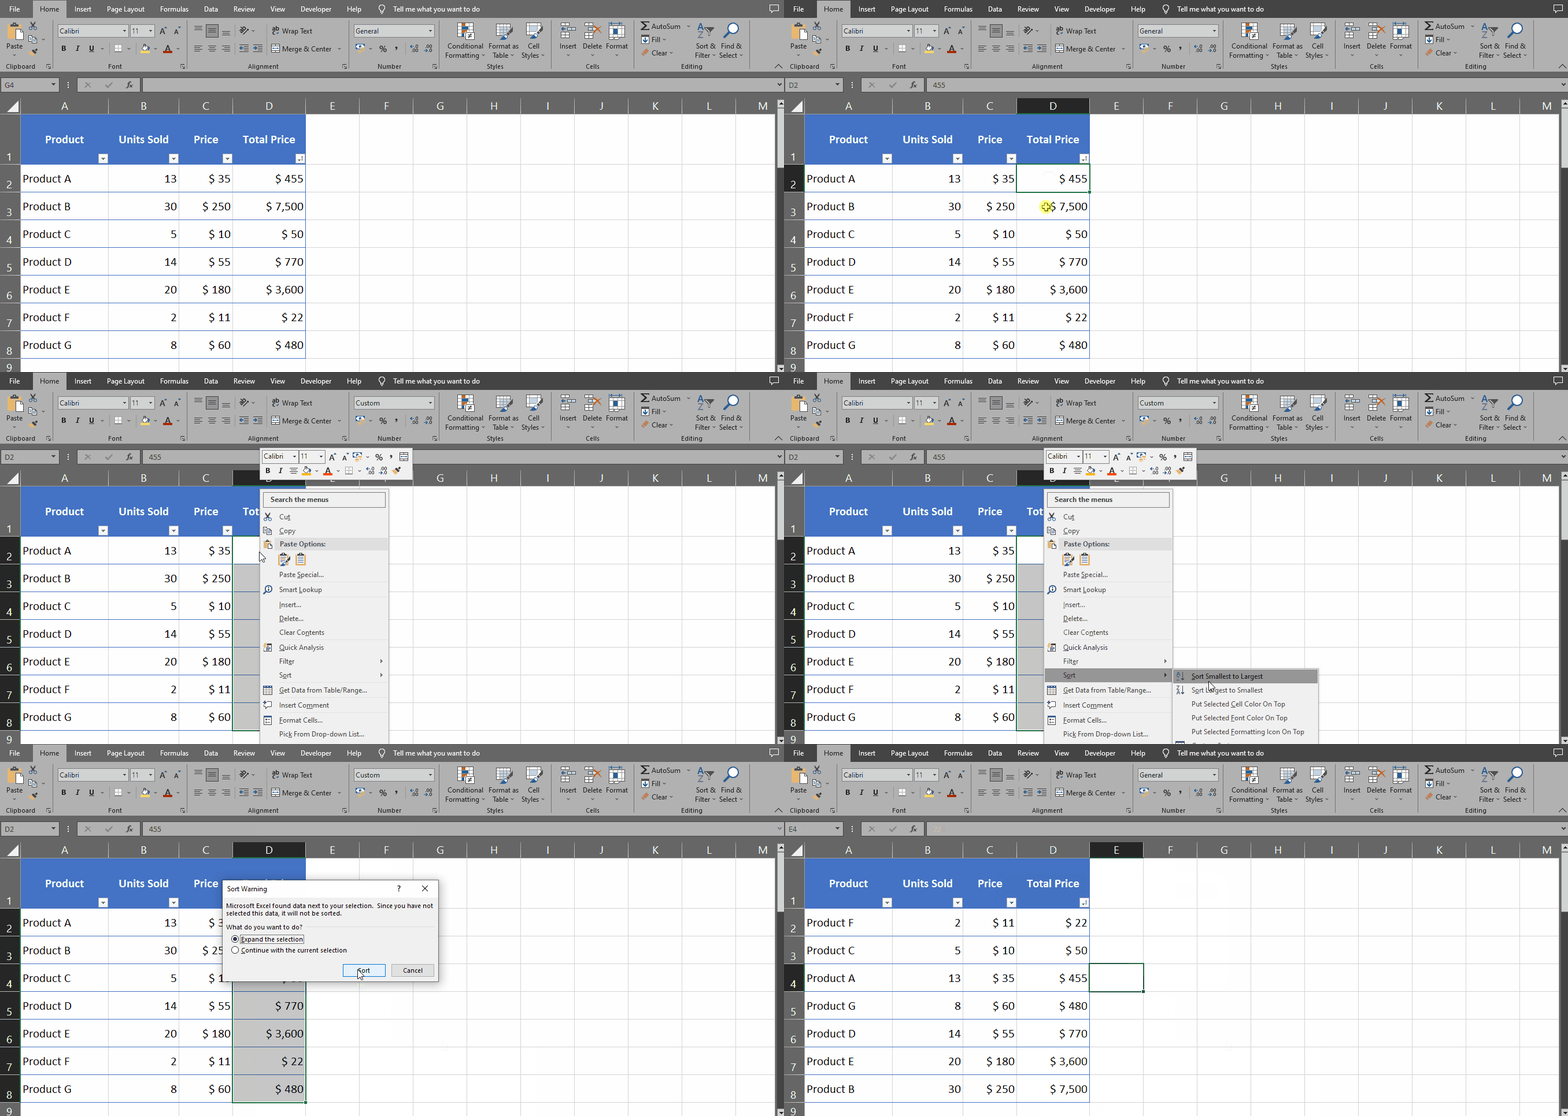
- All of your data will be selected with reference to the Total Price column.


