
How to lock cell in Google Sheets
 By
SpreadCheaters
By
SpreadCheaters
There are many functions in google sheets, one of them is lock function. Users can use this functionality to prevent other users from editing specific cells. For businesses that need to safeguard data from unauthorized changes, this function is helpful. It is beneficial for people who want to safeguard their data from unintentional alterations.
That’s exactly what you will be learning in this step-by-step tutorial. In the given example, we want to lock the cells containing the emails. Follow the below given steps:

Google Sheets is a free, web-based spreadsheet application by google. It enables collaboration, allowing numerous users to edit and format files in real-time, and it enables users to edit, organize, and analyze various forms of information. You can perform different operations on cells, format them and can perform multiple calculations on them.
Step 1 – Select the cells you want to lock
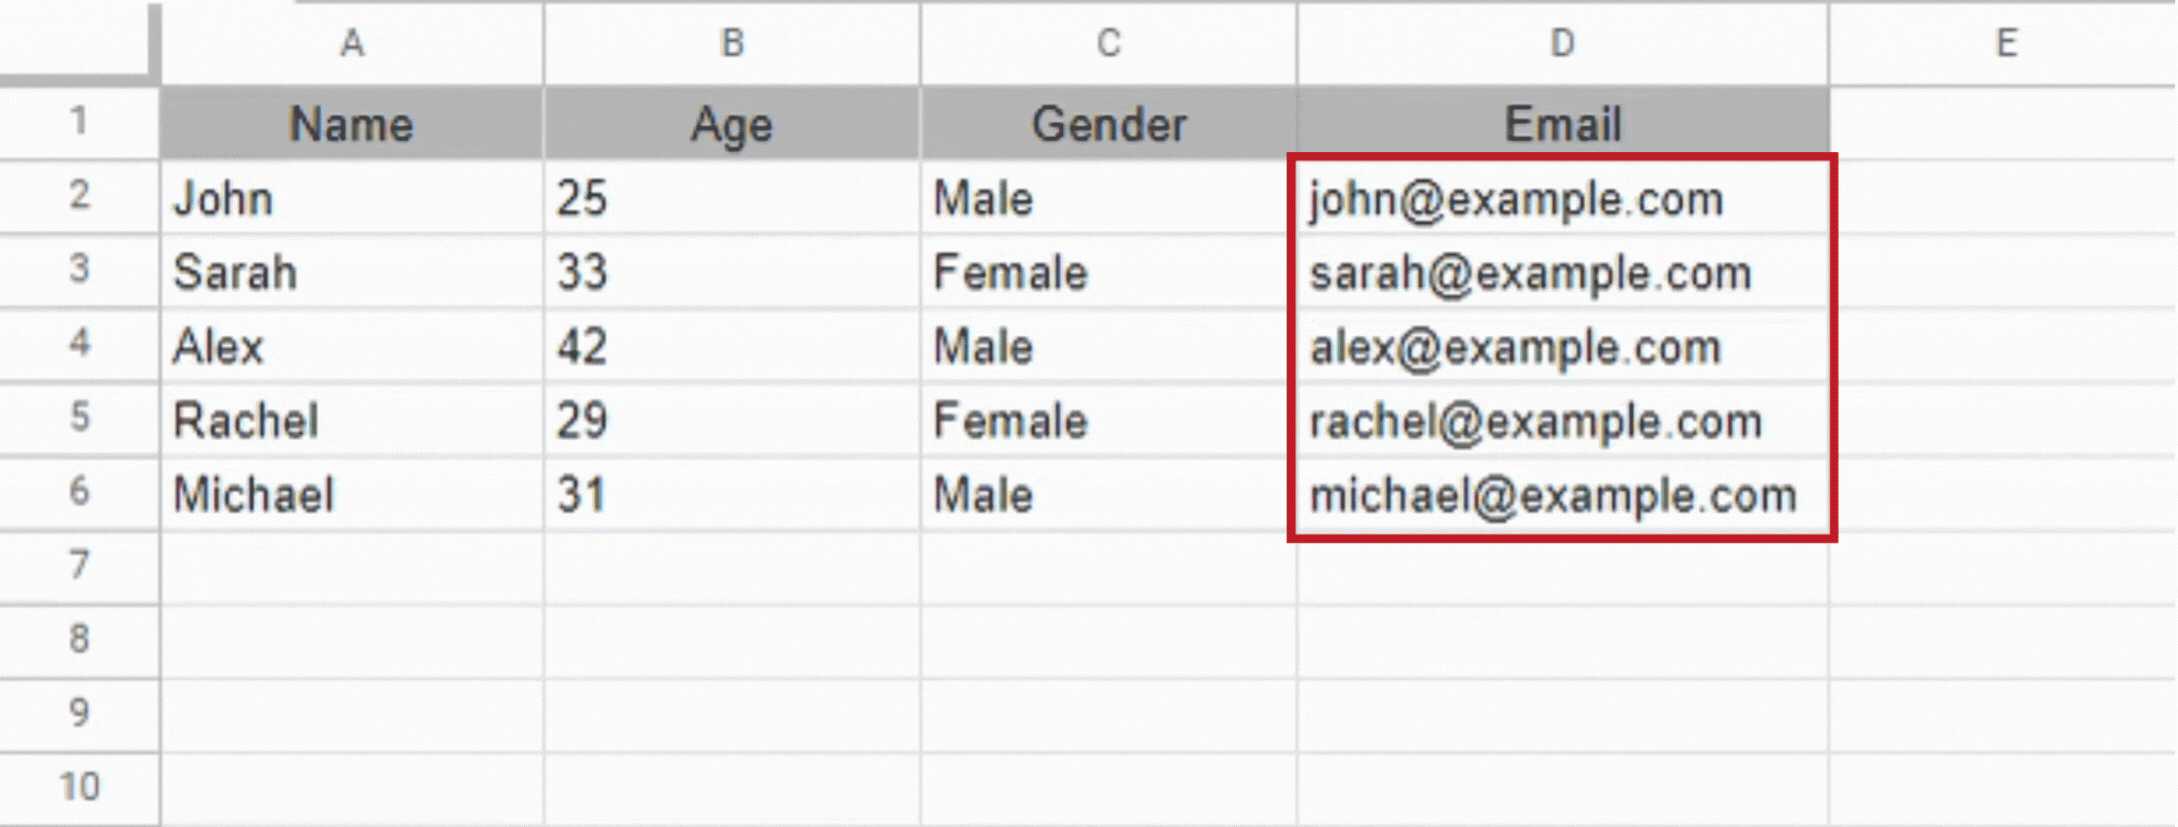
– In order to lock a cell you need to select that cell or range of cells first.
– In our case the cells are D2 – D6.
Step 2 – Click on Protect Range option
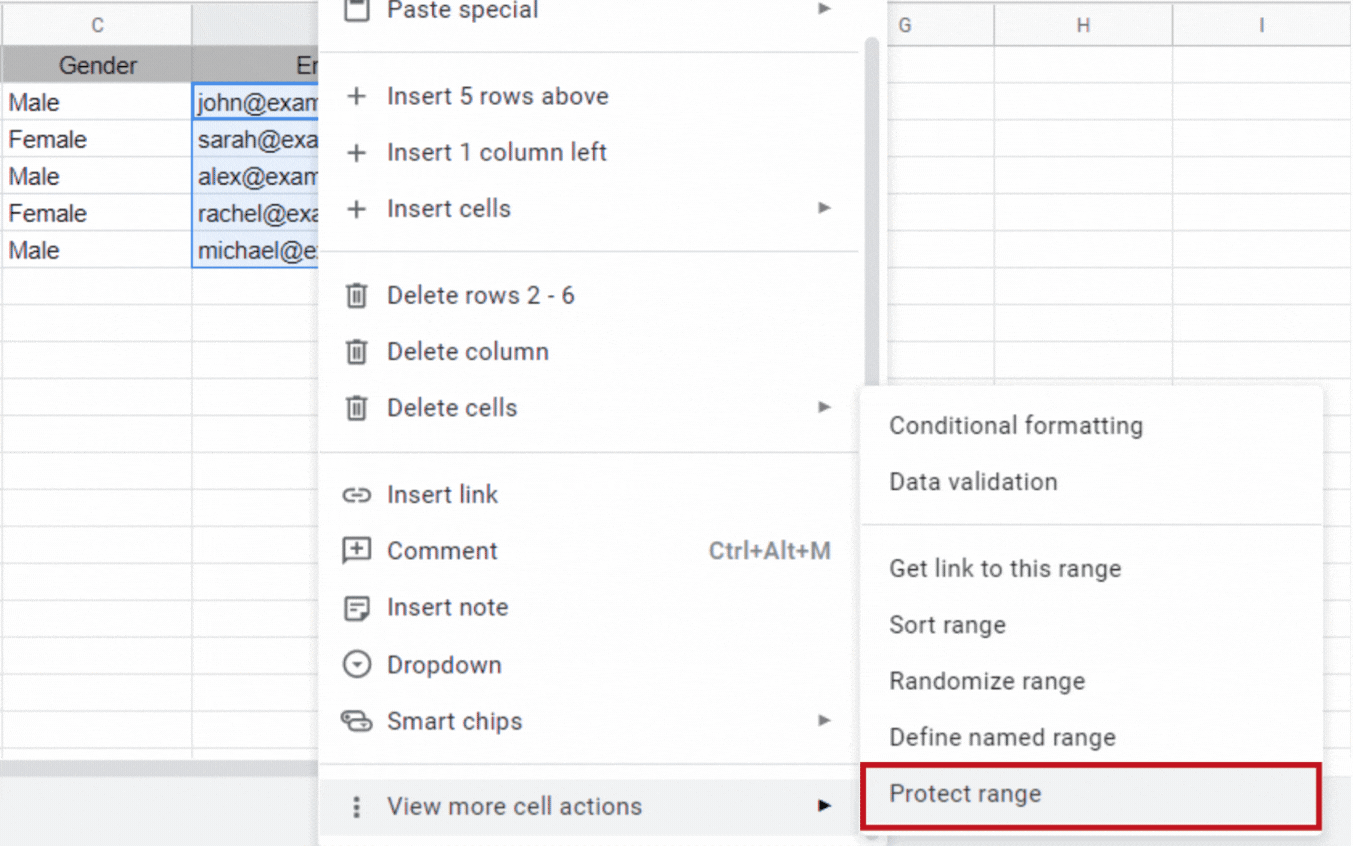
– After selecting the cells, Right-click on them.
– A menu will appear, click on the ‘view more cell actions’.
– Then click on ‘Protect Range’.
Step 3 – Add description for the cell
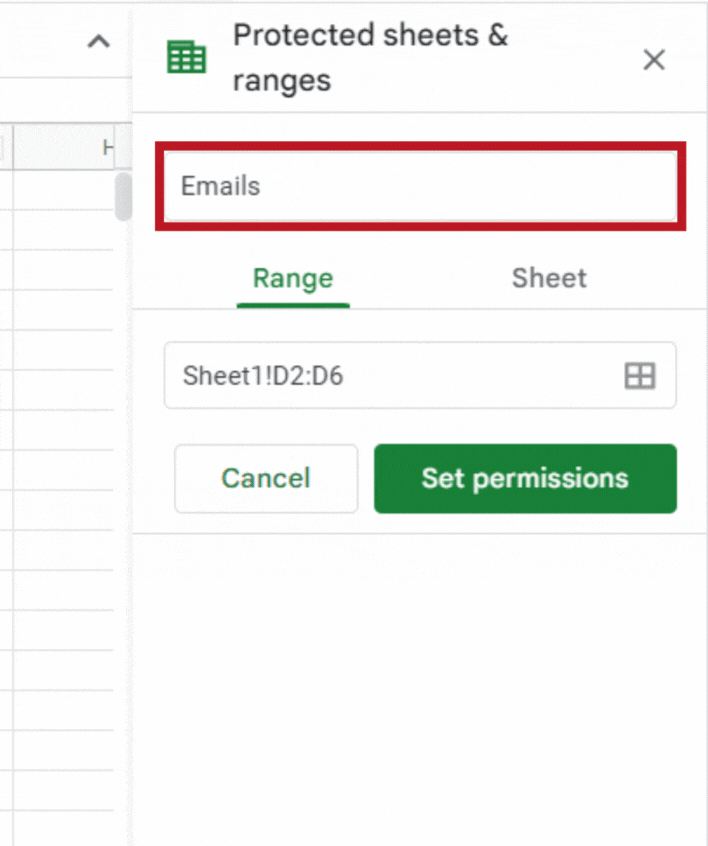
– After clicking on ‘Product Range’ a menu will appear on the right side.
– Add a description for the cell you are locking. This step is optional but recommended.
Step 4 – Click on ‘Set permissions’
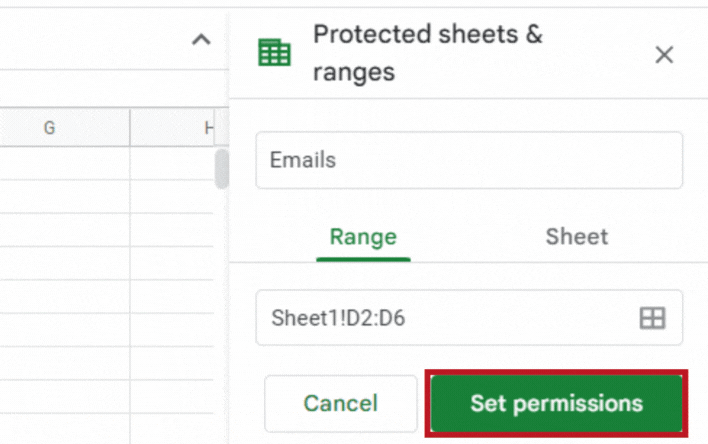
– After adding the description, confirm the cell range.
Step 5 – Select ‘Range editing permissions’
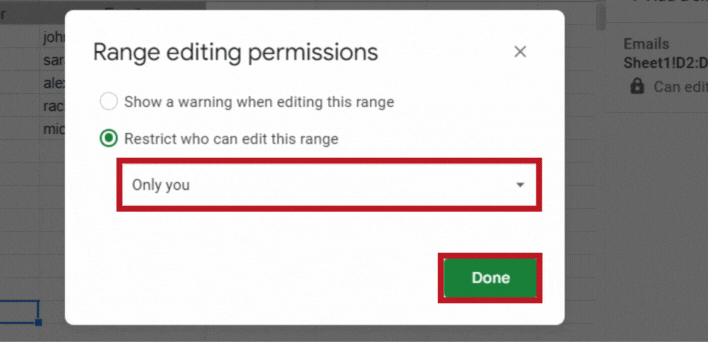
– In the ‘Range editing permissions’ menu, you will have to make sure that ‘Only you’ is selected in the ‘Restrict who can edit this’.
– Click on the ‘Done’ button.
In this tutorial, you have learned to lock a cell or range of cells so that no one can edit those except you. It is beneficial for people who want to safeguard their data from unintentional alterations.


