
How to limit rows in Google Sheets
 By
SpreadCheaters
By
SpreadCheaters
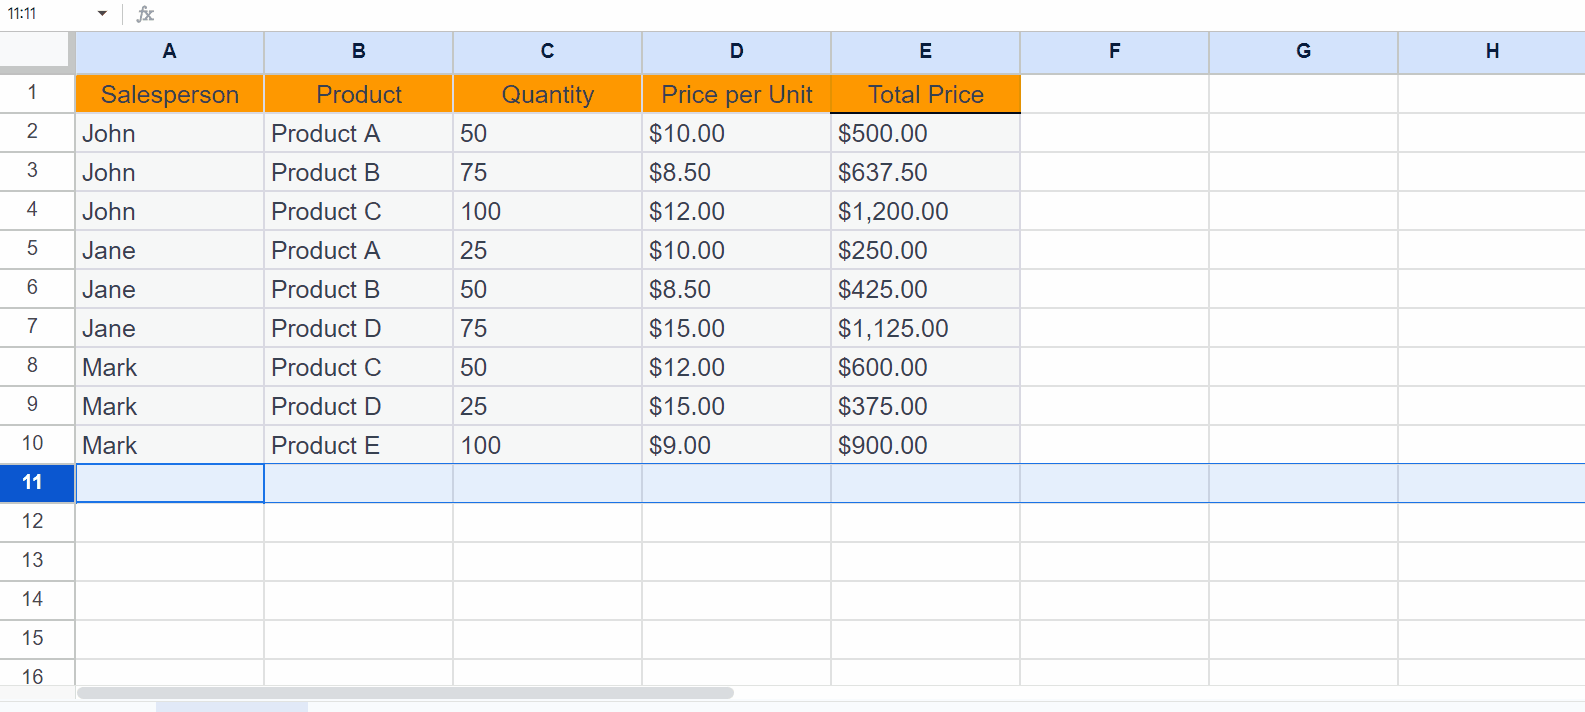
In Google Sheets, “limiting rows” refers to restricting the number of rows displayed or used in a separate sheet or range of cells. By limiting rows, you can control the amount of visible or processed data within a given context.
In this tutorial, we will learn how to limit rows in Google Sheets. To limit rows in Google Sheets we can hide the rows or we can simply delete the rows. By doing this, we can limit the sheet only to specific rows.
Method 1: Limiting Rows by Hiding the Rows
We can hide the rows without data to limit the number of rows in Google Sheets. By doing so, only the desired rows or the rows with data will be visible, restricting the user’s view to those specific rows.
Step 1 – Click on the Row Header

- Click on the header of the first row of the range of rows you wish to hide.
Step 2 – Press the CTRL+SHIFT+ “↓”
- Press the CTRL+SHIFT+ “↓” keys on the keyboard.
Step 3 – Perform a Right-Click on Any Row Header

- Perform a right-click on any of the selected row’s headers.
Step 4 – Perform a Click on the “Hide Rows” Option
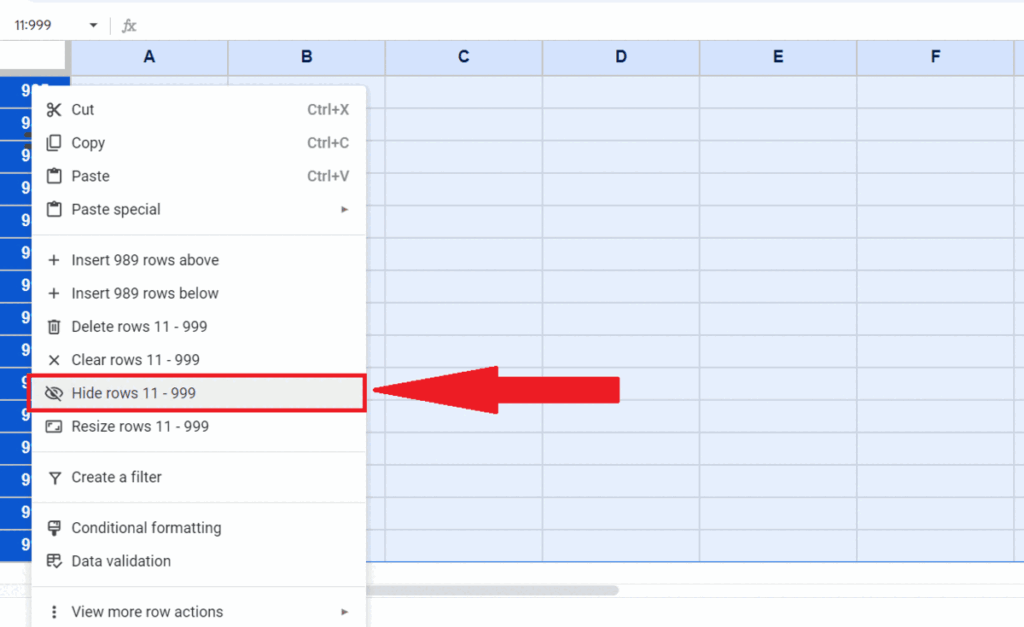
- Perform a click on the “Hide Rows” option in the menu.
Method 2: Limiting Rows by Deleting the Rows
We can also delete the rows to limit the user to specific rows. Following are the steps tp delete the rows.
Step 1 – Perform a Click on the Row Header
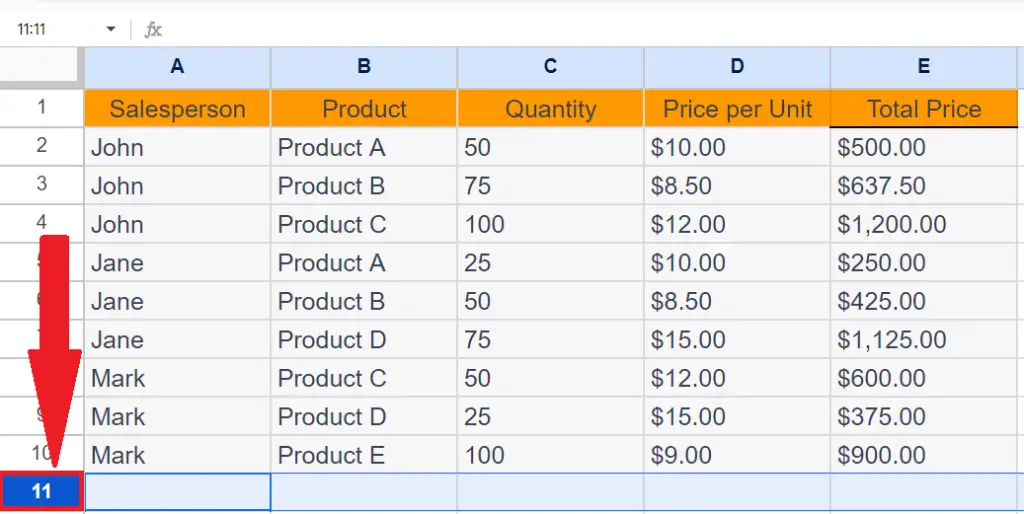
- Perform a click on the header of the topmost row within the range of rows you wish to delete.
Step 2 – Press the CTRL+SHIFT+ “↓”

- Press the CTRL+SHIFT+ “↓” keys on the keyboard.
Step 3 – Perform a Right-Click on Any Row Header
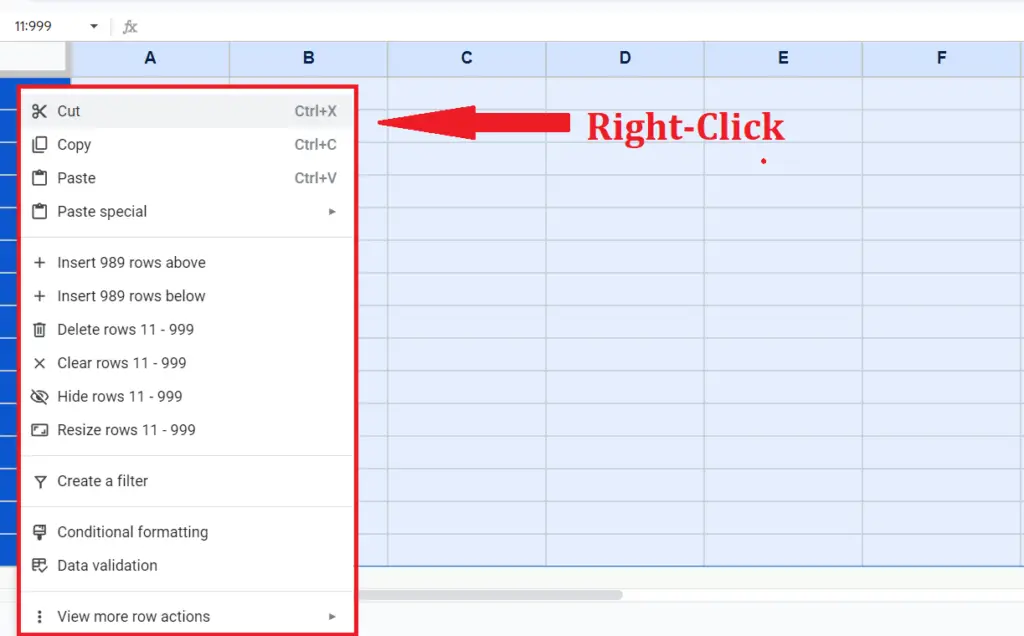
- Perform a right-click on any of the selected row’s headers.
Step 4 – Perform a Click on the “Delete Rows” Option
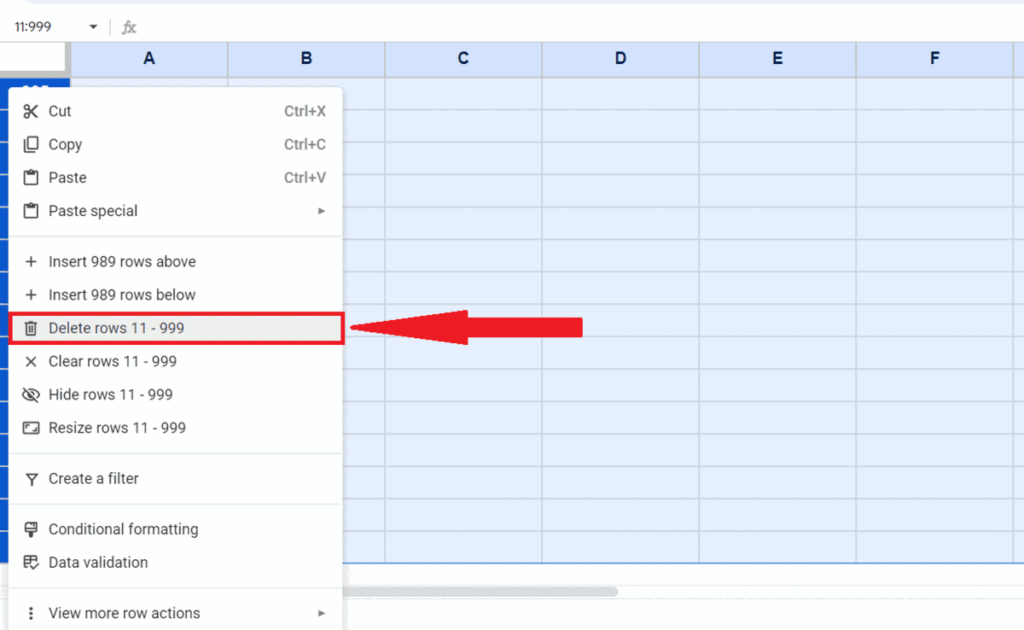
- Perform a click on the “Delete Rows” option in the menu.


