How to hide blanks in PivotTable
The term “(blank)” typically refers to empty or missing values in a dataset from which the PivotTable is created. Hiding blank values in a PivotTable can enhance data clarity and make the table easier to interpret. Empty cells can be distracting and make it more challenging to identify patterns or trends within the data.
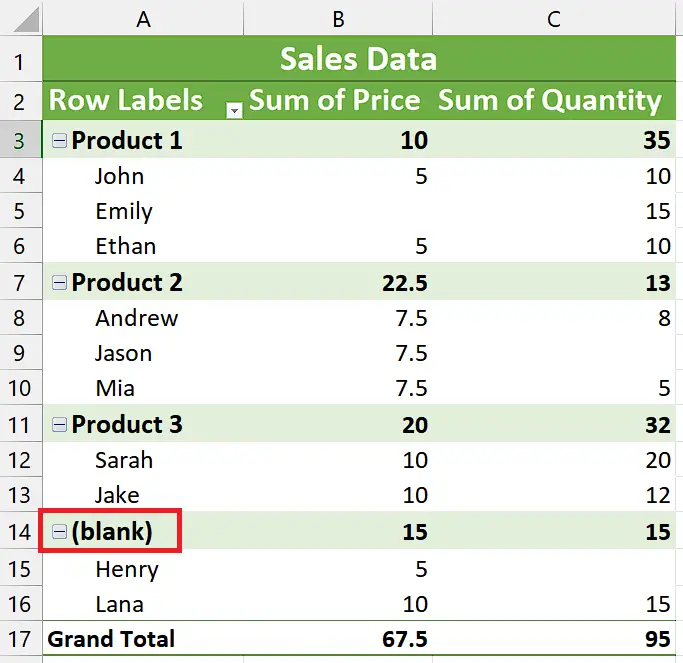
This PivotTable displays sales data for products and customers, including total sales values and quantities. It also includes a (blank) entry representing missing or unspecified information with values of 15 for sales and 15 for quantity. In this tutorial, we will learn how to hide the (blank) in this PivotTable.

Case 1 – Hiding the (blank)
In this case, we have a situation where our objective is to hide the (blank) value within the PivotTable, effectively removing it from the displayed data. By doing so, the (blank) value will no longer be visible in the PivotTable, providing a more streamlined and focused representation of the sales data for products and customers.
Step 1 – Show the Field Headers

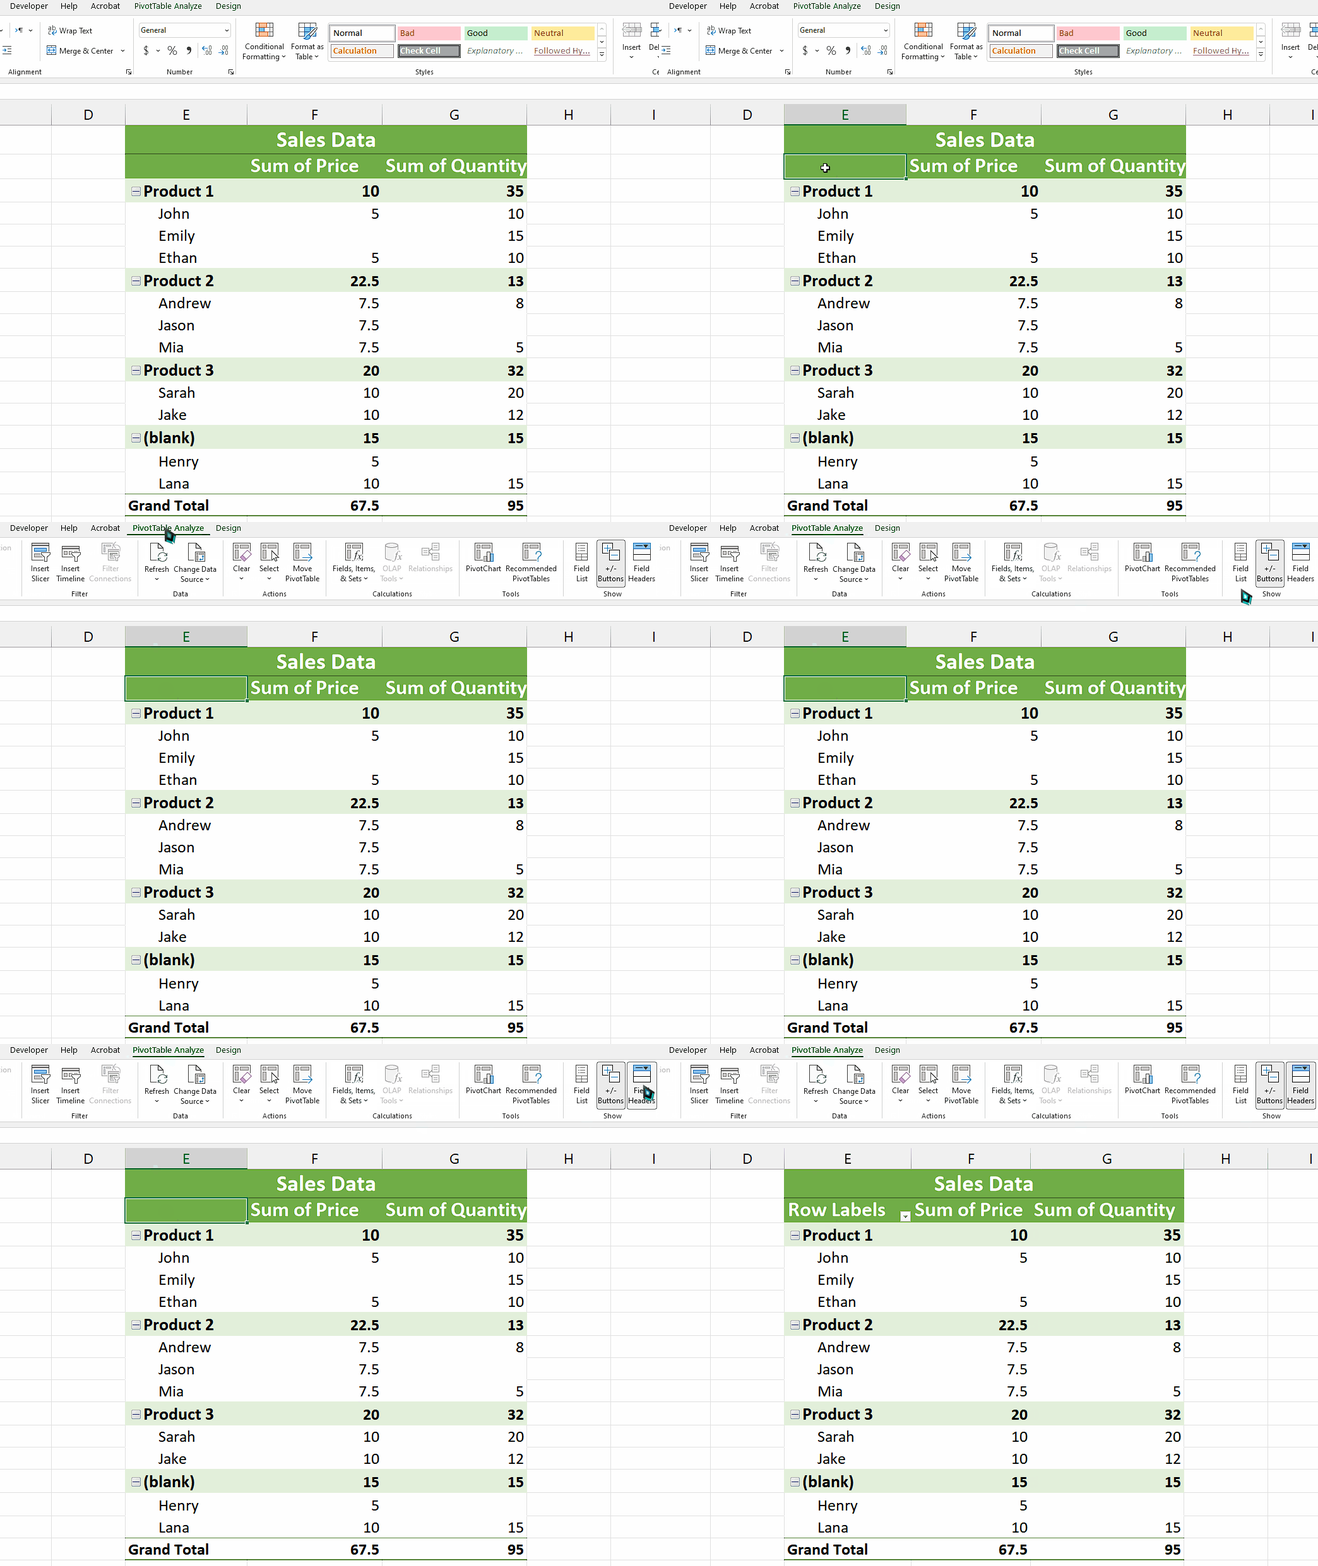
- As we can see, our PivotTable isn’t showing Field Headers.
- For enabling them, navigate to the “PivotTable” Analyze tab.
- Locate the “Field Headers” command button under the “Show” group.
- Click on the “Field Headers” command button and your Field Headers will show up.
Step 2 – Hide the (blank)

- Click on the downward arrow adjacent to “Row Labels” or “Column Labels” based on the presence of your (blank).
- Next, deselect the blank option from the drop-down menu.
Case 2 – Replacing (blank) with some text
In a given scenario, if we wish to substitute the (blank) entries in a PivotTable with specific text, it can help enhance the appearance and organization of the data while retaining its underlying value. By replacing the (blank) with desired text, we can achieve a more visually pleasing and tidy presentation.
Step 1 – Open the “Find and Replace” tool

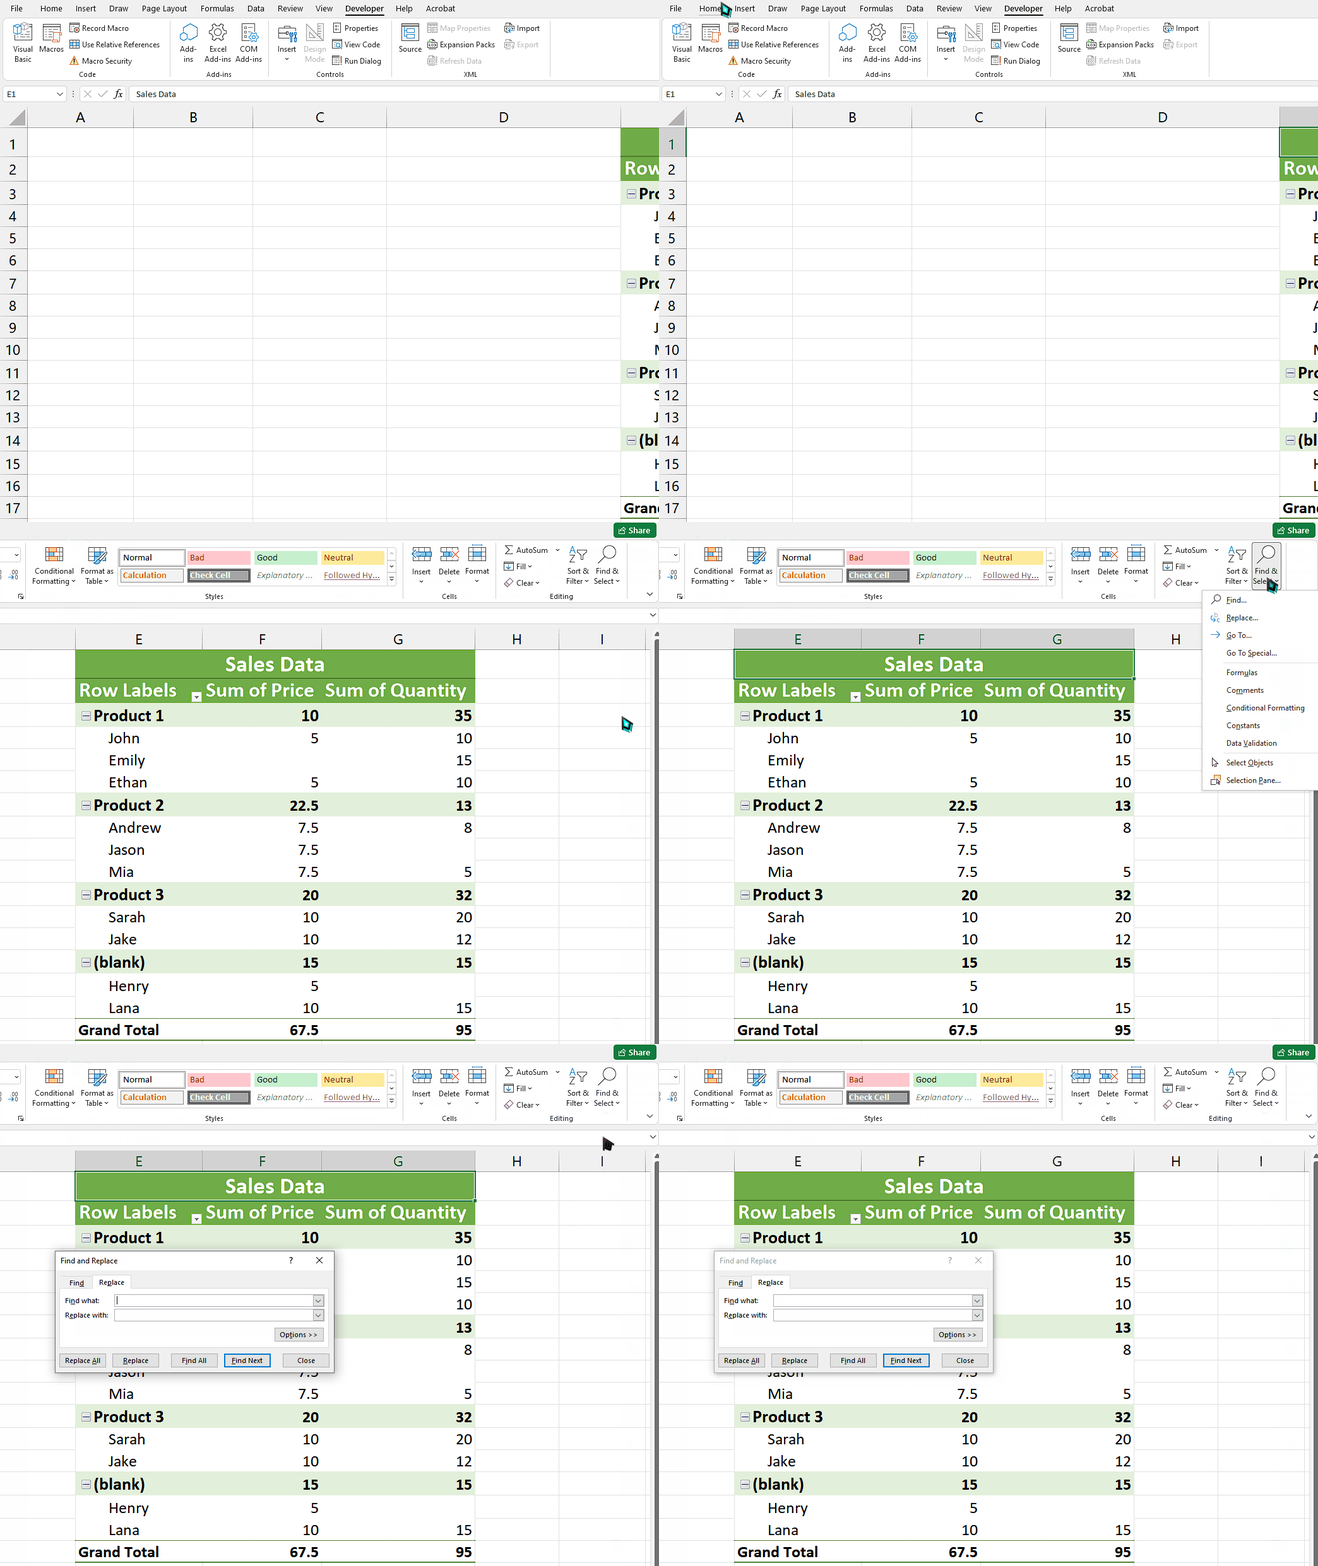
- Navigate to the “Home” tab in the Excel ribbon.
- Click on the “Find & Select” button, which is typically located in the “Editing” group.
- A drop-down list of a few options will appear.
- Click on the “Replace” option from the drop-down list.
- A small dialog box titled “Find and Replace” will appear.
Step 2 – Replace the (blank)

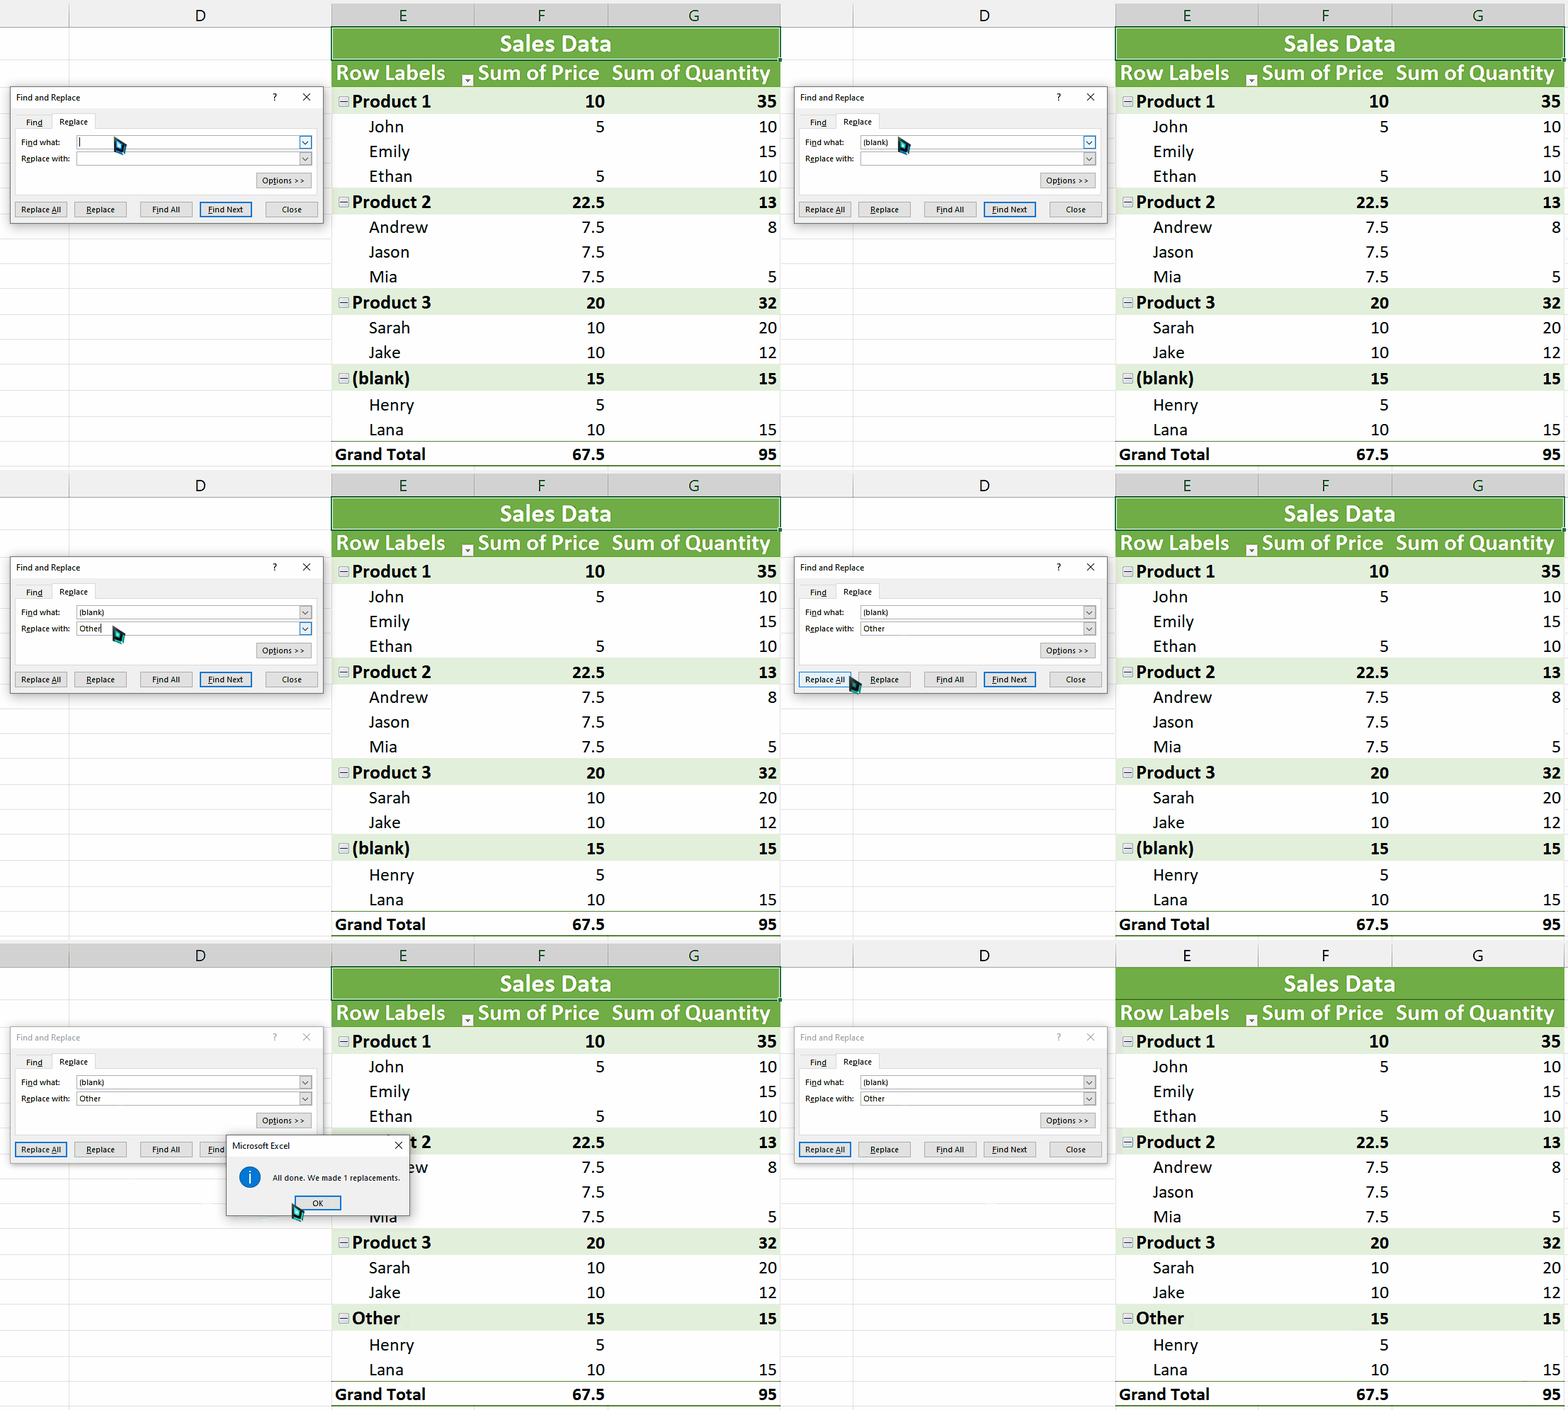
- After the dialogue box has opened, type (blank) in the “Find What” dialogue box.
- Then, type the desired text in the “Replace with” dialogue box.
- For example, we have written “Other” in the “Replace with” dialogue box.
- Now, click on “Replace All” and the (blank) will be replaced.


