
How to export data from Salesforce into Excel
 By
SpreadCheaters
By
SpreadCheaters
In this tutorial, we will learn how to export salesforce data into Excel. Exporting Salesforce data to Excel provides flexibility, versatility, and enhanced data manipulation capabilities that can be valuable for data analysis, reporting, backup, sharing, and offline access purposes. The major steps are given below;
Excel is a powerful spreadsheet software that allows users to organize, analyze, and manipulate data using formulas, functions, and visualizations. Salesforce data refers to the structured information stored within the Salesforce platform, comprising customer and sales-related data that enables organizations to manage customer relationships, track sales activities, and make data-driven decisions.
Step 1 – Selection of Reports menu
– Log in to your Salesforce account with the appropriate credentials.
– Navigate to the object or tab containing the data you want to export.
– Click on the “Home” tab in the navigation menu.
– A drop-down menu will appear.
– Click on the “Reports”. As shown above;
Step 2 – Selection of reports to export
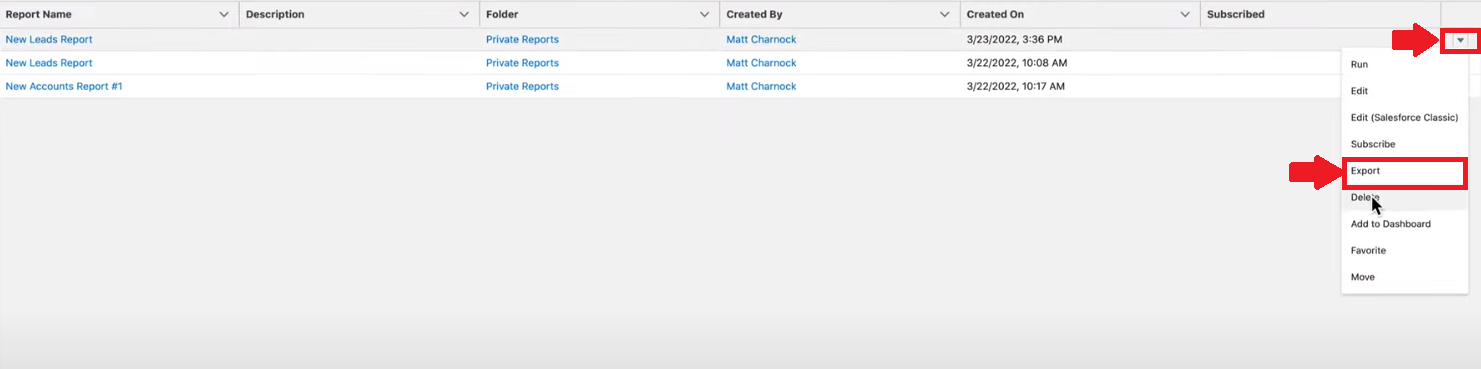
– If you have an existing report that contains the desired data, click on its name to open it.
– Otherwise, create a new report by clicking on the “New Report” button and selecting the appropriate report type.
– Once you have finalized the report, click on the “dropdown” button on the right side of the reports.
– A drop-down menu will appear.
– Click on the Export button. As shown above;
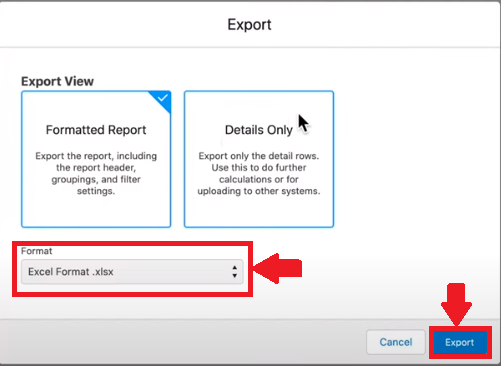
Step 3 – Select the data style to export

– A dialogue box will open.
– Select the export view of your choice.
– There are two types of views available to export. Select any as per your requirement.
– Select the format of MS Excel to export, in a tab given just below the export view.
– Choose the preferred file format, such as CSV (Comma Delimited) or XLSX (Excel format).
– Click on the “Export” button to initiate the export process.


