How to create a fillable form in Excel
Using Fillable forms in Excel allows you to collect data in a structured and organized manner. You can define the required fields and specify the type of data to be entered, such as text, numbers, or dates. This makes it easier to gather information from multiple users consistently.
The provided dataset consists of several fields representing company information. Each row represents a separate company entry. The form includes the following fields: Company Name, Company Type, Address, City, State, Postal Code, Country, and No. of Employees. These headers are necessary to create a proper fillable form. We aim to transform the provided dataset into a user-friendly fillable form. In today’s tutorial, we will learn how to do it.
Two methods to create a fillable form are as follows:
Method 1 – By using the VBA code
Step 1 – Open the VBA editor
- Launch Excel on your computer.
- Open the workbook in which you want to access the VBA Editor to create a fillable form.
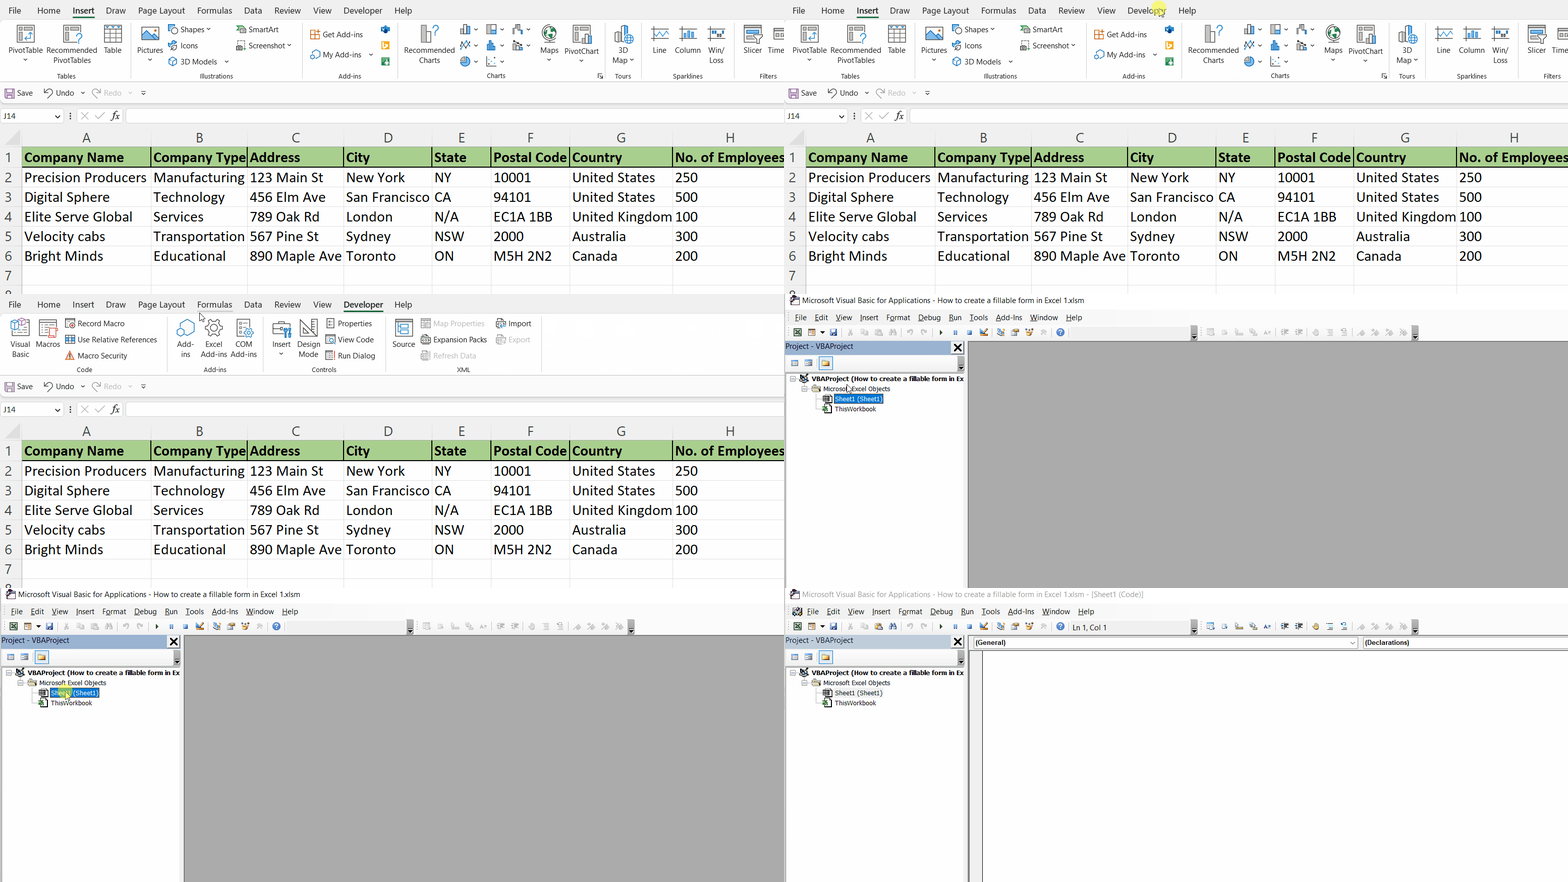
- Go to the “Developer” tab in the Excel ribbon. If you don’t see the “Developer” tab, you need to enable it first. To do so, right-click on the Excel ribbon, select “Customize the Ribbon”, and check the box next to “Developer” in the list of tabs.
- In the “Developer” tab, click on the “Visual Basic” action button. It is located in the “Code” section of the ribbon.
- Alternatively, you can use your keyboard’s shortcut “Alt + F11” to directly open the VBA Editor.
- The VBA Editor window will now open, showing the Project Explorer pane on the left side.
- In the Project Explorer pane, the workbook’s VBA project is listed with the workbook name. Double-click on it to expand its contents.
- Within the expanded workbook project, you will see a list of worksheet modules. Look for “Sheet1” and double-click on it to open the VBA code associated with Sheet1.
Step 2 – Writing the code

- Simply copy and paste the following code in the code area.
Sub Open_Data_Form()
ActiveSheet.ShowDataForm
End Sub
- Then press the ‘X’ button or use the shortcut key “Alt+Q” to close the VBA Editor.
Step 3 – Insert a button and assign a macro to it
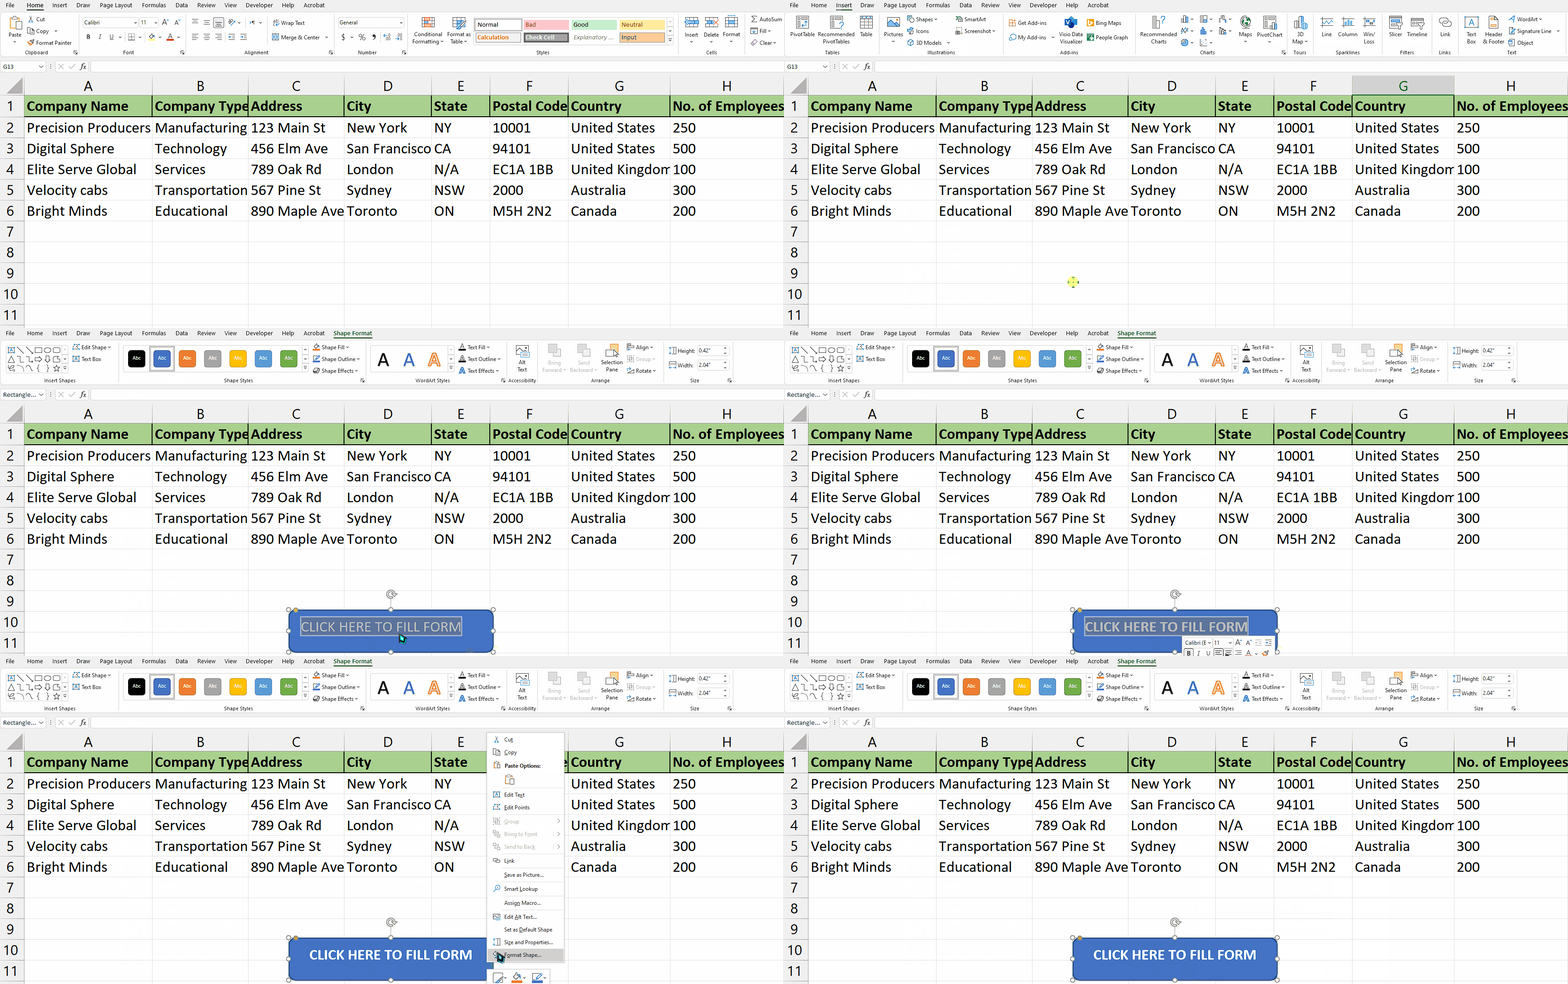
- Go to the “Insert” tab in the Excel ribbon.
- In the “Illustrations” group, click on the “Shapes” button. A drop-down menu will appear, showing various shape options.
- Select the desired shape from the menu. For example, choose a rectangle shape by clicking on it.
- Click and drag on the worksheet to draw the shape at your preferred location and size.
- With the shape still selected, click inside it to activate the text editing mode.
- Type “CLICK HERE TO FILL FORM” to add the desired text to the shape.
- To format the shape or the text, you can use the various formatting options available in the Excel ribbon, such as font styles, colors, and alignments.
- Right-click on the newly inserted shape. A context menu will appear.
- From the context menu, select “Assign Macro.” This will open the Assign Macro dialog box.
- In the Assign Macro dialog box, select the desired macro from the list. For instance, we will select the macro named “Sheet1.Open_Data_Form”.
- Once you have selected the macro, click the “OK” button to assign it to the shape.
Step 4 – Use the button to open the fillable form
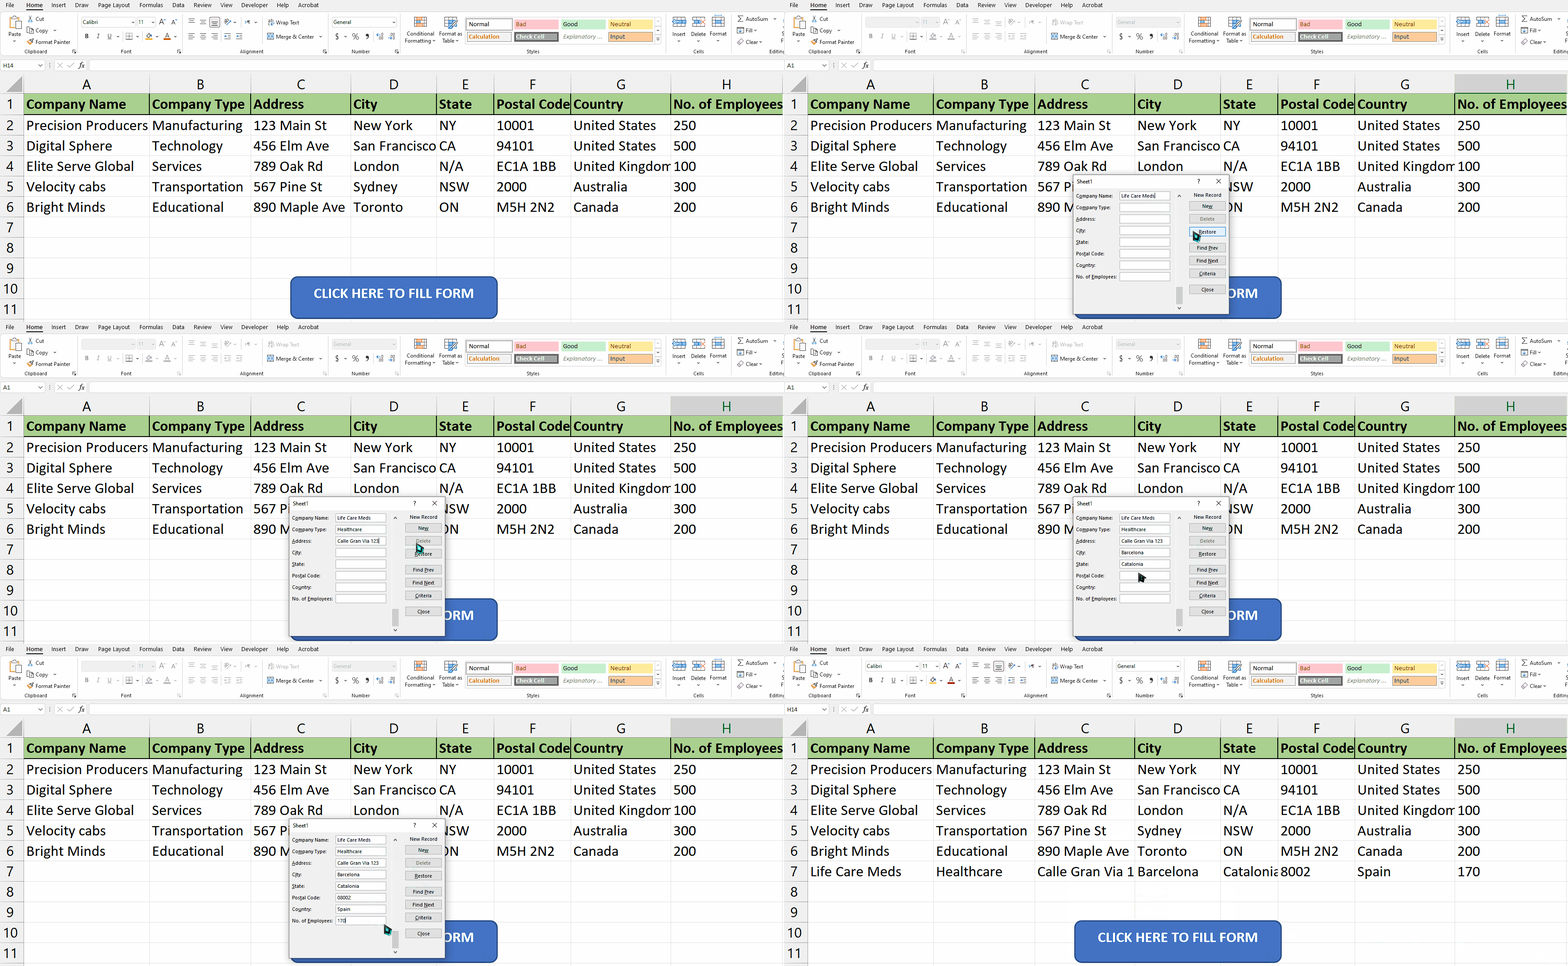
- Simply, click on the shape that we have inserted as a button.
- Then, a dialogue box would appear on your screen.
- Click on the “New” option within the dialogue box.
- Now, fill out the form according to your preference.
- Once you’ve filled out the form, close it by clicking on the “Close” button.
Method 2 – By using Excel Templates
Step 1 – Searching for Desired Template
- Open Microsoft Excel on your computer.
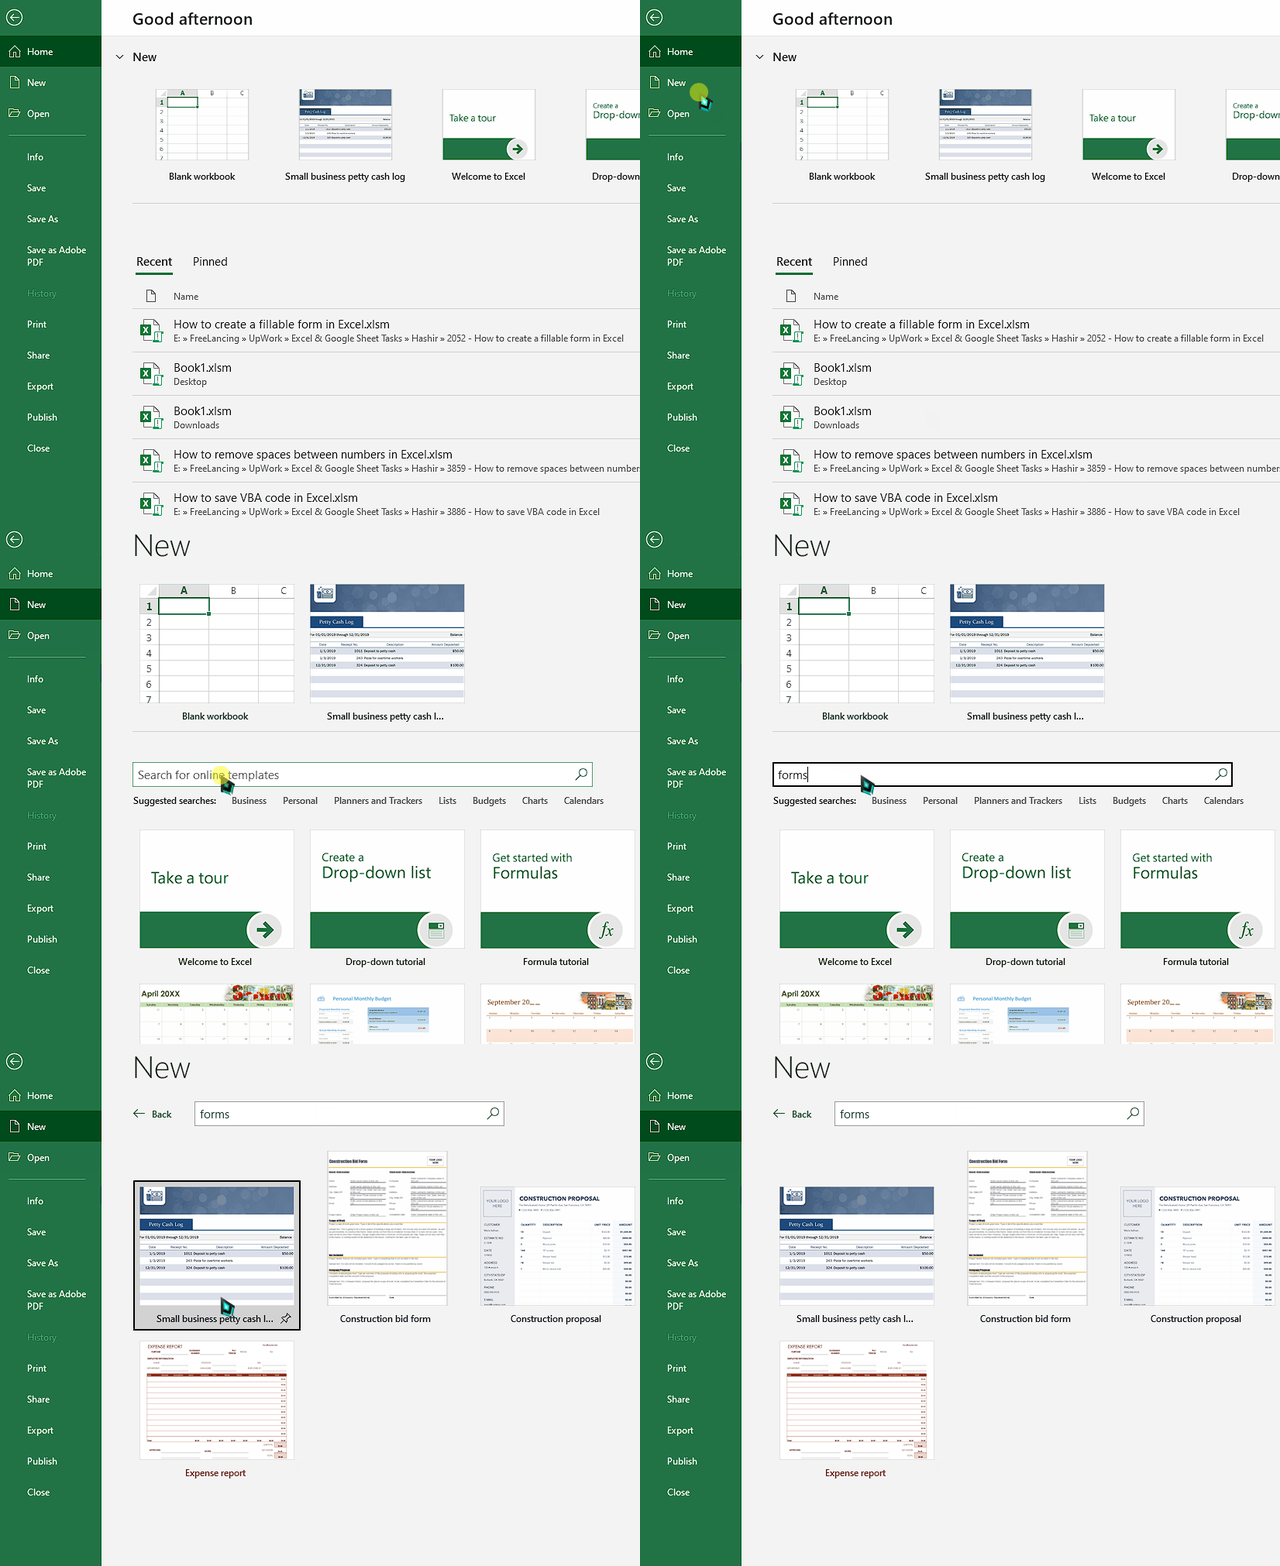
- Click on the “File” tab located in the top left corner of the Excel window.
- In the file menu, select “New” or “New Workbook” to create a new workbook.
- On the “New” page, you’ll see different template options.
- To browse the available templates, you can either scroll through the options or use the search bar to find a specific template.
- We are going to search for “forms” in the template search bar.
Step 2 – Using the Template
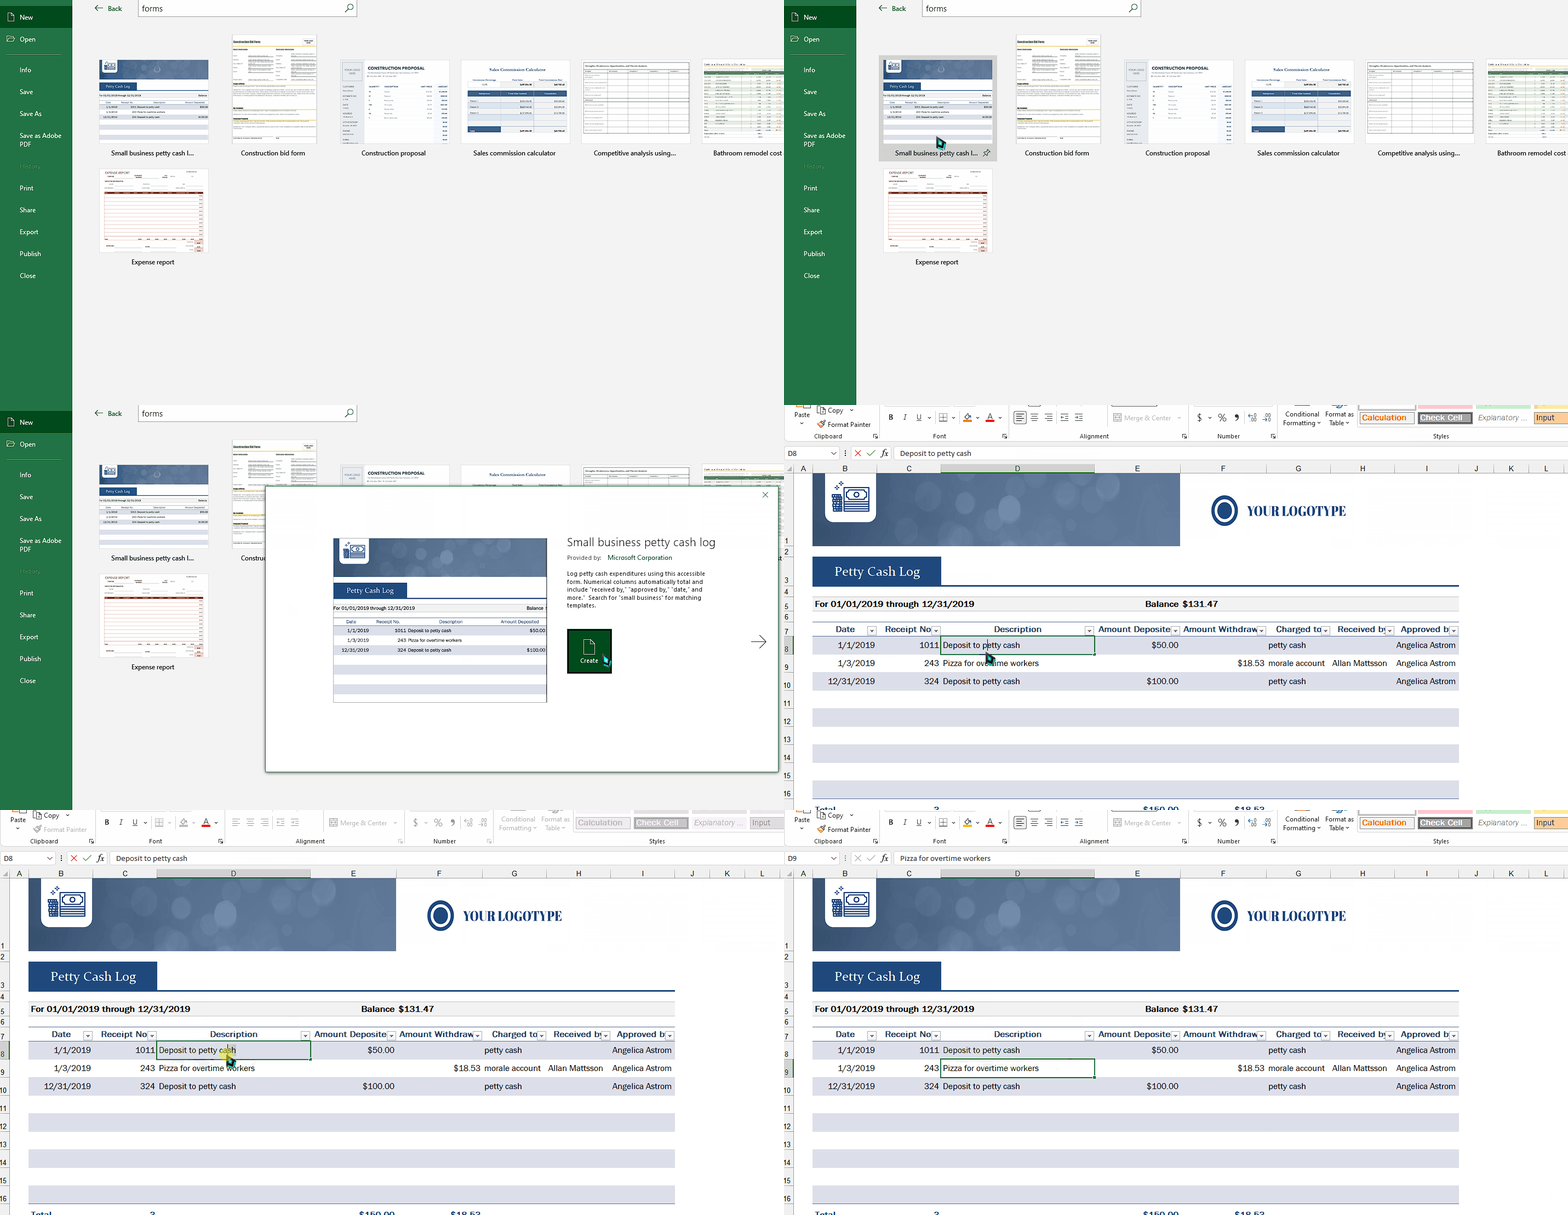
- Click on the template that you want to use.
- A preview of the template will appear on the screen.
- Once you’ve selected a template, click on the “Create” or “Download” button (the specific wording may vary depending on your Excel version).
- The selected template will open as a new workbook, and you can start working with it immediately.
- Make any necessary edits or modifications to the template to suit your needs.


