
How to apply top and double bottom border in excel
 By
SpreadCheaters
By
SpreadCheaters
Excel is a powerful spreadsheet application that offers a wide range of formatting options to enhance the appearance and clarity of your data. Borders play a vital role in organizing and highlighting information within cells. In this blog post, we will guide you through the process of applying top and double-bottom borders in Excel. These formatting techniques can help you create professional-looking worksheets, improve data readability, and make important data stand out.
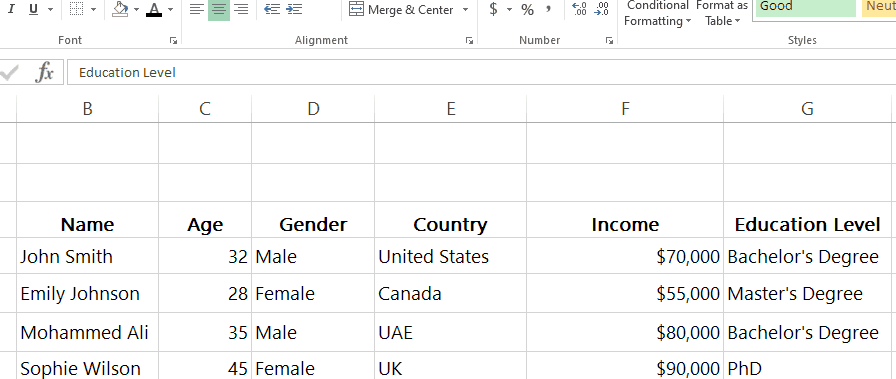
In this tutorial, we will learn how to add a Top and Double Bottom border using two different methods. We will be adding this border to the top row of the dataset. Let’s have a look at the dataset first
Method – 1 Adding border from the ribbon.
Step – 1 Go to the ribbon.
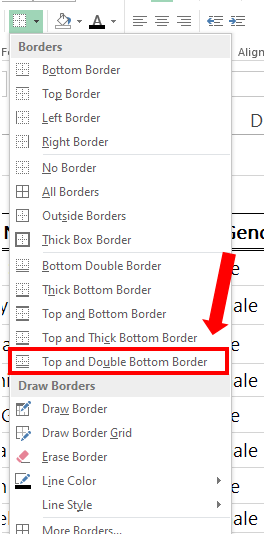
- Select the cells to add a Top and Double bottom border.
- In the Home tab in the Font group, open the drop-down menu of borders.
Step – 2 Apply the Top and Double Bottom Border.
- After opening the drop-drop menu, click on Top and Double Bottom Border.
- Borders will appear on the cell.
Method – 2 Applying border using format cells.
Using the Format Cells option you can manually add borders to the selected cells as shown below.
Step – 1 Open Format cells.
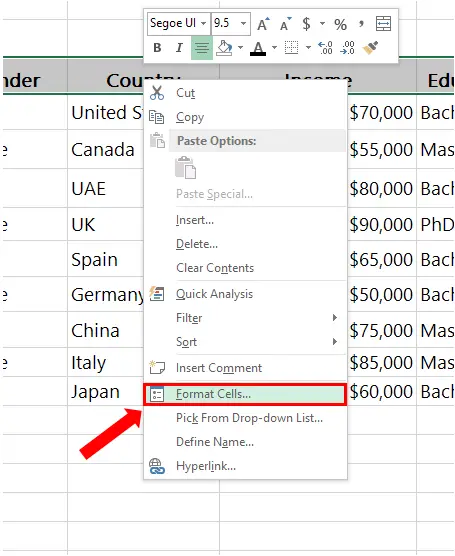
- Select the cells where you want to add the border.
- Right-Click on the selected cells.
- Click on Format Cells.
- In the Format Cells context menu click on the Border tab.
Step – 2 Apply the borders.
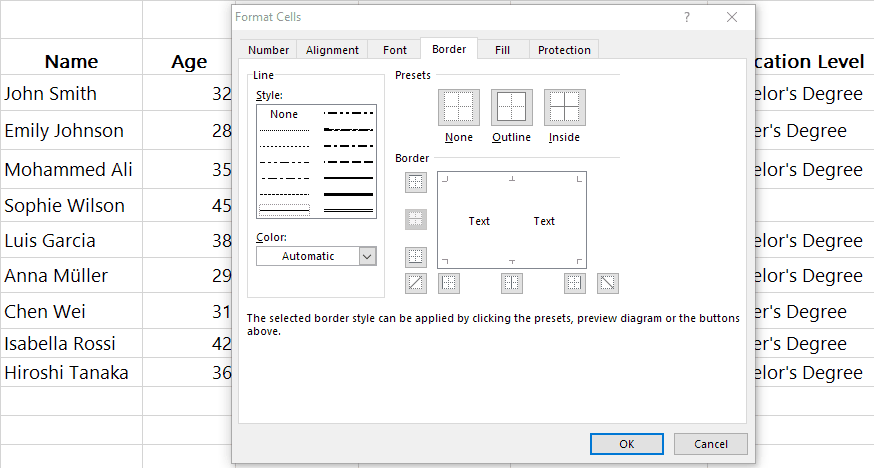
- In the Format Cells context menu add the borders manually.
- Choose the single border line from Style.
- In Border choose the side where the single border line will be added, in our case we added the single border on the top side.
- Now choose the double border line from Style.
- In Border choose the side where the single border line will be added, in our case we added the double border on the bottom.


