How to add numbers automatically in Google Sheets
The auto-adding numbers in Google Sheets is a useful process that can help streamline your data management process. With this feature, you can easily reference and organize your data, even if your data tables don’t start at the top of your spreadsheet. By automatically generating unique serial numbers for each row in your data, you can quickly and easily identify and track specific rows, without the need to manually enter row numbers.
In this tutorial, we will learn how to add numbers automatically in Google Sheets. In Google Sheets numbers can be added to a data set in various methods. We can use the Autofill feature to add the numbers, we can add 1 in the previous number or we can use the ROW function to add numbers.
Method 1: Using the Autofill Feature
Step 1 – Add the First Two Numbers in the Cells
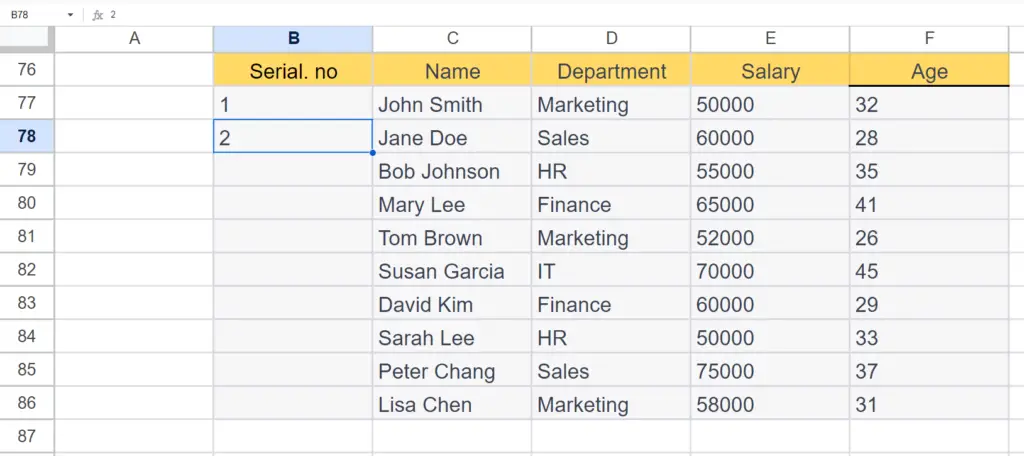
- Add the first two numbers manually in the first and second cells of the column in which you want to add numbers.
Step 2 – Hover the Cursor to the Right Bottom of the Cells
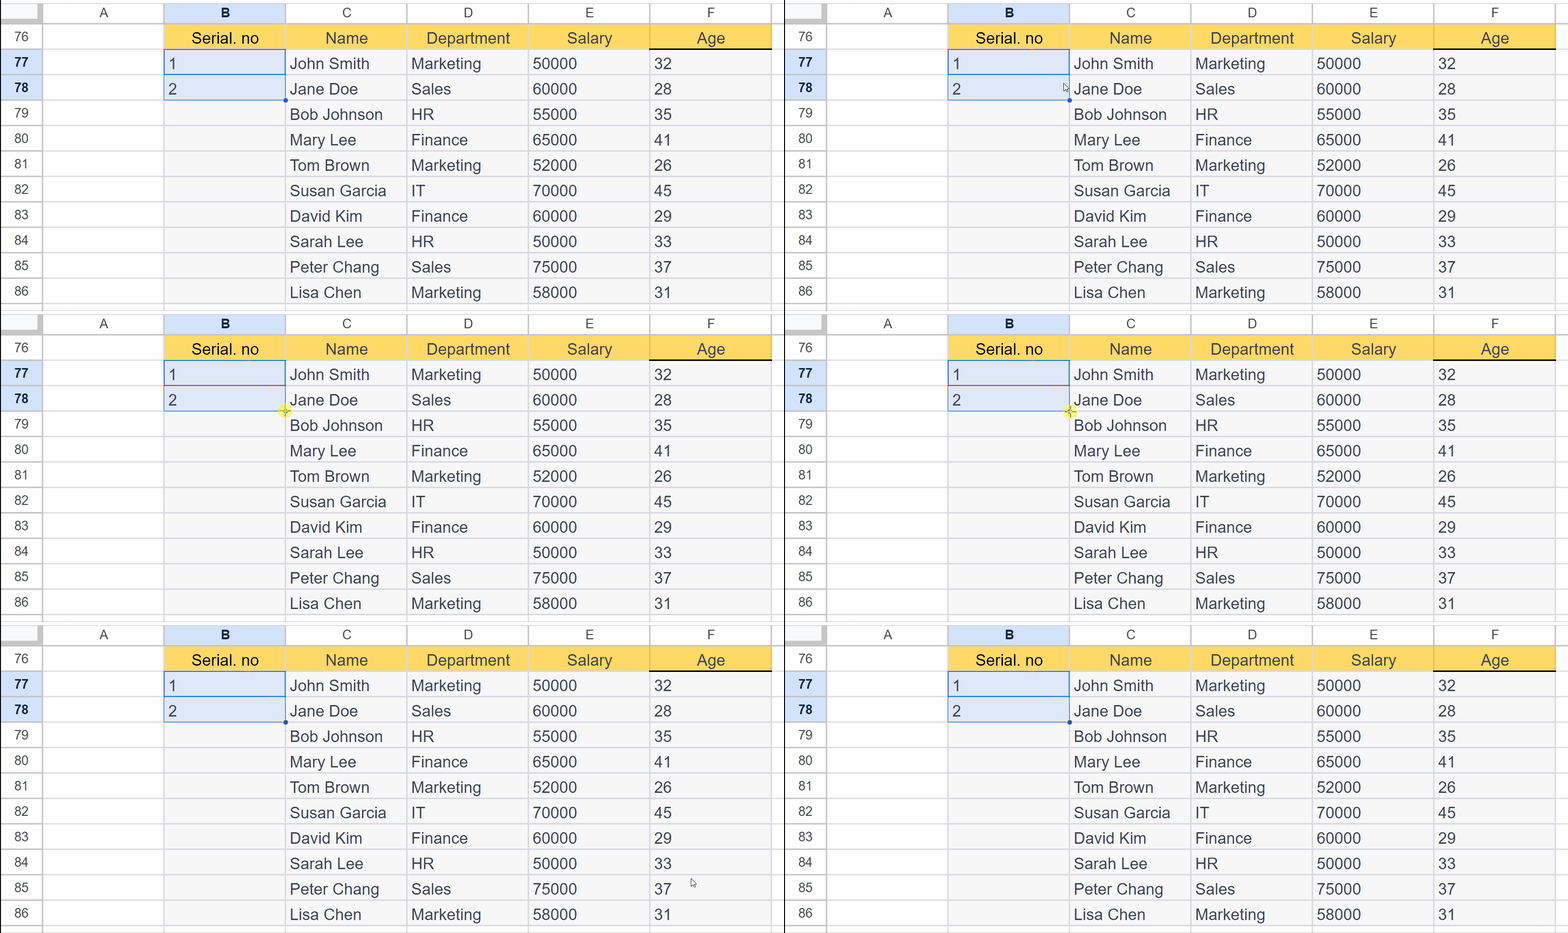
- Select the first two cells with numbers.
- Hover the cursor to the bottom right of the cells in which you have entered the number 1 and 2.
- The cursor will convert into a black plus sign.
Step 3 – Hold and Drag the Cursor Down and Drop
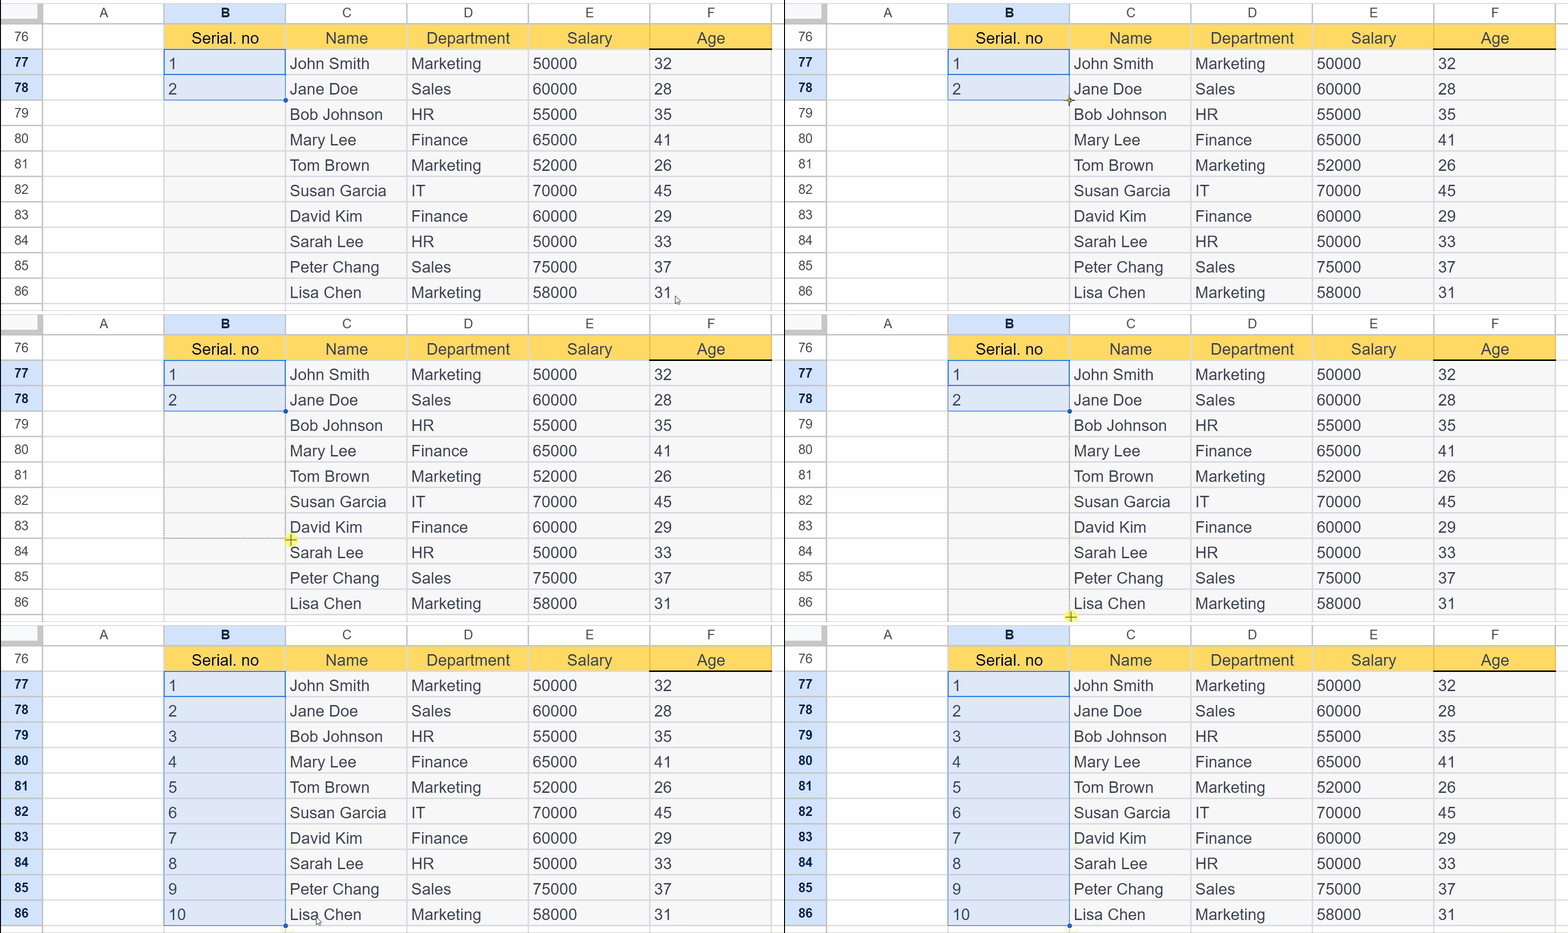
- Hold and drag the cursor down over the cells till where you want to add the numbers.
- Drop the cursor.
- Numbers will be added automatically in the column.
Method 2: Adding 1 to the previous number
Step 1 – Write the First Number of the Sequence in the First Cell
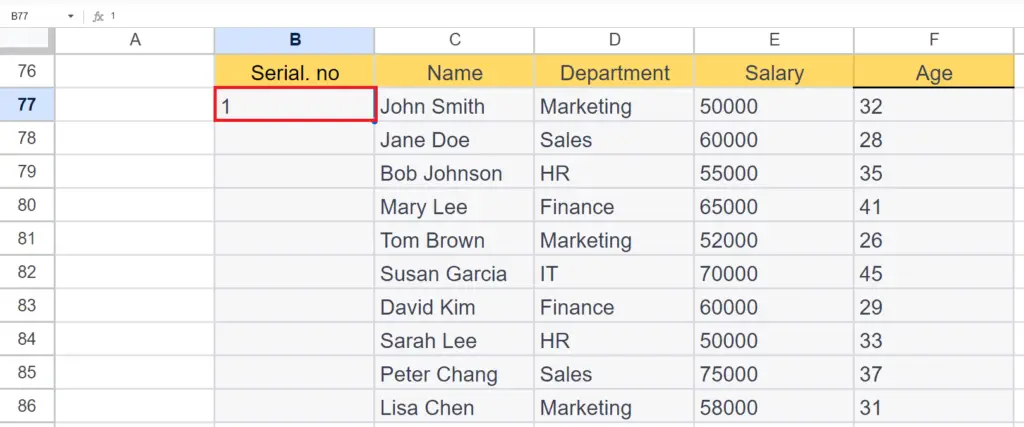
- Enter the digit 1 manually in the first cell of the column in which you want to add numbers.
Step 2 – Select the Next Cell and Place an Equals Sign
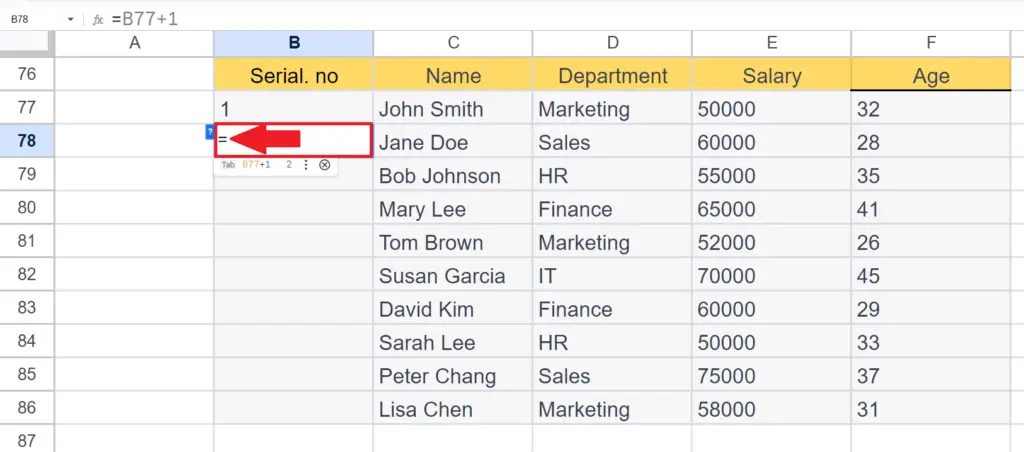
- Select the cell next to the cell in which the number 1 is added.
- Place an equals sign in the selected cell.
Step 3 – Enter the Reference of the Previous Cell and Add 1
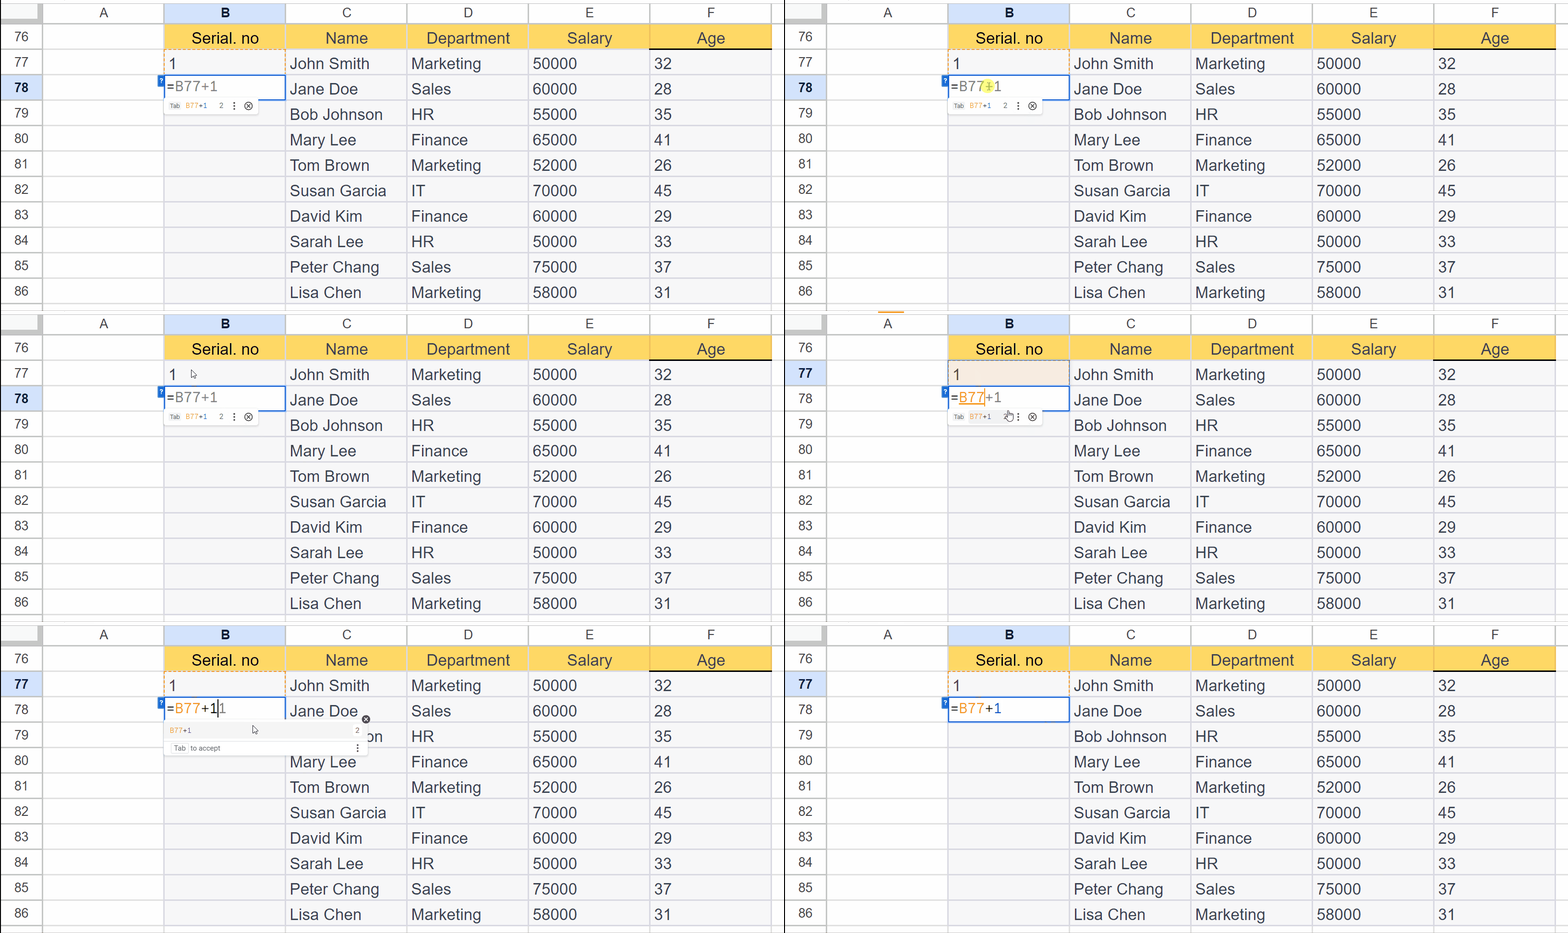
- Enter the reference of the previous cell i.e. B77.
- Add the number 1 in it i.e. = B77 + 1, in our case. You may change the cell address as per your requirements.
Step 4 – Press the Enter Key
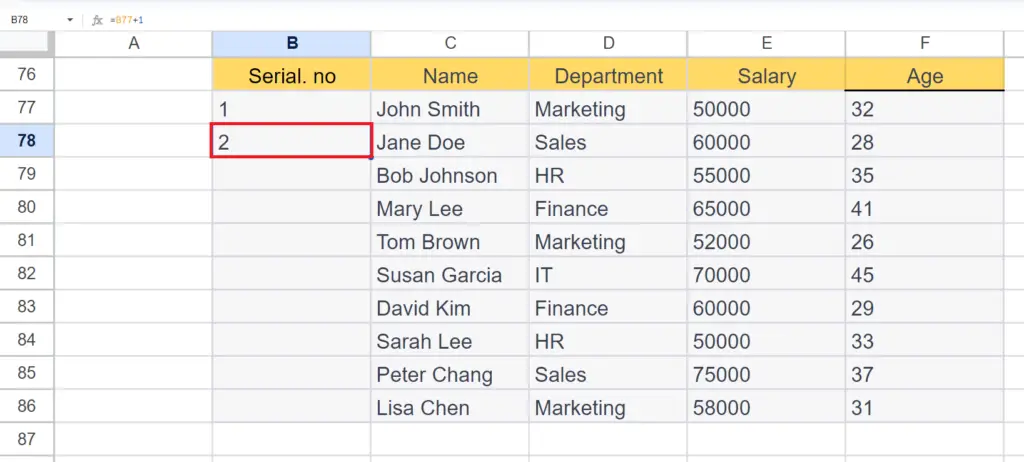
- Press the Enter key.
- The succeeding number will be printed.
Step 5 – Use the Autofill to Add the Numbers
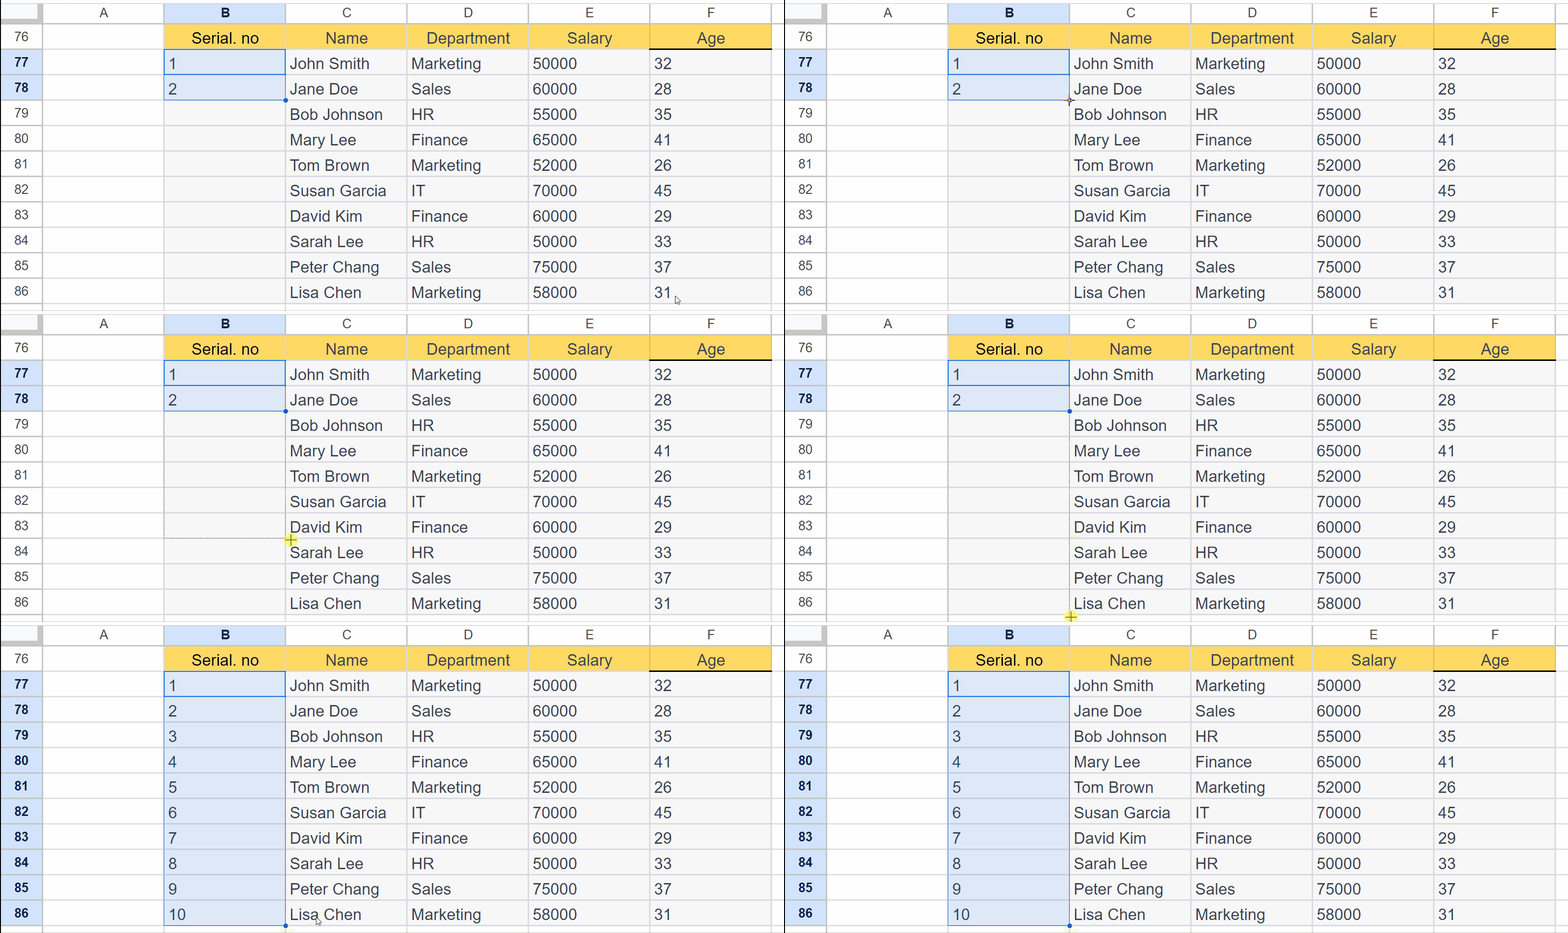
- Use the Autofill feature to add the numbers to each row.
Method 3: Using the ROW Function to Add Numbers
Step 1 – Select a Blank Cell
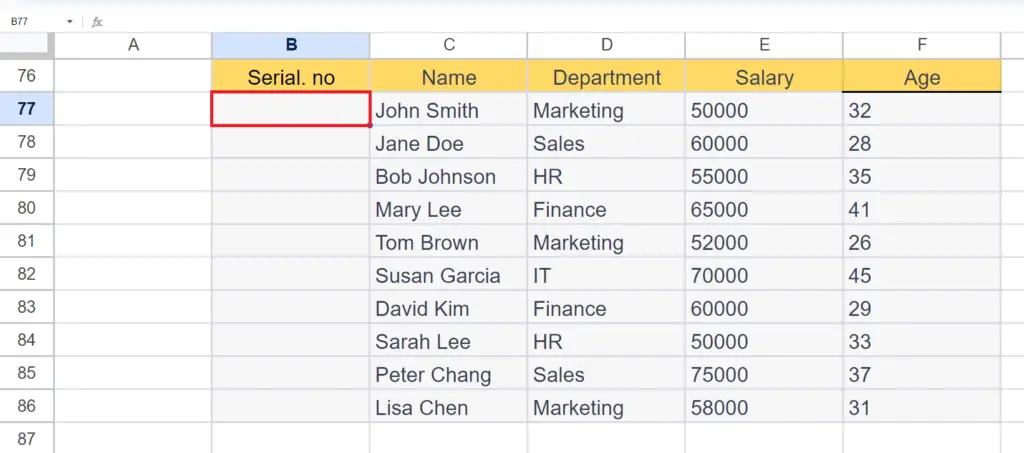
- Select a blank cell in the column where you want to add the numbers.
Step 2 – Place an Equals Sign and Enter the ROW Function
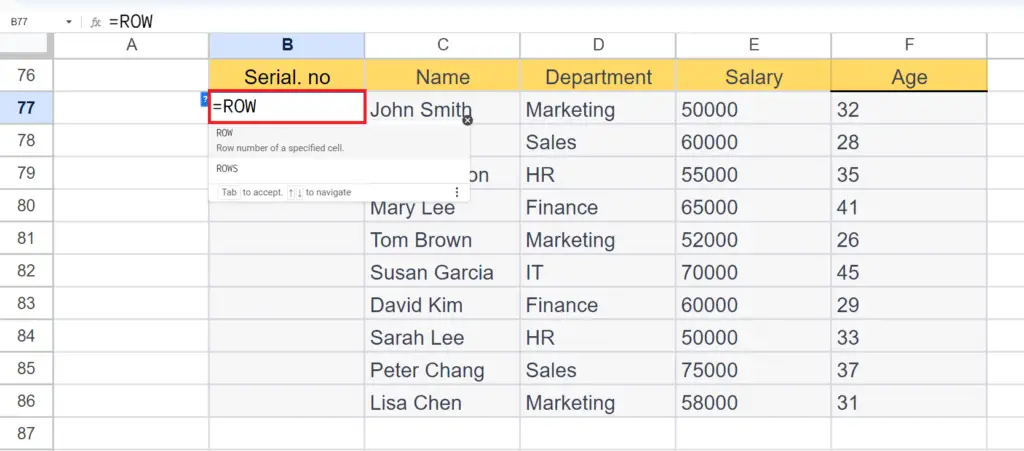
- Place an equals sign in the blank cell.
- Enter the ROW function.
Step 3 – Enter the Reference of the Selected Cell
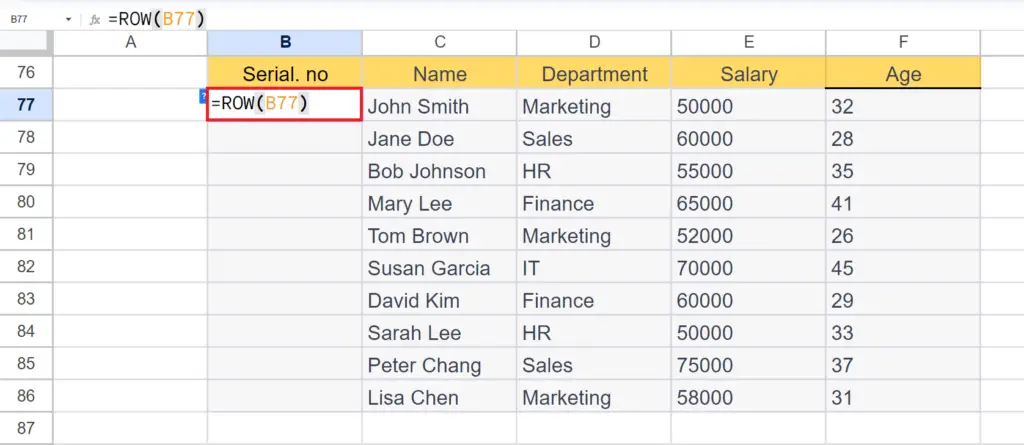
- Enter the reference of the selected cell in the ROW function.
- Close the function. I.e. ROW(B77)
Step 4 – Subtract the ROW Number of the Preceding Cell
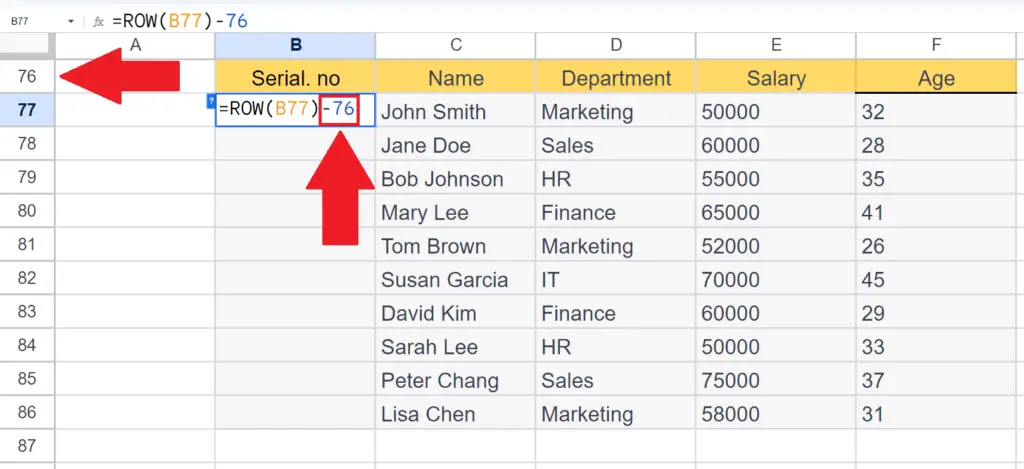
- Subtract the ROW number of the preceding cell from the ROW function i.e.
ROW(B77) – 76.
- Where B77 is the selected cell and 76 is the row number of the preceding cell.
Step 5 – Press the Enter Key
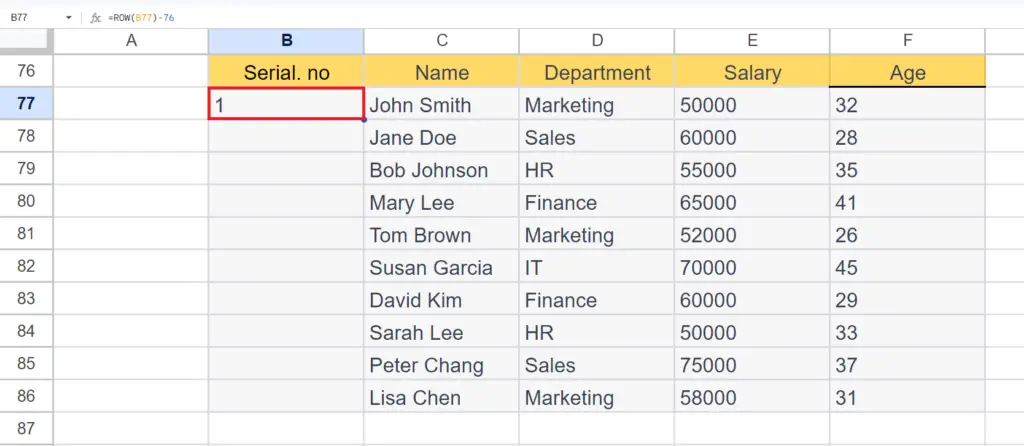
- Press the Enter key.
Step 6 – Use the Autofill to Apply the Formula to all the Rows
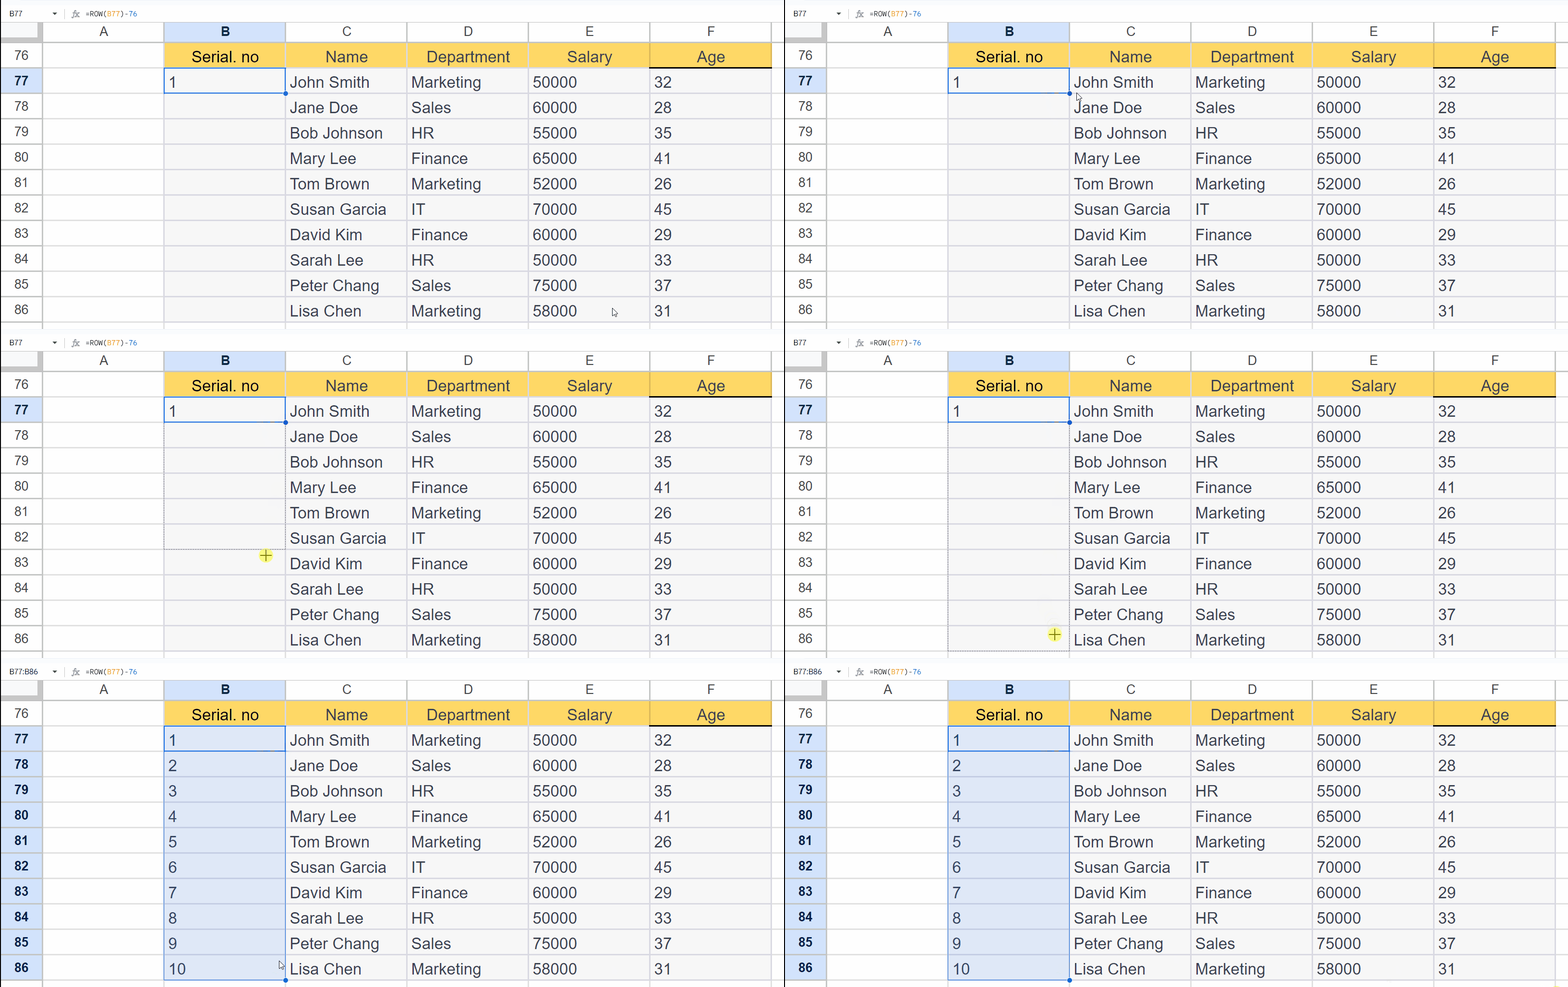
- Use the Autofill feature to apply the formula to all the rows.
Method 4 – Using the SEQUENCE Function
Step 1 – Select a Blank Cell and Place an Equals Sign in the Cell

- Select a bank cell from where you want the sequence to begin.
- Place an Equals sign in the cell.
Step 2 – Enter the SEQUENCE Function
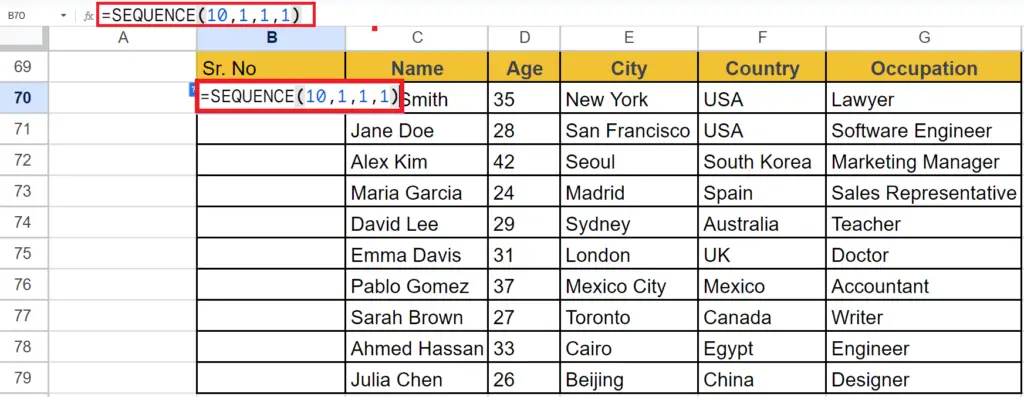
- Enter the SEQUENCE function in the cell.
- The syntax will be:
SEQUENCE(10,1,1,1)
The first argument specifies the number of rows in which the sequence will be generated and the second argument is the number of columns.
The third i.e. 1 is the number from where the sequence will start.
The fourth argument is the step size i.e. 1.
Step 3 – Press the Enter Key
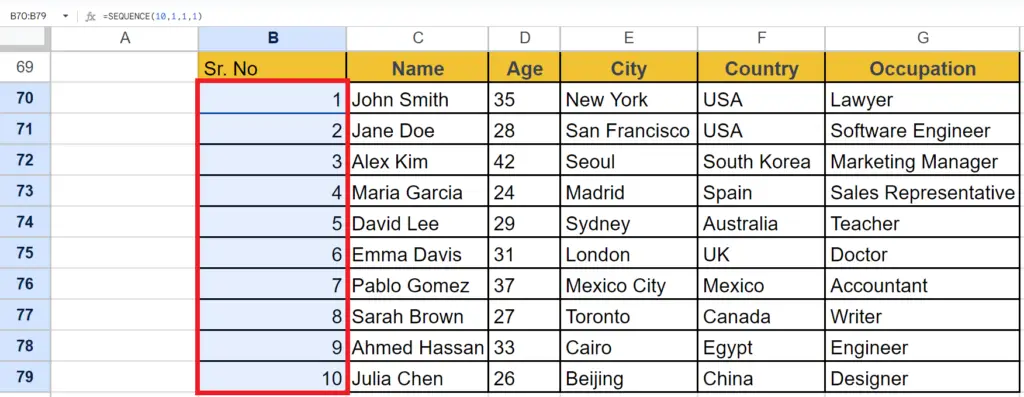
- Press the Enter key to add the numbers automatically as shown below.

