
How to add fonts to Excel
 By
SpreadCheaters
By
SpreadCheaters
When you add fonts to Excel, you are actually installing them at the operating system level, which means they become available for use in any application that uses fonts. The following dataset consists of an area where cells have been merged, there we are going to add a new font, as you can see from the below gif the font we are going to add is not currently available. So, in this tutorial, we will learn how to add new fonts to Excel. Follow the steps given below to learn this.
In Excel, fonts refer to the typefaces or styles of text that can be used to format the content within cells. Adding fonts to Excel means installing new font files on your computer that can be used within Excel and other applications. By default, Excel comes with a set of pre-installed fonts that are available for use. Adding fonts to Excel can be useful if you want to match the visual style of your spreadsheet with other documents or if you simply prefer to work with different fonts for aesthetic or readability reasons.
Step 1 – Open the website

– If you want to add fonts to Excel, first you need to open Google Chrome.
– Then go to the website “Google Fonts”
Step 2 – Choose a font

– When you open the website, you can see many fonts.
– Choose any font from that.
– In our case, we choose the font “Kablammo”.
Step 3 – Click on the font

– Click on the font you want to add in Excel.
– Click on the “Download Family” option.
Step 4 – Click on the folder

– Click on the download option in the menu bar.
– It will display your recent download.
– Click on the font you downloaded or hover the mouse on the downloaded font and click on the folder option.
Step 5 – Right click on the folder

– When you click on the folder option it will show where the font has been downloaded.
– Now right-click on the folder.
Step 6 – Choose an option
– When you right-click on the folder, a pop-up menu will appear.
– Click on the option “Extract All” from that menu.
Step 7 – Choose a folder

– A dialogue box will open.
– Choose any folder or you can create a new folder.
– Click on Browse.
– In our case, we are choosing a folder.
– Once you have chosen the folder, click on the Select folder option then click on the Extract option.
Step 8 – Choose appropriate options

– When you click on extract a dialogue box will open.
– You can choose to skip this file or you can choose to replace the file in the destination.
– We are choosing to replace the file in the destination.
– Now choose the option skip.
– Then the font file will be installed in the selected folder.
Step 9 – Click on the true type font (ttf) file
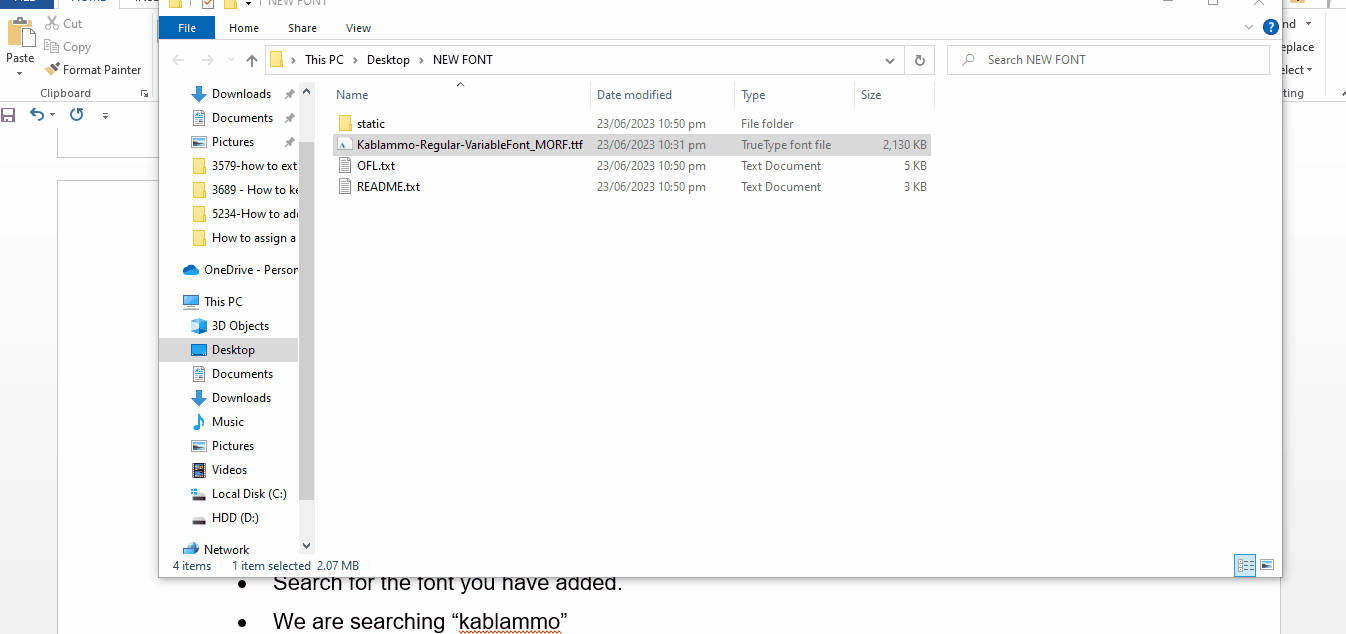
– Click on the ttf file.
– Now click on Install.
– When it will be installed the option of install will grey out or will be disabled.
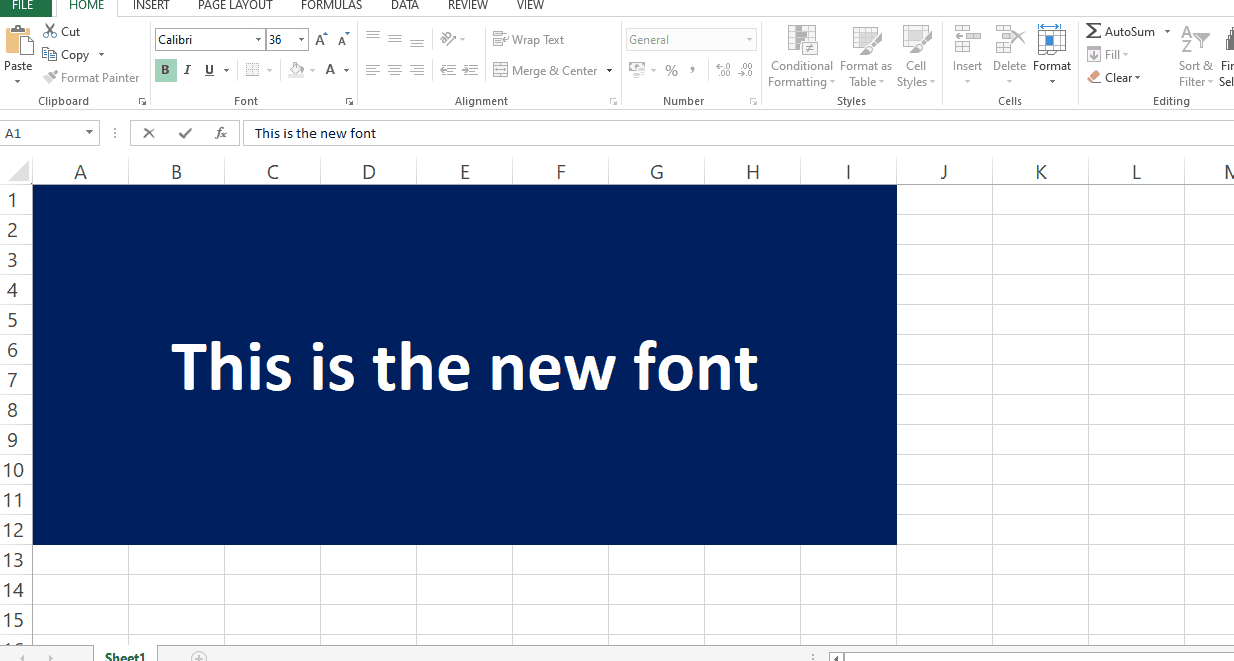
Step 10 – Open the Excel file
– Now open Excel.
– Search for the font you have added.
– We are searching for “kablammo bloop”.
– Press enter to select the font.
– Now select the font and the font will be applied.


