
How to add a timestamp in Google Sheets
 By
SpreadCheaters
By
SpreadCheaters
While working in Google Sheets, timestamps can help us track certain actions, such as when a cell was edited or a form was submitted. If multiple people work on the same sheet, timestamps can help identify who made changes and when. Timestamps can be used to track trends over time, such as when certain events occur or how frequently certain actions are taken.
In today’s tutorial, we’ll learn how to use timestamps in Google Sheets. There are two forms of timestamps in Google Sheets, which are “Dynamic” and “Static” timestamps. Let’s consider the following case for adding static timestamps in Google Sheets:
Case 1 – Using Static Timestamps
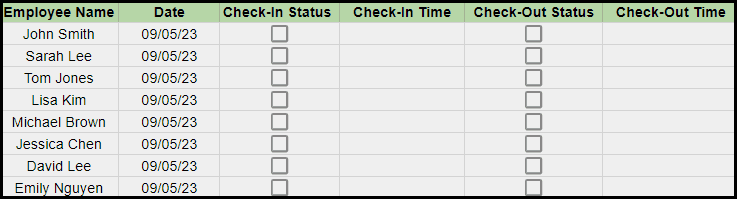
Static timestamps do not change with time. They remain as they are inserted until someone changes them. For example, we want to make a list of the check-in and check-out times of employees working in an office. Consider the following dataset for this example:
Step 1 – Create a Checkbox for the “Check-In” and “Check-Out” status
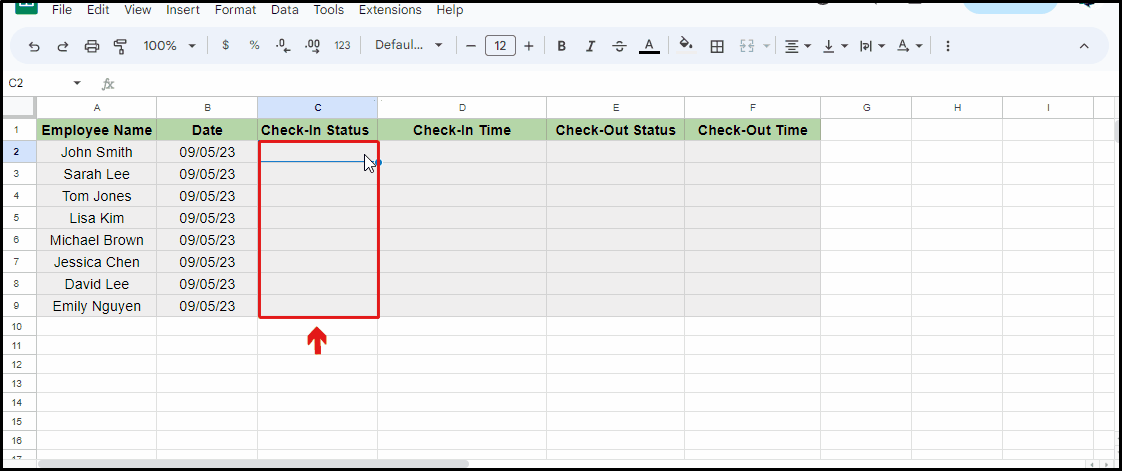
- Select the column for “Check-In Status”.
- Click on “Data” from the ribbon.
- Click on Data Validation from the drop-down menu.
- Click on the “Add Rule” button.
- In the criteria section, click on the down arrow to open a drop-down menu.
- Choose Checkbox from the drop-down menu.
- Tickmark the “Use Custom Cell Values”.
- Write “A” for checked, and “B” for unchecked.
- Click on Done.
- Follow the same steps for the “Check-Out Status” column.
Step 2 – Turn ON Iterative Calculations
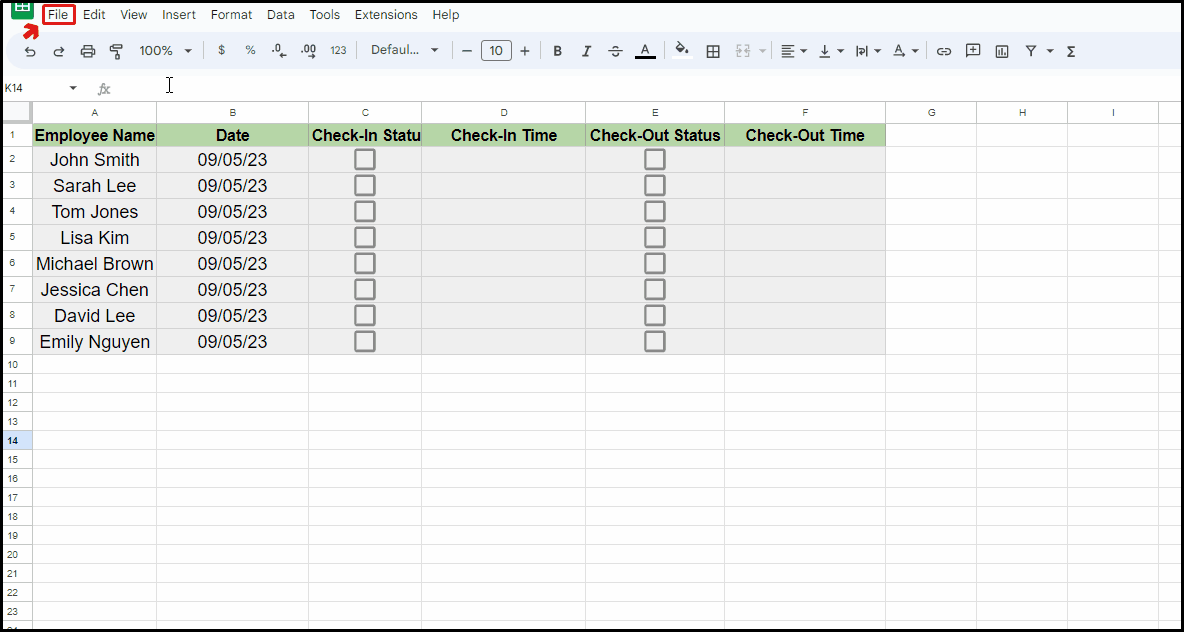
- Click on the “File” option from the ribbon.
- Click on Settings.
- Go to the “Calculation” tab.
- Turn ON “Iterative Calculations”.
- Click on “Save Settings”.
Step 3 – Use the IF function to generate auto Timestamp
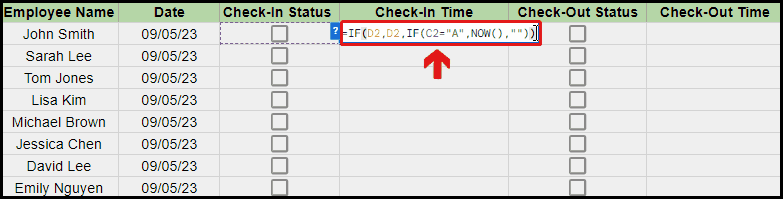
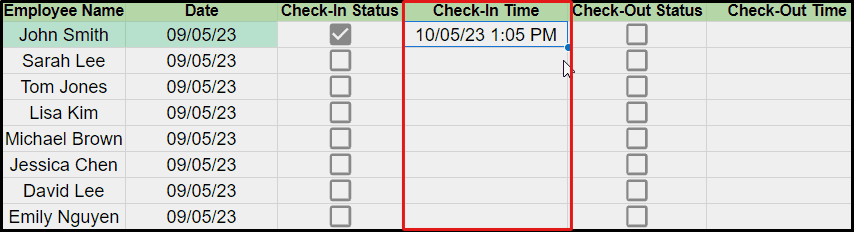
- We need to use the IF function to generate an automatic timestamp when the employee tickmarks his check-in or check-out status.
- In this case, the used formula is =IF(D2,D2,IF(C2=”A”,NOW(),””)).
- Write this formula in the cell where you want to generate a timestamp.
- Press Enter.
- Now if the employee tickmarks his status, the timestamp will be generated.
Step 4 – Use the Fill handle to apply the formula to the whole column
- Move your cursor to the bottom right of the cell where the formula is already implemented.
- Drag the Fill handle up to the last employee.
- The formula will be implemented in the whole column.
- Now, if any worker arrives at the office and tickmarks his Check-In status to mark his attendance, a timestamp will be generated.
- Follow the same steps for the “Check-Out Status” column.
Break Down of the used formula
In this case, an IF() statement is used to generate an automatic timestamp when the checkbox is ticked. Syntax of IF() function is =IF(logical_test_condition,value_if_true,value_if_false). In this particular case, for check-in time, we used the formula =IF(D2, D2, IF(C2=” A”, NOW(),””)). And formula used for check-out time is =IF(F2, F2, IF(E2=”A”, NOW(),””)). In these formulas, in place of “logical_test_condition”, we write the cell in which the formula is written. In place of “value_if_true”, we again write the cell in which the formula is being written. In place of “value_if_false”, we use another IF function. In the second IF function, in place of “logical_test_condition”, we write C2 = ”A”, which means that if the checkbox is ticked, then the condition will be true. Because we had assigned A to the cell if the checkbox is ticked. In place of “value_if_true”, we use the NOW() function, which is used to create the timestamp of the current time. In place of “value_if_false”, we write “”.


