
How does Excel Solver work
 By
SpreadCheaters
By
SpreadCheaters
Excel, a versatile and comprehensive spreadsheet software, offers much more than simple calculations and data analysis. Within Excel’s vast array of tools, Excel Solver stands out as a powerful feature that enables users to unlock optimization capabilities. With Solver, users can tackle complex problems by fine-tuning variables, adhering to constraints, and optimizing objectives. In this blog post, we will delve into the inner workings of Excel Solver, exploring its core components and uncovering its immense potential in addressing real-world optimization challenges.
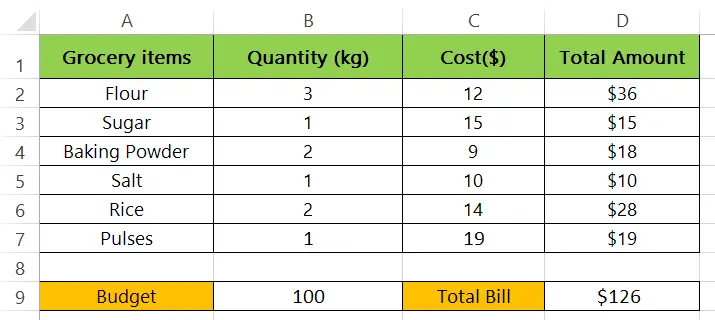
Here we have a dataset that contains Grocery Items, Quantity (Kg), Cost ($), and Total Amount. We are also given the Budget to spend on groceries but our Total Bill is going over the Budget. To get our bill equal to our budget we’ll be making some changes in the Quantity of each grocery item. We can do this by simply using the Solver feature of Excel. Follow the simple steps below to do it.
Step – 1 Open Excel Options.
- Click on File on the top left of Excel.
- Click on Options.
- Excel Options will open.
Step – 2 Add the solver option to the ribbon.
- In the Excel Options dialog box, click on Add-Ins.
- Under Add-Ins, select Solver Add-in.
- After that at the bottom you’ll see ‘Manage:‘, click on ‘Go’ in front of ‘Manage:‘, as shown in the gif below.
- In the Add-in menu check the check box of Solver Add-in.
- At last click OK.
Step – 3 Open the Solver menu.
- Open the Data tab.
- In the Analysis group click on Solver.
- This will open the Solver Parameters dialog box.
Step – 4 Defining Parameters for Solver.
- First of all in the Set Objective blank space select the target cell that we are focusing on.
- In BY Changing Variable Cells select the range of cells, where changes will be made to get the desired results.
- Now we will be adding conditions/formulas which will be used by the solver to produce the desired results, for that click on Add.
Step – 5 Adding the conditions.
- After clicking on Add, Add Constraint context menu will open.
- In Cell Reference select the cell that you want to be changed (Total Bill).
- In Constraint blank space select the cell (Budget) that will be compared with the Reference value.
- Choose the condition that will be used to compare the two cells, as we wanted the Total Bill and Budget to be equal that’s why we choose the ‘=’ relational operator.
- Condition will look something like this
Total Bill = Budget
- Click Add.
- Now we will add a second condition that will restrict Solver to change values in Quantity to less than zero to obtain the desired results.
- In the Cell Reference select the range of values in the Quantity column and in the Constraint section type 0.
- In the middle choose the condition ‘>=’, as we want values in the Quantity column to be at least zero.
- Second condition will look something like this:
$B$2:$B$6 >= 0
The range is of the Quantity column.
- Click Cancel to close the Add Constraint menu.
- Follow the Gif below to have a better understanding.
Step – 6 Apply the Conditions.
- In the Solver Parameter menu click on Solve.
- Excel will automatically change the values in the dataset to match the Total Bill with Budget, as shown below.


