What is 11×17 paper called and how to print on an 11×17 paper in Excel
How to change paper size in Excel to print on 11×17 paper

When working with large datasets or complex charts, it may be necessary to print the data across multiple pages to ensure all the information is visible and easy to read. Using the Tabloid paper size in Excel allows you to print a larger area of your spreadsheet on a single page, which can make it easier to view and analyze your data. Additionally, printing on a larger paper size may reduce the number of pages needed to print a full spreadsheet or chart, which can save time and resources.
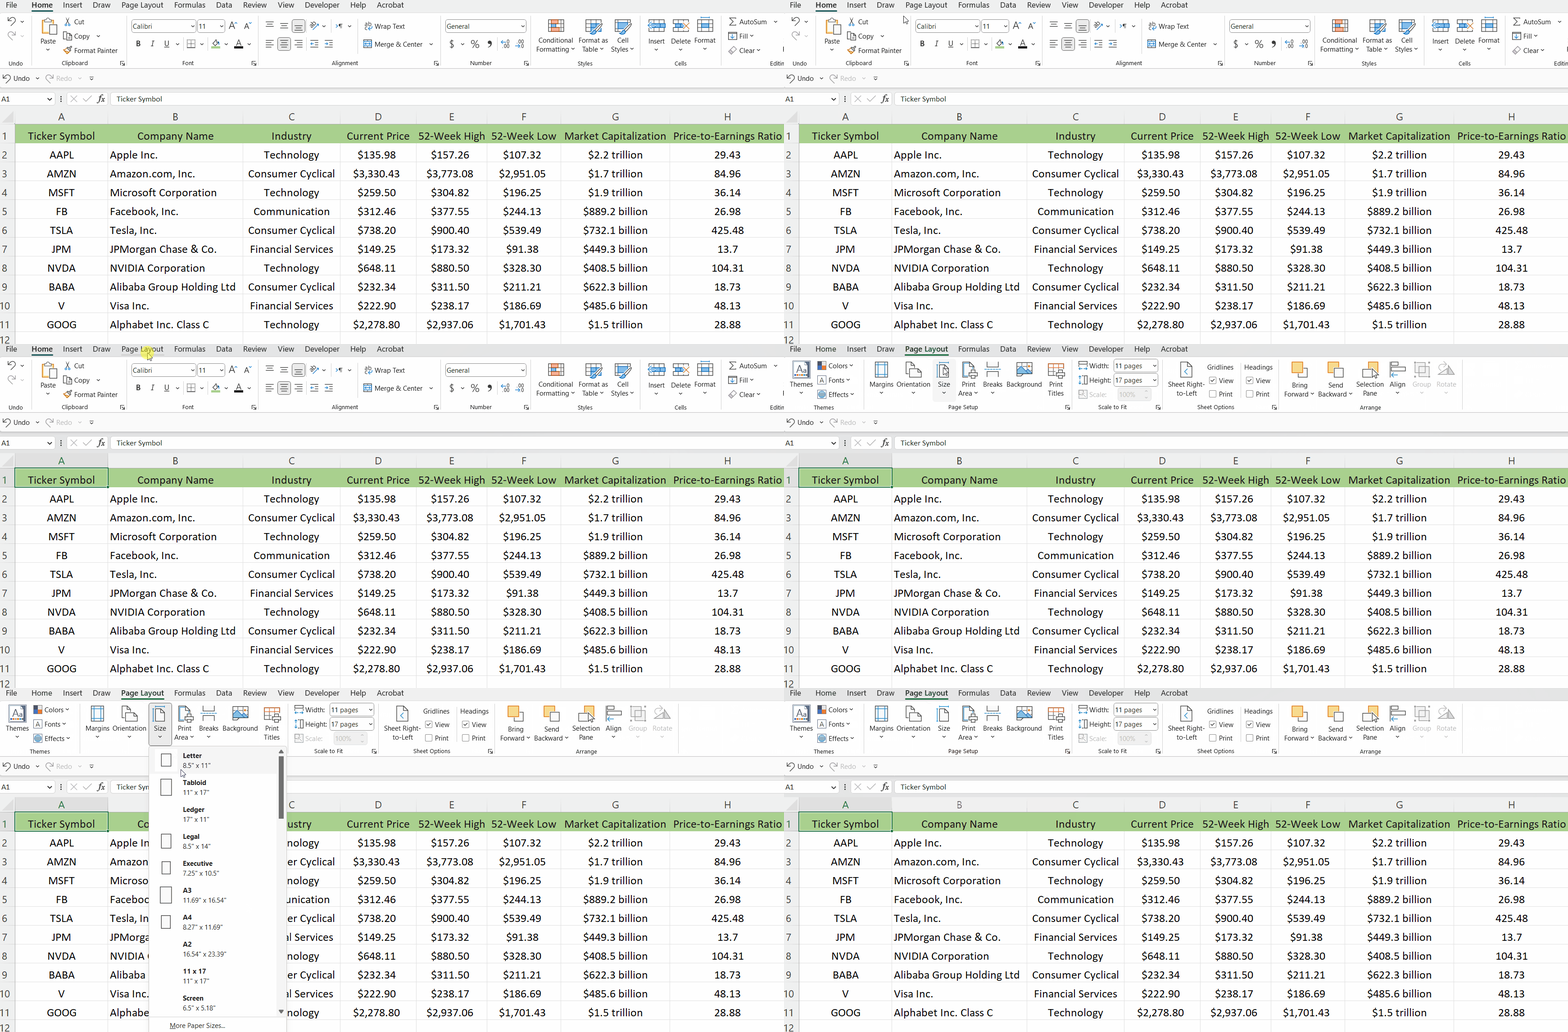
The following dataset shown above consists of data from the stock market and we will take this dataset as an example to learn how to print this data in an 11×17 spreadsheet.
Follow the simple steps mentioned below to print this data on 11×17 paper:

Excel offers a wide range of papers that can be selected while taking the printout of a document. The selection of the paper sizes depends upon the nature of the data that needs to be printed. If the dataset is huge then you might want to use big papers and if the dataset is smaller then you might use the standard A4 size papers. Excel also provides the facility to choose a customized paper size in the print settings for special cases.
In this tutorial, we’ll discuss about a special paper size called 11×17 and see how to set it up in the print settings of Excel.
What is 11×17 paper called actually?
The paper size that is 11 inches wide and 17 inches long is commonly known as
“Tabloid” or “Tabloid Extra” in the United States and Canada. It is also sometimes referred to as “B-size” paper in other countries. Tabloid paper size is useful in Excel for printing large spreadsheets or charts that may not fit on a standard letter size paper.
Step 1 – Selecting the (11×17) Tabloid Size

– For selecting the tabloid page size, go to the Page Layout Tab.
– Locate and click on the Size drop-down in the Page Setup group.
– A drop-down menu will open.
– Select the Tabloid (11×17) option by clicking on it as shown above.
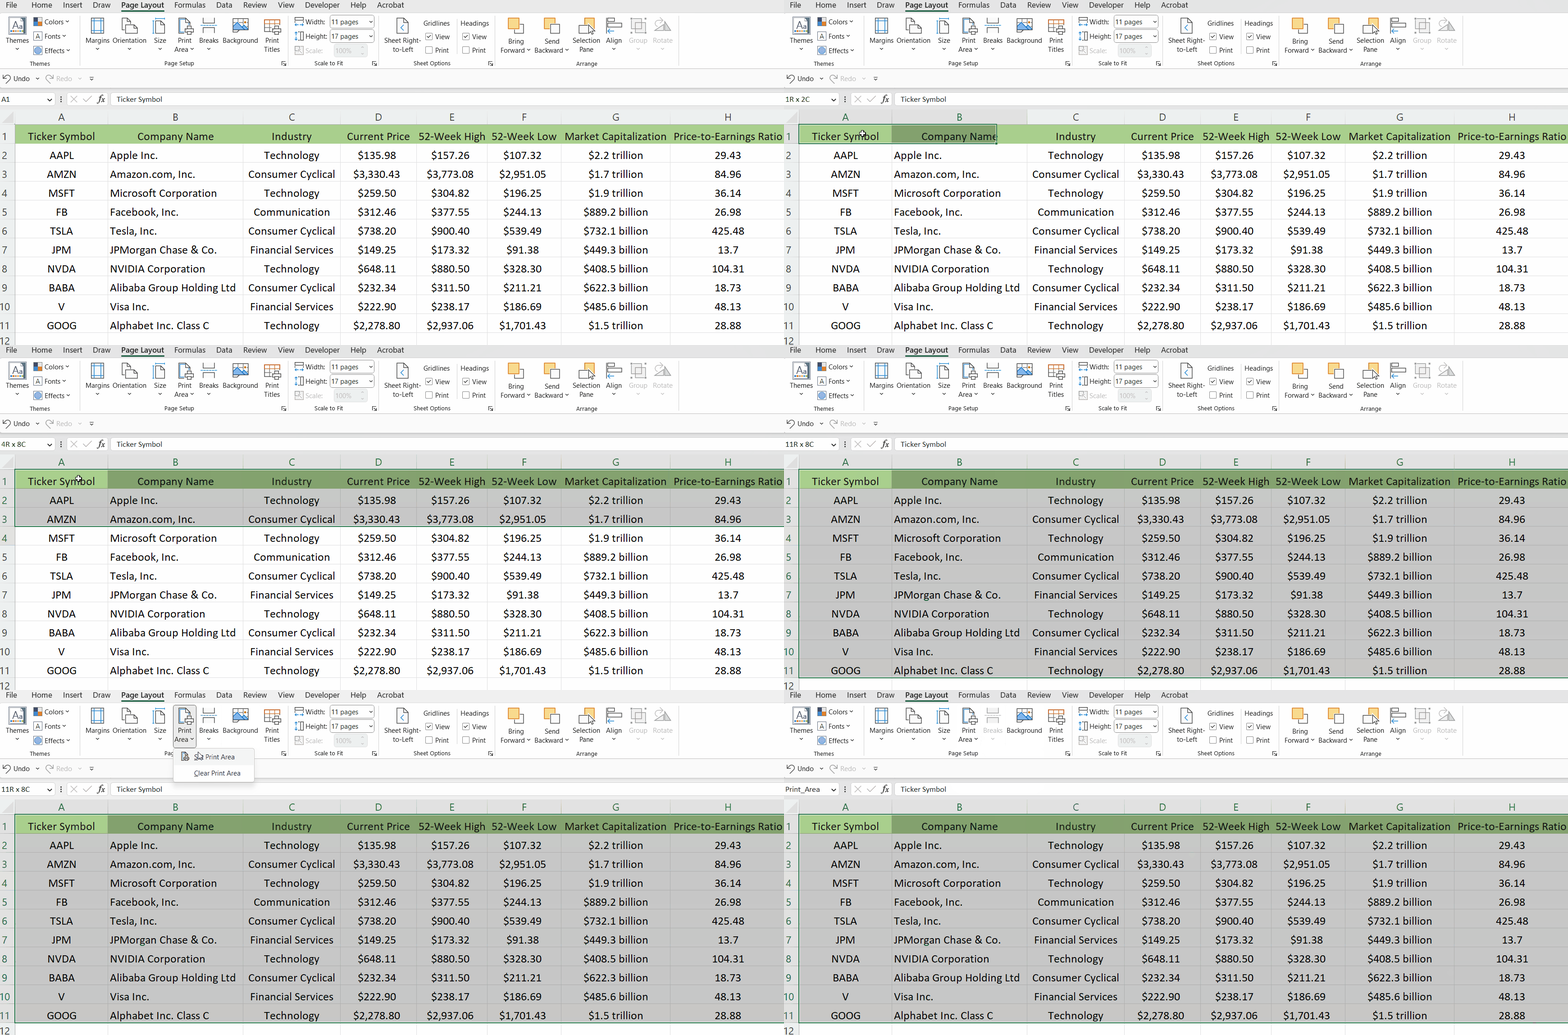
Step 2 – Setting the Print Area

– Select the rows and columns that you want to print.
– Locate and click on the Print Area option.
– A small drop-down menu will open.
– Click on the first option named as Set Print Area.
– Now, the rows and columns that you have selected are set as print area.
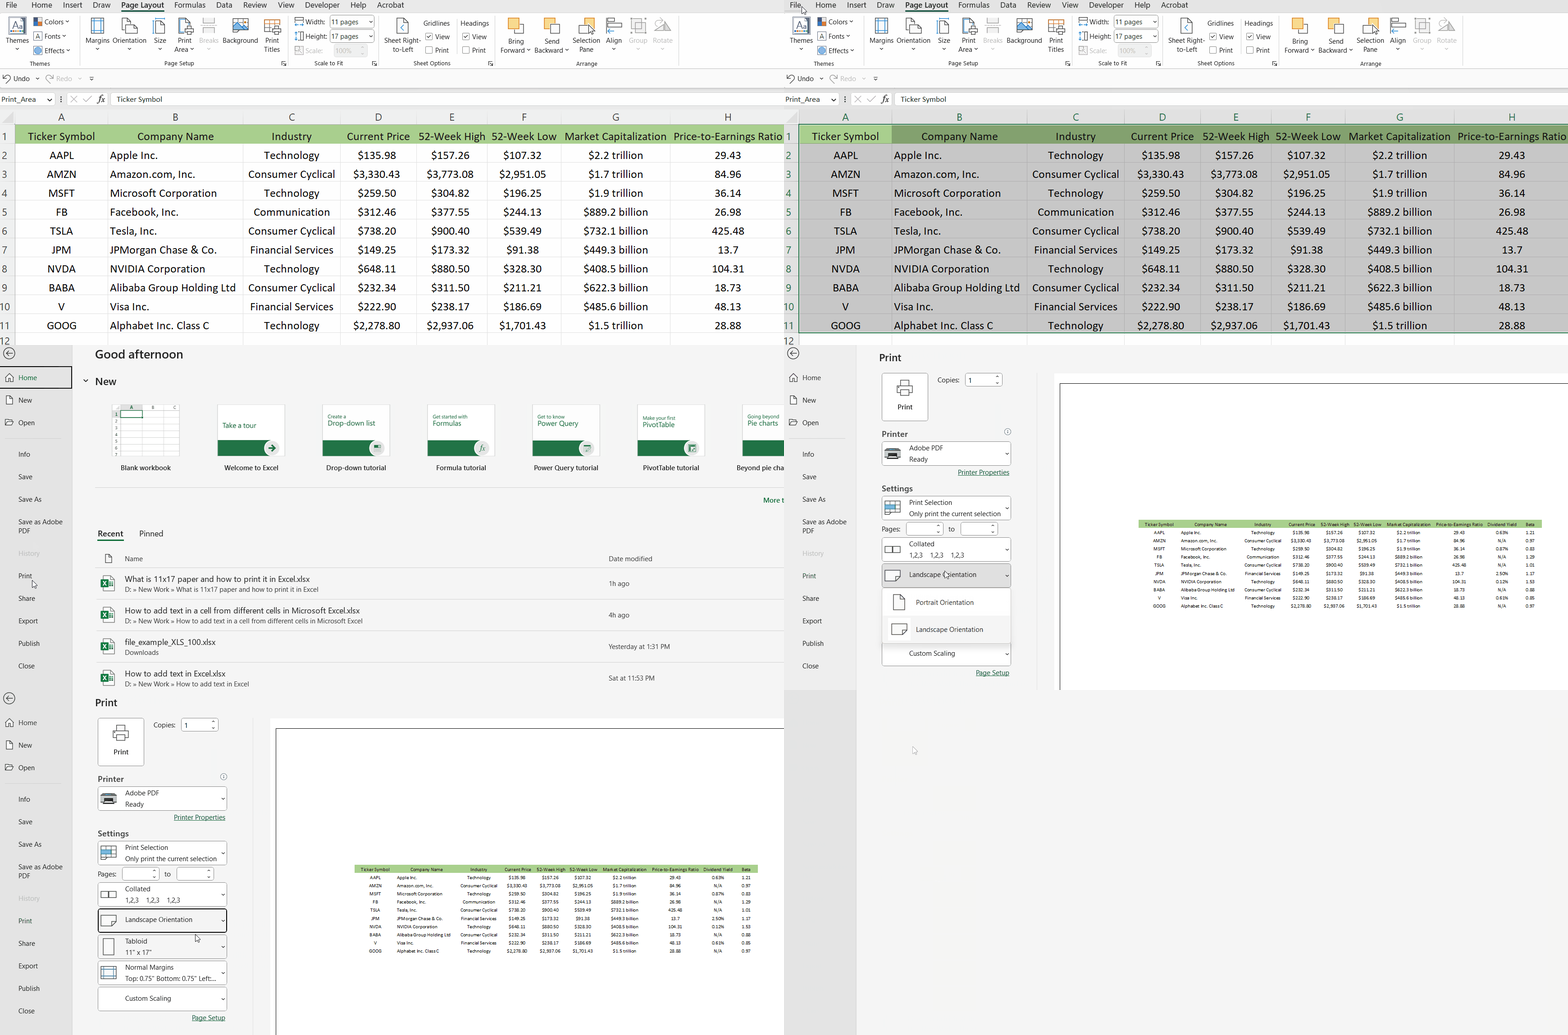
Step 3 – Printing the Page

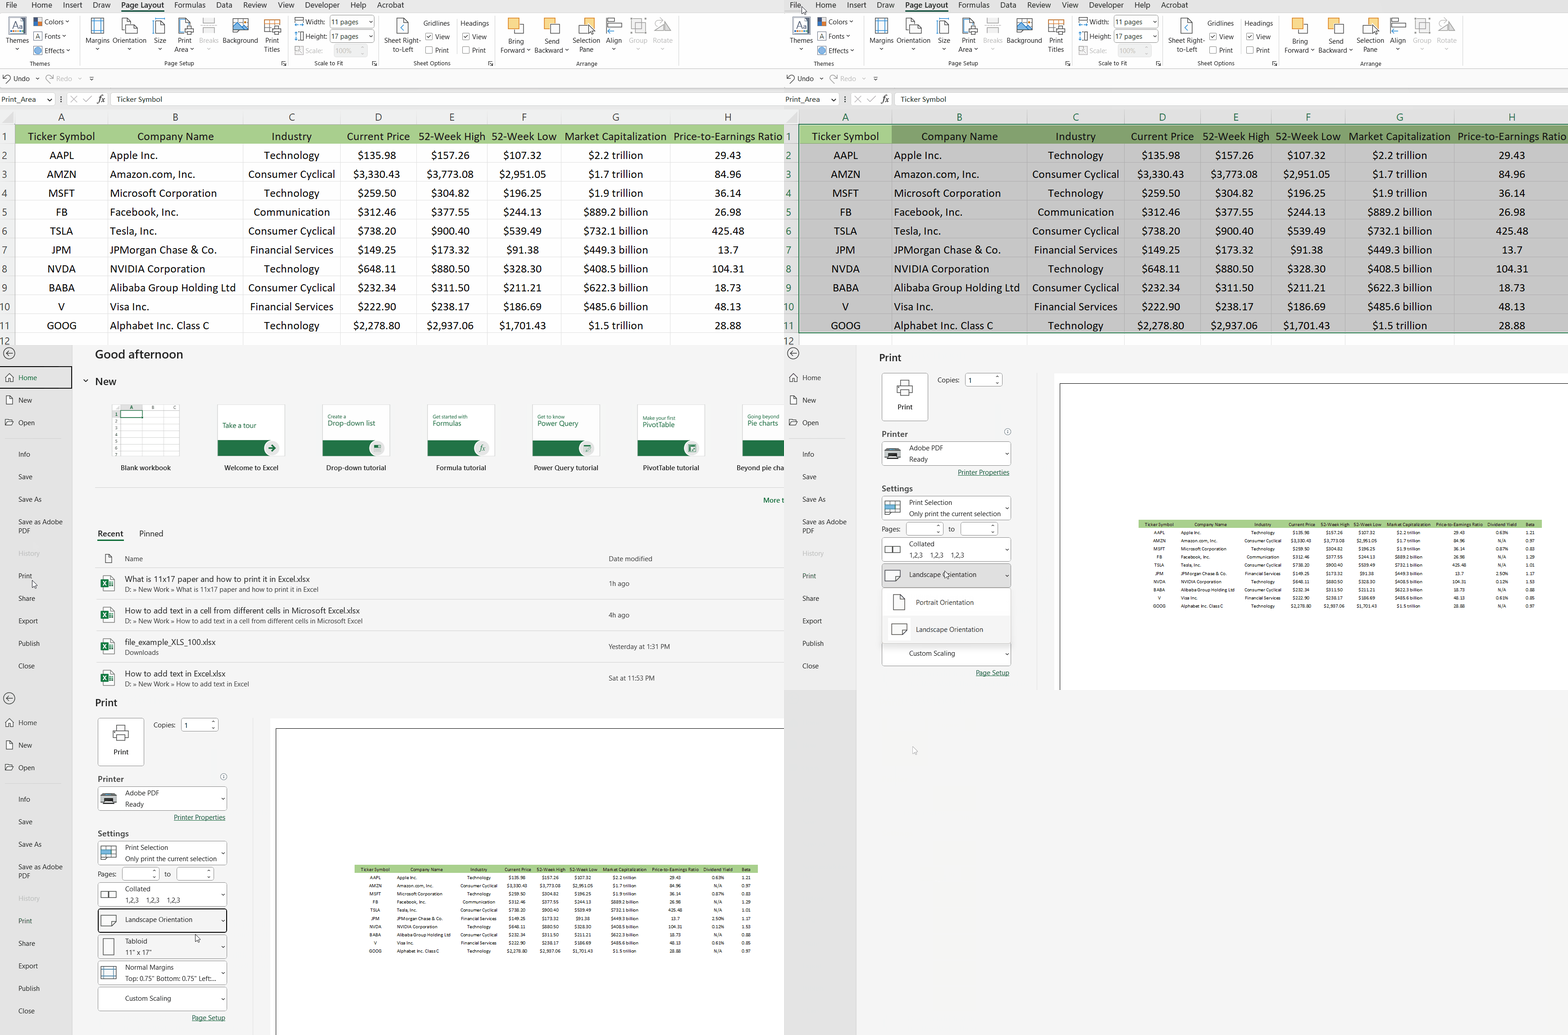
– After you’ve selected the Print area, go to the File tab.
– You can also open this by shortcut CTRL+P.
– Locate and click on the Print option.
– Select the Landscape orientation adjacent to the Print option.
– Then, click on the Print option in the top left corner.
Conclusion:
So, that is how you can set different paper sizes in the print settings of Excel, depending upon your requirements. It is quite useful for saving papers if you choose your paper size wisely and exactly as the requirement of the size of the datasets.


