
How to wrap a cell in excel
 By
SpreadCheaters
By
SpreadCheaters
Page last updated:
04/11/2022 |
Next review date:
04/11/2024
Microsoft Excel is an electronic spreadsheet with numerous rows and columns, used for organizing data. Wrap Text is a vital feature of it. It allows users to adjust the text within the cell by adjusting cell’s height automatically. It makes the text very easy to read and a better fit for printing. Moreover, it helps users to keep the column width consistent throughout the entire worksheet.
A text can be wrapped by two following methods;
- By pressing the wrap text button in the Home tab
- By using the keyboard shortcut ALT + H + W
Method 1 – By pressing the wrap text button in the Home tab
Step 1- Selection of cell
- Open Microsoft Excel spreadsheet
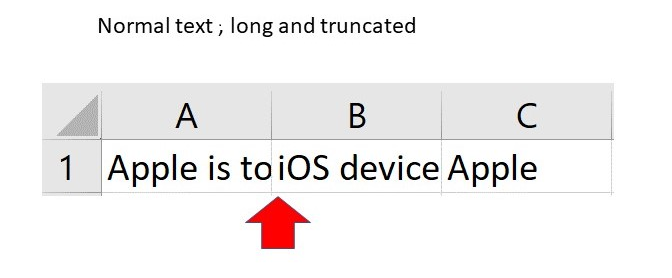
- Select the cells in which the text is longer and truncated.
Step 2 – Press the wrap text button
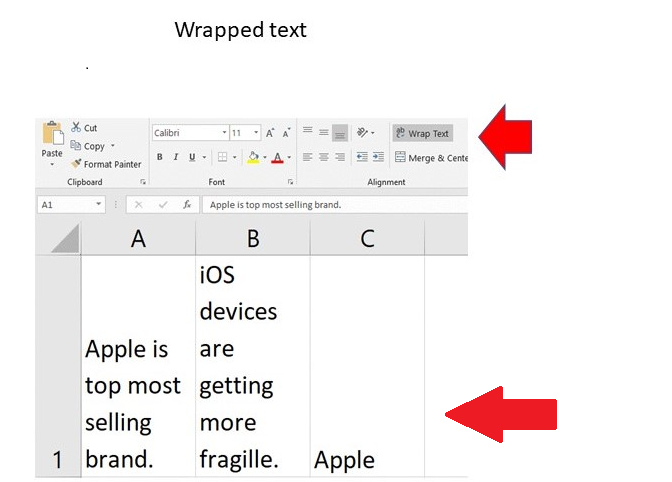
- Go to the Home tab.
- Press the Wrap text button.
- Text will be wrapped.
You will get all your text wrapped.
Method 2 – By using the keyboard shortcut ALT + H + W
Step 1 – Select the cell to wrap

- Open Microsoft Excel spreadsheet
- Select the cell in which the text is longer and truncated.
Above is a picture, as an example of plain text.
Step 2 – Press the shortcut keys

- Press the keys ALT + H + W.
- The wrap text button will automatically get selected.
- Text will be wrapped.
Above is a picture, as an example for a better understanding;
So, all text has been wrapped in the picture above.


