
How to use Offset in VBA Excel
 By
SpreadCheaters
By
SpreadCheaters
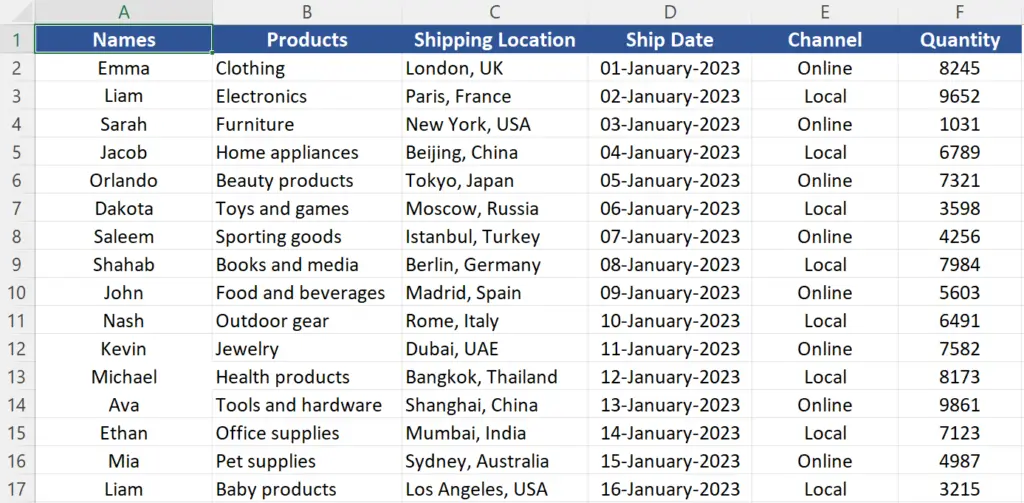
In today’s tutorial, we’re going to learn how to use Offset in excel by using VBA code. We have the following dataset of a large dataset consisting of names of the people who are shipping different products on some dates along with their channel of selling and location on which they are shipping products. This dataset above will be used as an example for learning today’s tutorial.
Syntax of Offset command in VBA
To use the Offset command effectively, you need to use the following syntax and specify number of rows column before which you wish to insert the new column.
ActiveCell.Offset([RowOffset, [ColumnOffset])
RowOffset:
The row offset parameter specifies how many rows you want to move up or down. For example, a Positive value will move down from active cell and a negative value will move up from the active cell.
ColumnOffset:
The column offset parameter specifies how many columns you want to move right or left. For example, a Positive value will move towards the right from active cell and a negative value will move towards left from the active cell.
Excel VBA provides us with many functions which can be used for automating our tasks and minimizing the efforts to perform repetitive tasks. One such small but very handy function is Offset in VBA which provides the user the facility to move away from the currently active cell (in terms of rows and columns) based on the parameters specified in the function.
Step 1 – Enable Developer Option
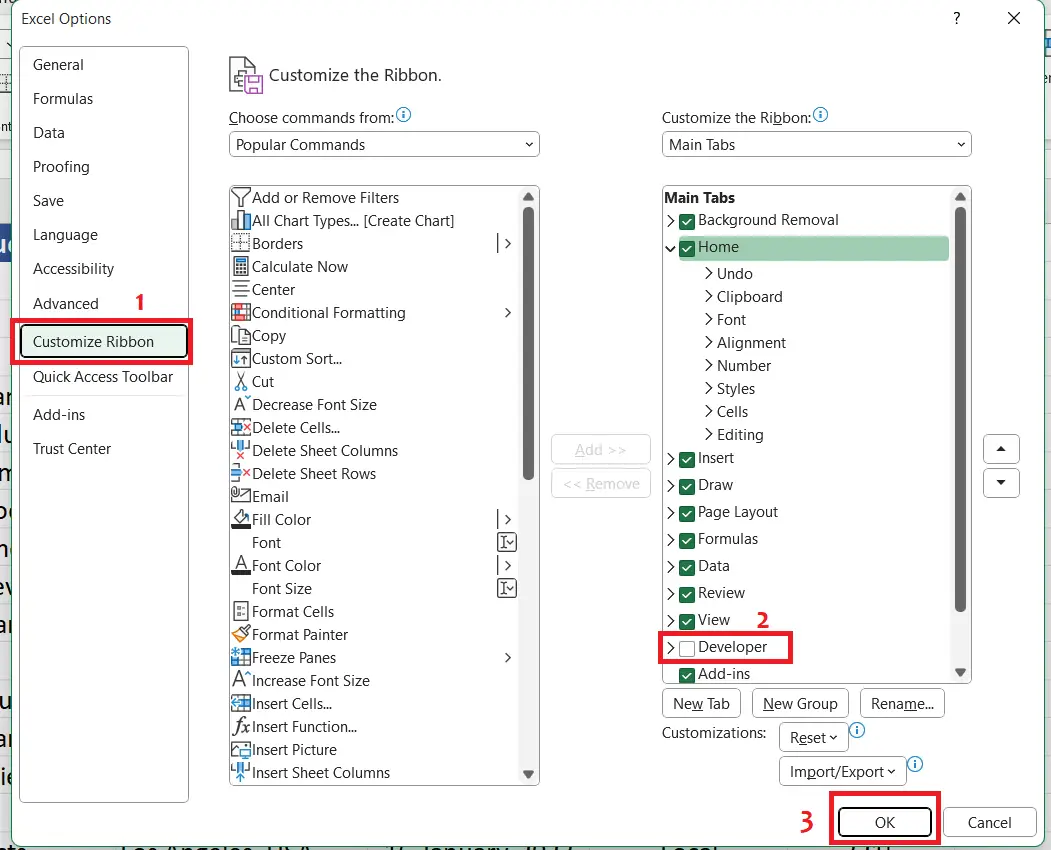
– Click on File and then click on Options.
– In Options click on Customize Ribbon.
– Check the Developer check box in the Main Tabs section.
– Click OK.
Step 2 – Open VBA Editor
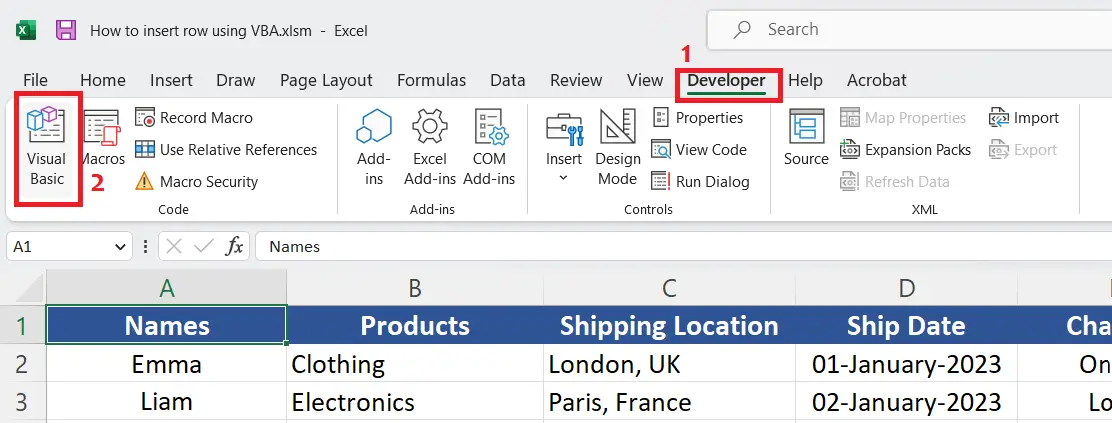
– From the Developer tab click on the Visual Basic option or you may press the ALT+F11 shortcut key to open the VBA Editor.
Step 3 – Use Offset to change rows only using VBA Code
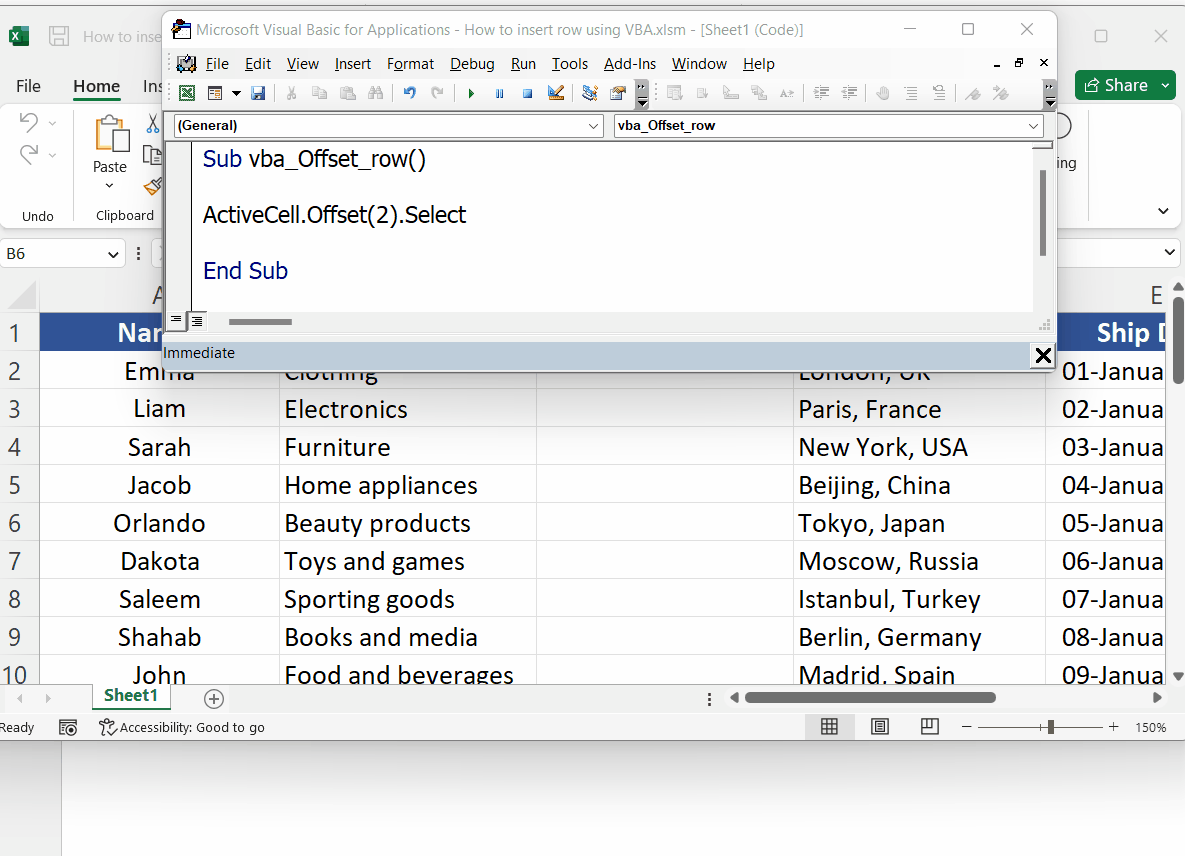
– Following code can be used to move away up or down from the Active cell. To run the code press F5 or if you want to run the code from inside the Editor then press the green play button.
Sub vba_Offset_row()
ActiveCell.Offset(2).Select
End Sub
Due to the positive value of offset the selection will move 2 rows down in our case. If a negative integer value is used then the selection will move upward as shown above.
Step 4 – Use Offset to change columns only using VBA Code
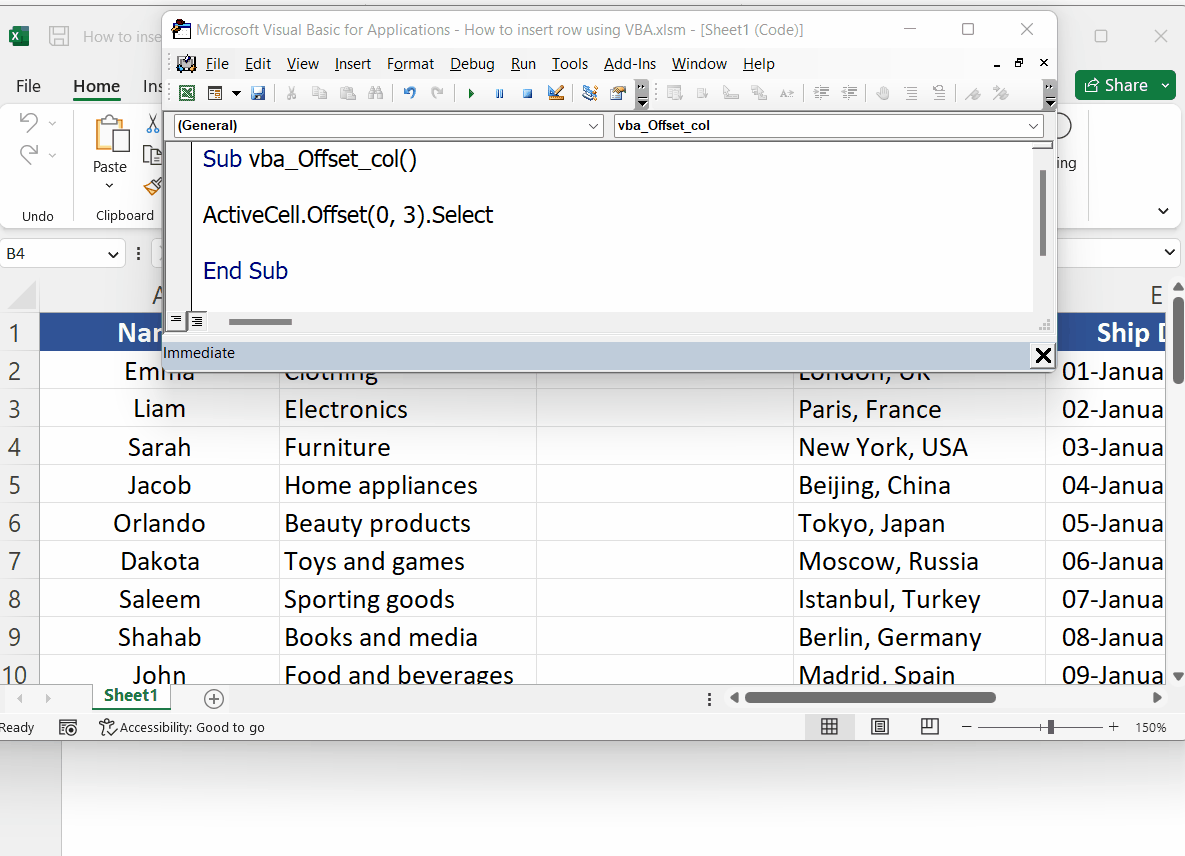
– Following code can be used to move away right or left from the Active cell. To run the code press F5 or if you want to run the code from inside the Editor then press the green play button.
Sub vba_Offset_col()
ActiveCell.Offset(0,2).Select
End Sub
Due to the positive value of offset the selection will move 2 columns toward right in our case. If a negative integer value is used then the selection will move towards the left as shown above.
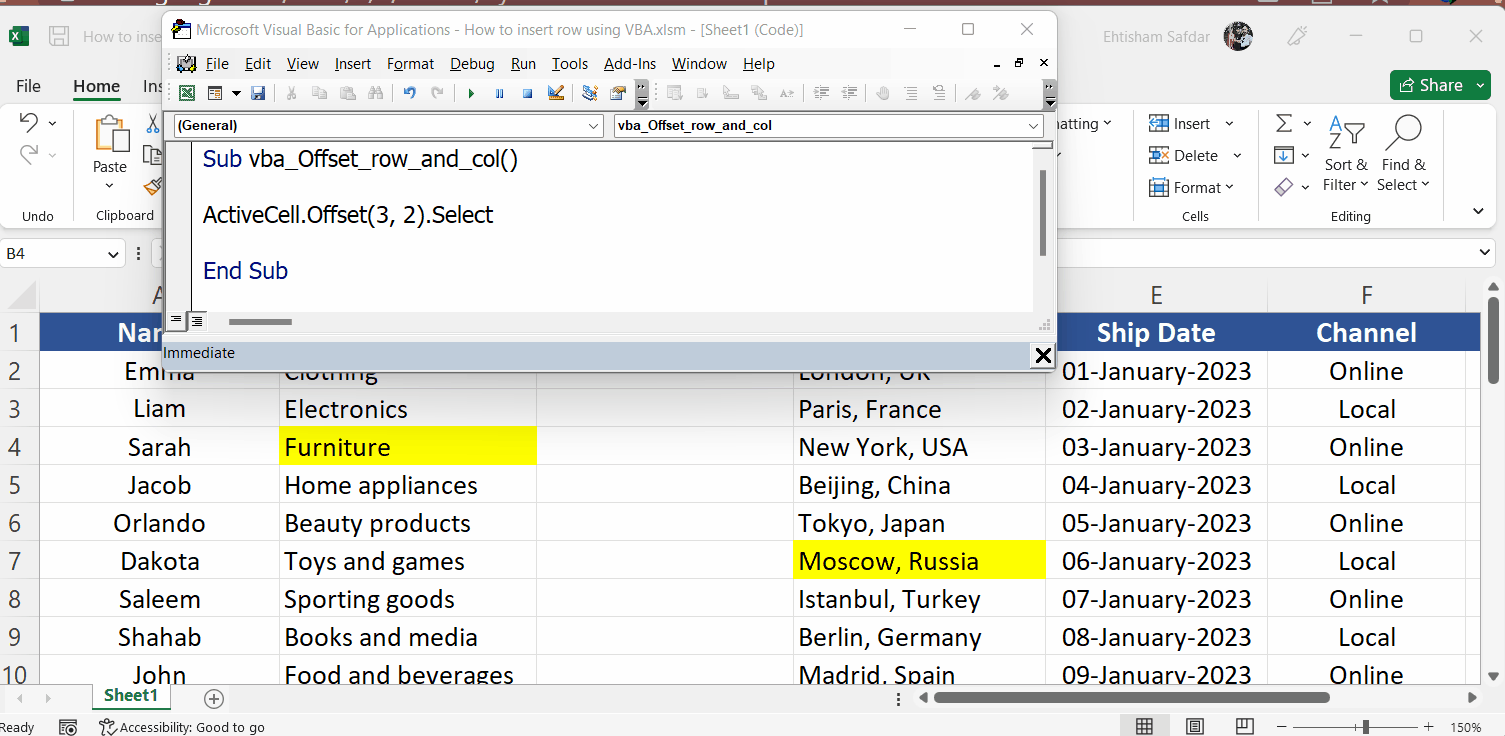
Step 5 – Use Offset to change rows & columns using VBA Code

– Following code can be used to move away right or left from the Active cell. To run the code press F5 or if you want to run the code from inside the Editor then press the green play button.
Sub vba_Offset_col()
ActiveCell.Offset(3, 2).Select
End Sub
Due to the positive values of offset the selection will move 3 rows down and 2 columns toward right in our case. If negative integer values are used then the selection will move up and towards the left as shown above. We have highlighted the cells already to show which cells will be selected through offset command. We can see that the green selection rectangle moves back and forth from the first highlighted cell to the other.


