
How to use Else If or Nested IFs in Excel
 By
SpreadCheaters
By
SpreadCheaters
To use the “IF” function properly we need to understand the syntax of the formula and what parameters it requires to work. So, let’s see the structure of the formula first and then we’ll apply this to a data set to see the formula in action.
- Structure of IF Function:
The structure of the IF function in Excel is fairly simple and easy to comprehend. The generic formula of an IF Function is given below;
=IF(Logical_Test_Condition, Result_if_true, Result_if_false)
This function requires the following three parameters, which are explained below one by one.
Logical_Test_Condition:
The first parameter is the logical test condition which will be evaluated by the formula. When constructing a test condition, we can use the following logical operators to evaluate a logical scenario;
- = (equal to)
- > (greater than)
- >= (greater than or equal to)
- < (less than)
- <= (less than or equal to)
- <> (not equal to)
Result_if_true:
The formula evaluates the logical condition and if the condition is found correct (true) then this value will be chosen to appear as a result.
Result_if_false:
This is the value which will be chosen as a result, when the test condition is found incorrect (false) after being evaluated in the formula.
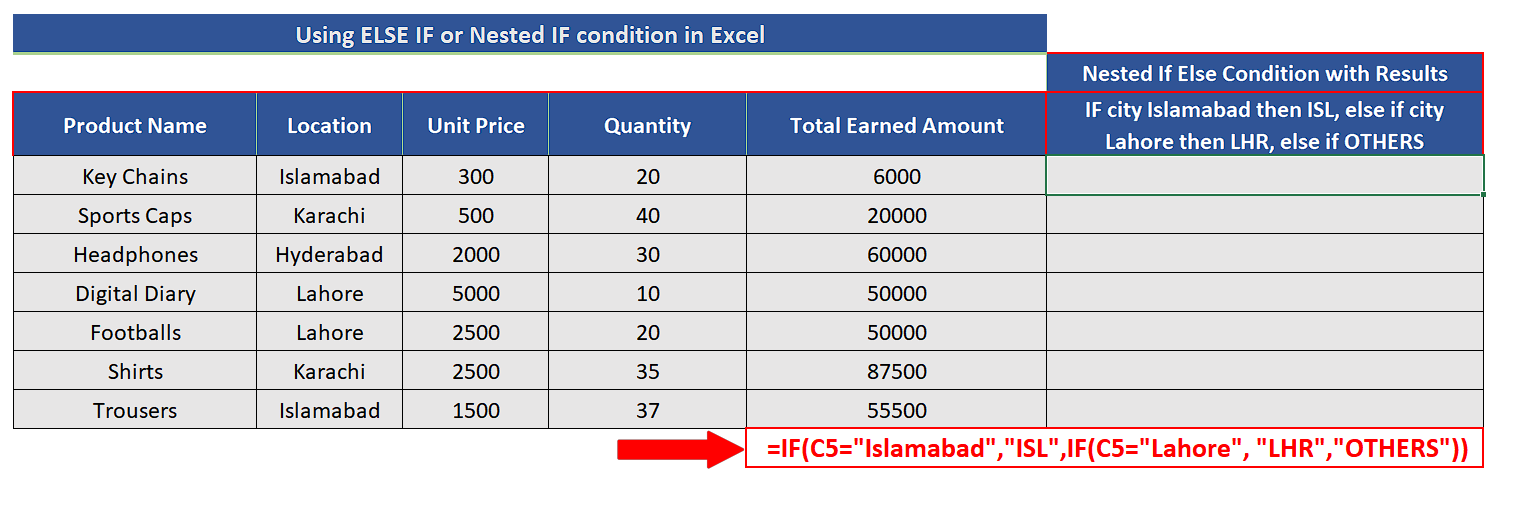
Let’s consider the following sales dataset which has the details of the cities as well. Let’s assume that we wish to create simple tags base upon the city names like ISL for Islamabad and LHR for Lahore. The rest of the cities will get the OTHERS tag.
For this purpose, we’ll create a series of nested IF conditions which will work on the following algorithm;
- Check IF the city name is ISLAMABAD. IF TRUE then assign tag “ISL”.
- IF FALSE then check again IF city name is LAHORE. IF TRUE assign tag LHR.
- IF FALSE assign tag OTHERS.
Let’s implement this logic using the nested if else in our spreadsheet.

Microsoft Excel is a very useful software when it comes to manipulating data sets. It offers very handy features to make logical decisions based on the data set values. “IF” function in Microsoft Excel provides the facility to make simple or complex logical decisions based on particular cell values. Sometimes, we need to make complex decisions which require multiple layers of logic and in that case, we’ll have to use IF condition within the Else option of first IF condition. This is called using Nested IF conditions. In this tutorial, we’ll learn how to use Else IF in Excel.
Step 1 – Create the requisite formula
– The formula to implement the above-mentioned logic is very simple and we’ll have to use two layers of nested if conditions as follows;
=IF(C5=”Islamabad”,”ISL”,IF(C5=”Lahore”, “LHR”,”OTHERS”))
Here cell C5 contains the name of the city to be checked.
Step 2 – Implement the formula to assign tags
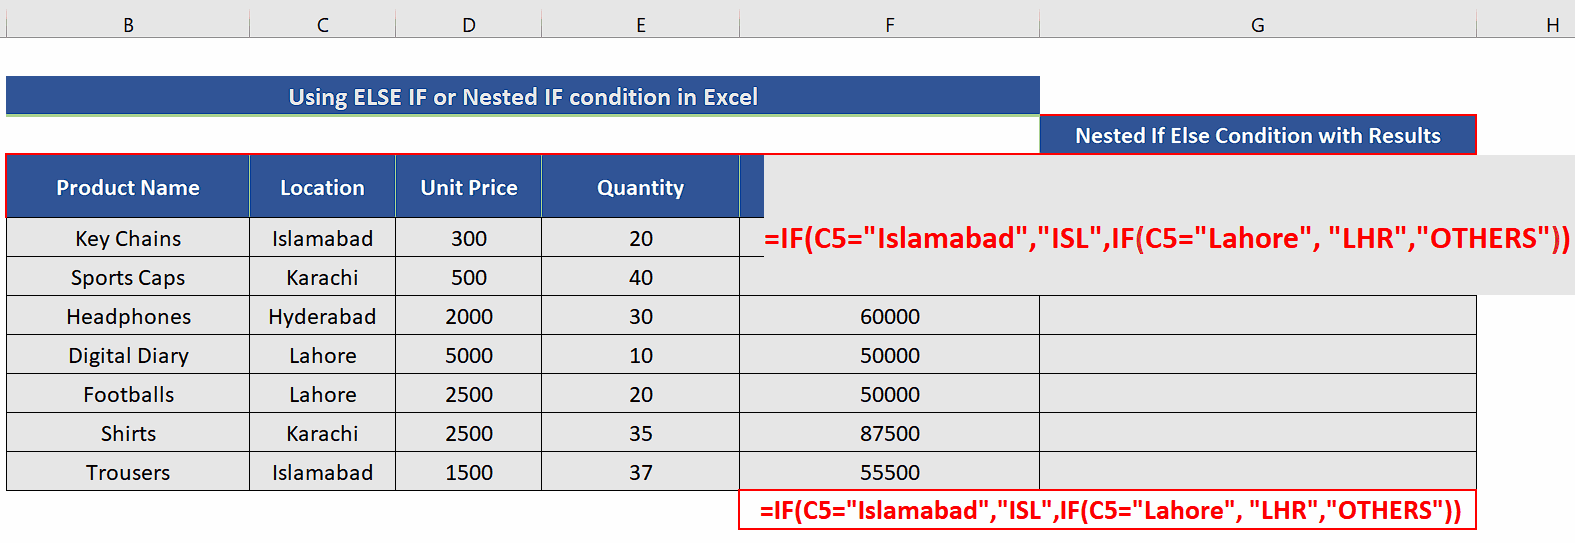
– The formula can now be implemented in an appropriate cell to achieve the above-mentioned logical results as shown above.
– After successful implementation of the formula in one cell, we will drag the fill handle to implement the formula to the whole dataset.


