
How to use Autofill to copy a formula in Excel
 By
SpreadCheaters
By
SpreadCheaters
Autofill is a powerful feature in Microsoft Excel that allows you to quickly and easily copy a formula or a series of data from one cell to adjacent cells. It can save you a lot of time and effort, especially when you’re working with large amounts of data. In this tutorial, we’ll discuss how to use Autofill to copy a formula in Excel.
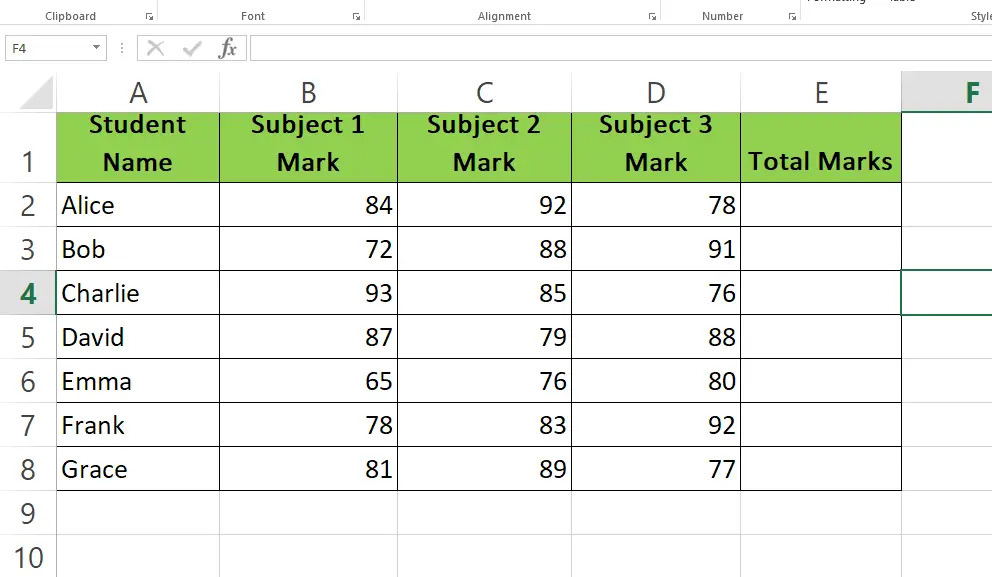
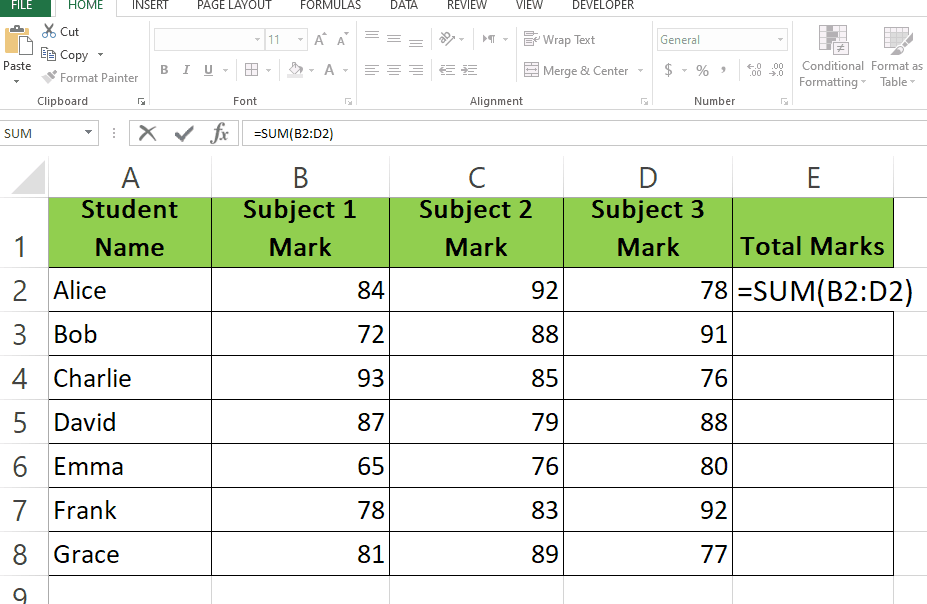
Here we have a dataset that contains Student Names and their Marks in three different subjects. We will type the formula to add their subject marks and through Autofill, we’ll copy the formula to the rest of the cells. Let’s have a look at the dataset first above.
Method 1 – Drag the formula.
Step – 1 Type the formula.
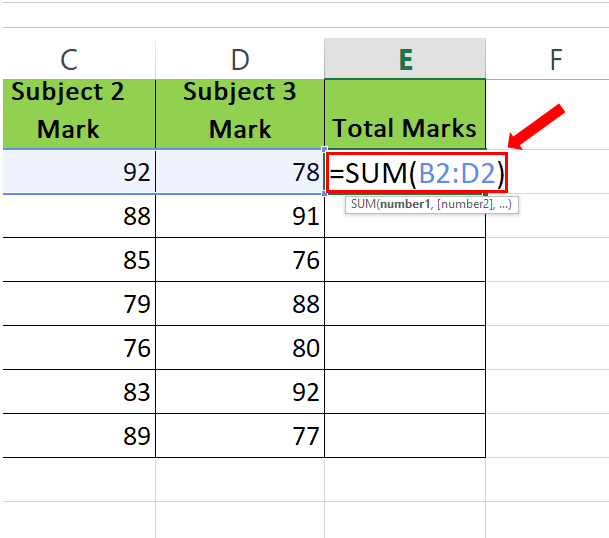
- Select the cell where you want to type the formula.
- In our case we have to add all Subject Marks therefore our formula is
=SUM(B2:D2)
Step – 2 Type the formula.
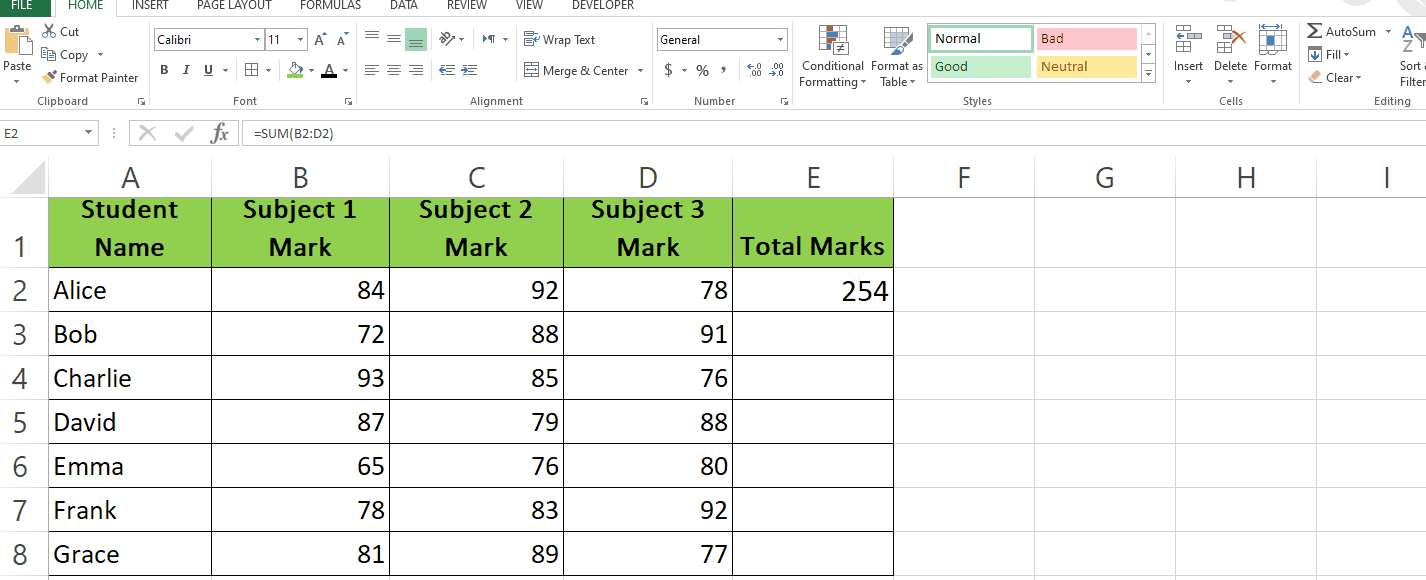
- Select the cell with the formula.
- Drag the cell from the bottom right to the rest of the cells.
- Formula will be applied automatically to the remaining cells.
Method 2 – FILL formula.
Step – 1 Select the cells.
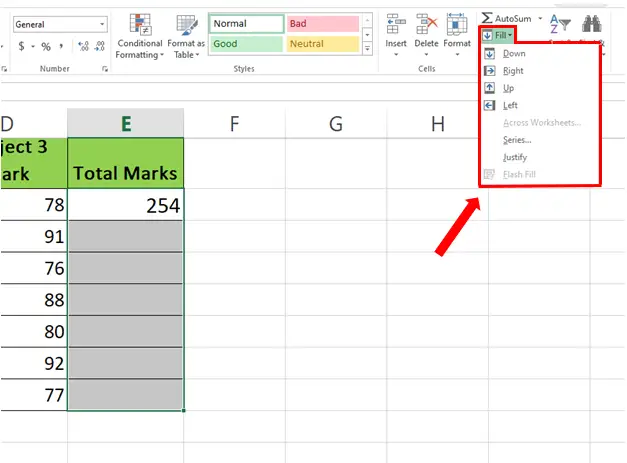
- Select the cell with the formula and the remaining cells.
- In the Editing group open the dropdown menu of the Fill option.
Step – 2 Apply Autofill.
- After opening the drop down menu of Fill click on Down(In our case)
- Formula in the first cell will be applied to the selected cells automatically.
Conclusion:
Using autofill to copy a formula in Excel can save you a lot of time and effort, especially when dealing with large datasets. By following the simple steps outlined above, you can quickly and easily copy formulas to a range of cells, allowing you to perform calculations and analyze your data more efficiently.


