
How to use Autofill in Excel 2013
 By
SpreadCheaters
By
SpreadCheaters
Excel is a very powerful tool for performing mathematical and other calculations and data analysis. However, it provides us with a variety of other tools as well to make our life easy while entering the data in Excel. AutoFill is such a function of Excel by which we can automatically fill in the next value in the next cell. This feature of Autofill works the same way in Excel 2013 and higher versions.
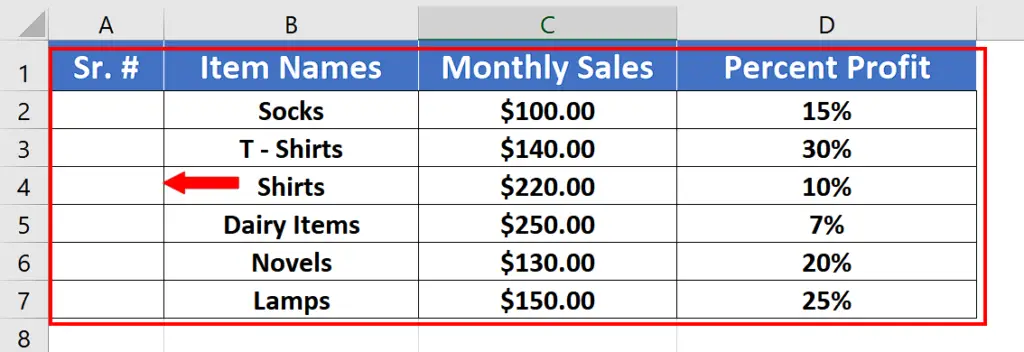
In today’s tutorial we’ll learn how to use the Autofill function in Excel and how to define your custom AutoFill values. Let us consider the scenario where we want to add sequential serial numbers in our sales data.
Use Excel’s predefined lists for Autofill
Excel provides us with a lot of predefined lists for Autofill and we can use them to fill in sequential numbers, dates, days and months as well.
Step 1 – Use autofill to fill in sequential numbers or dates
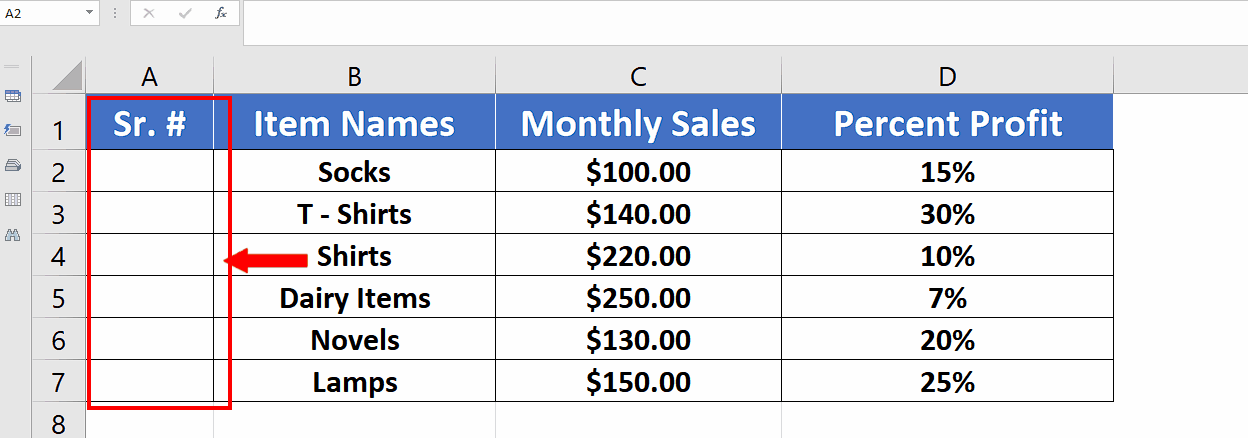
- Autofill lets us fill in sequential numbers very easily. To do this, write the first number of the sequence.
- Drag the fill handle while holding down the CTRL key and autofill will fill in all number values for you. The default increment is 1. If you don’t hold down the CTRL key then only the same number will be copied. We can do the same thing with dates as well.
Step 2 – Use autofill to fill in sequential days and months
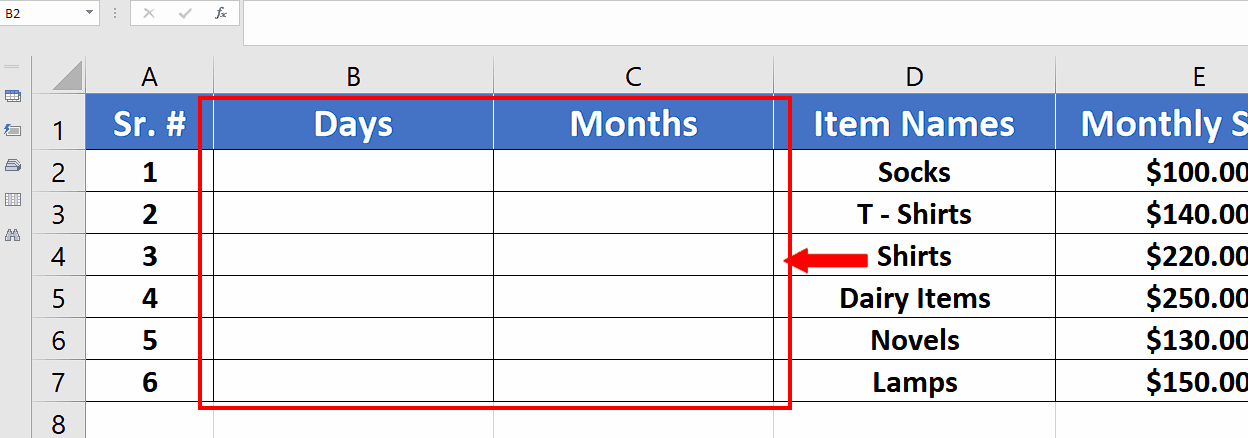
- Autofill also provides a facility to fill in sequential days and months very easily. To do this, write the first day or month of the sequence.
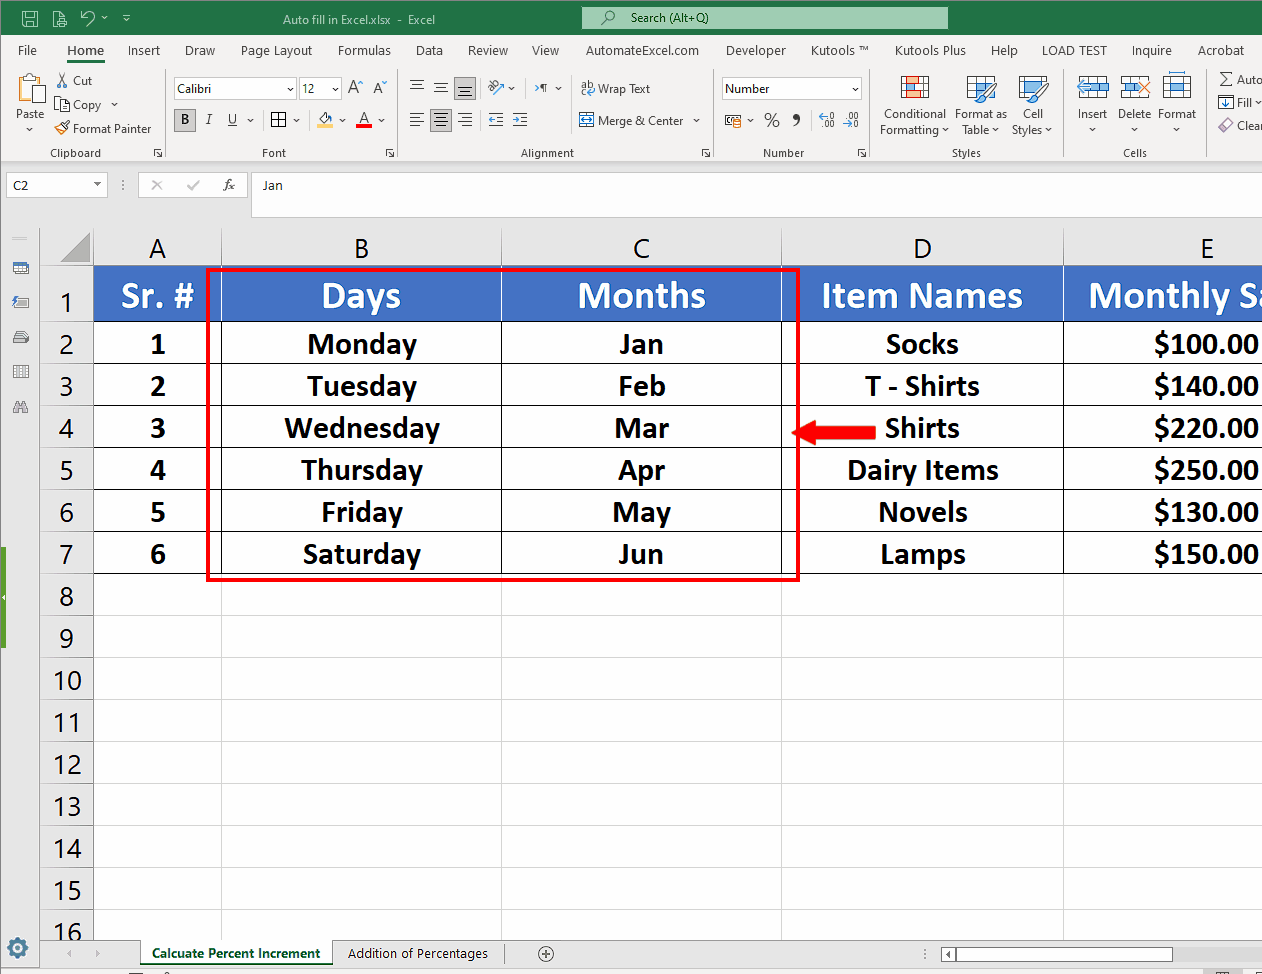
- Drag the fill handle down the rows. However, this time you don’t hold the CTRL key and autofill will fill in all number values for you. The default increment is 1 day. In this scenario if you hold down the CTRL key then only the same day name will be copied.
Create custom autofill lists in Excel
Till now we have used Excel’s predefined Autofill lists to fill in sequential numbers, days and months. However, we can create our customized lists as well and then use them to fill in the values that we use frequently. To do this follow the steps below;
Step 1 – Go to options in File Menu
- In the file menu click on the options button to open up the Excel options.
Step 2 – Locate the General options in Advanced Tab
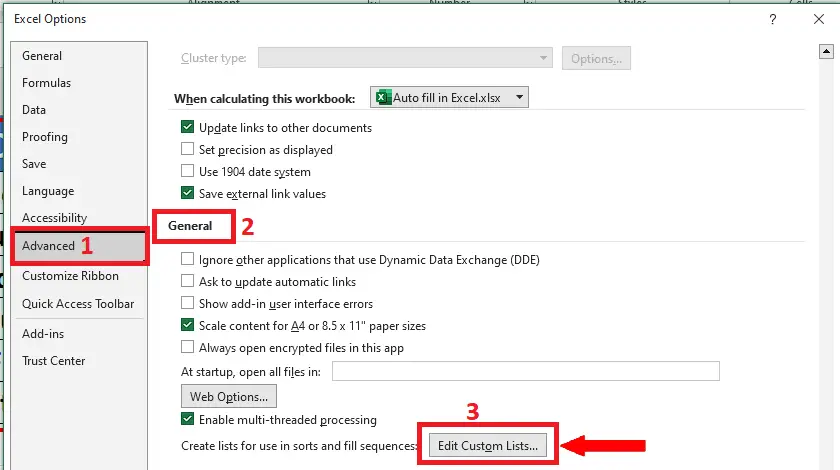
- Locate the General Options in the Advanced tab.
- Now click on the Edit Custom Lists.
Step 3 – Add custom list entries for autofill list
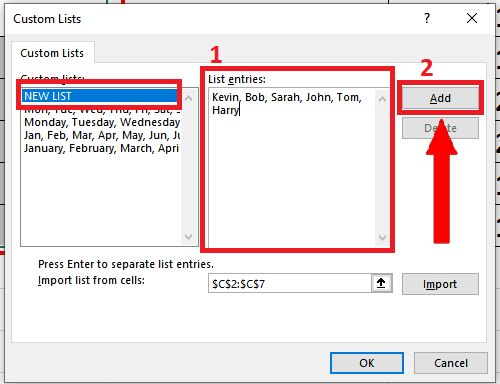
- NEW LIST option will be selected by default. Enter the custom list entries in List entries: box on the right side.
- Click on Add button after entering all values separated by commas. This will add the custom list in Excel’s predefined lists.
- Now press the OK button on Custom Lists and Excel Options dialog boxes.
Step 4 – Use custom list entries to autofill a list of employees

- Now that a custom list has been created and we can use it now in our Excel workbook. Write the first or any name from the list that was generated in the previous step.
- Drag the fill handle down without holding the CTRL key to fill in the list values automatically.


