
How to sort by alphabetical order in excel
 By
SpreadCheaters
By
SpreadCheaters
Page last updated:
22/10/2022 |
Next review date:
22/10/2024
Microsoft Excel offers an ordering feature to sort data alphabetically.
This function is very useful when dealing, for example, with an agenda or an addresses list or with any set of data that you need to organize.
To sort a set of data alphabetically you have two options:
- Option 1. To sort data from the toolbar;
- Option 2. To sort data from the column header.
Option 1 – To sort data from the toolbar:
Let’s assume you have an address list and you want to order it alphabetically. This feature allows you to order alphabetically your data also without a filter set on the table header. To do this yourself please follow the steps described below;
Step 1 – Select the table data you want to sort

- Open the desired Excel workbook in which you want to enable this feature;
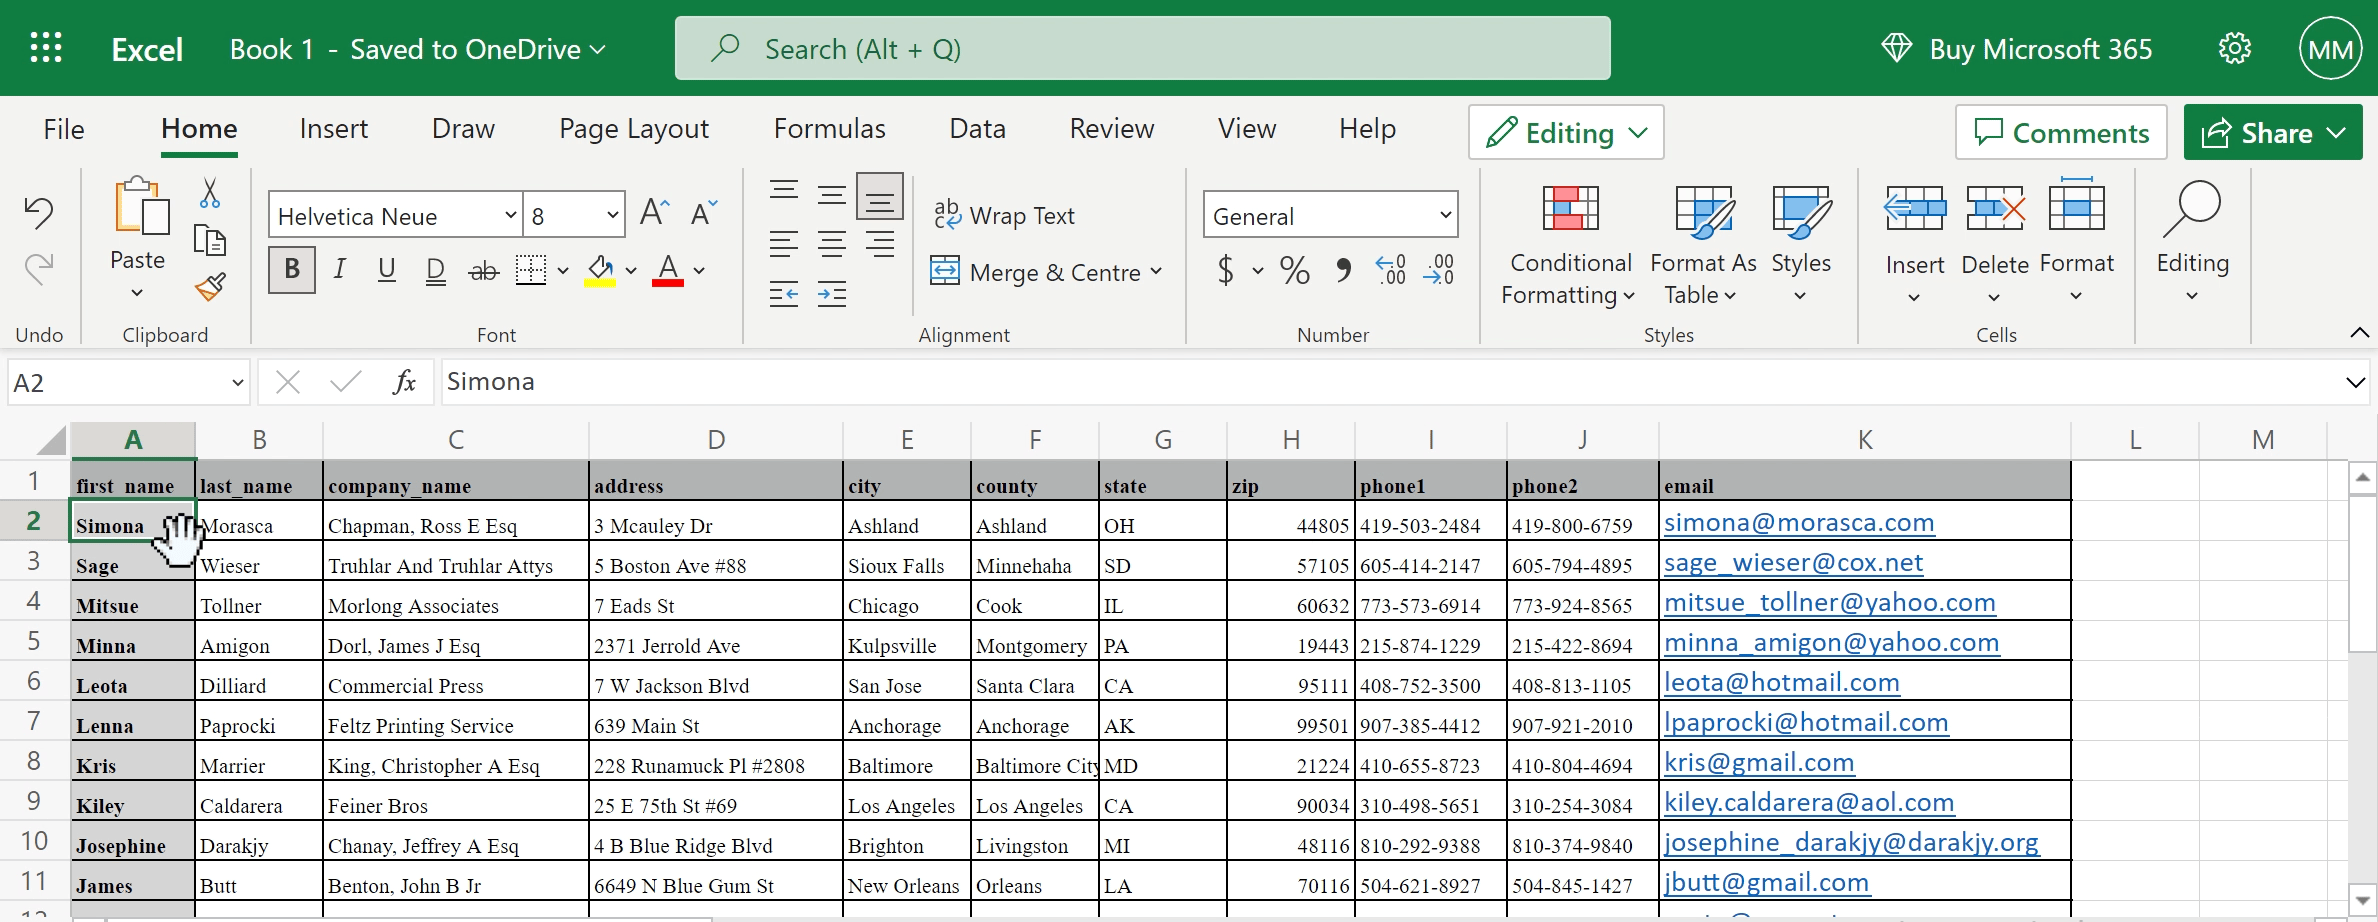
- Select the cell of the column you want the table sorted by. In the example below we want to sort the table with “first name” in alphabetical order.
Step 2 – Locate the Data tab
- Navigate to “Data Tab” from the list of tabs available at the top row as shown.
Step 3 – Sort the data alphabetically
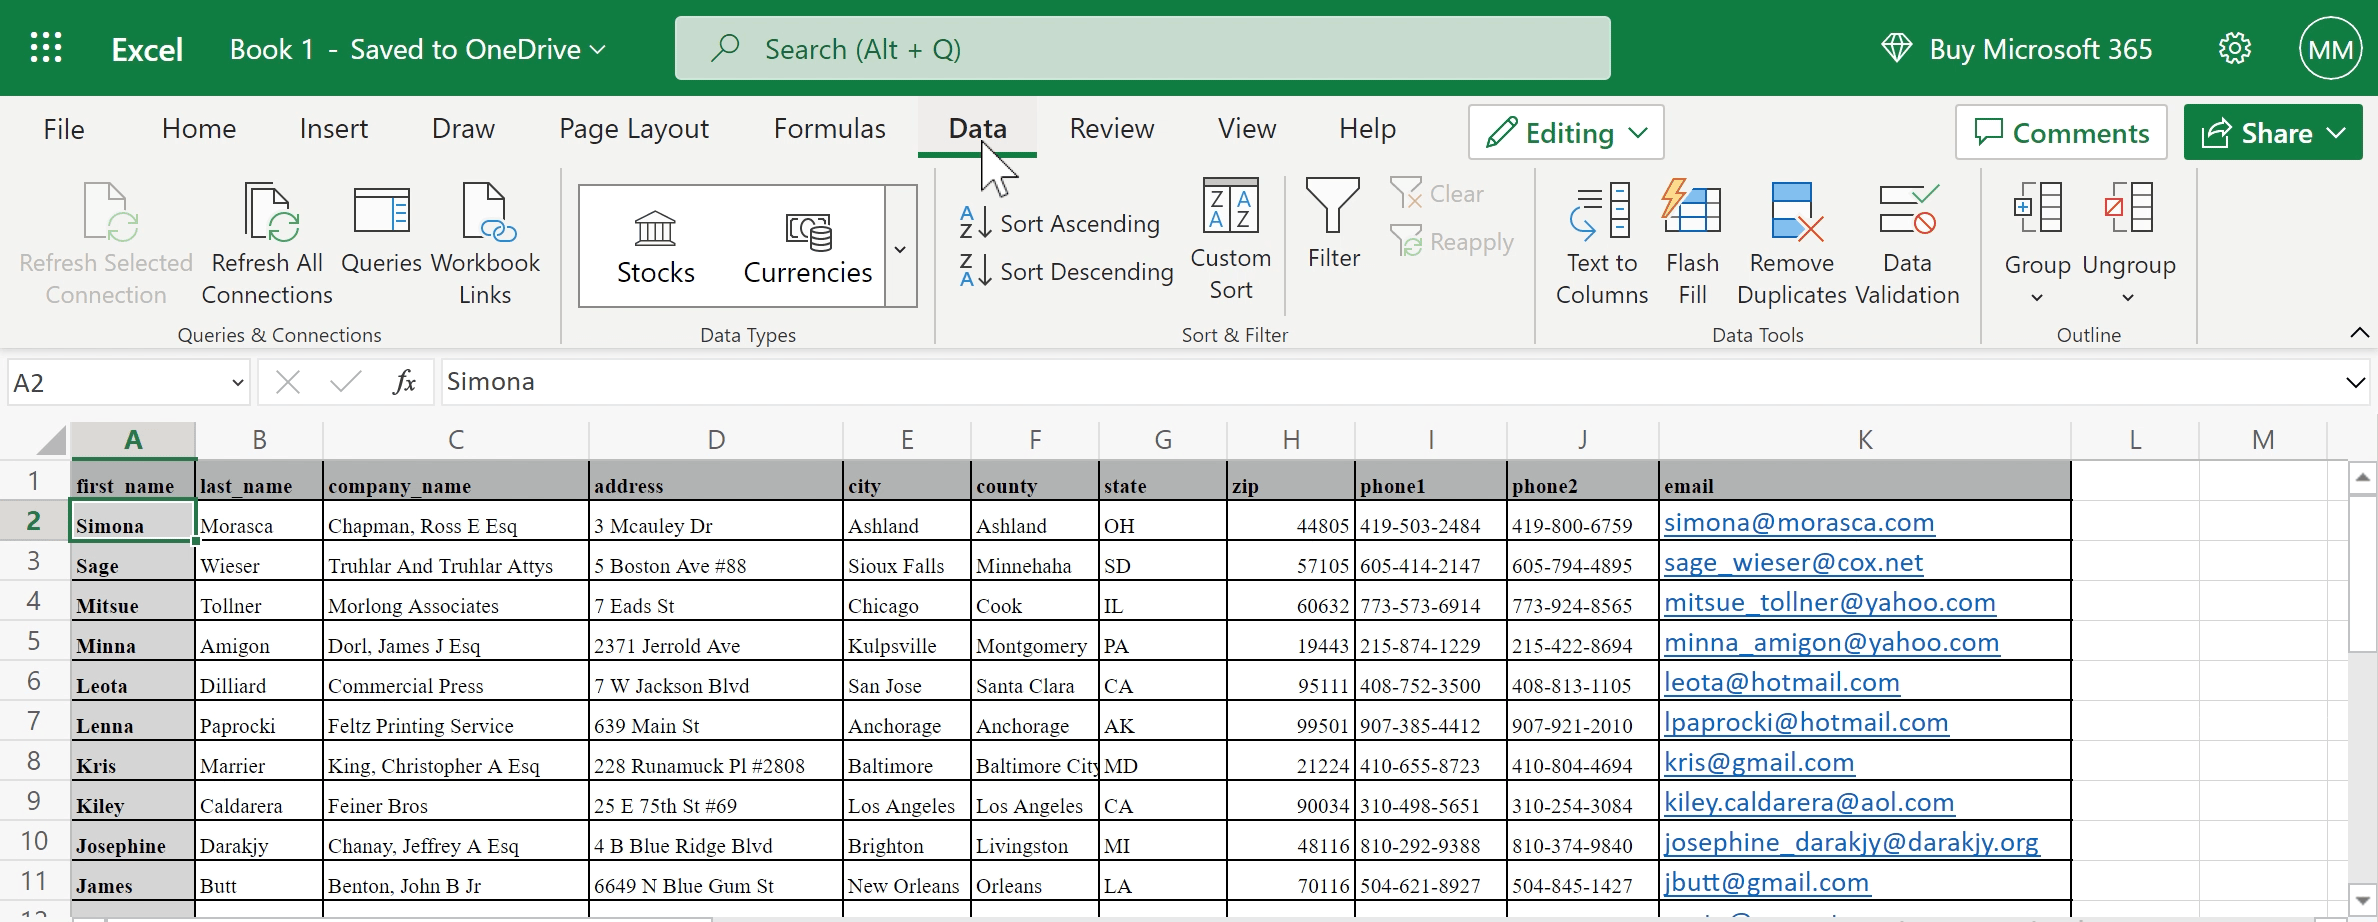
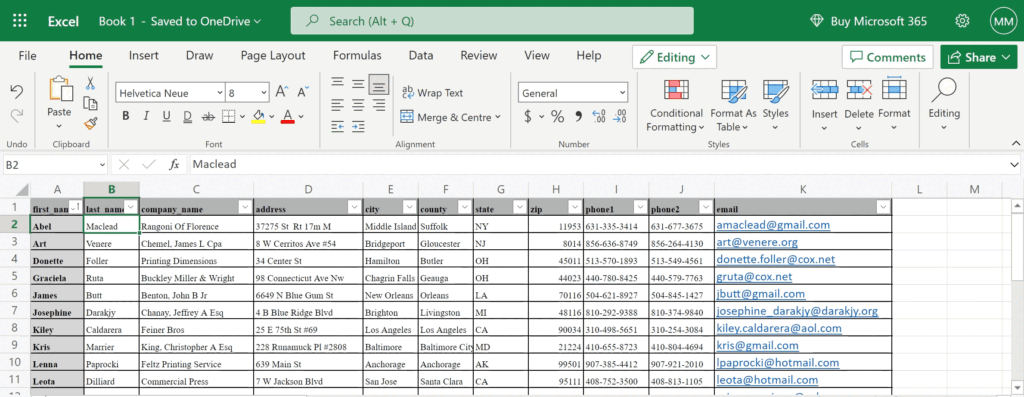
- In “Data Tab”, locate “Sort Ascending” to sort from A to Z or “Sort Descending” to sort from Z to A. Choose one of the two options, for example “Sort Ascending” as shown below . Now the table is ordered with “first name” sorted from A to Z.
Option 2 – To sort data from the column header:
If you set a filter on your data, you can find the ascending and descending commands by clicking on the column header arrow following the steps below.
Step 1 – Set the filter
- Select the Table Header;
- Click on Data tab;
- Select Filter.
Step 2 – Sort the data alphabetically
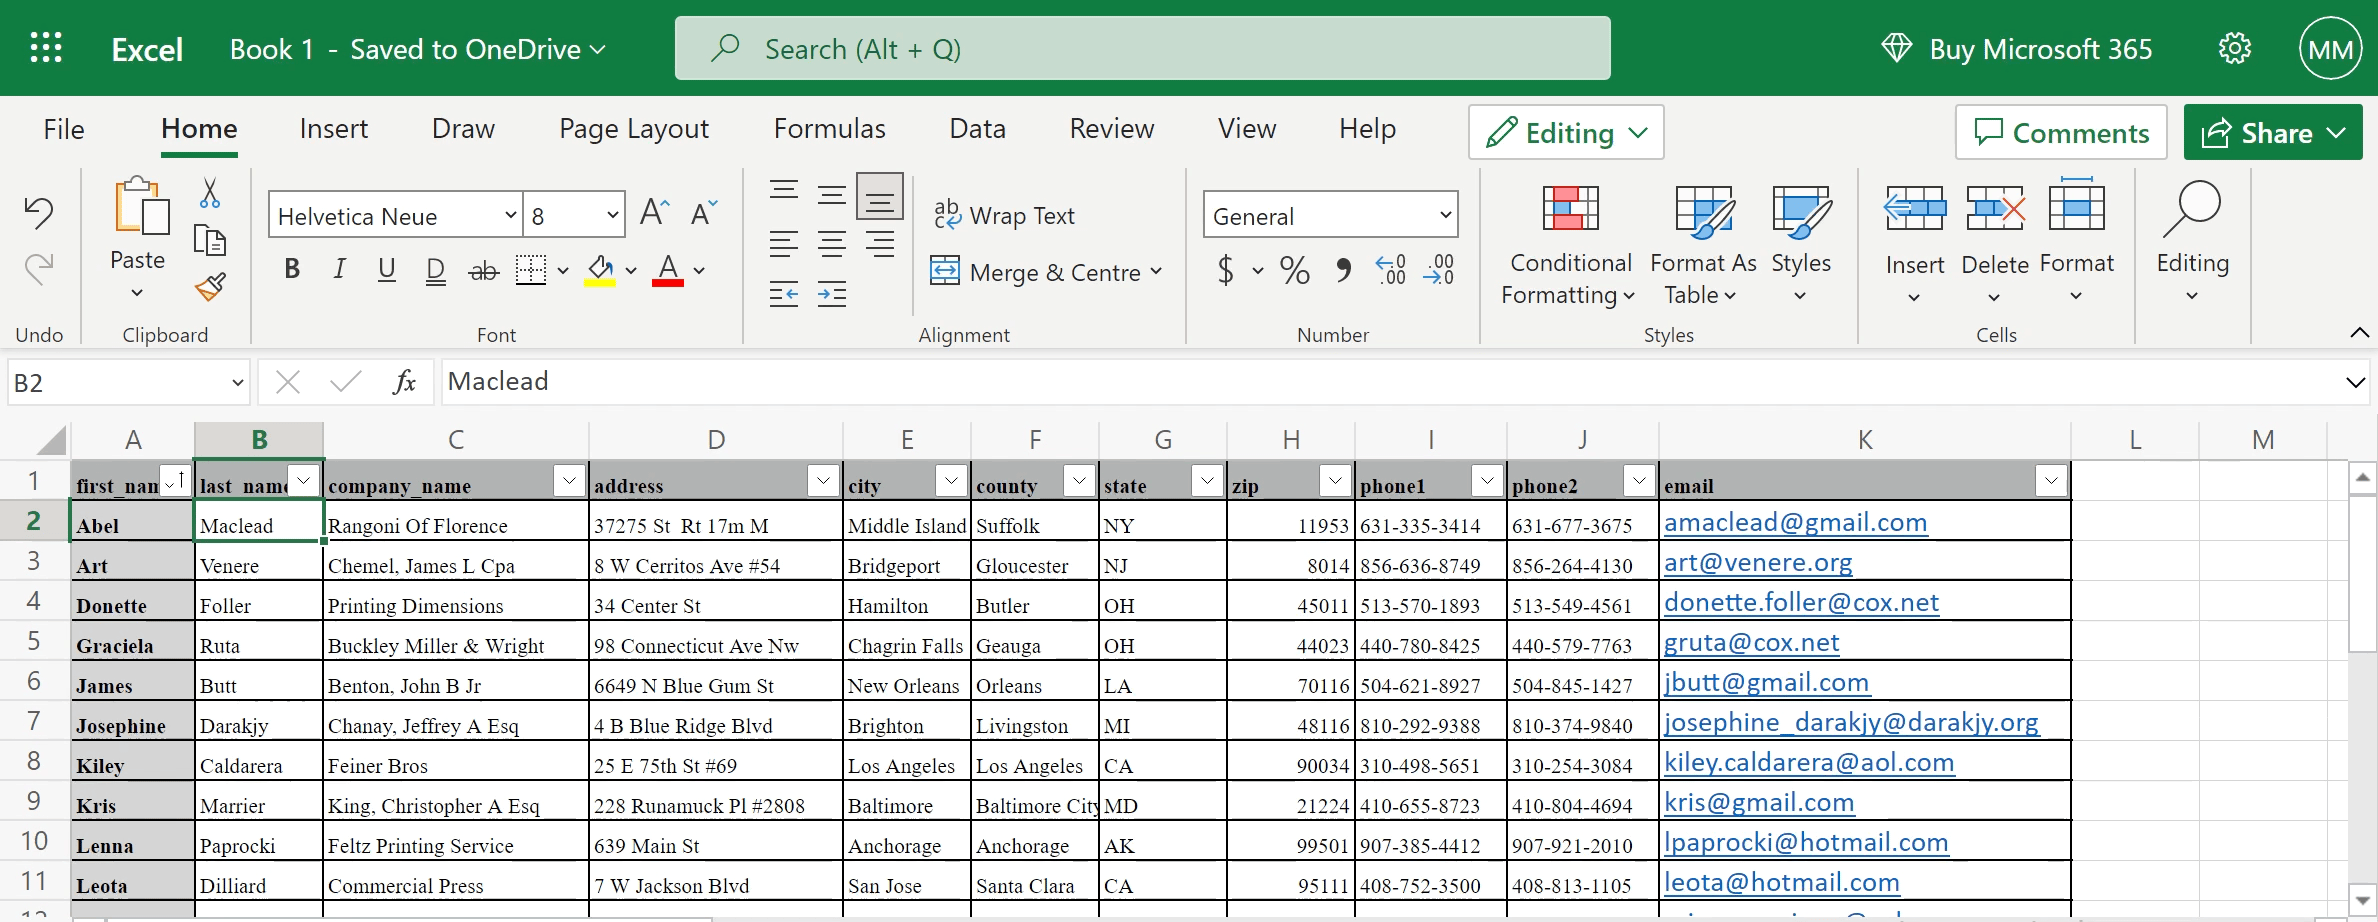
- Click on the column header arrow of the column you want the table sorted by;
- In the filter menu, locate “Sort A to Z” to sort ascending or “Sort Z to A” to sort descending. Choose one of the two options, for example “Sort Z to A” as shown below . Now the table is ordered with “first name” sorted descending.


