How to sort alphabetically in excel and keep rows together

Excel has a lot of built-in functions for the ease of users. As Excel gives us the ability of data manipulation, likewise, there is another stupendous feature of Excel which is used to find any word from a big range of data. In most cases, data ranges are large enough, one can not even scroll down. So, we have to sort one column’s data alphabetically while keeping the rows intact. Excel provides a built-in tool to make it happen.
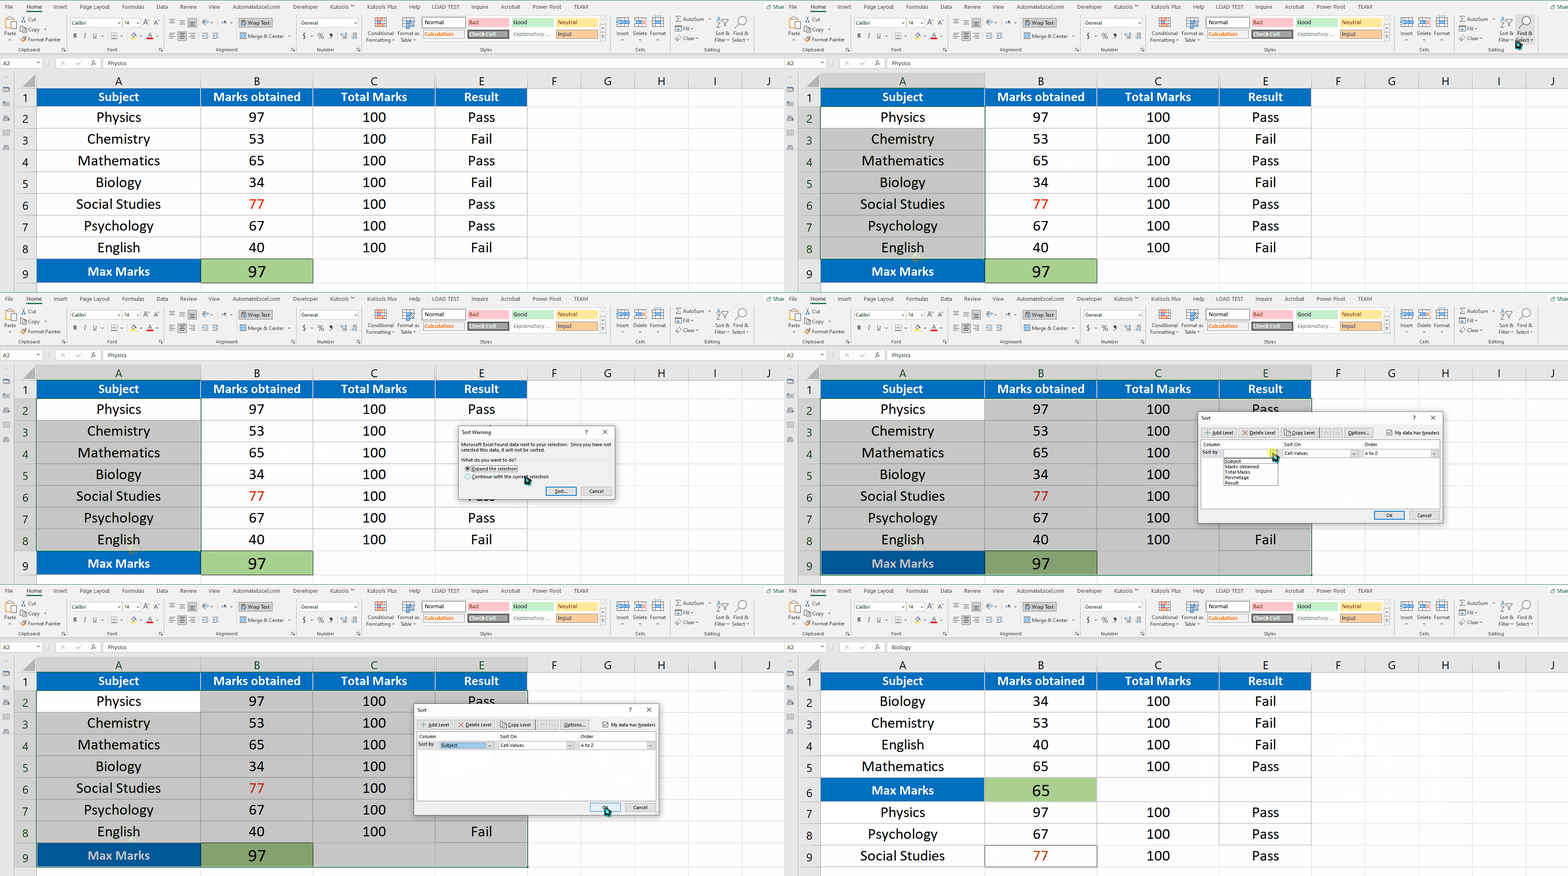
Let’s learn this with an example. Suppose we have a data set of subject names and obtained numbers, we want it to be sorted alphabetically. Following are the steps to do it.
Step 1 – Select the data range and sort it

– Select the desired data range or column.
– Click on sort and filter. A drop down menu will appear.
– Click on custom sort.
– A new dialog box will appear. In the column section select the desired column name. In this case we select subjects.
– Click OK.
– As soon as you press the enter key data will be sorted according to alphabetical order with rows intact.
Above is an animation as an example.


