
How to sort a column in Excel
 By
SpreadCheaters
By
SpreadCheaters
Excel is a very useful and powerful tool to manipulate, visualize and handle data files. One very important and primitive data visualization tool, used very commonly is the sorting tool. It helps us to arrange and visualize the data in a very few and simple steps. Let’s learn how to use this tool effectively on our dataset by sorting the data based on various columns.
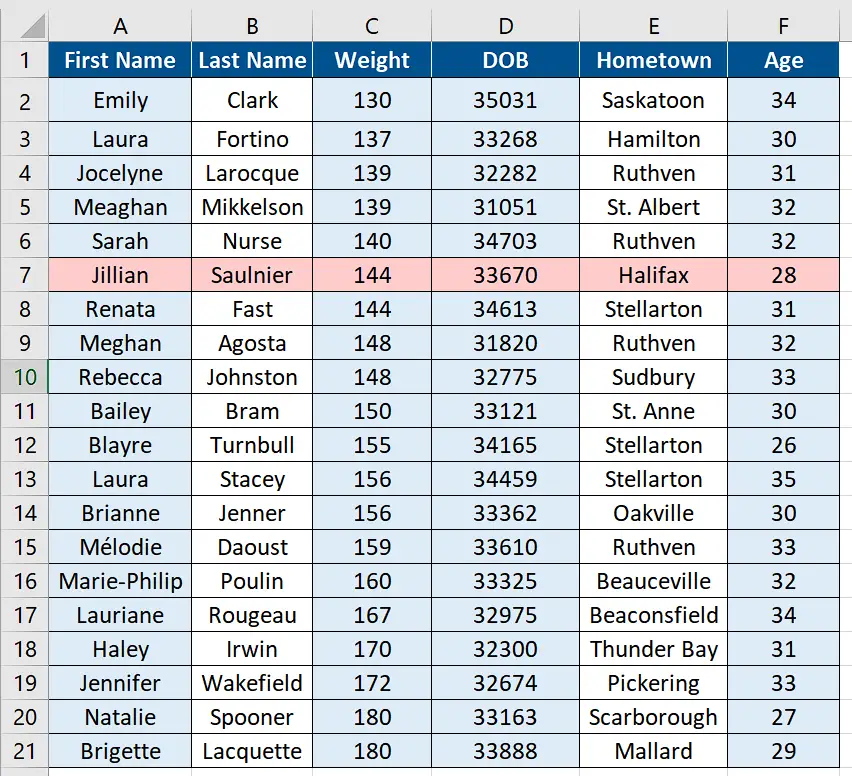
Step 1 – Select the column to be sorted
– First of all, select the appropriate column which is to be sorted.
Step 2 – Click on the Sort & Filter option on home tab
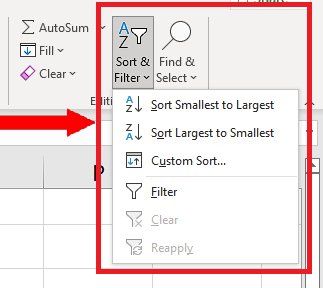
– In the Home tab, go to the Editing group and click on Sort & Filter drop down. The drop-down menu will show options depending upon the nature of the data. If the data is numeric the options will be “Sort Smallest to Largest”, “Sort Largest to Smallest” and “Custom Sort”.
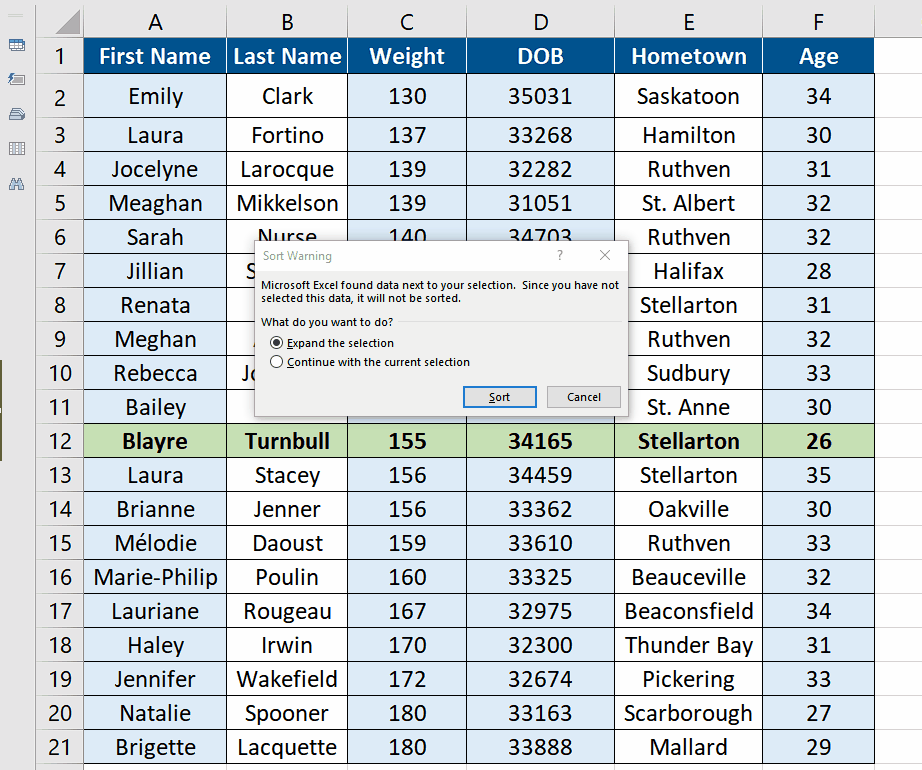
Step 3 – Click on Sort Smallest to Largest option

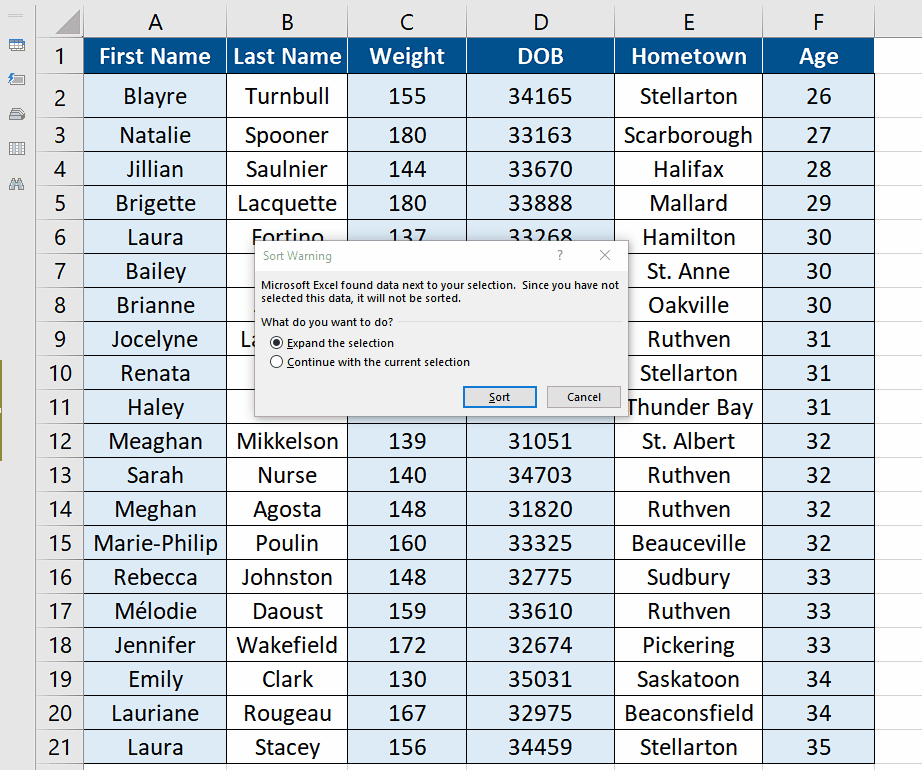
– Now click on the Sort Smallest to Largest option. If your data has more than one column other than the selected one then a new Sort Warning dialog box will open up, asking you to expand the selection or continue with the current selection.
– If your data has only one column then this option will not come up and the data will be sorted instantly.
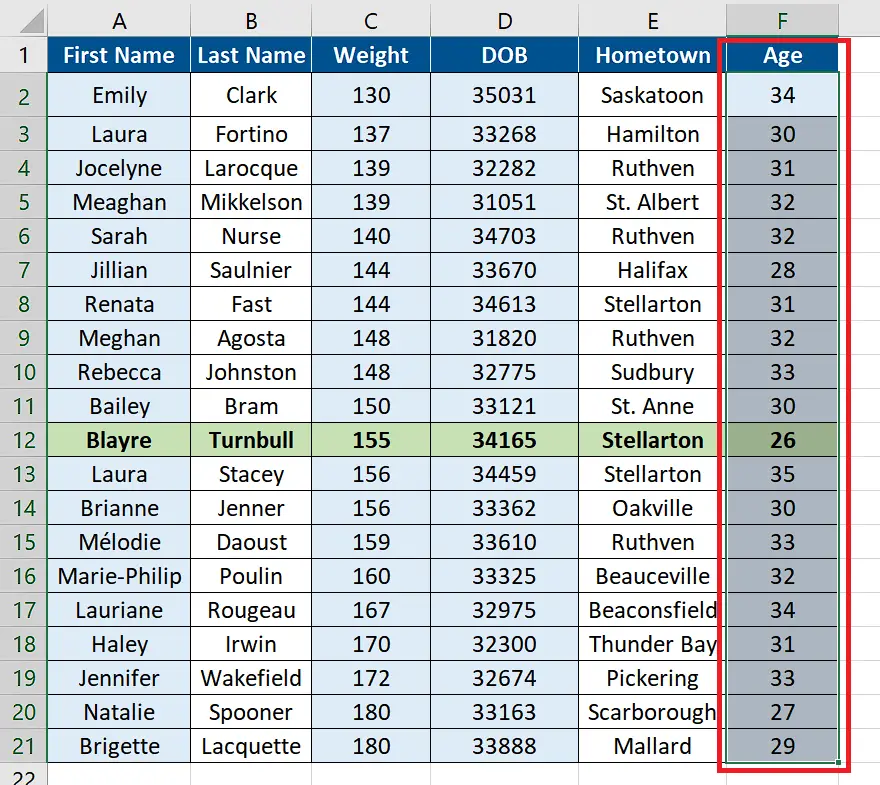
– If we select the first option, which is checked by default and recommended as well, then Excel will include all the data in the sorting process and sort data in ascending order with respect to the selected column which in our case is the Age.
Step 4 – Click on the Sort button to get all data sorted
– Now click on the Sort button and this will sort the whole data with respect to the Age column in ascending order. The best thing about this process is that it will keep all the row data intact as shown below.
– The data can be sorted in descending order just by changing the option in step 3 from Sort Smallest to Largest to Sort Largest to Smallest.
Step 5 – Select the First Names column to sort data alphabetically
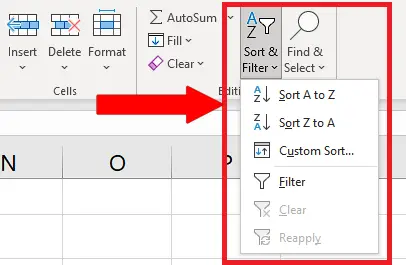
– To sort the data alphabetically, we will select the first column which contains the First Names and repeat all steps up to step 3. In step 3 we’ll be presented with the options to “Sort A to Z”, “Sort Z to A” and “Custom Sort”.
Step 6 – Click on Sort button in Sort Warning to sort data
– We can use any of the first two options to sort the data alphabetically. In this tutorial we’ll select the first option “Sort A to Z”.
– Sort Warning dialog box will open up, asking you to expand the selection or continue with the current selection.
– Choose the default option and click on Sort button to complete the process.


