How to show all text in an Excel cell
You can watch a video tutorial here.
Excel is well suited for calculations and for creating and maintaining databases. Unlike word-processing applications where text is organized according to pages, Excel organizes data in cells. As each cell has a default size, sometimes the text is too large for the cell and is not displayed in its entirety. There are several ways in which to show all the text in a cell.
Option 1 – Use Word Wrap
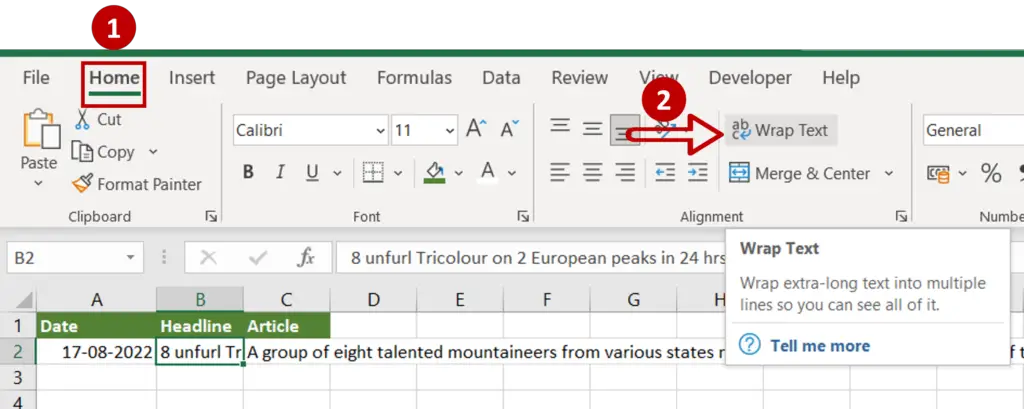
Step 1 – Select the cell

- Select the cell in which all the text is not shown
Step 2 – Wrap the text

- Go to Home > Alignment
- Click the Wrap Text button
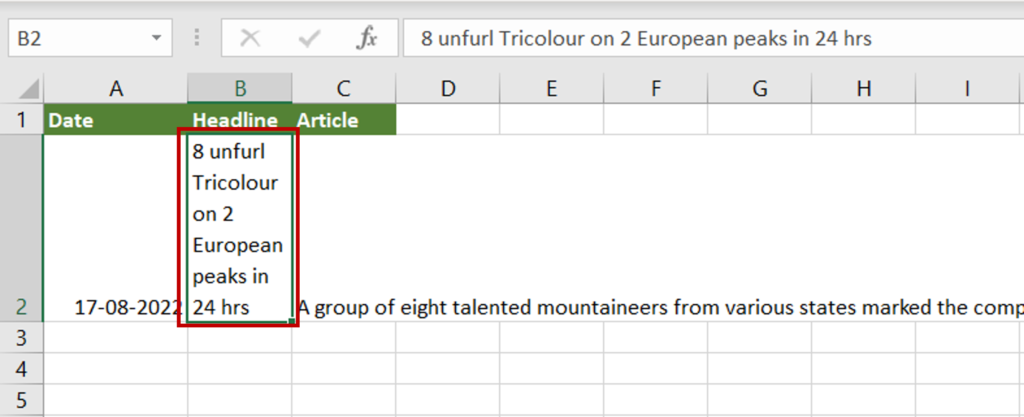
Step 3 – Check the result

- The height of the row increases to show all the text
Option 2 – Increase the column width
Step 1 – Select the cell

- Select the cell in which all the text is not shown
Step 2 – Increase the width

- Click and hold the column divider on the right
- Drag the column divider to increase the width of the column
- Release the mouse button at the desired width of the column
- The width of the column shows while the divider is being dragged
Step 3 – Check the result

- All the text in the cell is shown
Option 3 – Increase column width & wrap text
Step 1 – Select the cell

- Select the cell in which all the text is not shown
Step 2 – Increase the column width

- Click and hold the column divider on the right
- Drag the column divider to increase the width of the column
- Release the mouse button at the desired width of the column
- The width of the column shows while the divider is being dragged
Step 3 – Wrap the text

- Go to Home > Alignment
- Click the Wrap Text button
Step 4 – Check the result

- All the text in the cell is shown


