
How to select only cells with data in Microsoft Excel
 By
SpreadCheaters
By
SpreadCheaters
Selecting cells only with data in Excel means choosing only the cells in a particular range that contain values or information, and excluding the cells that are empty or blank. This is a useful feature in Excel when you want to perform operations or calculations only on cells that have data, and exclude those that do not.
In this tutorial, we will learn how to select cells with data only in Microsoft Excel. To select cells only with data in Excel, you can use the “Go To Special” feature, which allows you to select cells based on different criteria, including cells with data. This feature can be accessed by clicking on the “Find & Select” button in the “Editing” group on the “Home” tab, and then selecting “Go To Special”. Also, we can use Conditional Formatting to select the cell with data only.
We currently have employee data for a company, but there are some missing details. Our goal is to identify and select only the cells that contain the information.
Method 1: Using the Go to Special Command
Step 1 – Click on the Find & Select Button
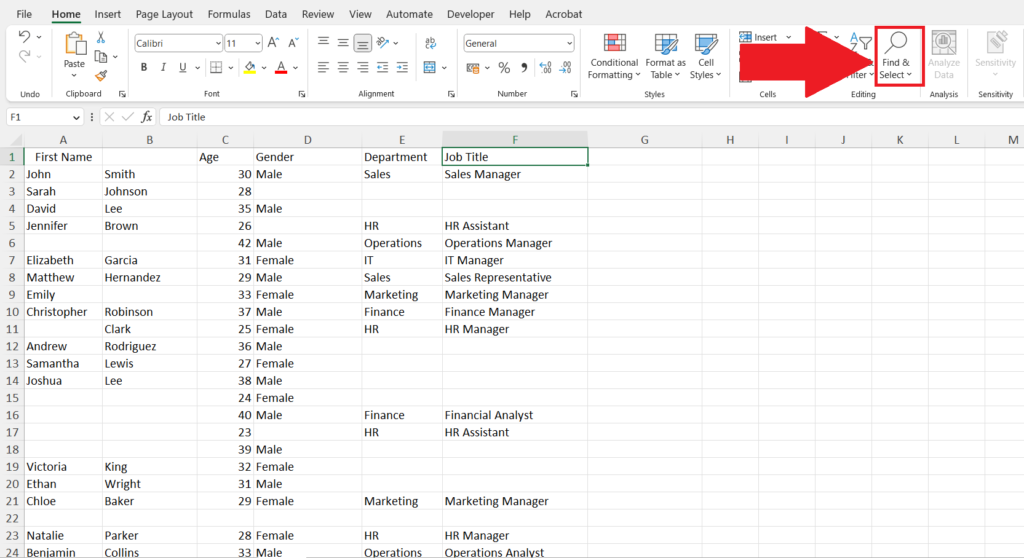
- Click on the Find & Select button in the Editing section in the Home tab.
Step 2 – Click on the Go to Special Button
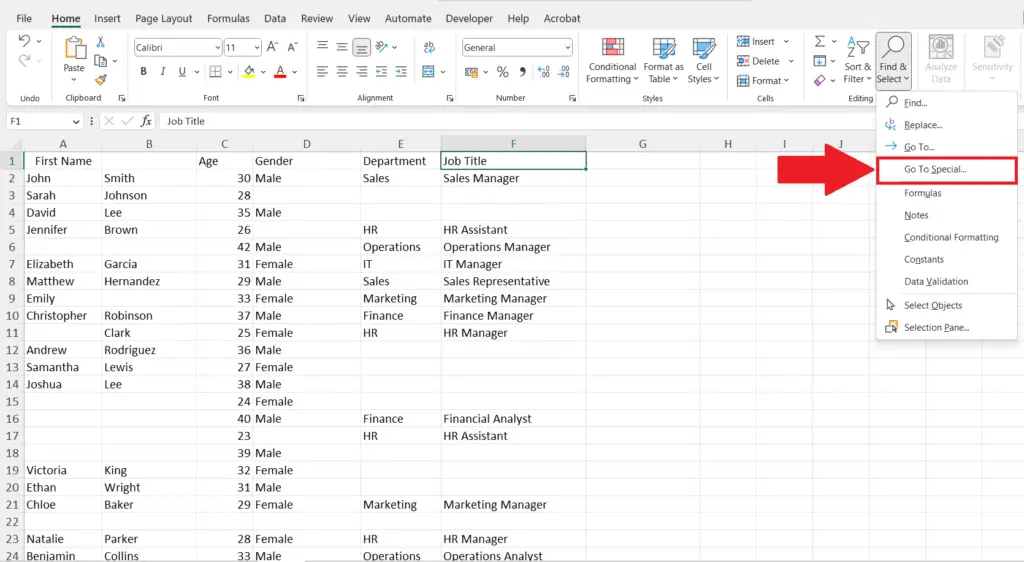
- Click on the Go to Special button in the drop-down menu.
- The Go to Special dialog box will appear.
- This can also be opened using the shortcut key CTRL+G.
Step 3 – Select the Constants in the Select Section
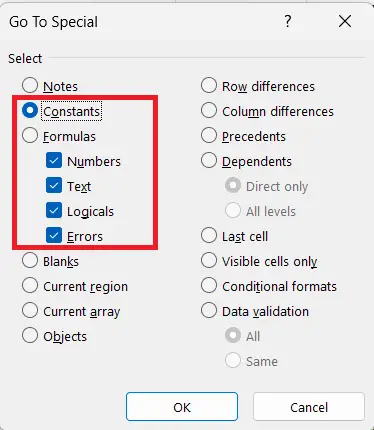
- Select the Constant option in the Select section.
Step 4 – Click on OK
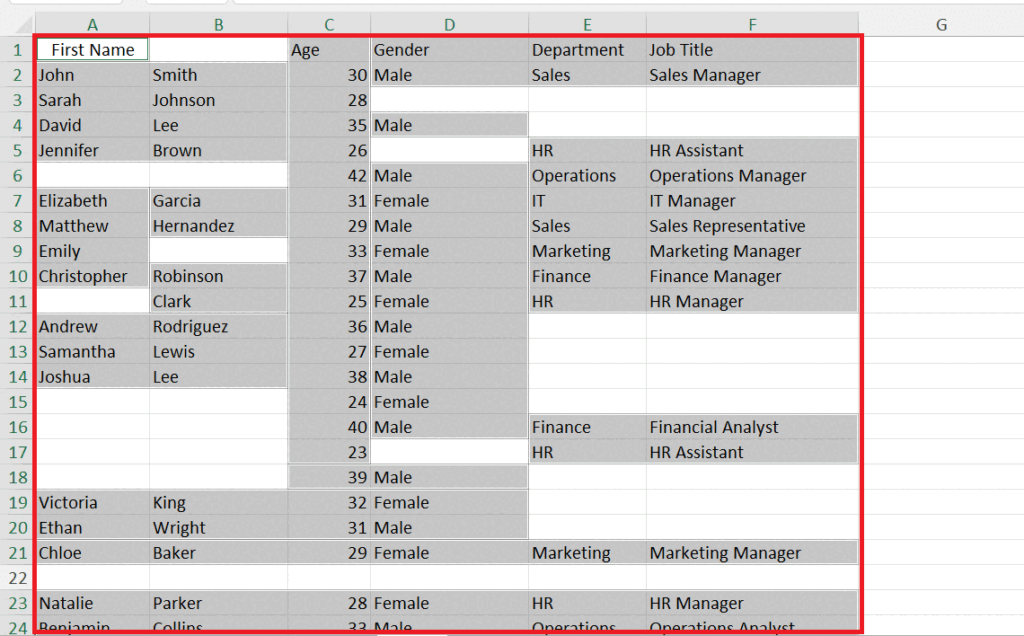
- Click on OK in the Go to Special dialog box.
Method 2: Using the Conditional Formatting
Step 1 – Select the Data

- Select all the data containing the cells with data.
Step 2 – Click on the Conditional Formatting Button
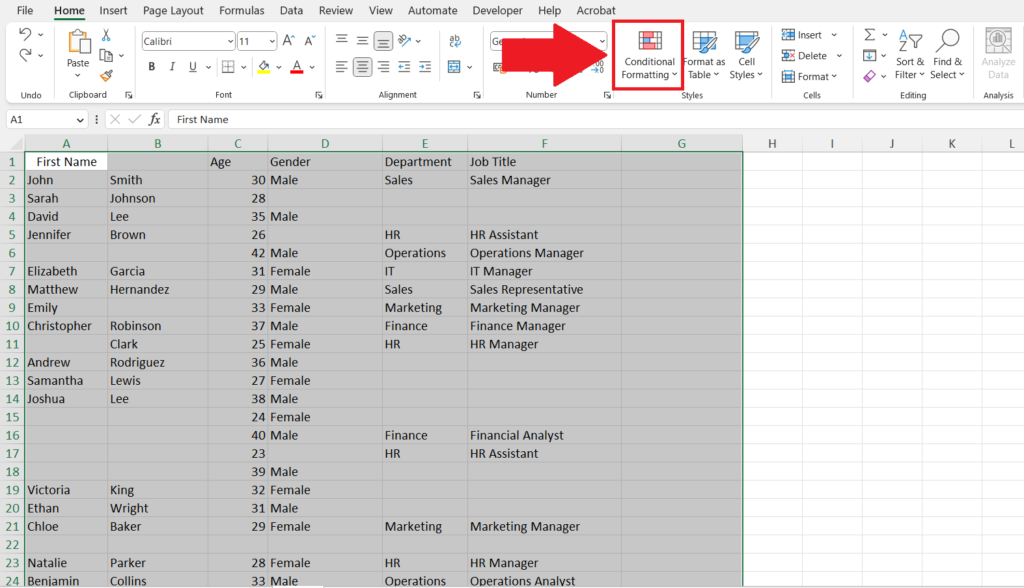
- Click on the Conditional Formatting button in the Styles section in the Home tab.
Step 3 – Click on the New Rule Option
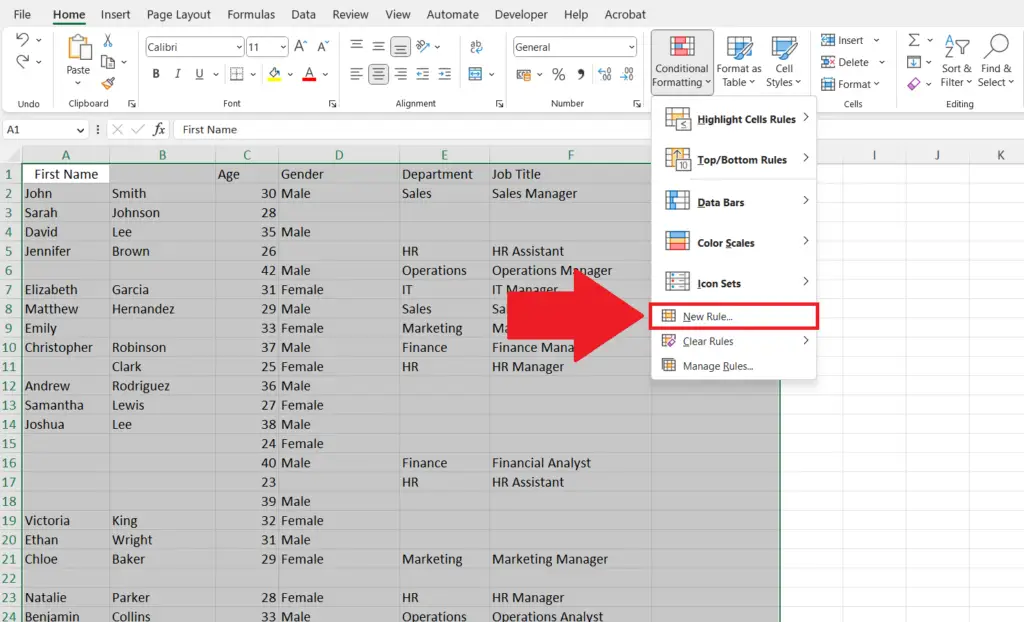
- Click on the New Rule option in the drop-down menu.
Step 4 – Select “Format only cells that contain” Option
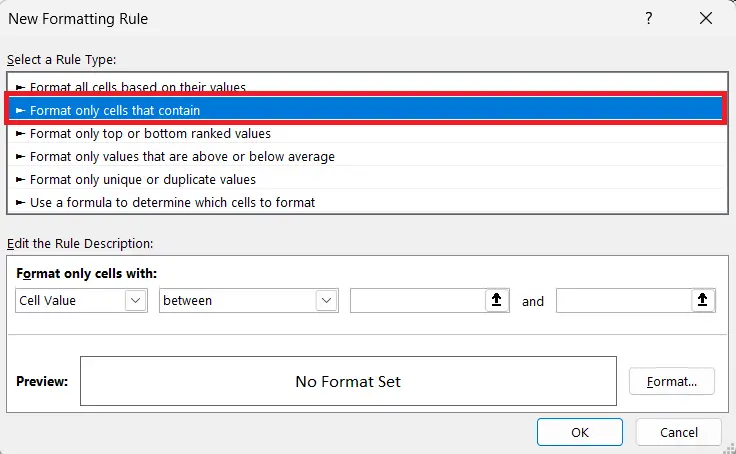
- Select the “Format only cells that contain” option in the “Select a Rule Type” option.
Step 5 – Select “No Blanks” in the “Format only cells with:” Option
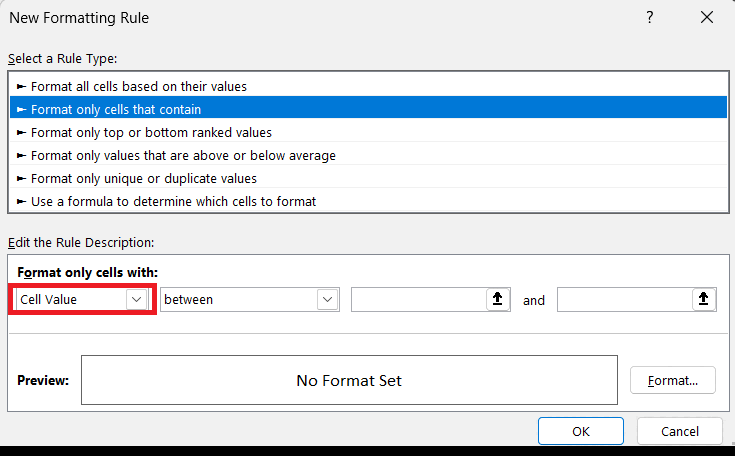
- Click on the first list arrow in the “Format only cells with:” option.
- Select the “No Blanks” option in the list.
Step 6- Click on the Format button and Select a Fill Colour
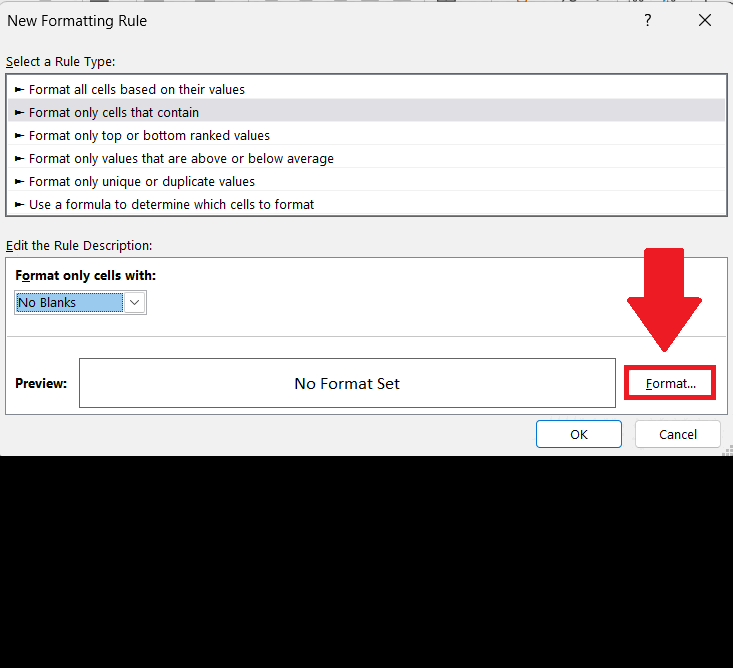
- Click on the Format button.
- Select a Fill colour.
Step 7 – Click on OK
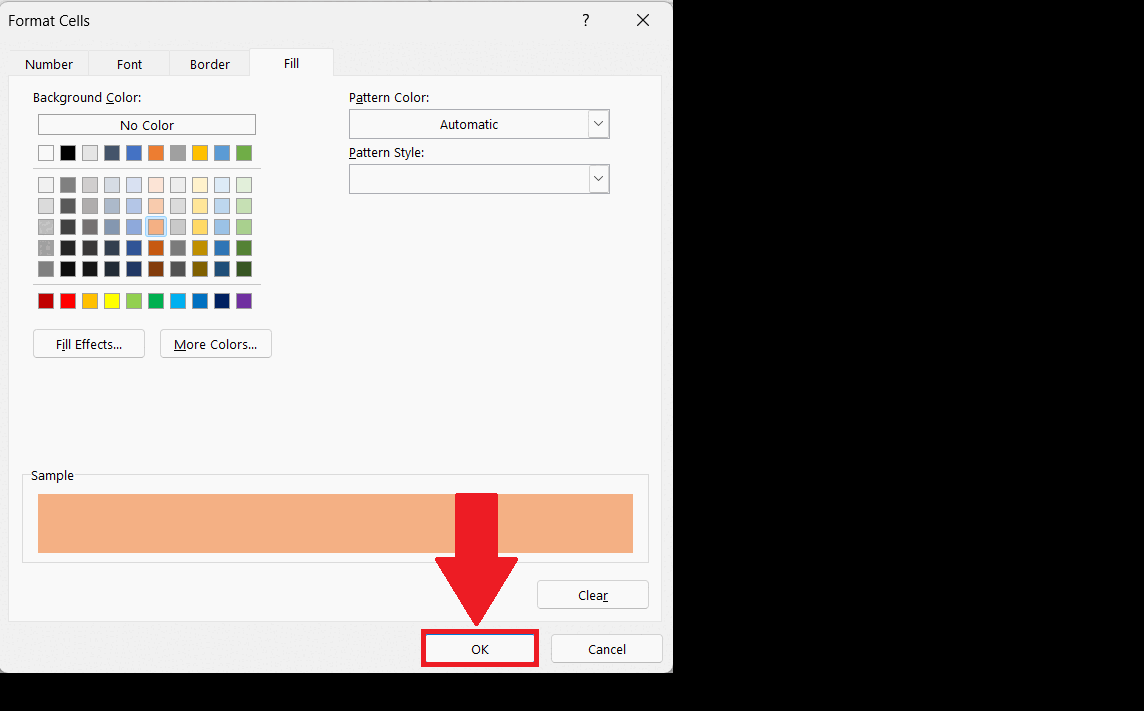
- Click on OK in the Format cells dialog box.
- Click on OK in the New Formatting Rule dialog box.
- Cells with data only will be highlighted.


