
How to search in Microsoft Excel Document
 By
SpreadCheaters
By
SpreadCheaters
In this tutorial, we will learn how to search in Microsoft Excel. In Microsoft Excel, we can use the Find & Select feature to search in a document. Find & Select is a powerful tool in Excel that enables users to search for specific data within a spreadsheet quickly. It also allows users to extract specific data from a bulk dataset. This feature can be found in the Home tab of the Excel ribbon, and it offers several search options, including finding cells that contain specific text, numbers, or formulas.
In the current data set, we have 3 lists of names. We aim to search for a specific name in these lists.

Searching a document in Excel refers to the process of looking for specific information or data within a spreadsheet. This is a common task when working with large or complex Excel spreadsheets, as it allows you to quickly find and access the data you need. It is particularly beneficial when dealing with massive amounts of data or when searching for particular details. It can lead to time savings, improved accuracy, and enhanced data organization.
Step 1 – Go to the Home Tab

– Go to the Home tab in the menu bar.
Step 2 – Click on the Find & Select Button
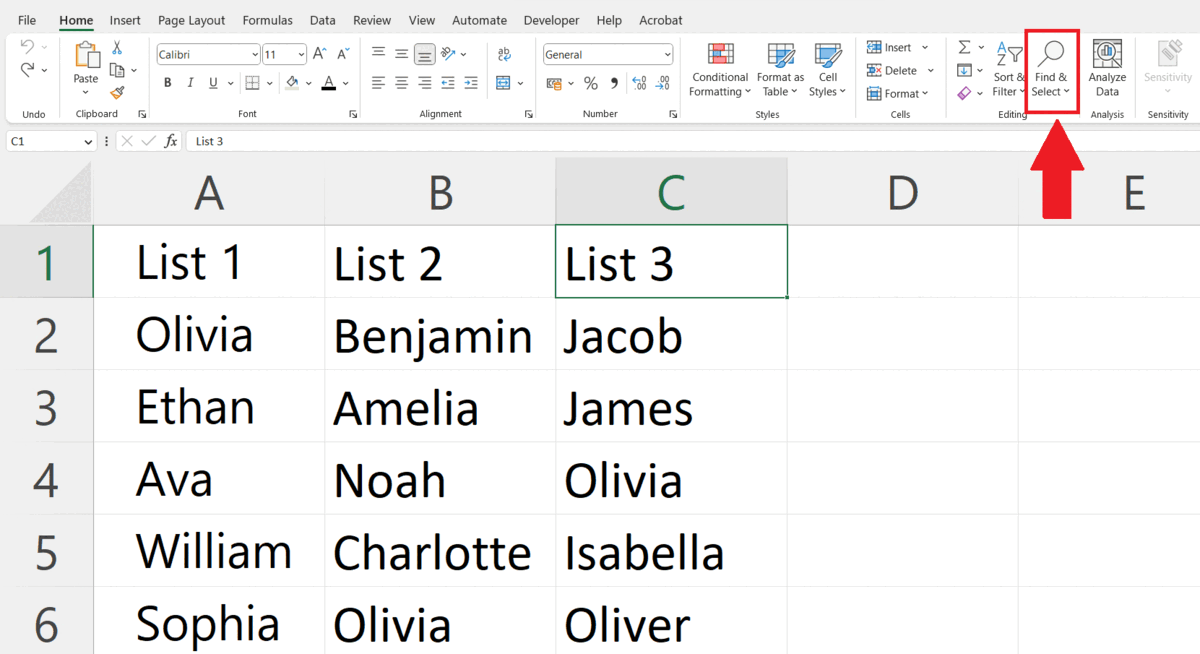
– Click on the Find & Select button in the Editing section.
– A drop-down menu will appear.
Step 3 – Click on the Find Option
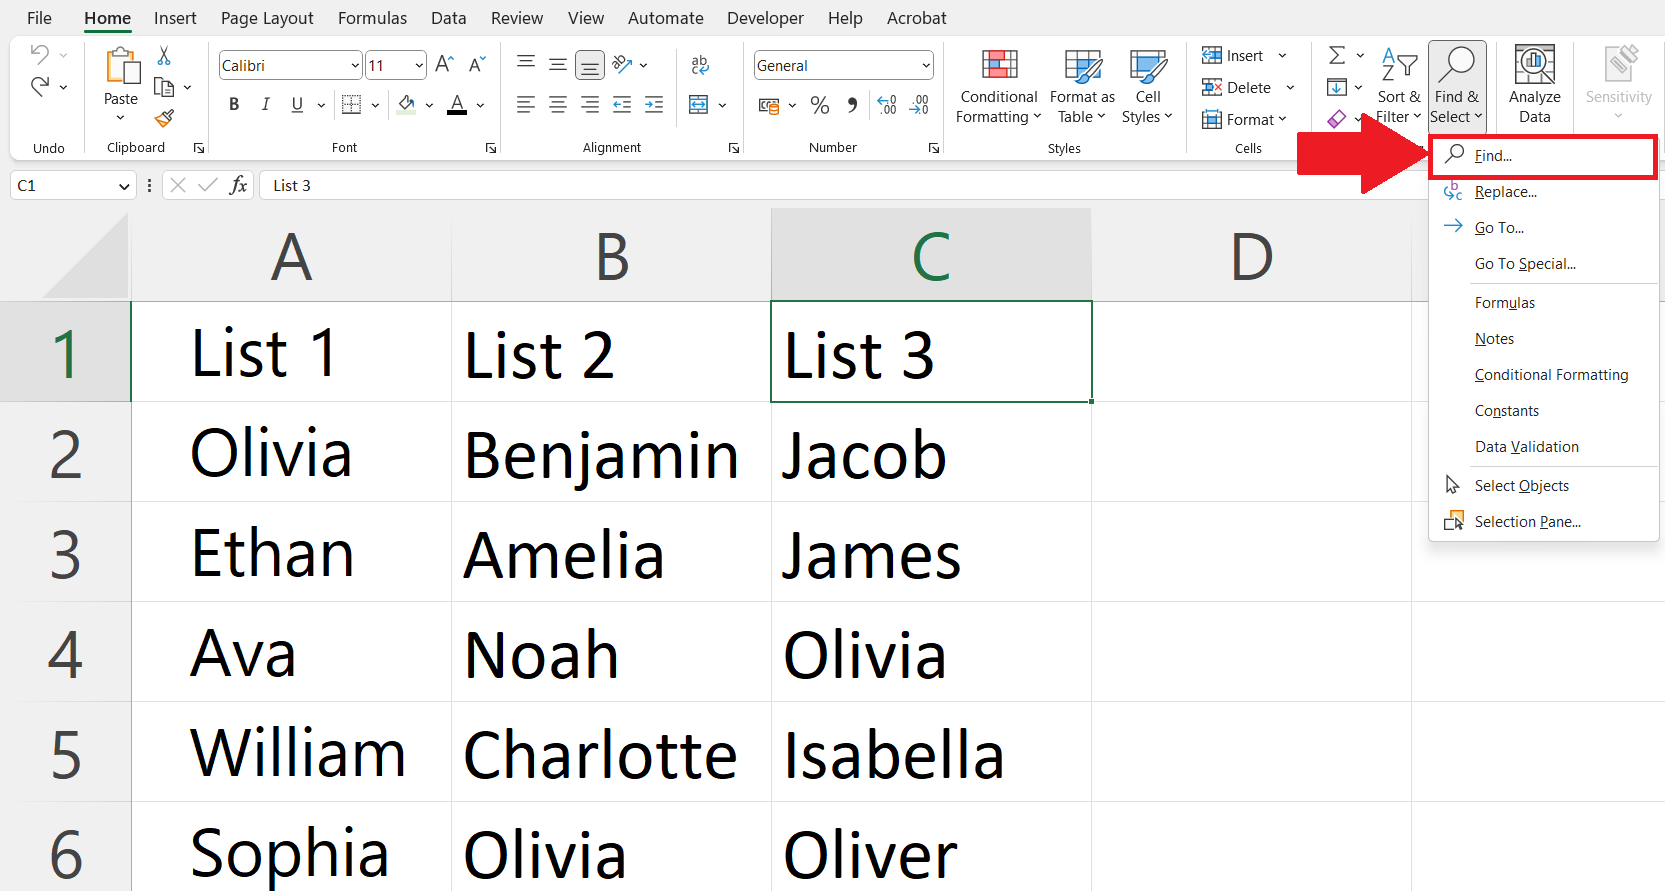
– Click on the Find option in the drop-down menu.
– The Find and Replace dialogue box will open.
– The same dialogue box can be opened using the short-cut key CTRL+F
Step 4 – Enter the Data
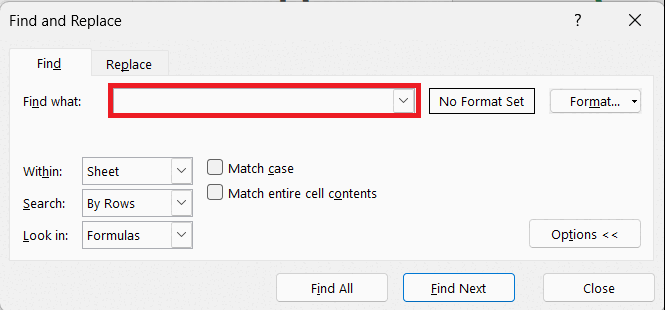
– Enter the data you want to search in the Find what box.
Step 5 – Click on the Find All Option
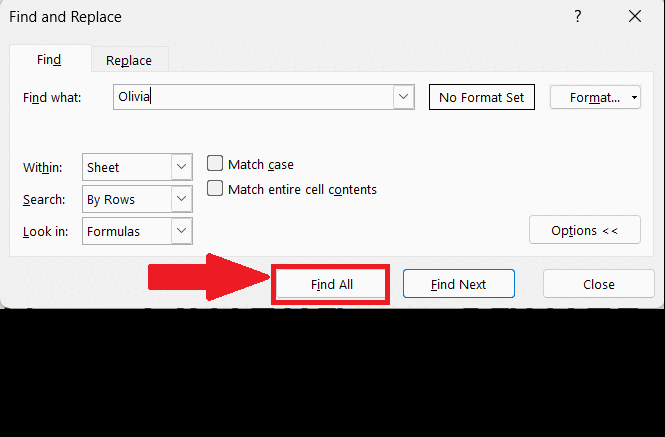
– Click on the Find All option in the Find and Replace dialogue box.
– All the cells containing the desired data will be listed.
Step 6 – Select all the Cell References
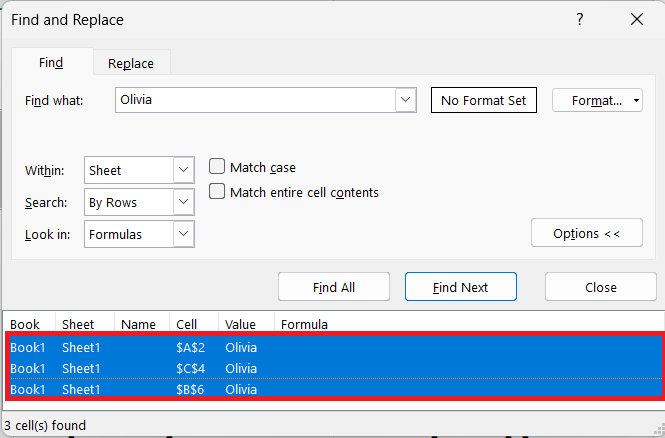
– Select all the cell references listed in the dialogue box.
Step 7 – Click on the Close option

– Click on the Close option in the Find and Replace dialogue box.
– All the cells containing the searched data would be selected.


