
How to save Excel as JPEG
 By
SpreadCheaters
By
SpreadCheaters
In this tutorial we will learn how to save an excel sheet in JPEG form by using the copy function. For this we select the region on sheet that we want to save and then use copy function on it to copy it in the form of picture. After using function we paste the picture on sheet and save it in JPEG form.

Microsoft Excel is a spreadsheet software developed by Microsoft. It is widely used for data analysis, financial modeling, and project management. The software allows users to create and manipulate tables of data, perform calculations and functions, create charts and graphs, and perform various other tasks related to data organization and analysis.
Step 1 – Select the Data
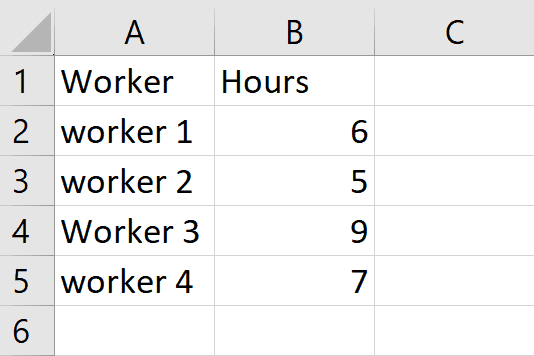
– Select all the data you want to convert in jpeg
Step 2 – Click on Copy
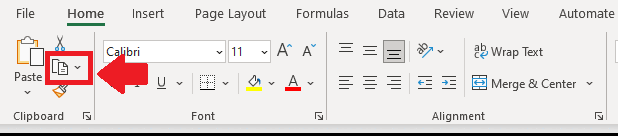
– Click on Copy in the task bar and a dropdown menu will appear
Step 3 – Click on Copy as Picture
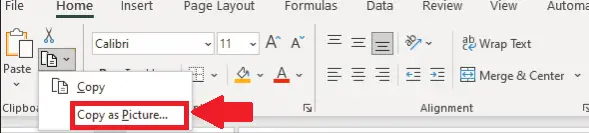
– In the the drop down menu click on Copy as Picture and a drop down menu will appear
Step 4 – Click on As shown on Screen
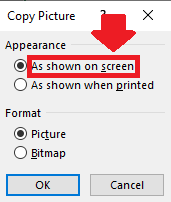
– Click on As shown on Screen below the Appearance option
Step 5 – Click on Picture
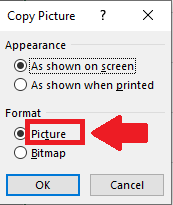
– Click on Picture below the Format option
Step 6 – Clock on OK
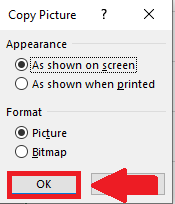
– Click on OK after selecting Appearance and Format
Step 7 – Paste the Picture
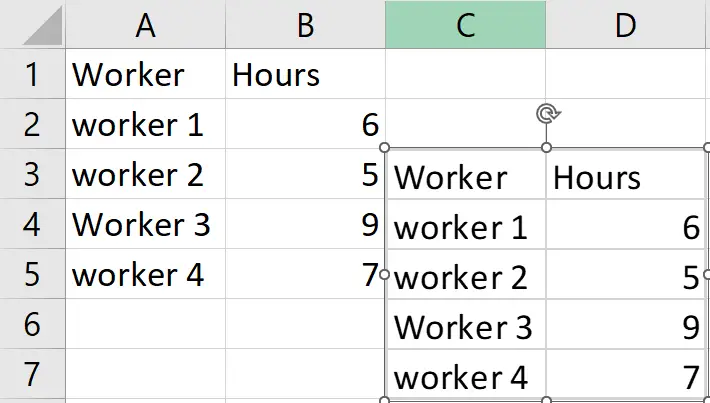
– Click anywhere on the sheet where you want to paste the picture
– Paste the picture by using “ctrl” and “v” keys at same time to paste the picture
Step 8 – Click on the Picture
– Right Click the picture a dropdown menu will appear
Step 9 – Save the Picture
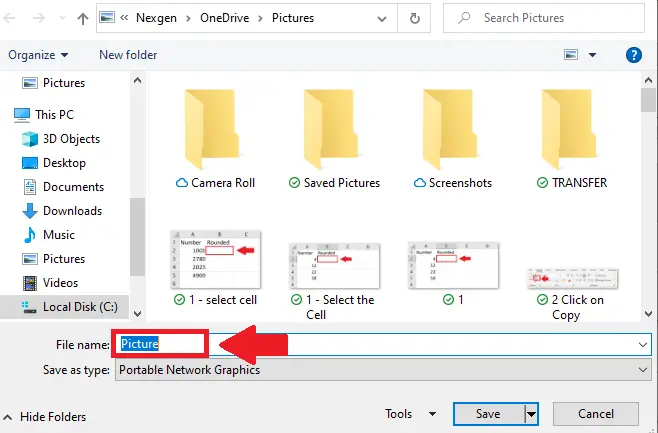
– From the dropdown menu click on Save as Picture
– Type the name of Picture in the box next to Picture option
Step 10 – select the type of Picture
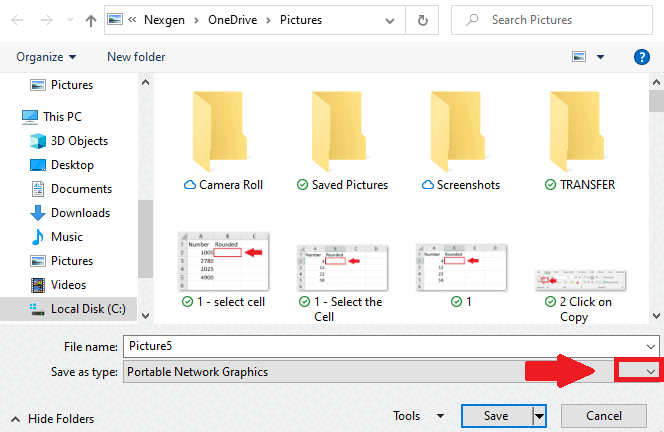
– Click on arrow in box next to Save as Type option and a dropdown menu will appear
– From the dropdown menu Click on “JPEG File Interchange format”
Step 11 – Click on Save
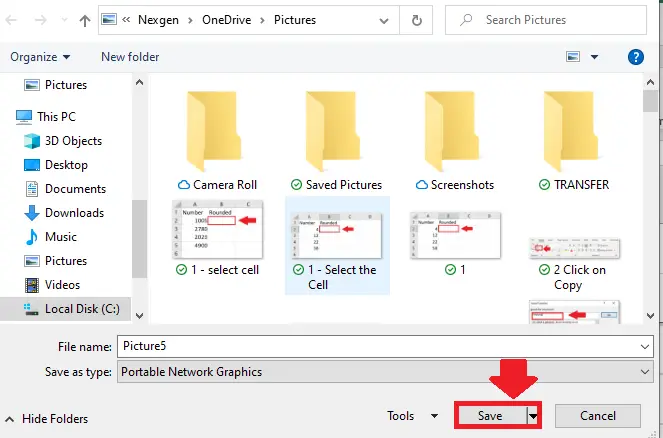
– Click on save to save the picture


