How to remove rows containing identical transactions in Excel

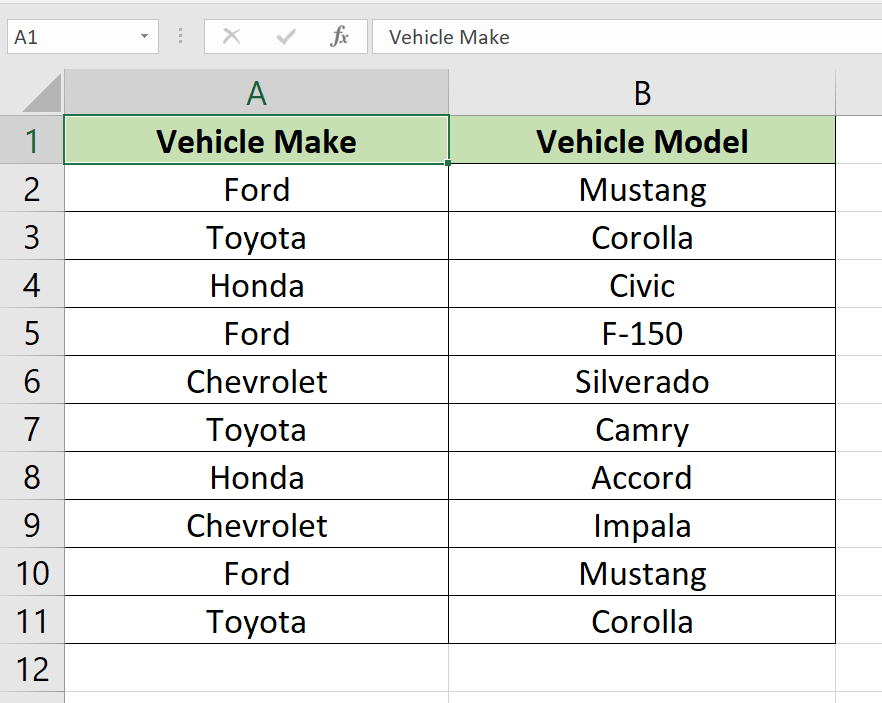
Here we have a random dataset shown above, In this dataset, there are two duplicate rows, representing two Ford Mustangs and two Toyota Corollas. In this tutorial, we will learn how to remove duplicate rows in excel so that it is easier to read data but first let’s have a look at the Dataset.

Excel is a powerful tool for managing and analyzing data. However, when working with large datasets, it is common to encounter Duplicate Rows, which can make the data harder to work with and lead to errors in analysis. One common scenario is when dealing with transactions in Excel. In this case, it is essential to remove duplicate transactions to ensure accurate financial analysis.In this tutorial will walk you through the steps to remove rows containing identical transactions in Excel.
Step 1 – Locate the Remove Duplicates option in Data Tab

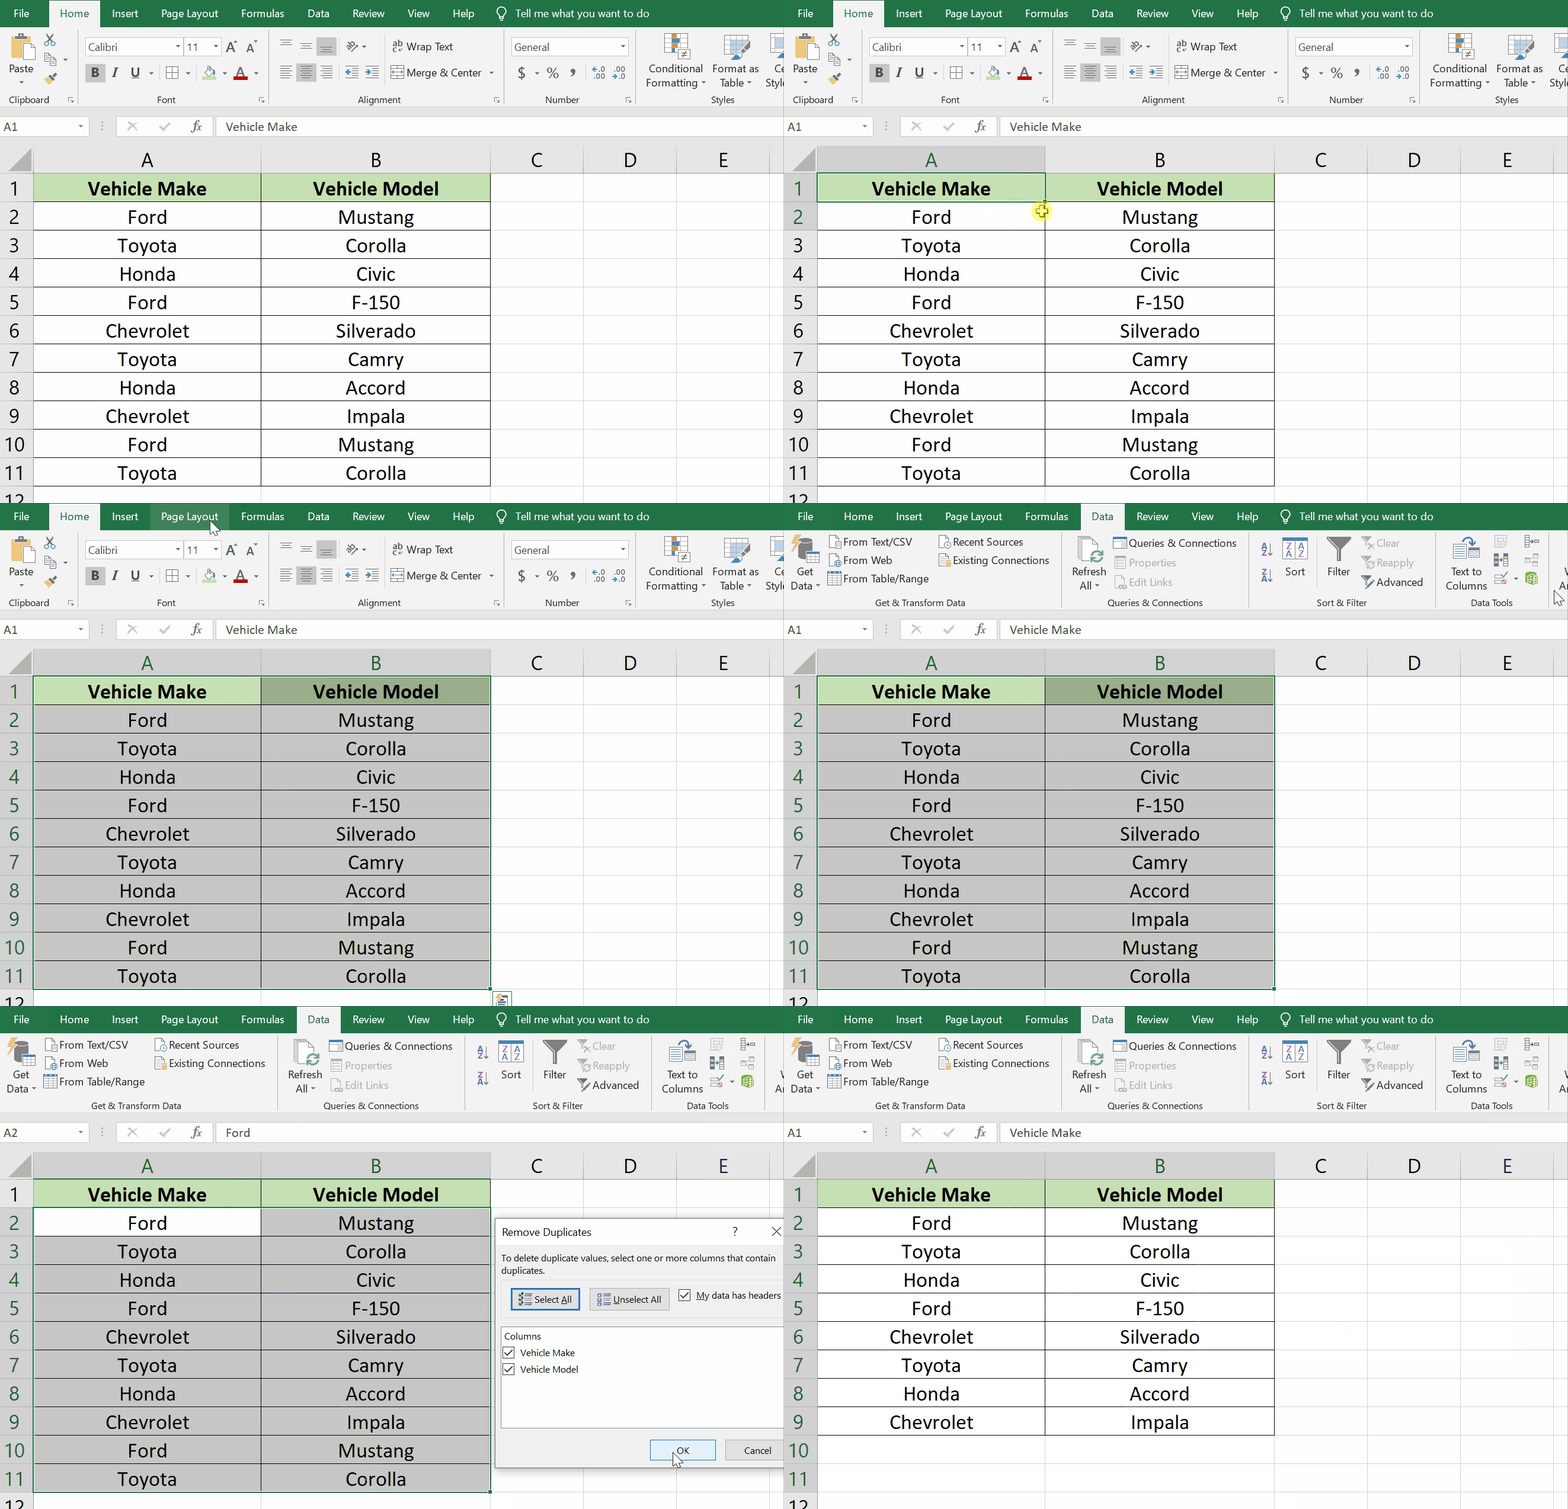
– Select the 2 columns which contain the duplicate data.
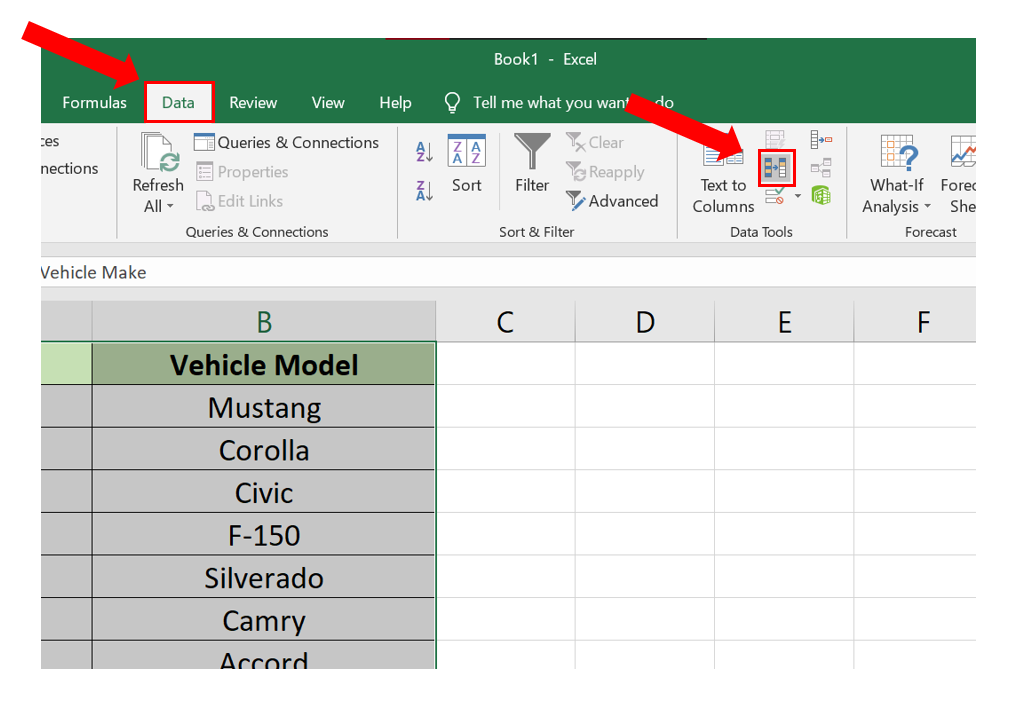
– Click on the Data tab.
– Click on the REMOVE DUPLICATE command in the DATA TOOLS ribbon.
Step 2 – Removing Duplicates in the selected columns.

– Clicking on the REMOVE DUPLICATES command will reveal a dialog box.
– Clicking OK will then remove any duplicate rows in the chosen columns.
Conclusion:
Using this very simple built-in tool provide by Excel, we can remove duplicates from our data no matter how big the data is.


