
How to remove Prefix in Microsoft Excel
 By
SpreadCheaters
By
SpreadCheaters
In this tutorial we will learn how to remove a prefix in Microsoft Excel. Removing prefixes from data involves eliminating a specific set of characters that appear at the beginning of a text string. Prefixes can be found in various forms, including titles, salutations, or identifiers that may be present in names or codes. Removing prefixes can be necessary for data cleaning and standardization, which can improve the accuracy and consistency of the data. Here we have a data set having names with a prefix i.e. Mr. .Here are the steps to remove this prefix from all the data.
Microsoft Excel is a popular spreadsheet software developed by Microsoft. It is part of the Microsoft Office suite of applications and is widely used for organizing, analyzing, and manipulating data in a tabular format. Excel provides a wide range of features, including formulas, charts and graphs, pivot tables, conditional formatting, data validation, and more. These features make it a powerful tool for businesses, educators, researchers, and individuals alike.
Step 1 – Select the Data
– Select the data containing the prefix.
Step 2 – Go to the Home Tab
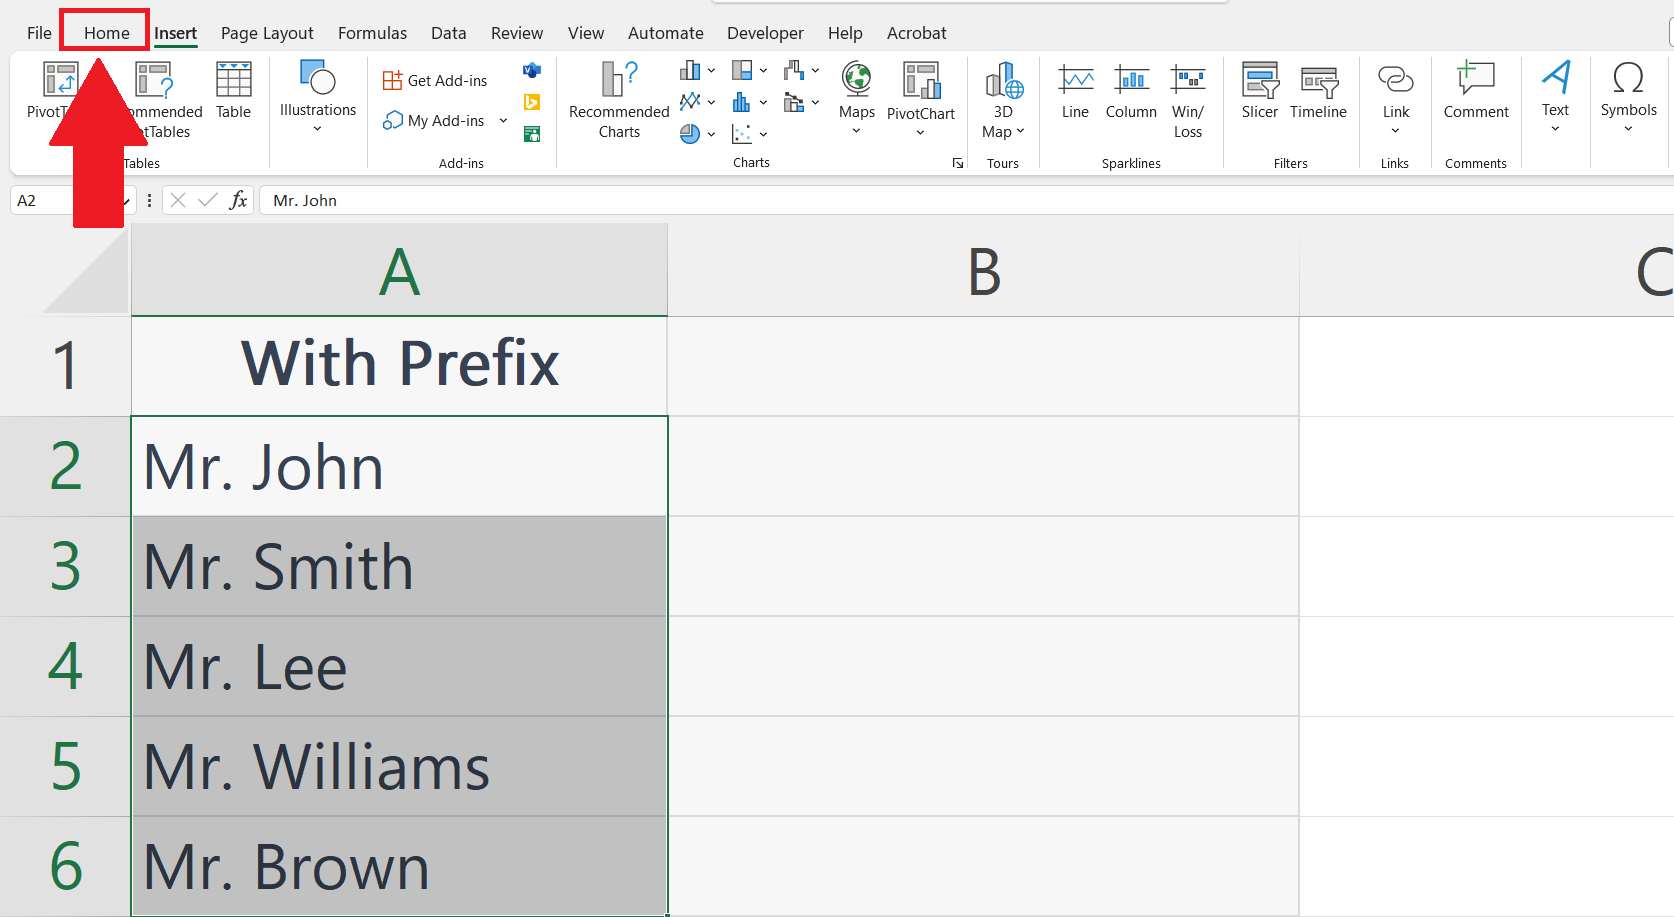
– Go to the Home tab in the menu bar.
Step 3 – Click on the Find & Select Button
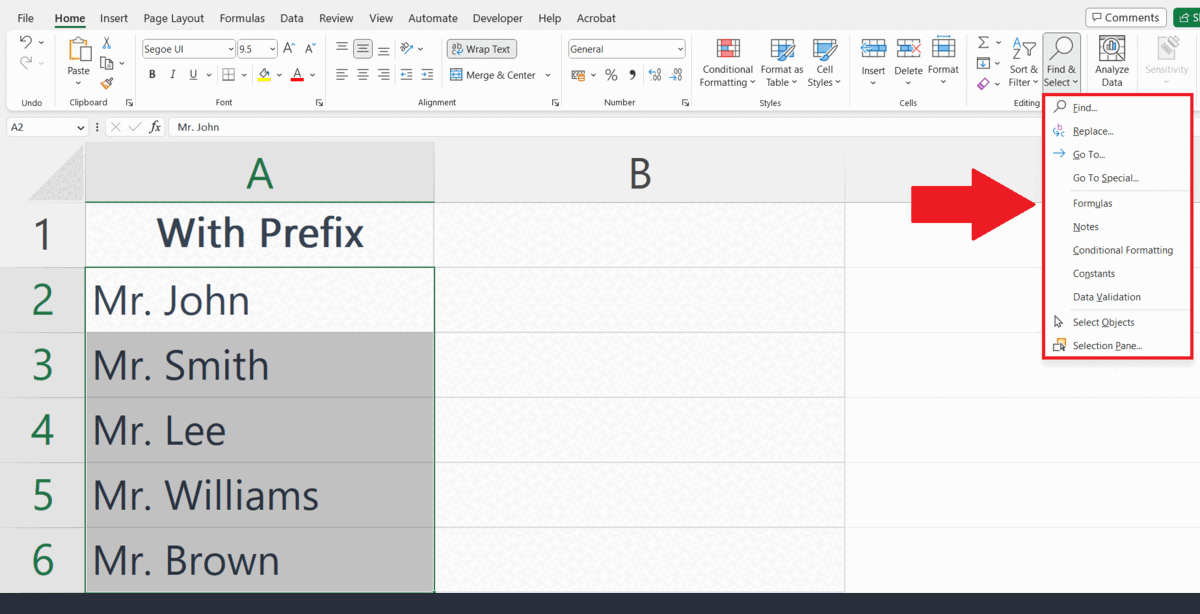
– Click on the Find and Select button.
– A drop-down menu will appear.
Step 4 – Click on the Replace option
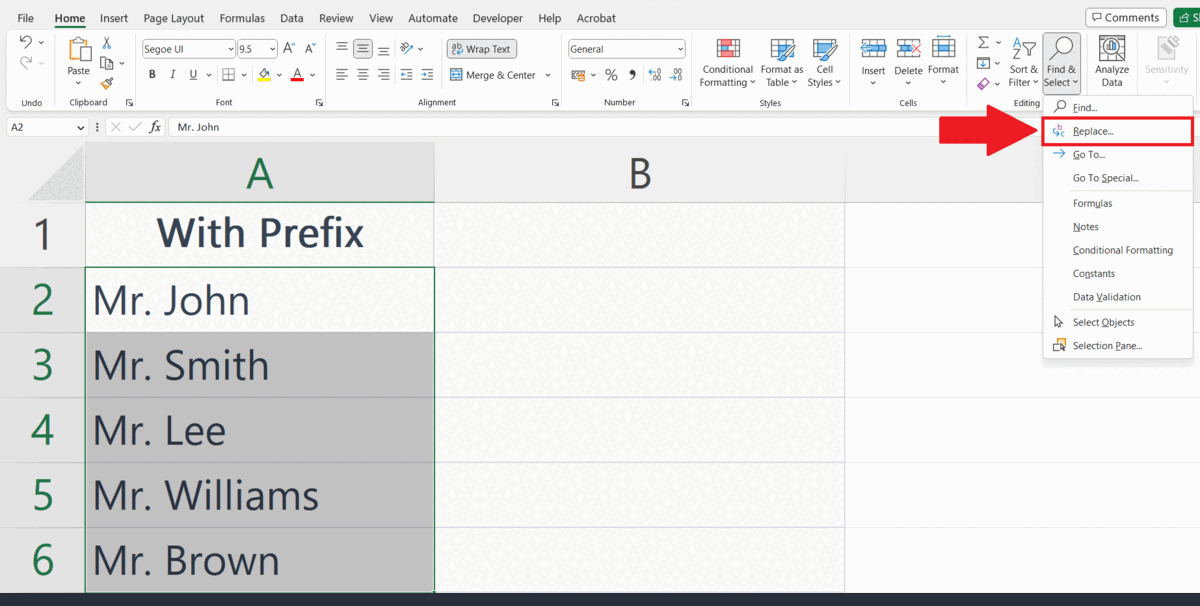
– Click on the Replace option in the drop-down menu.
– Find and Replace dialog box will appear.
– Go to the Replace tab.
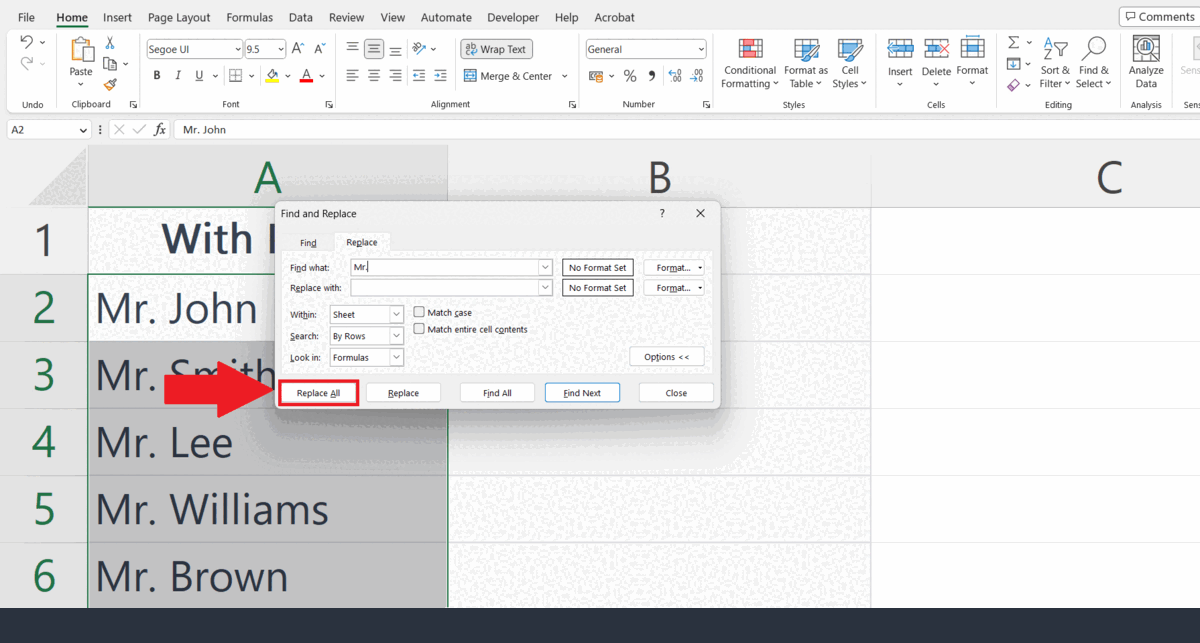
Step 5 – Enter the Prefix in Find What option
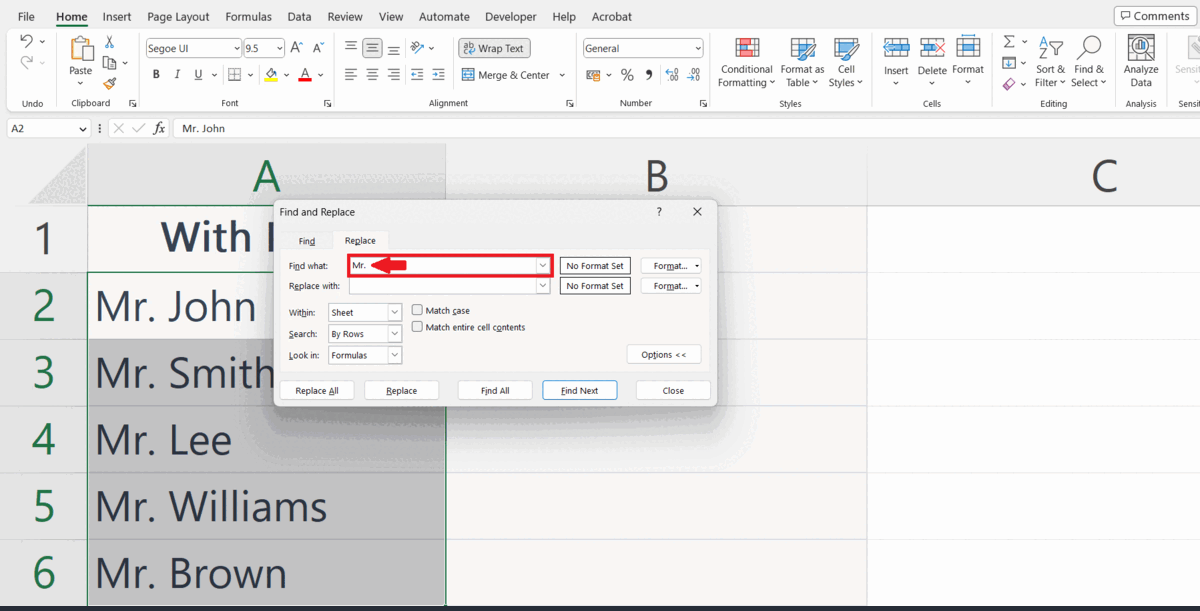
– Enter the Prefix to be removed in the Find What option.
– Leave the Replace with option blank.
Step 6 – Click on the Replace All Button

– Click on the Replace All button in the Find and Replace dialog box.
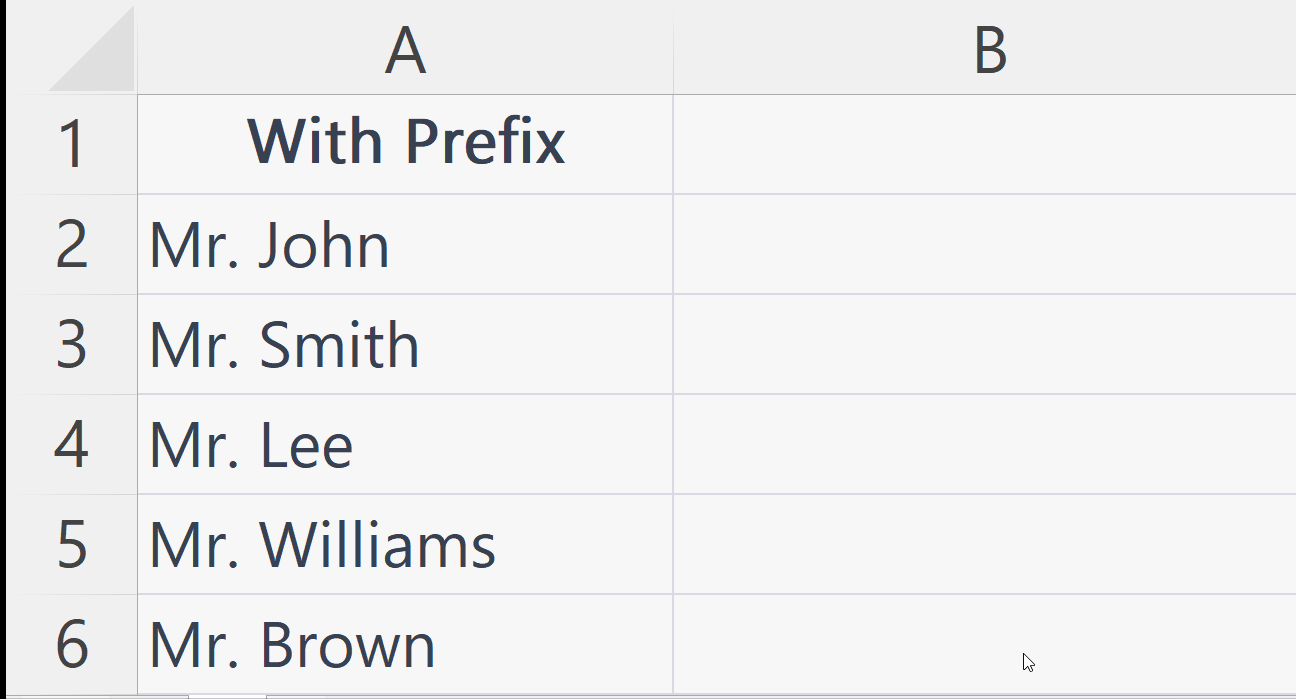
– The prefix will be removed from all the selected data.


