
How to print addresses on envelopes from Excel
 By
SpreadCheaters
By
SpreadCheaters

When you have a set of addresses in Excel and you want to print them on envelopes, you need to use a feature called Mail Merge which is part of Microsoft Word. The format of the address is defined in Microsoft Word and the values for the addresses are drawn from Excel. Here is the sequence of steps for Mail Merge:
– Create the format of the address in Microsoft Word, depending on the size of the envelope
– Link the address fields from Excel with the format in Word
– Merge the Word format with the Excel data and either print directly or save it as a document to be printed later
Step 1 – Open the Mail Merge Wizard
– Open a new document in Microsoft Word
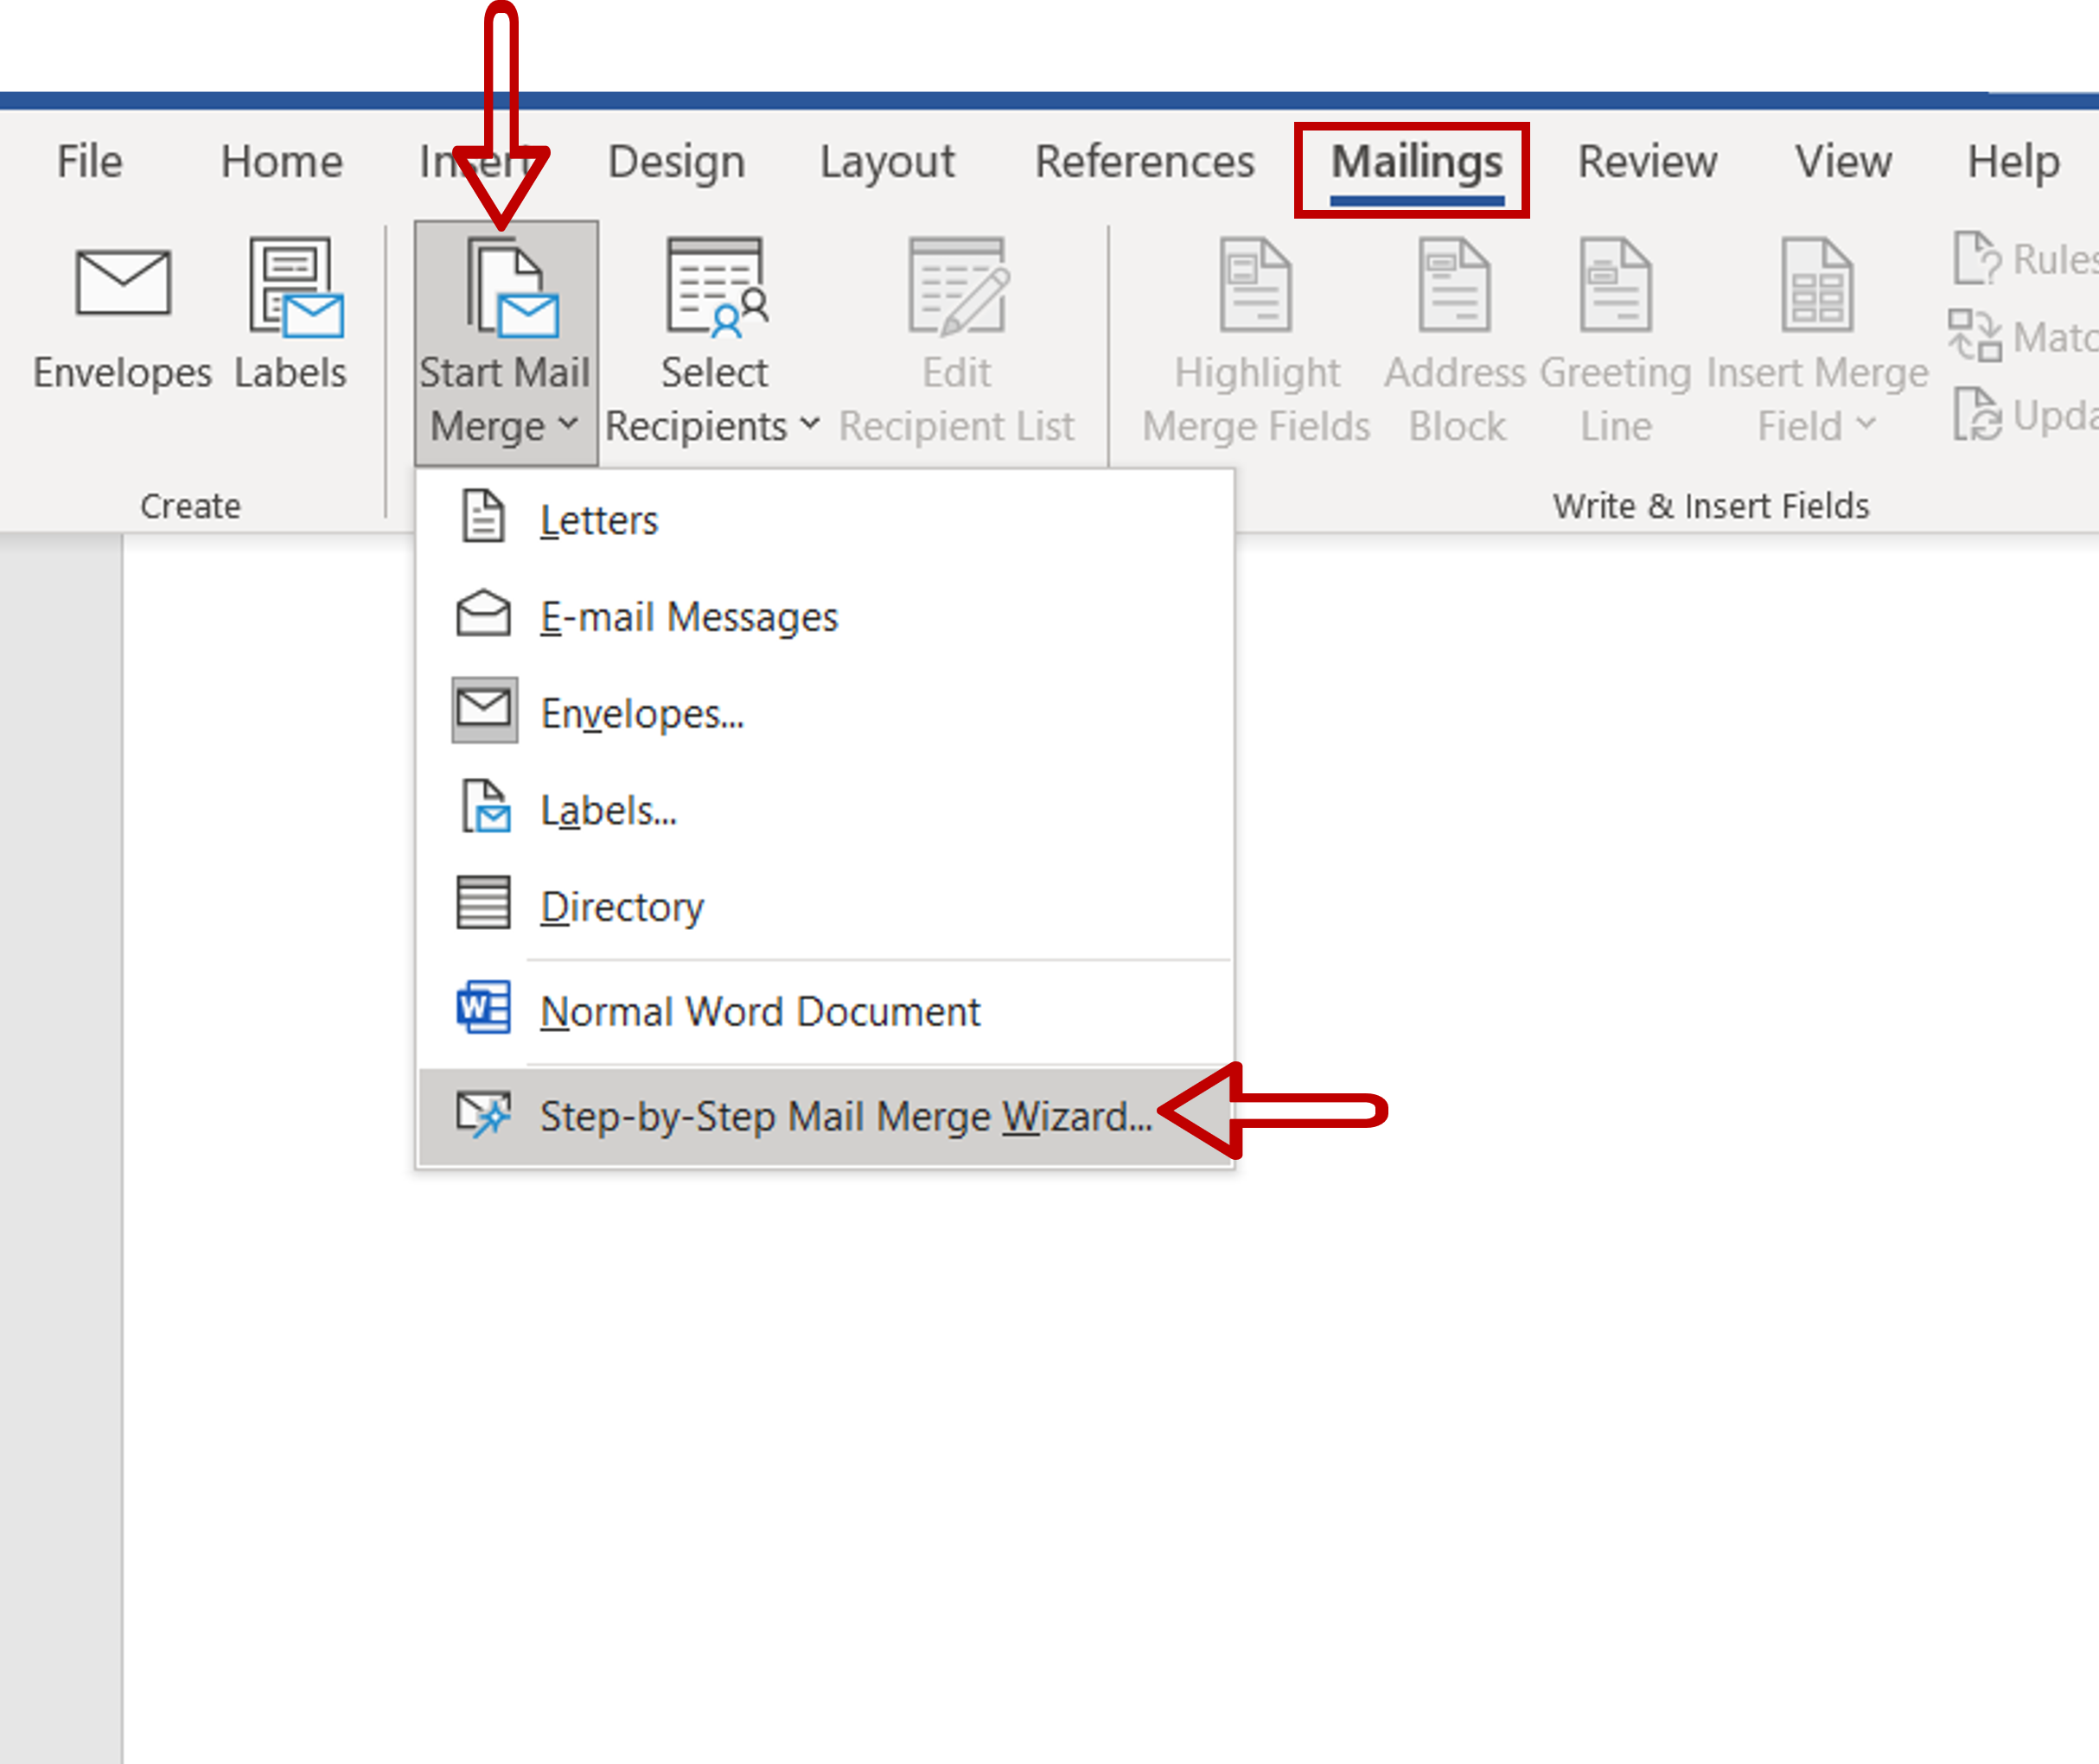
– Go to Mailings > Start Mail Merge > Step-by-Step Mail Merge Wizard
Step 2 – Select document type
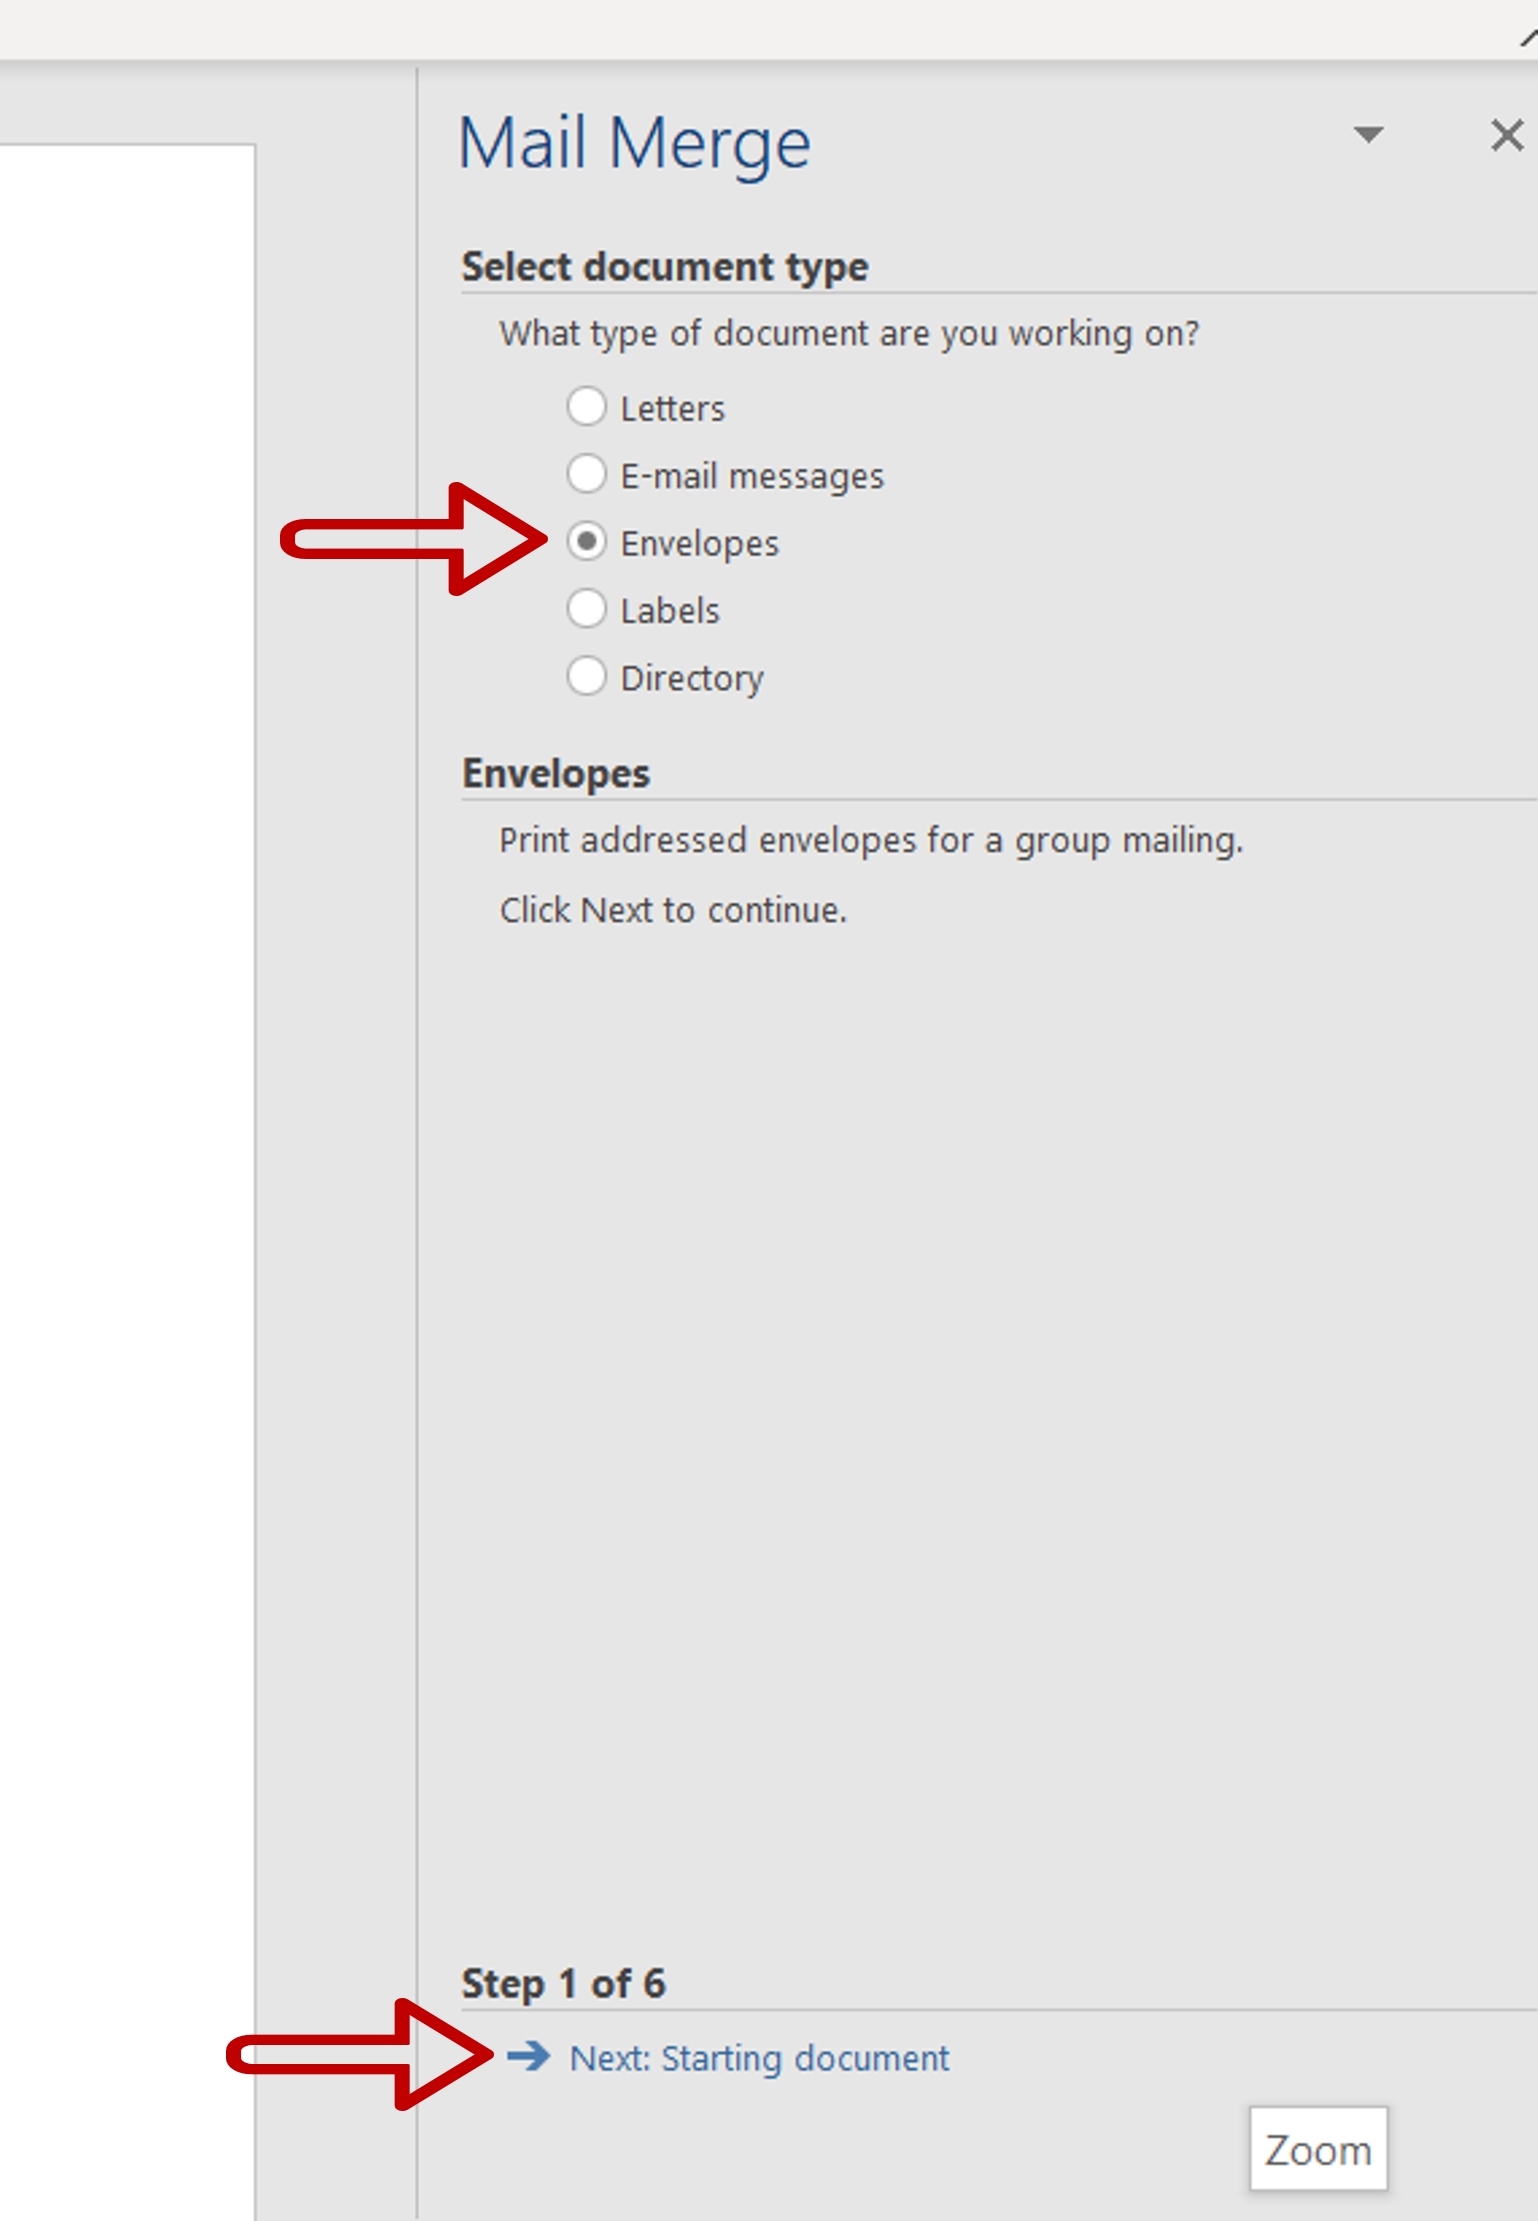
– Select Envelopes
– Click Next: Starting document
Step 3 – Select starting document
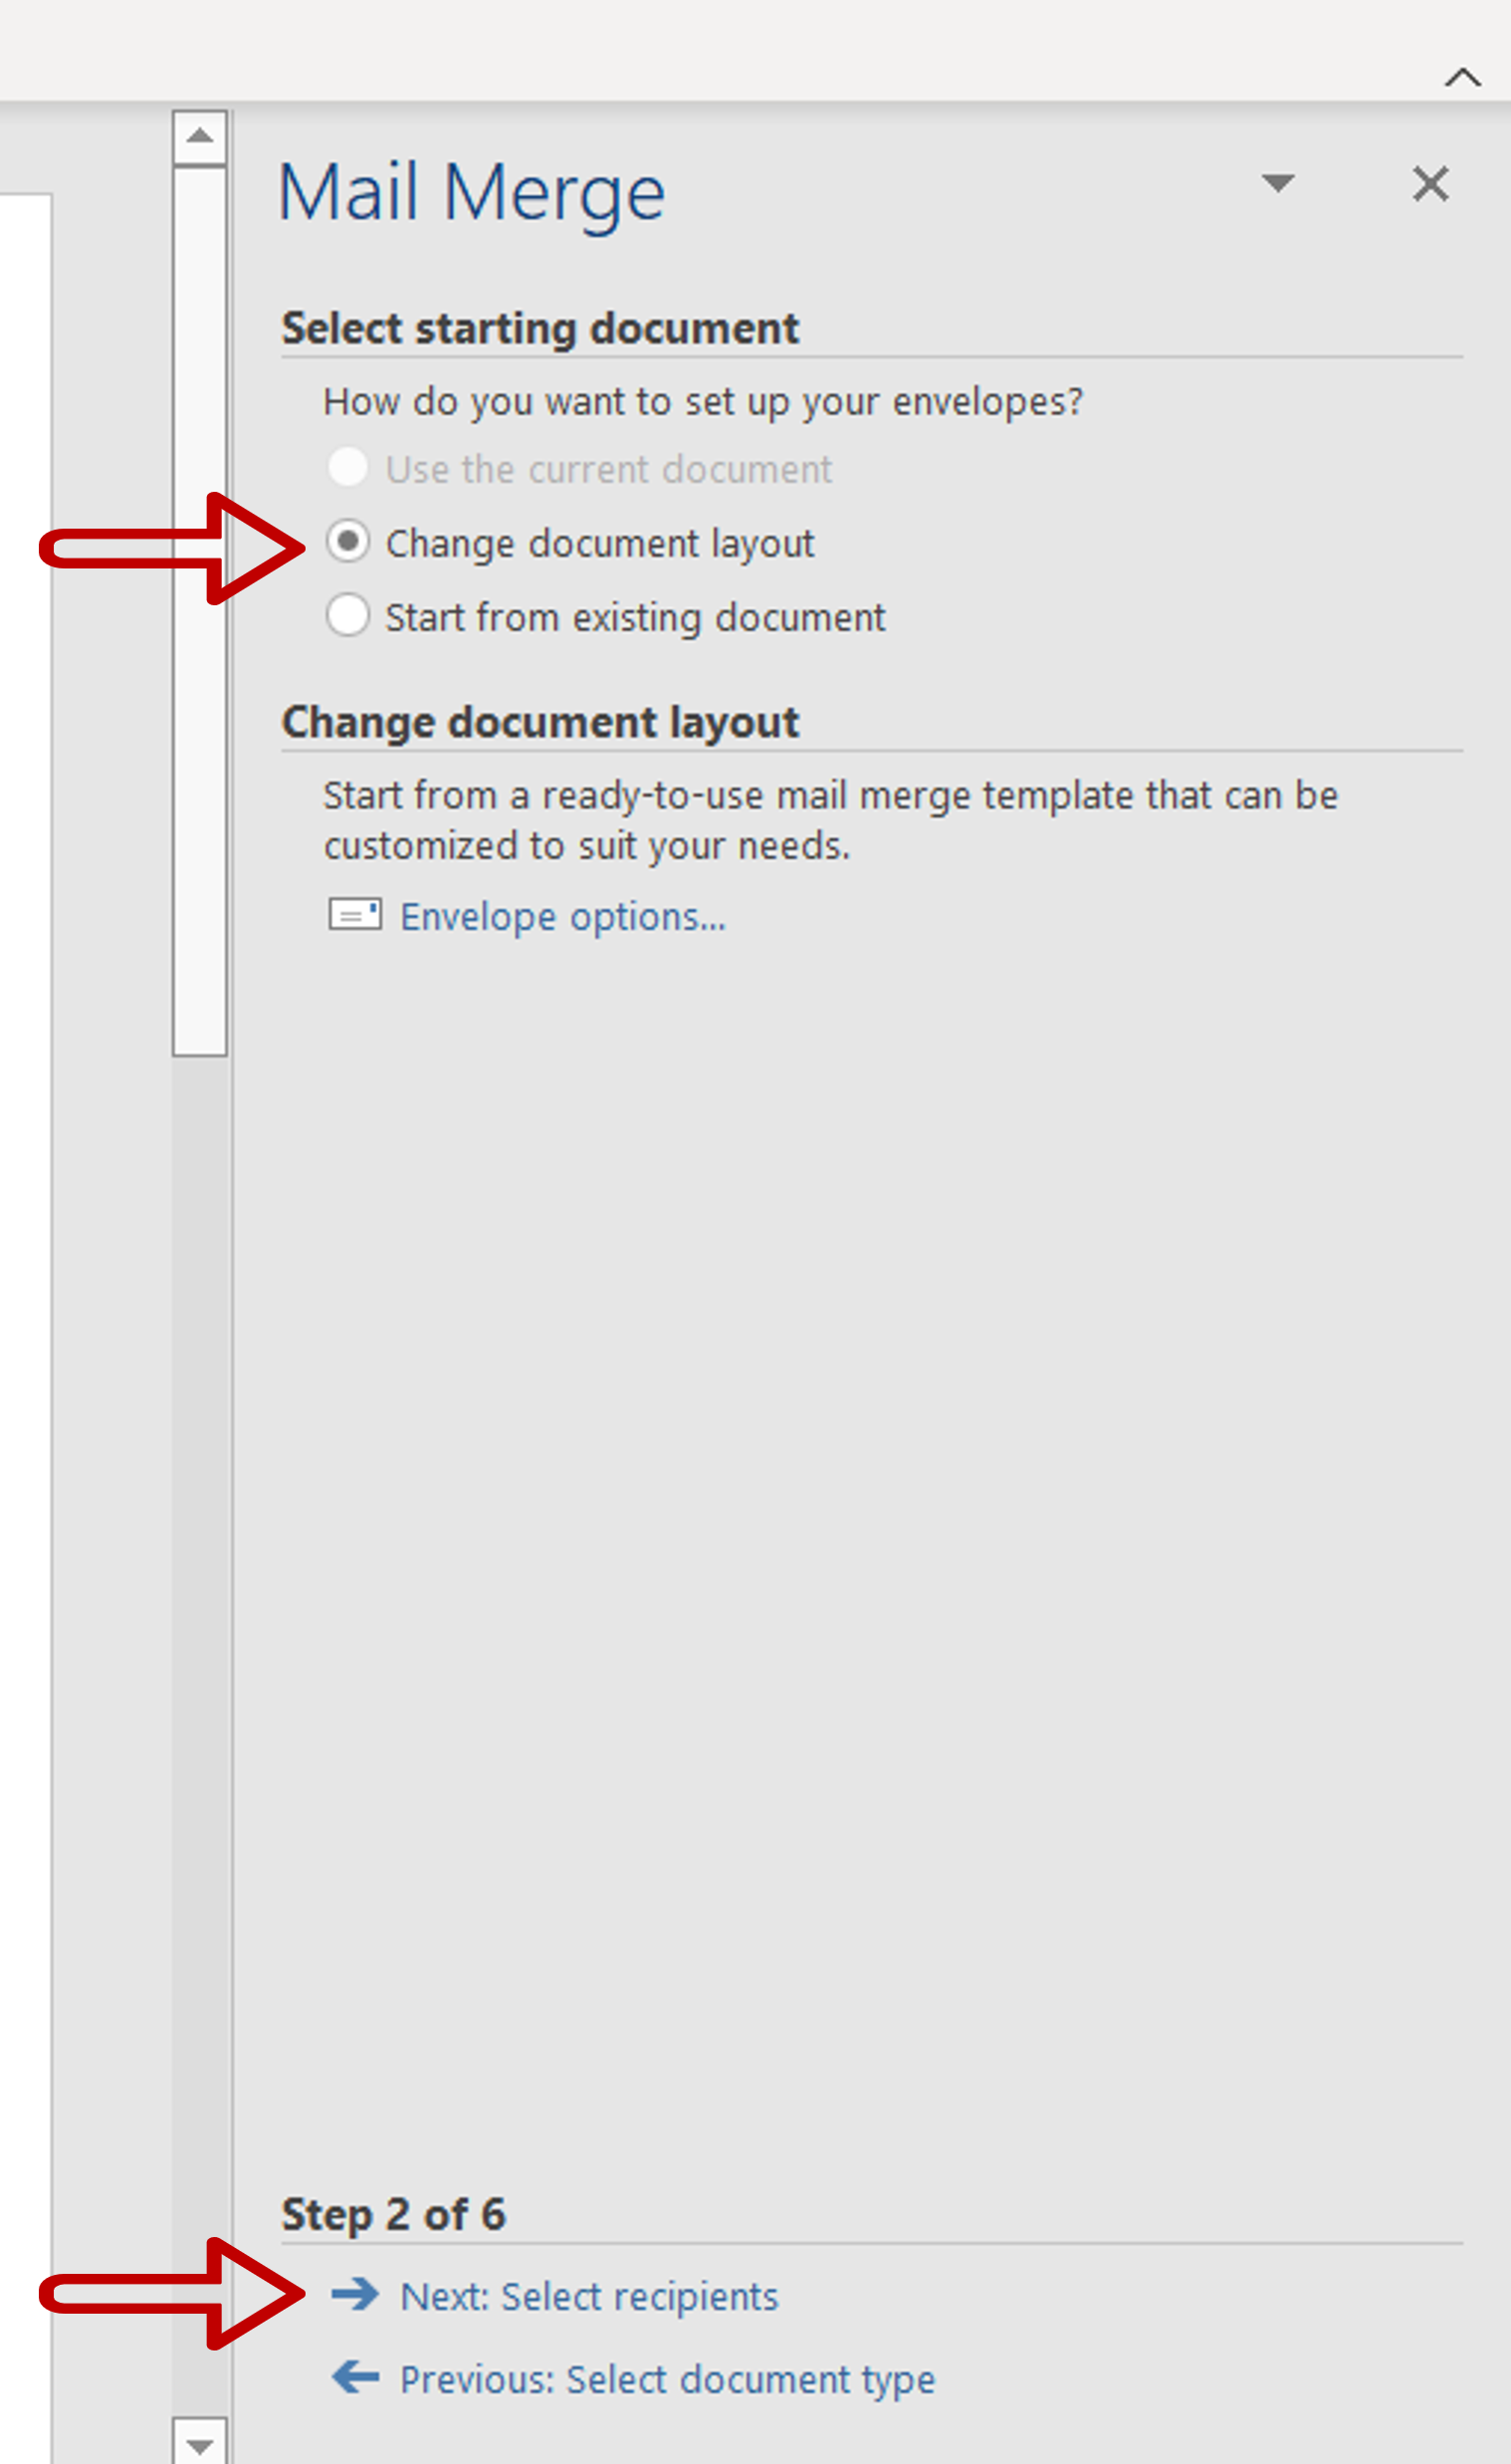
– Choose Change document layout
Note: If you have a document that is already formatted for envelopes you can choose Start from existing document
– Click Next: Select recipients
Step 4 – Choose the envelope options
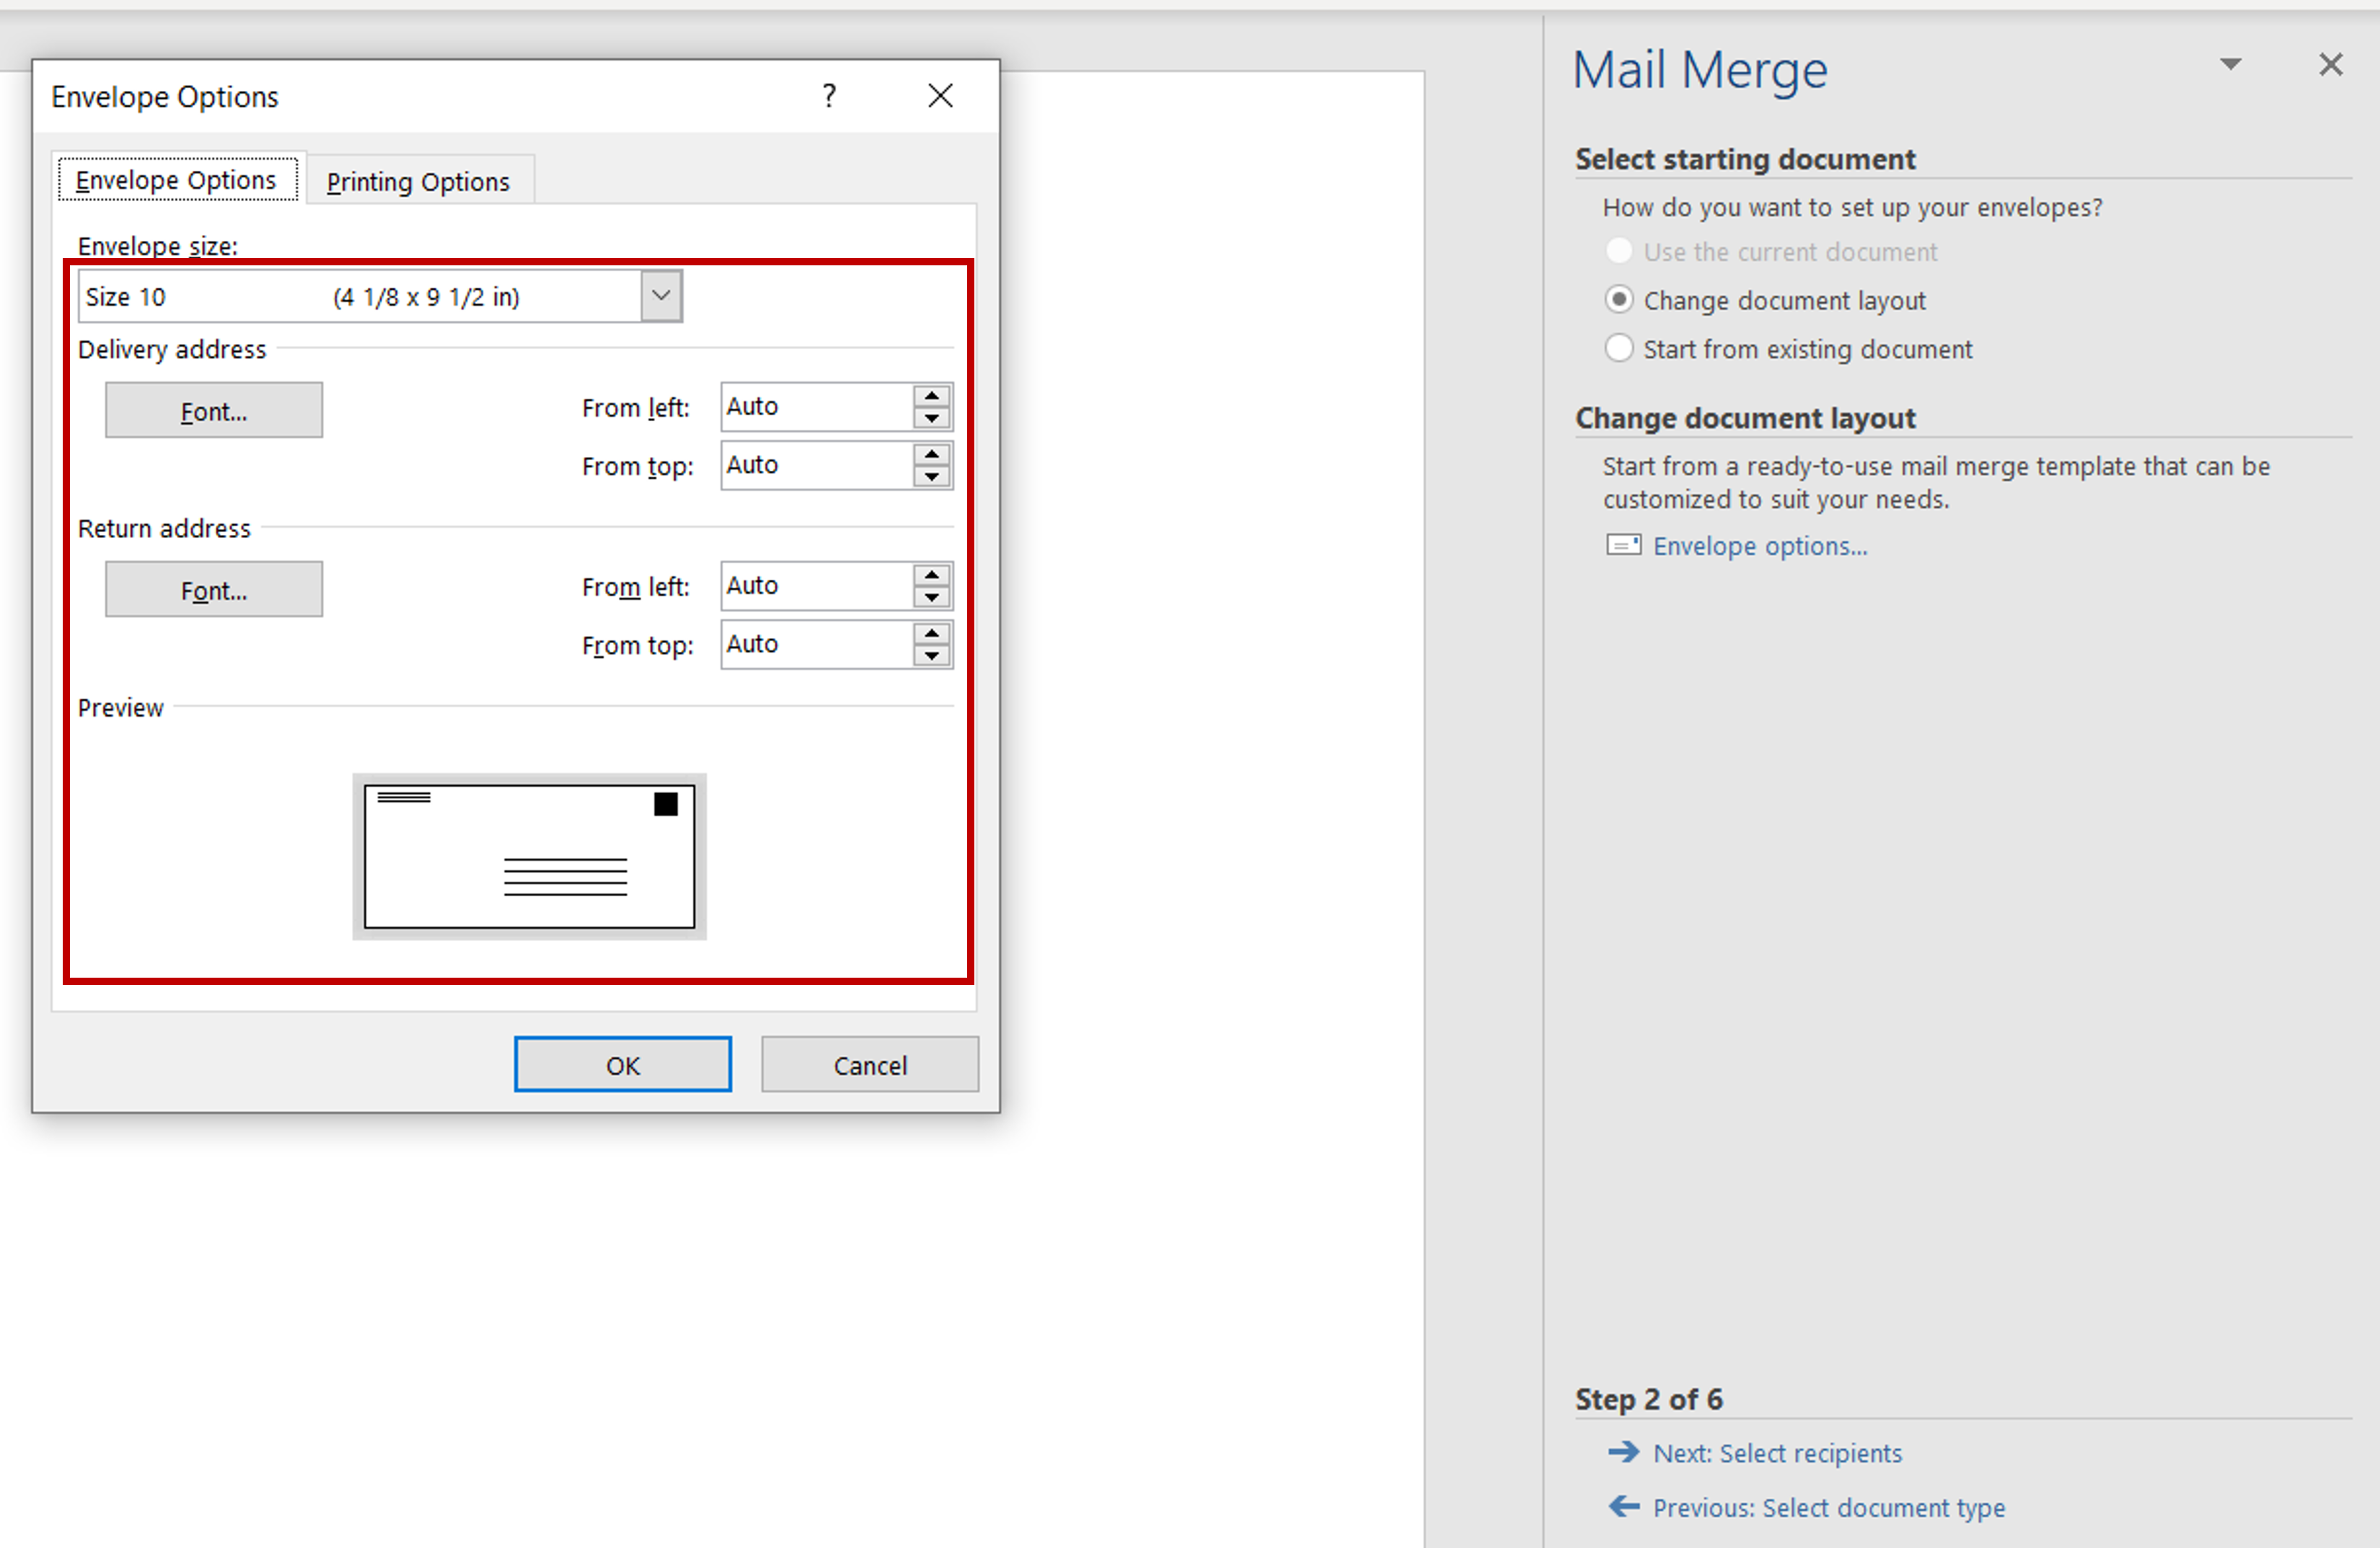
– Select one of the preset sizes of envelopes or define your size
– Set the location of the delivery and return addresses using the preview as a guide or use the default settings
Step 5 – Choose the printing options
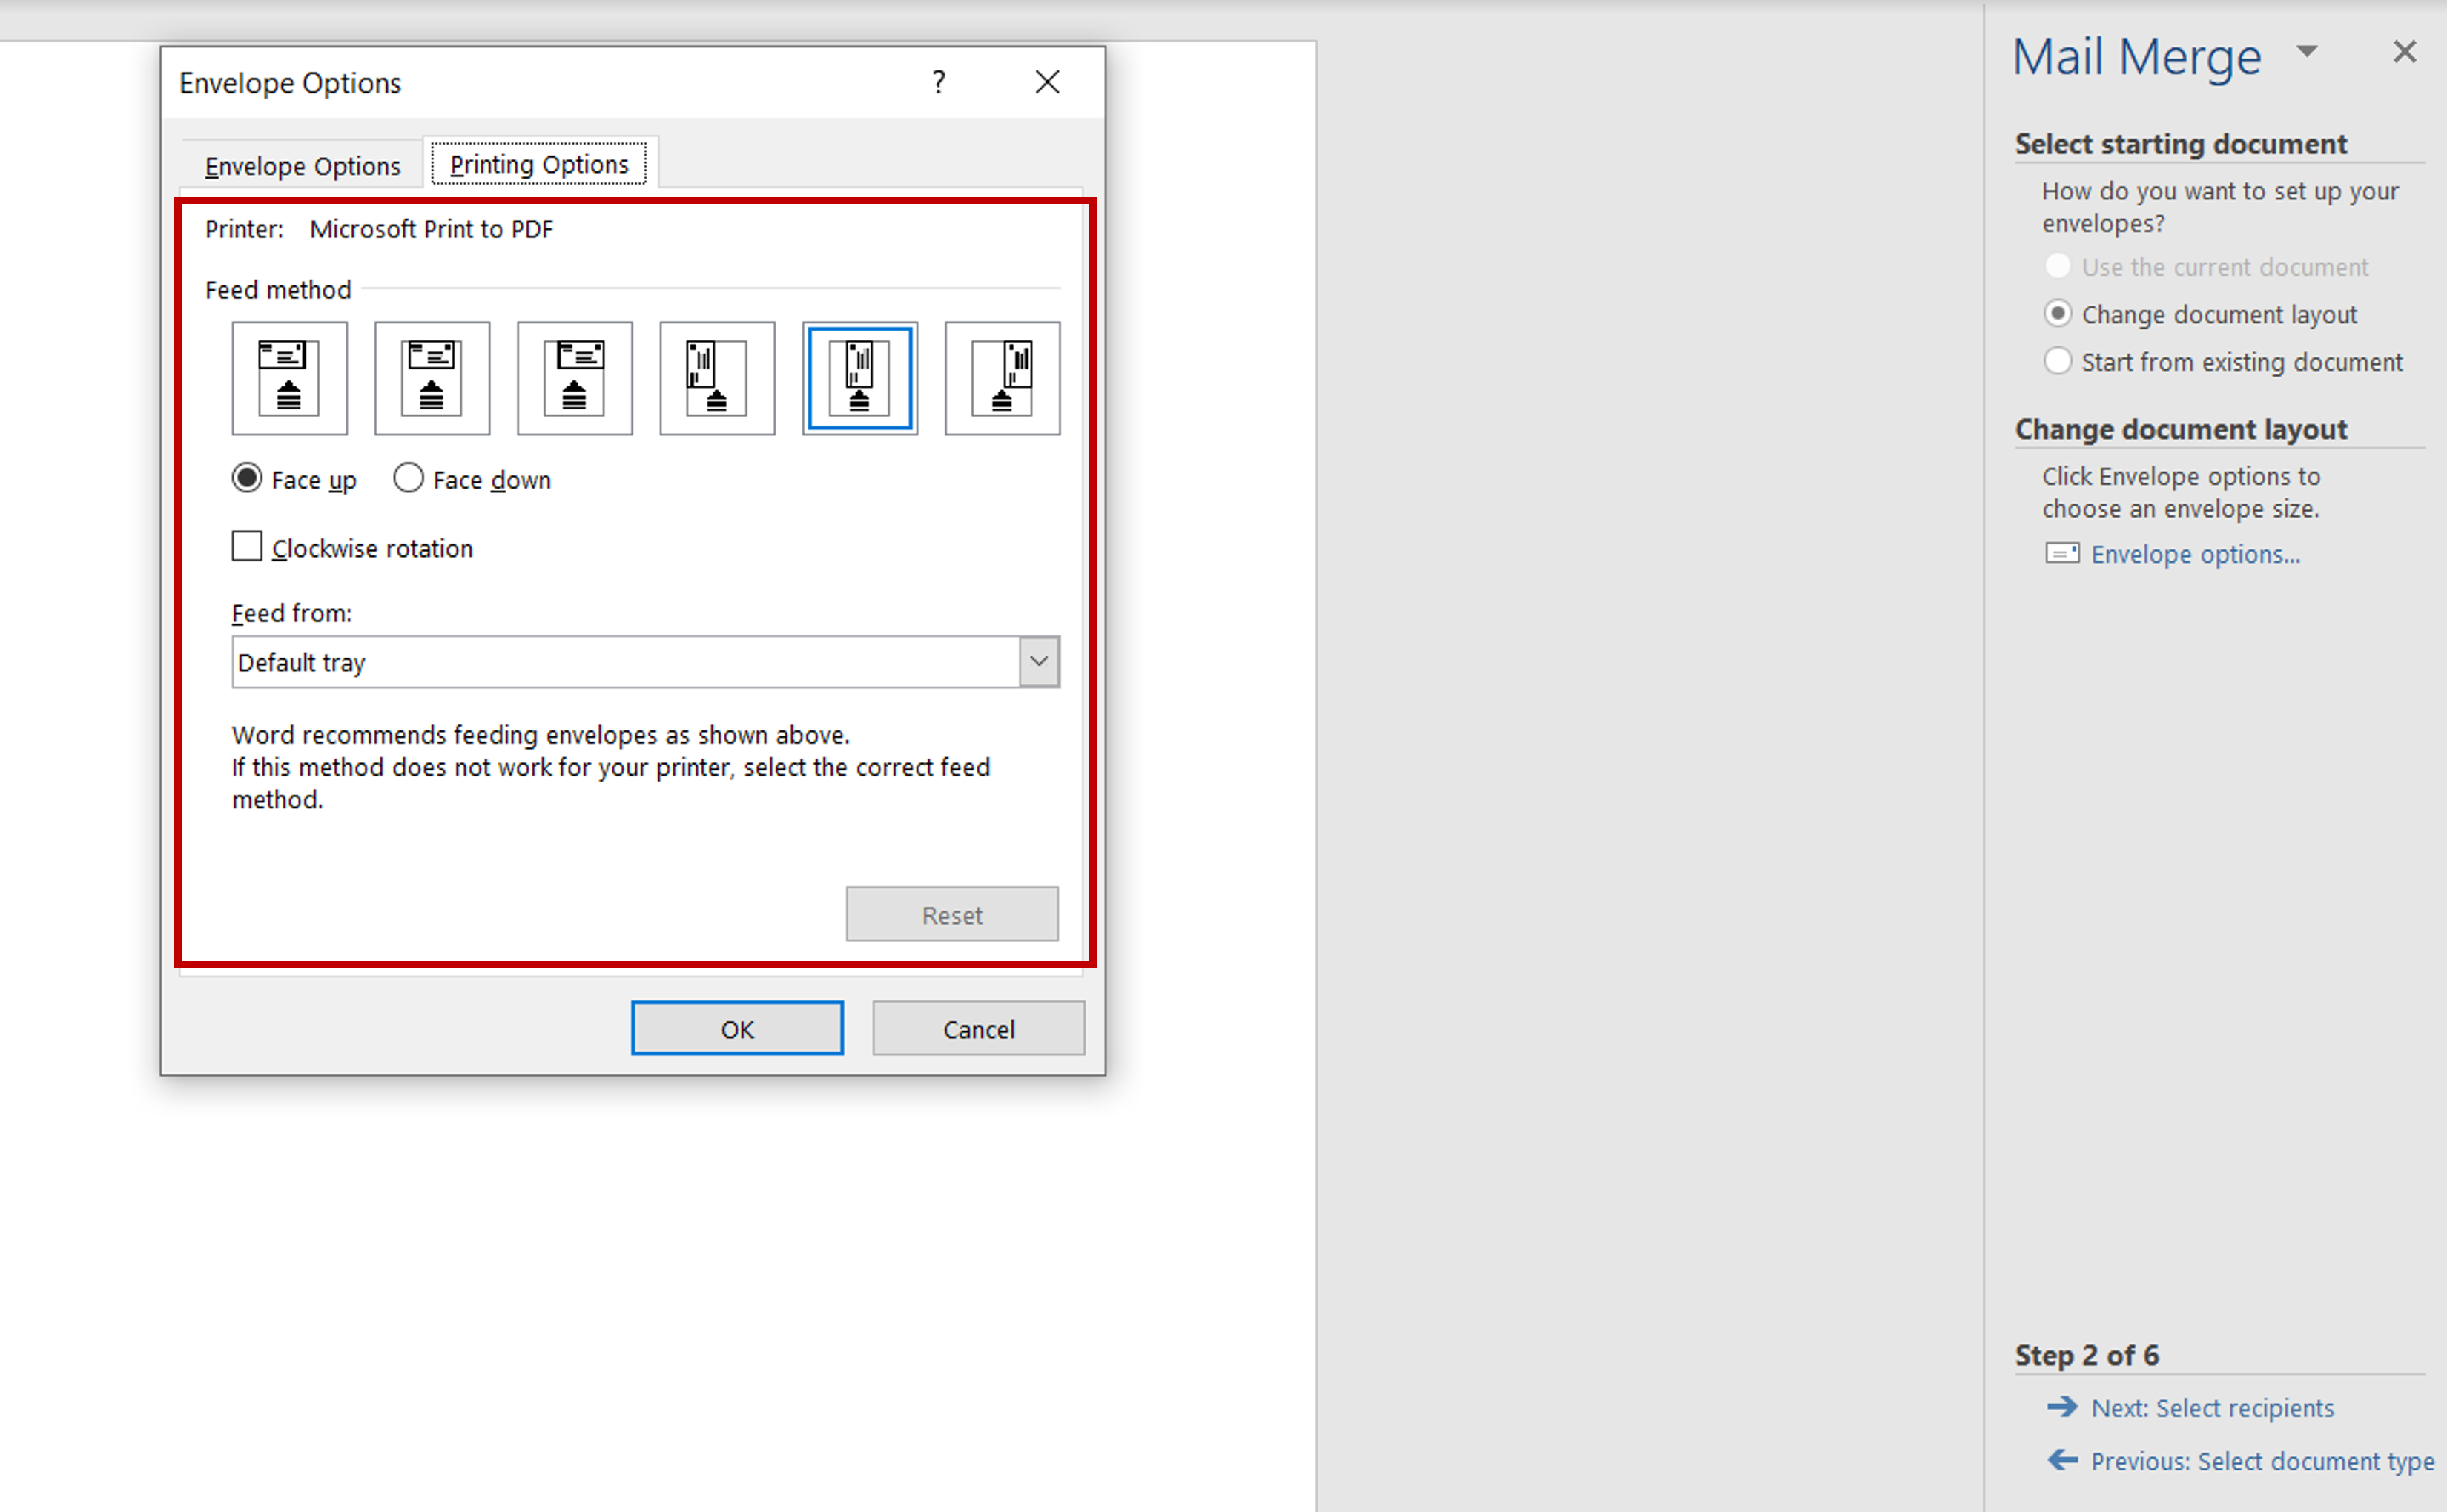
– Go to the Printing Options tab
– If you are performing the merge directly to the printer (and not saving it as a document), set the options for printing depending on your printer
– Click Next: Select recipients
Step 6 – Select recipients
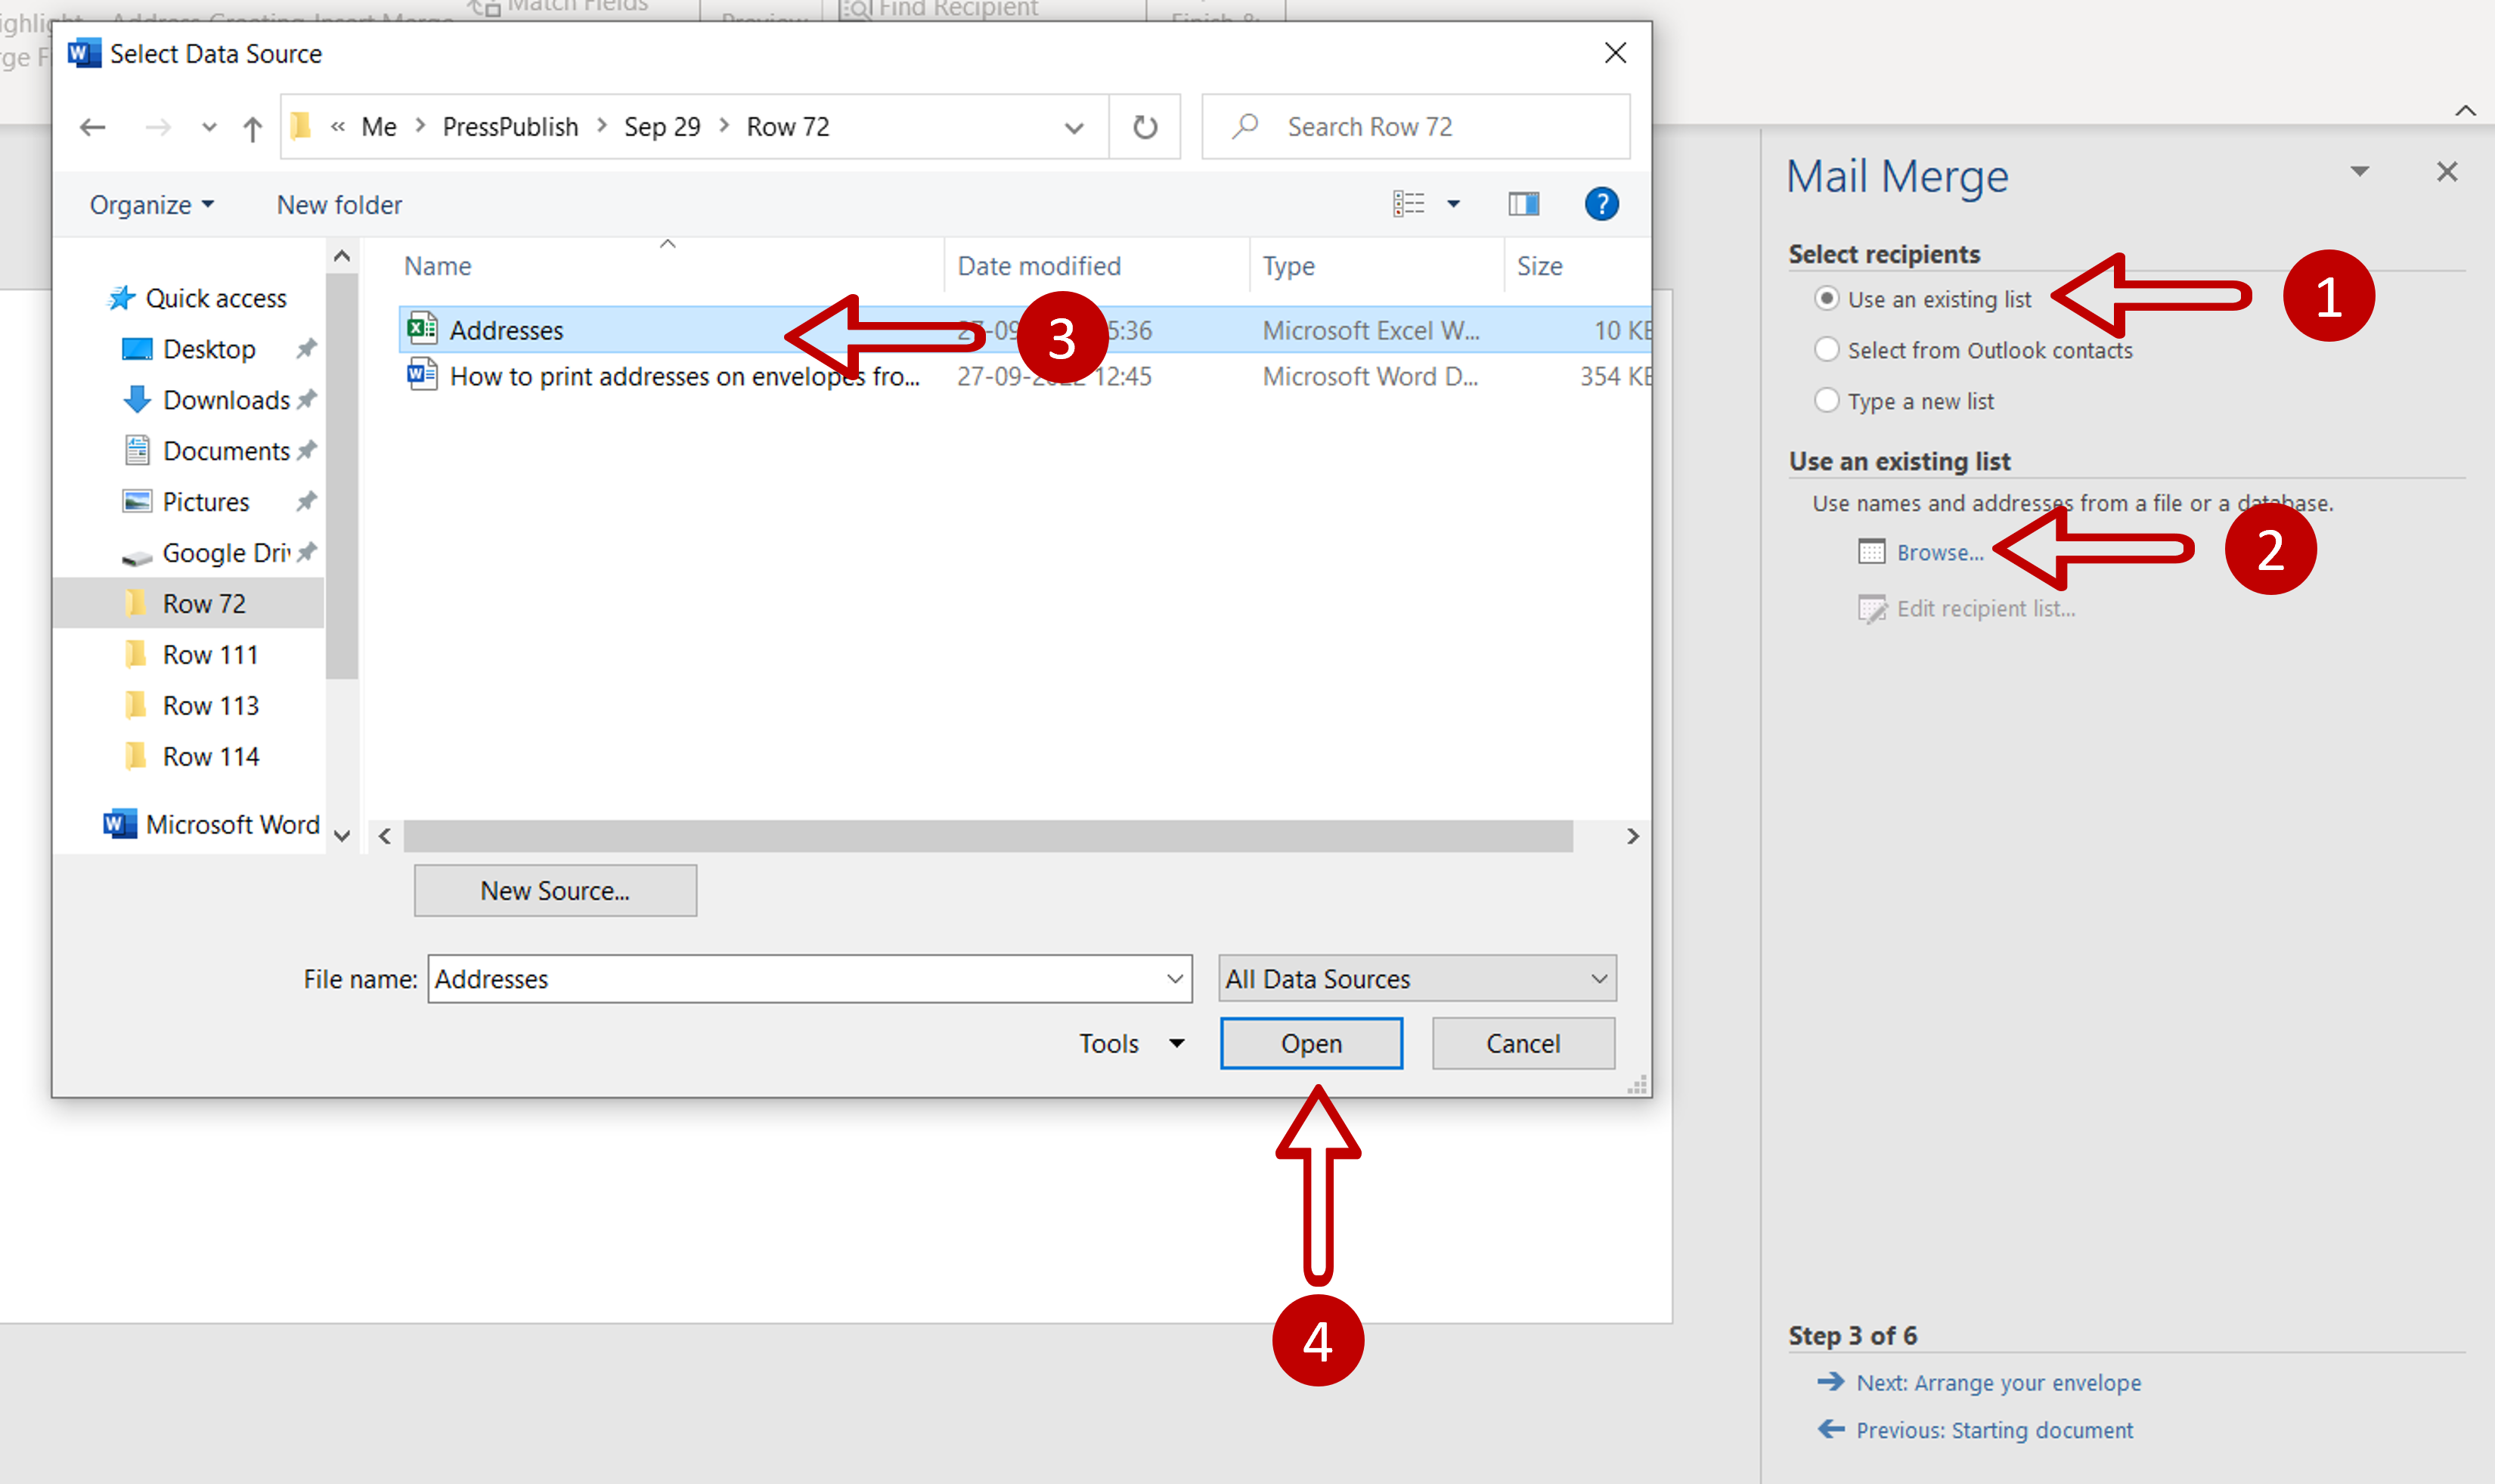
– Click Use an existing list
– Click Browse
– Choose the Excel file from the local directory
– Click Open
Step 7 – Select the sheet
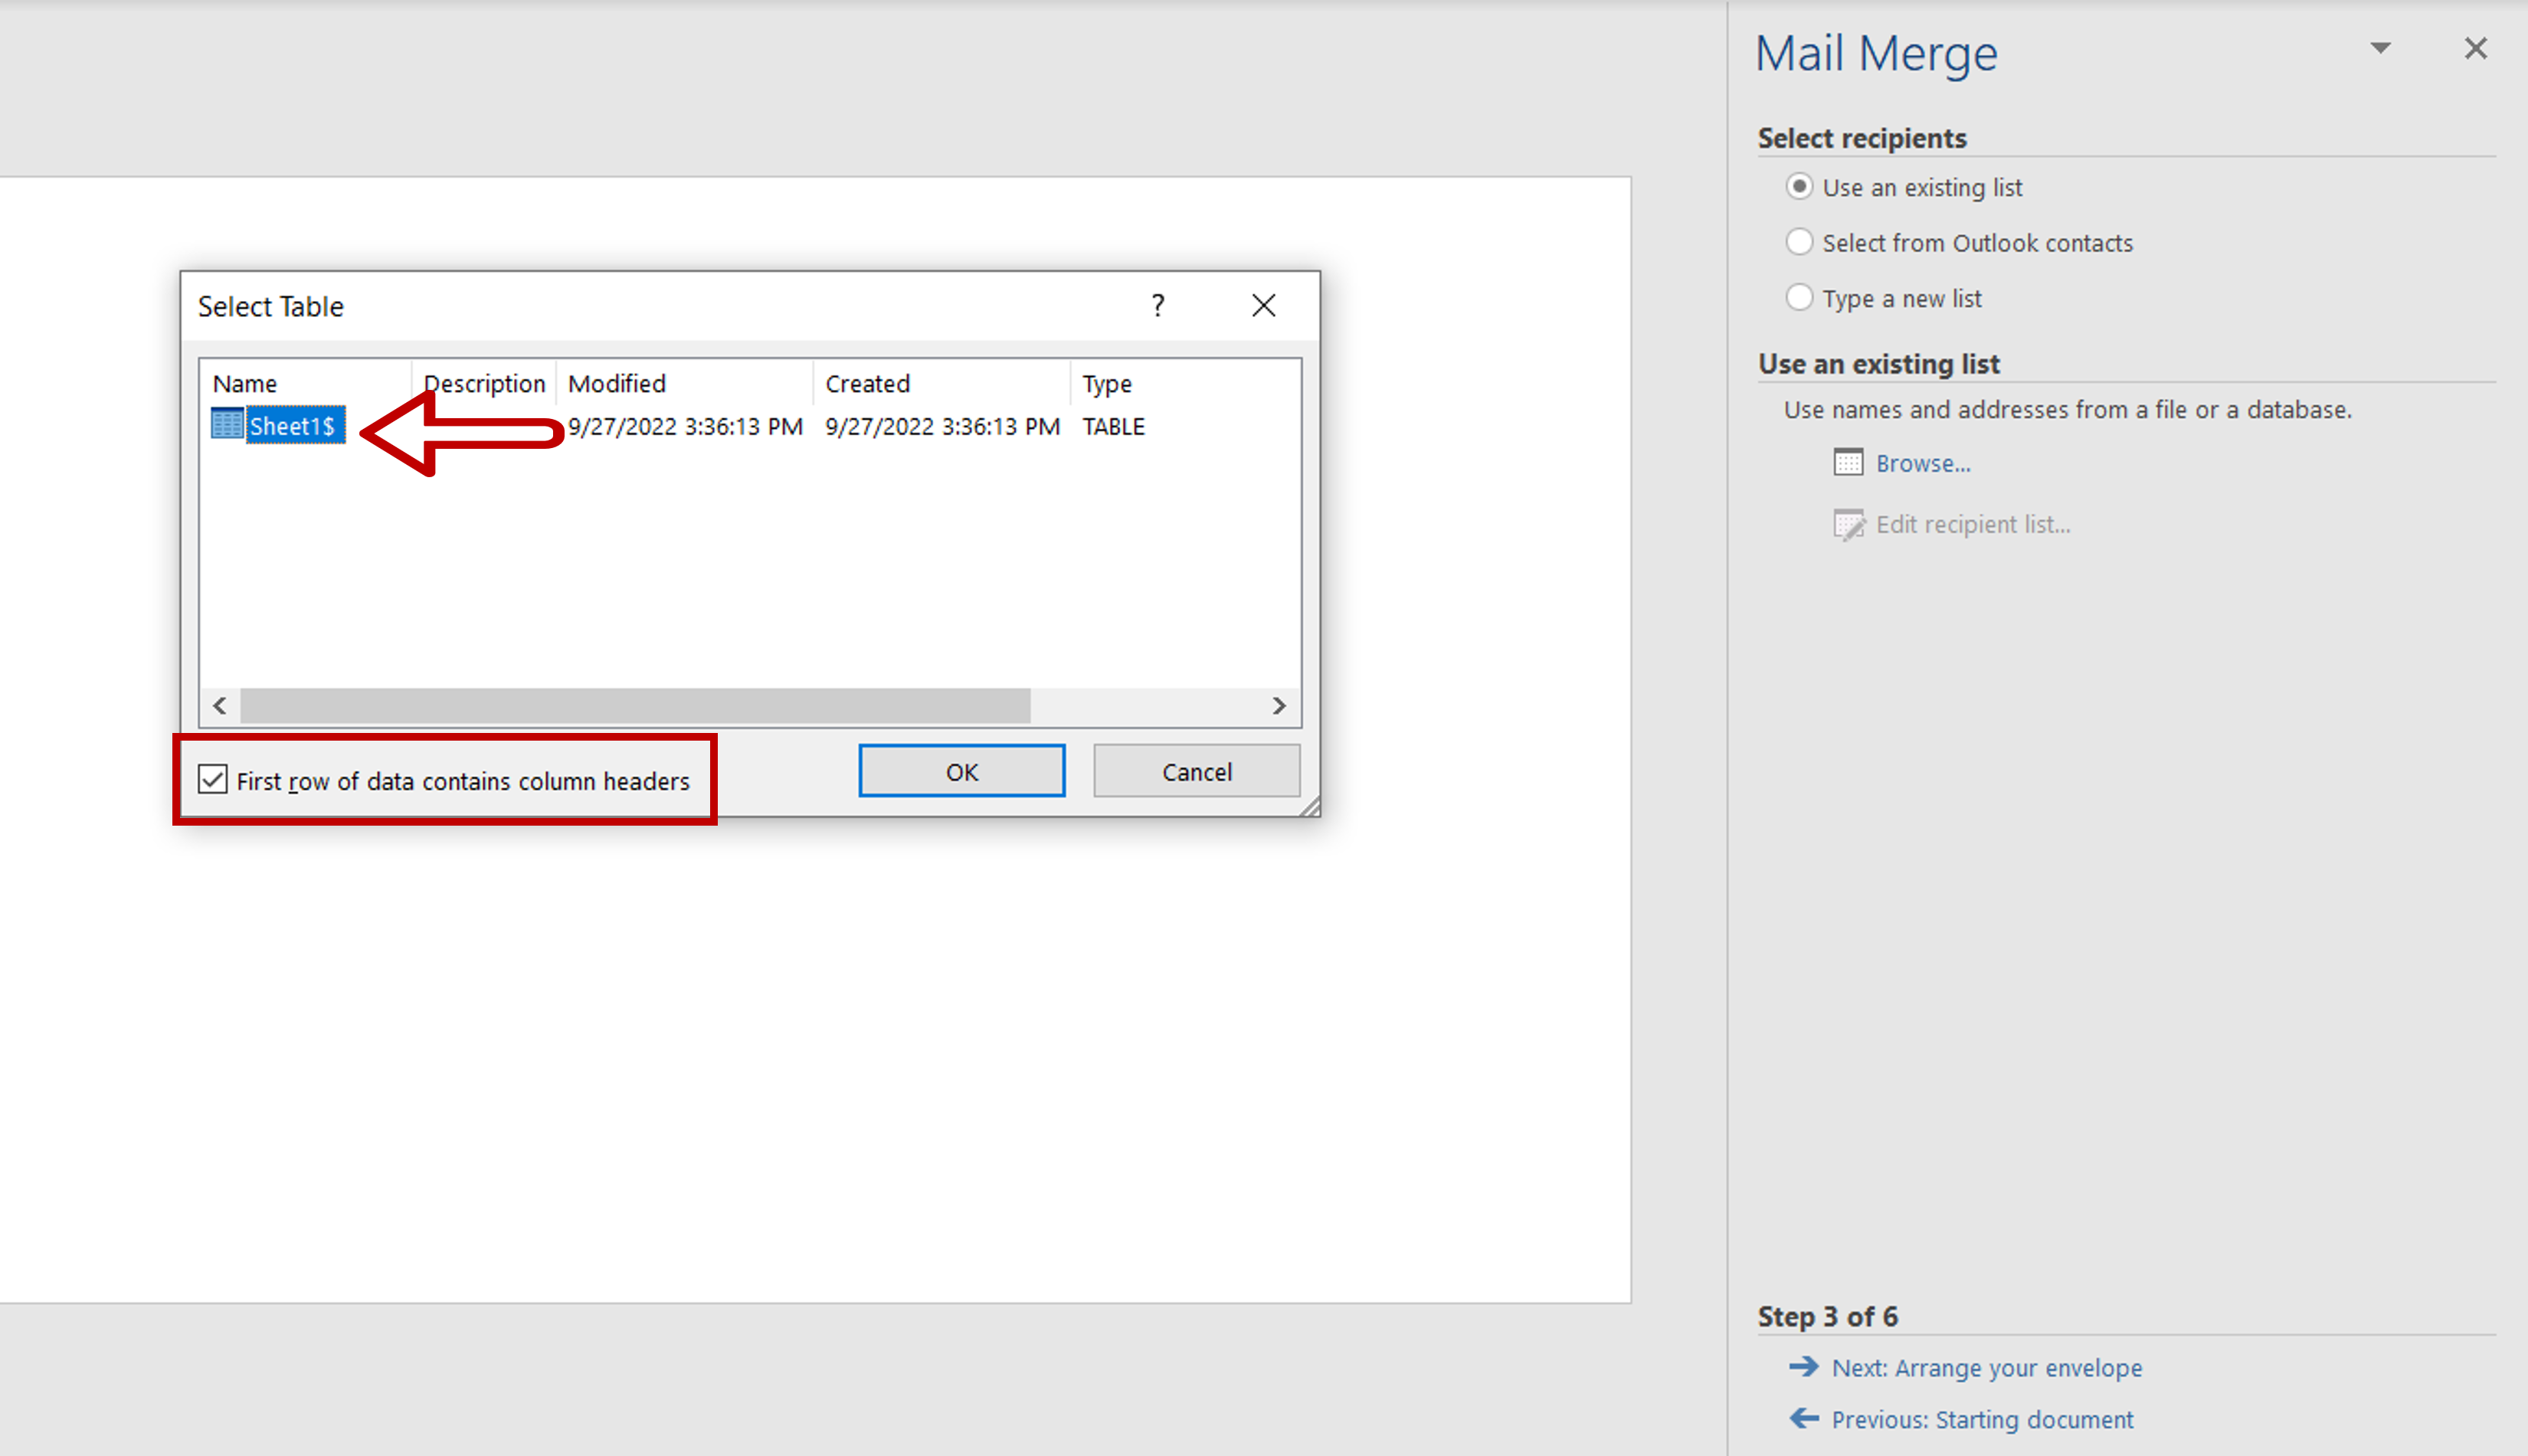
– Select the sheet from the workbook that contains the addresses
– If the sheet has column headers, tick First row of data contains column headers
– Click OK
Step 8 – Check the list of addresses
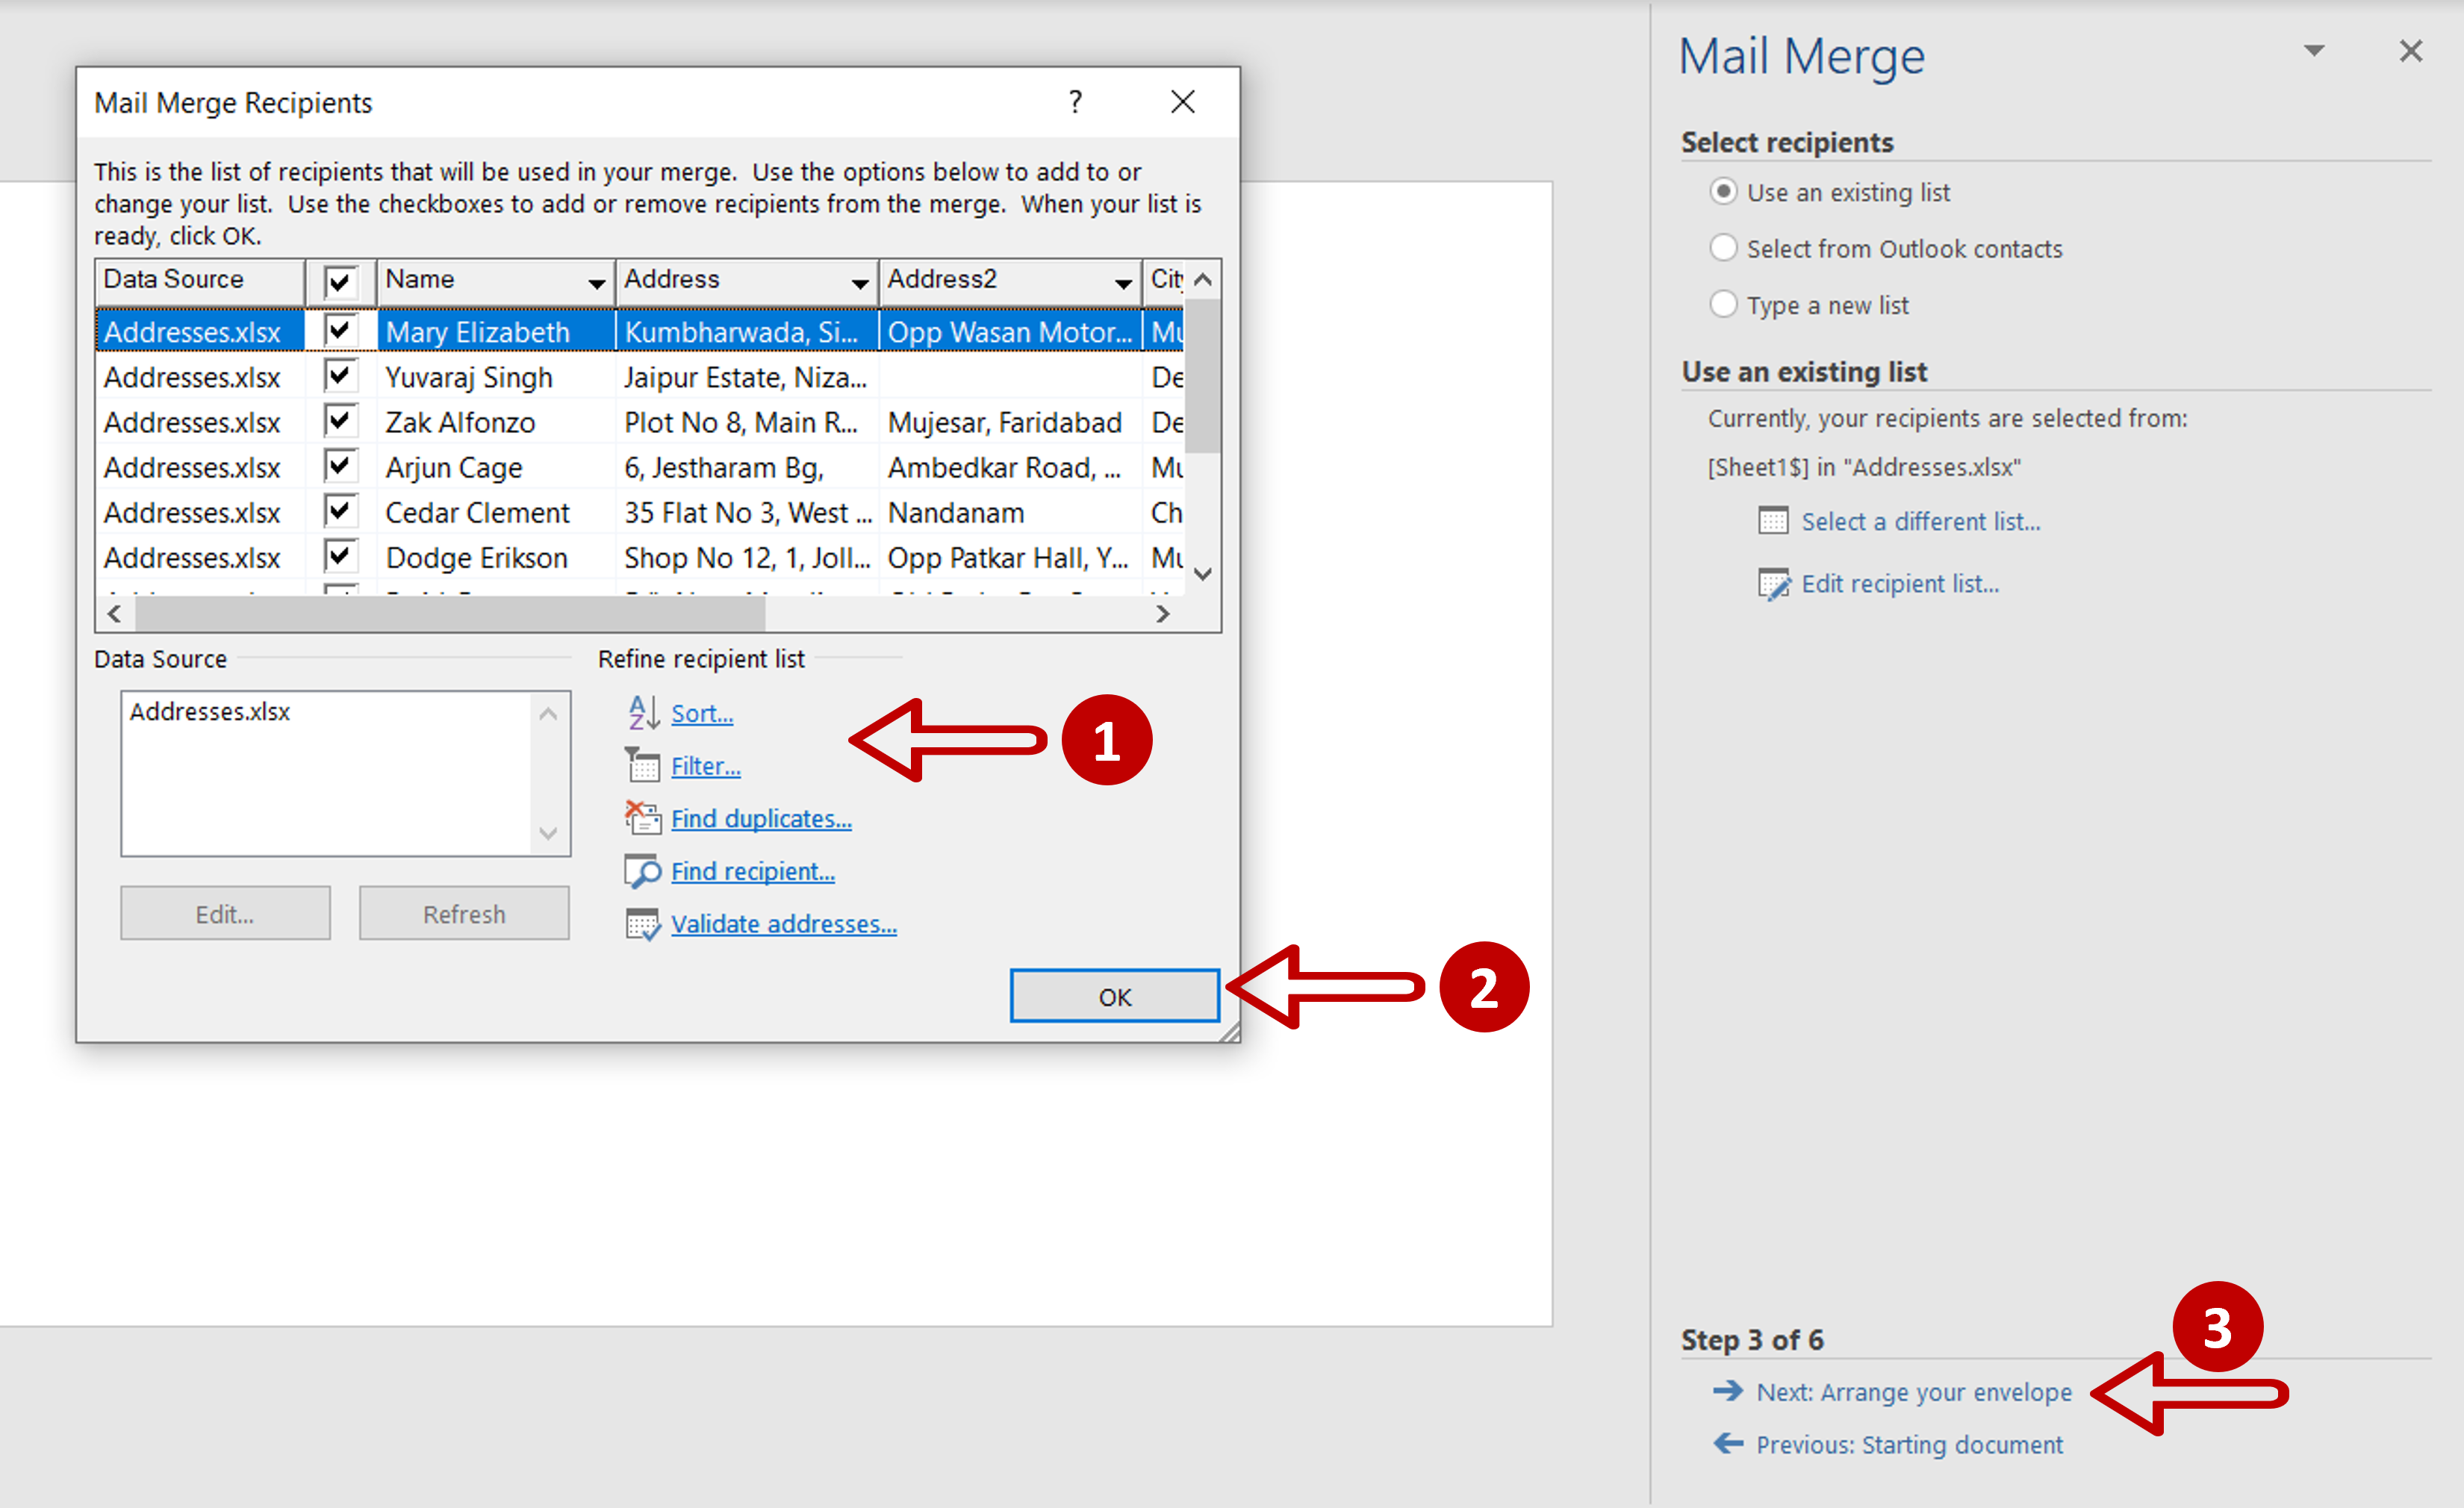
– Check that the addresses are the ones that you want
– Perform refinements, if required
– Click Next: Arrange your envelope
Step 9 – Arrange your envelope
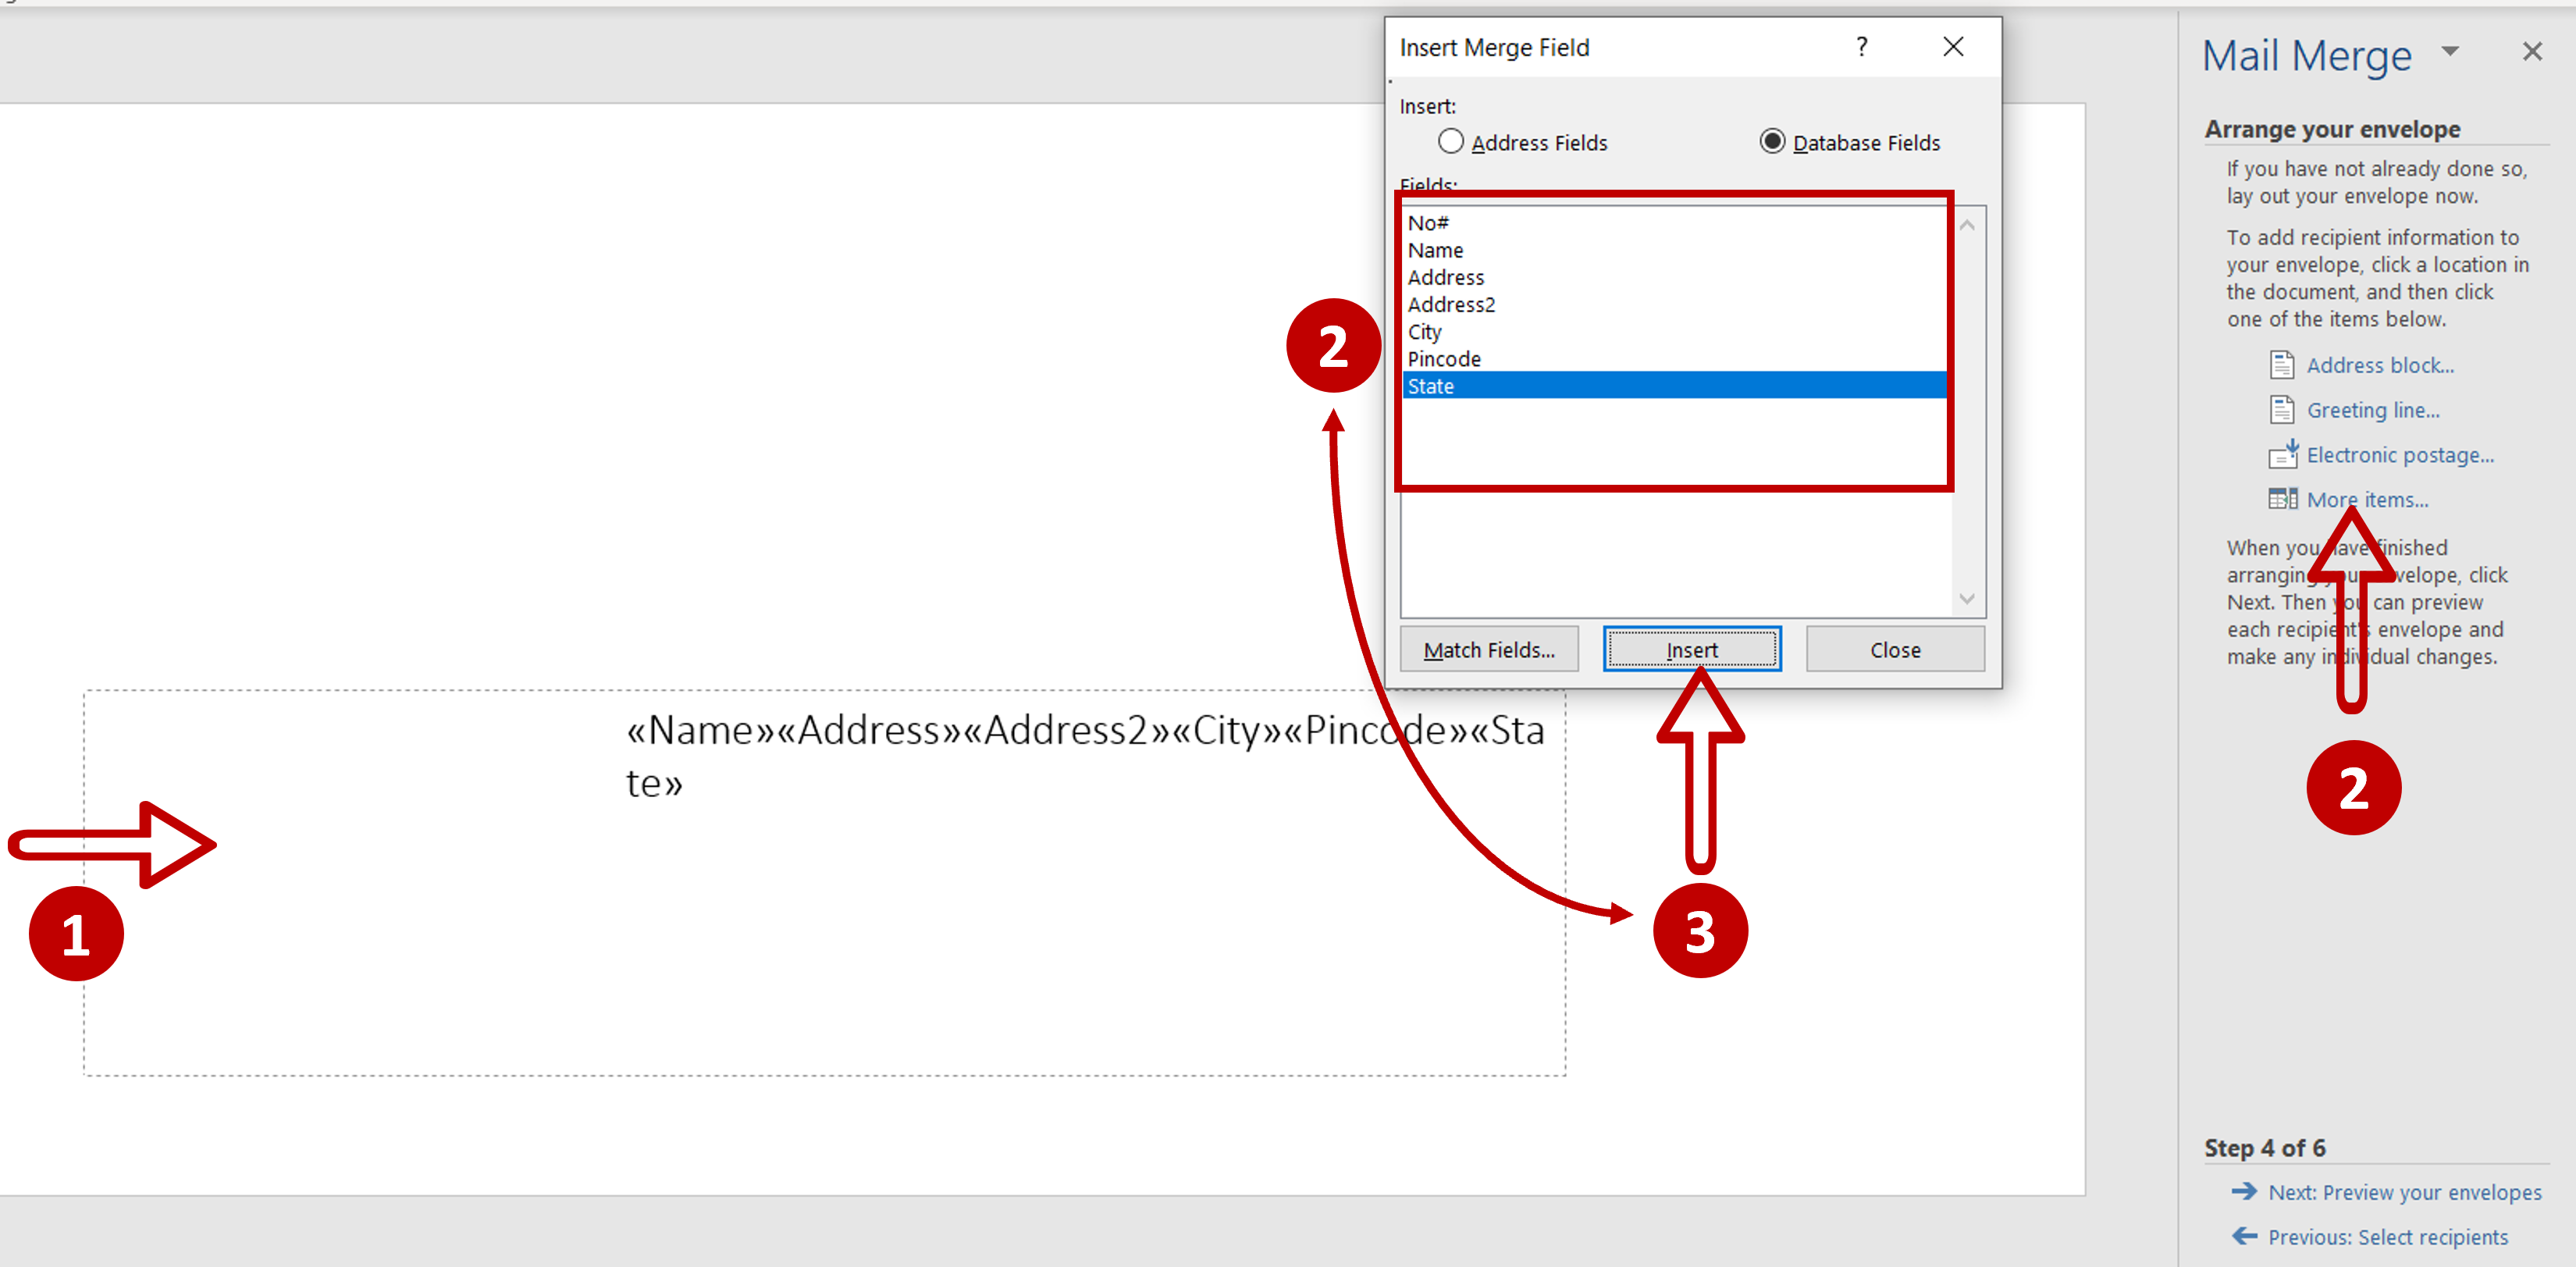
– Place the cursor in the address area by clicking on it
– Click More Items
– From the Insert Merge Field window, insert each field into the document one-by-one
– Click OK
Step 10 – Arrange the fields
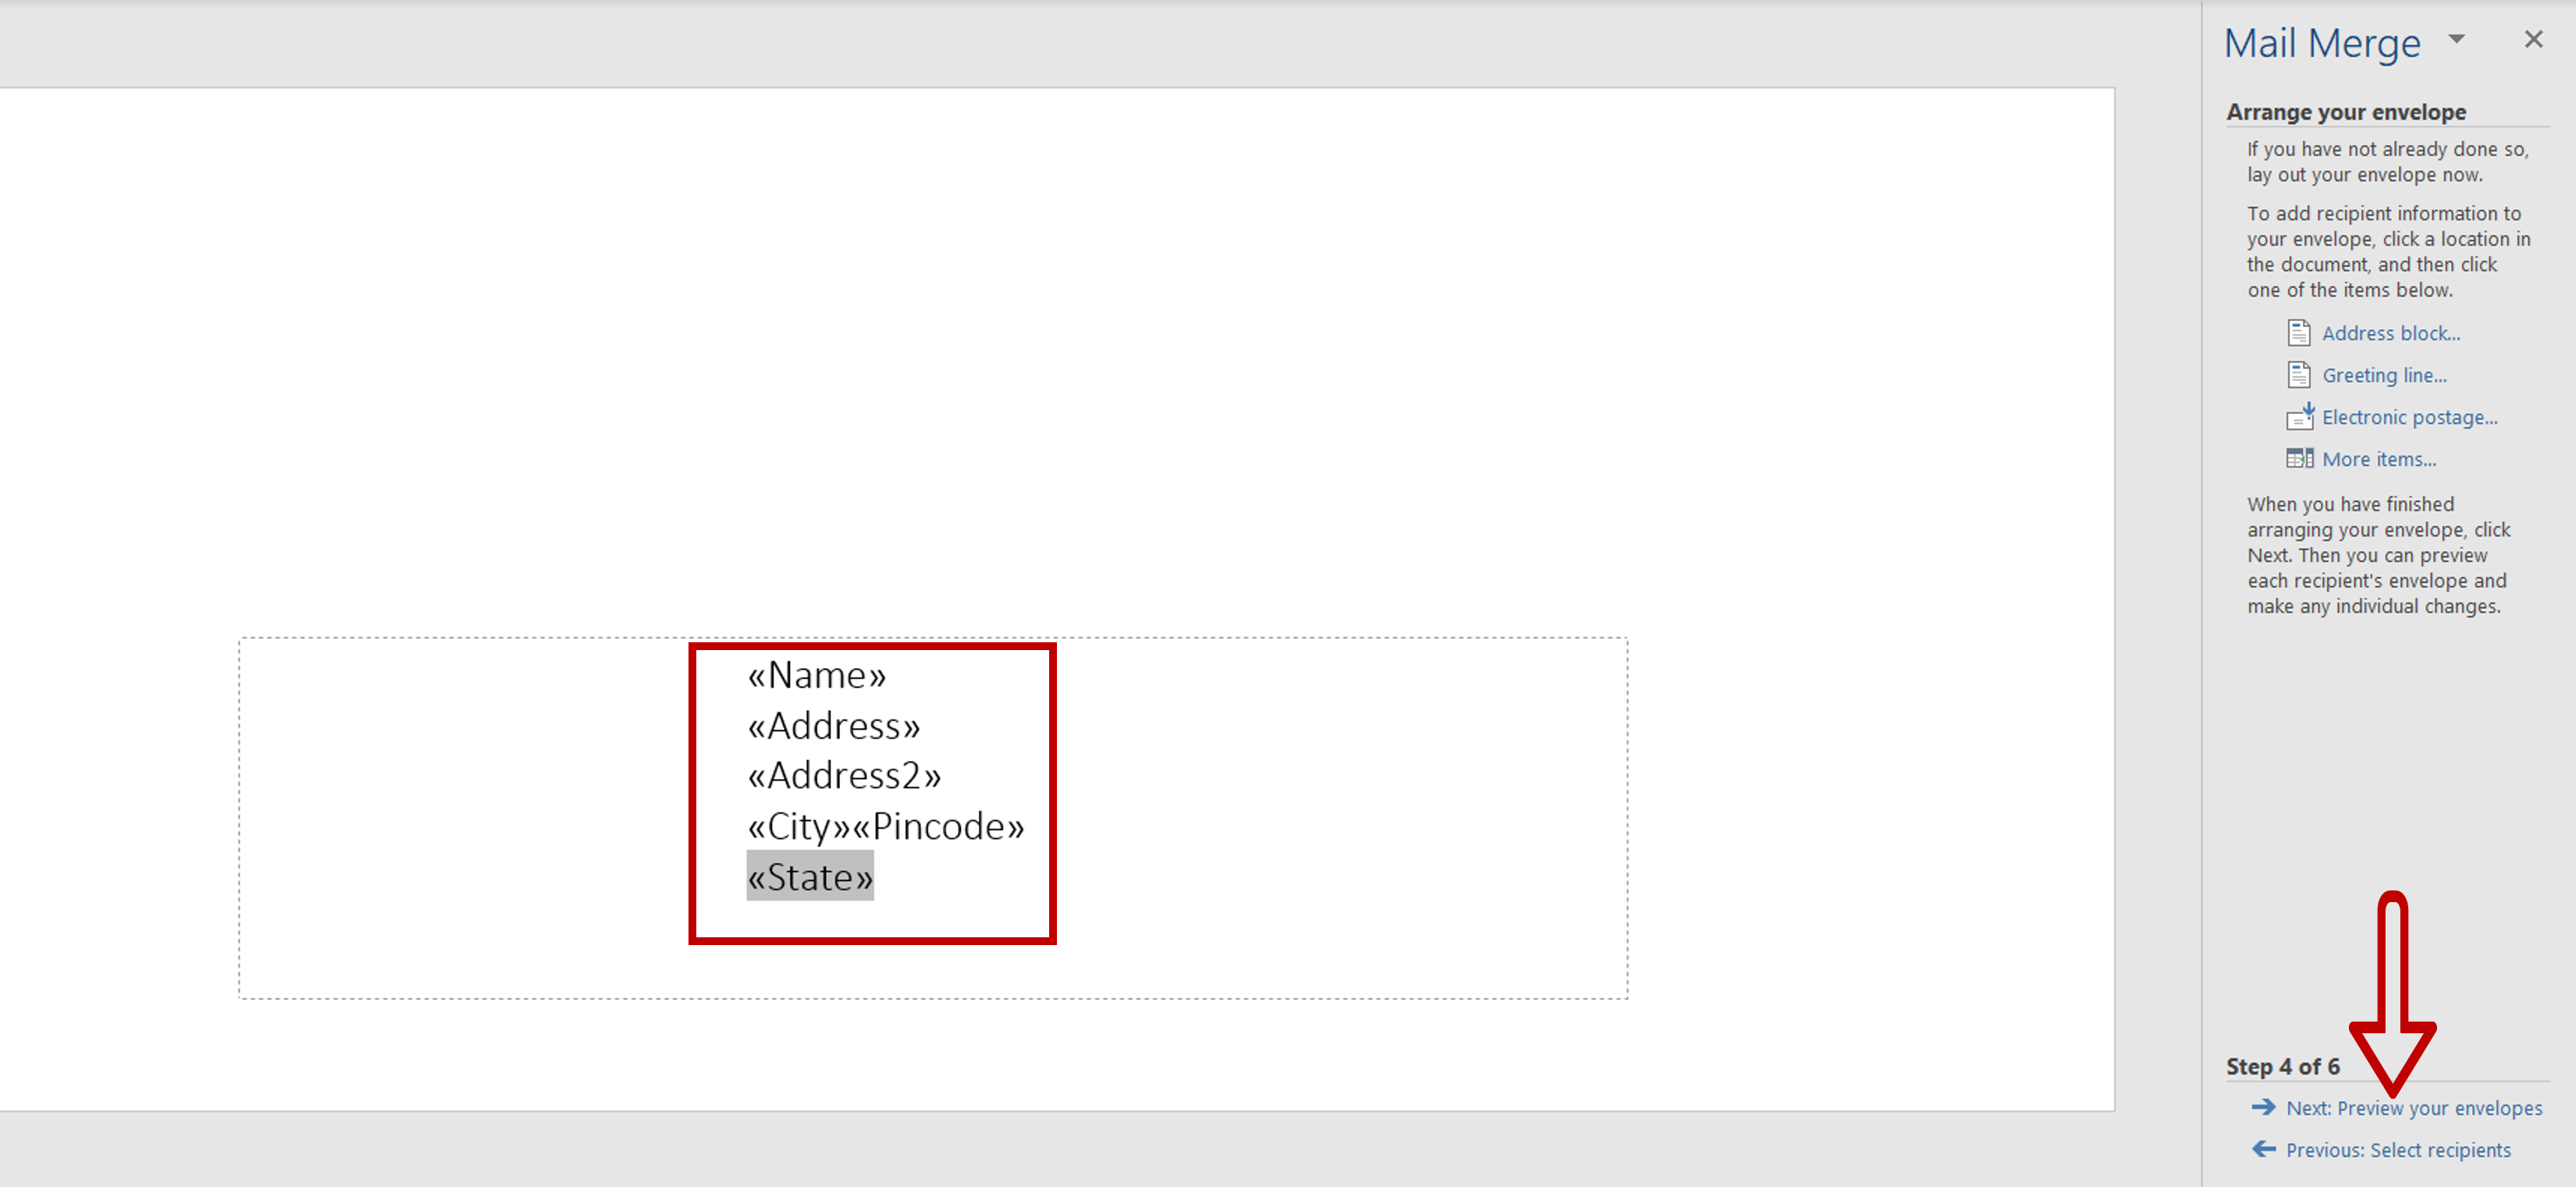
– Arrange the fields in the style of your choosing
– Click Next: Preview your envelopes
Step 11 – Preview the envelopes
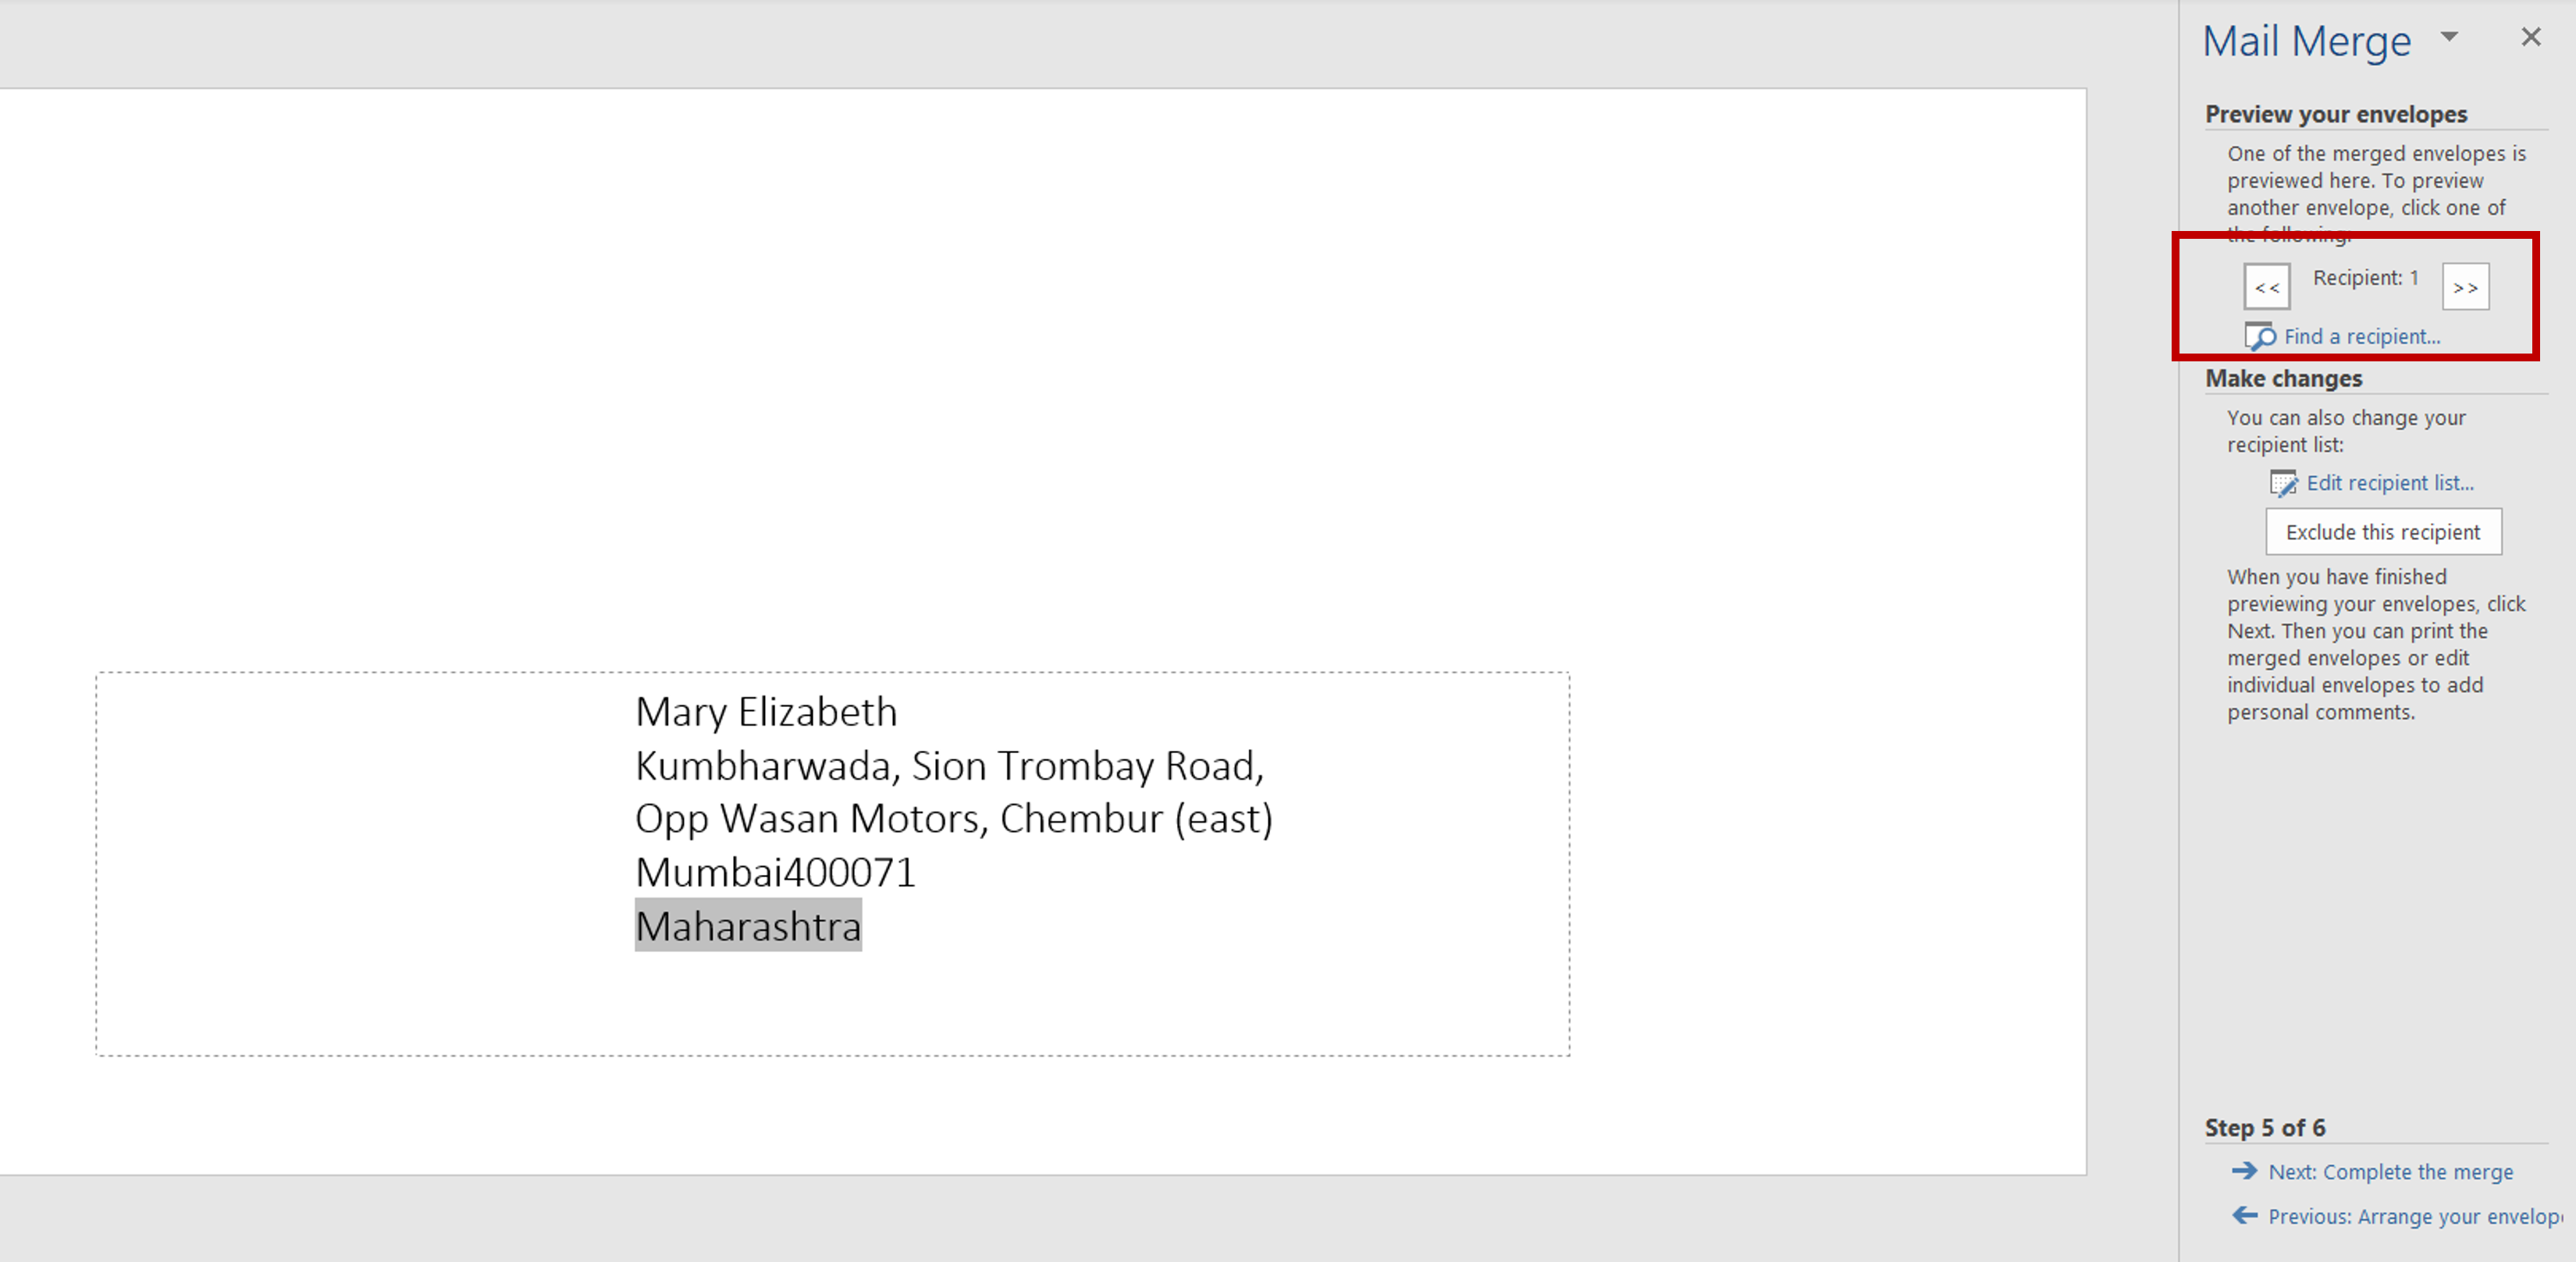
– Using the buttons, scroll through the recipients and make changes if needed
– Click Next: Complete the merge
Step 12 – Complete the merge
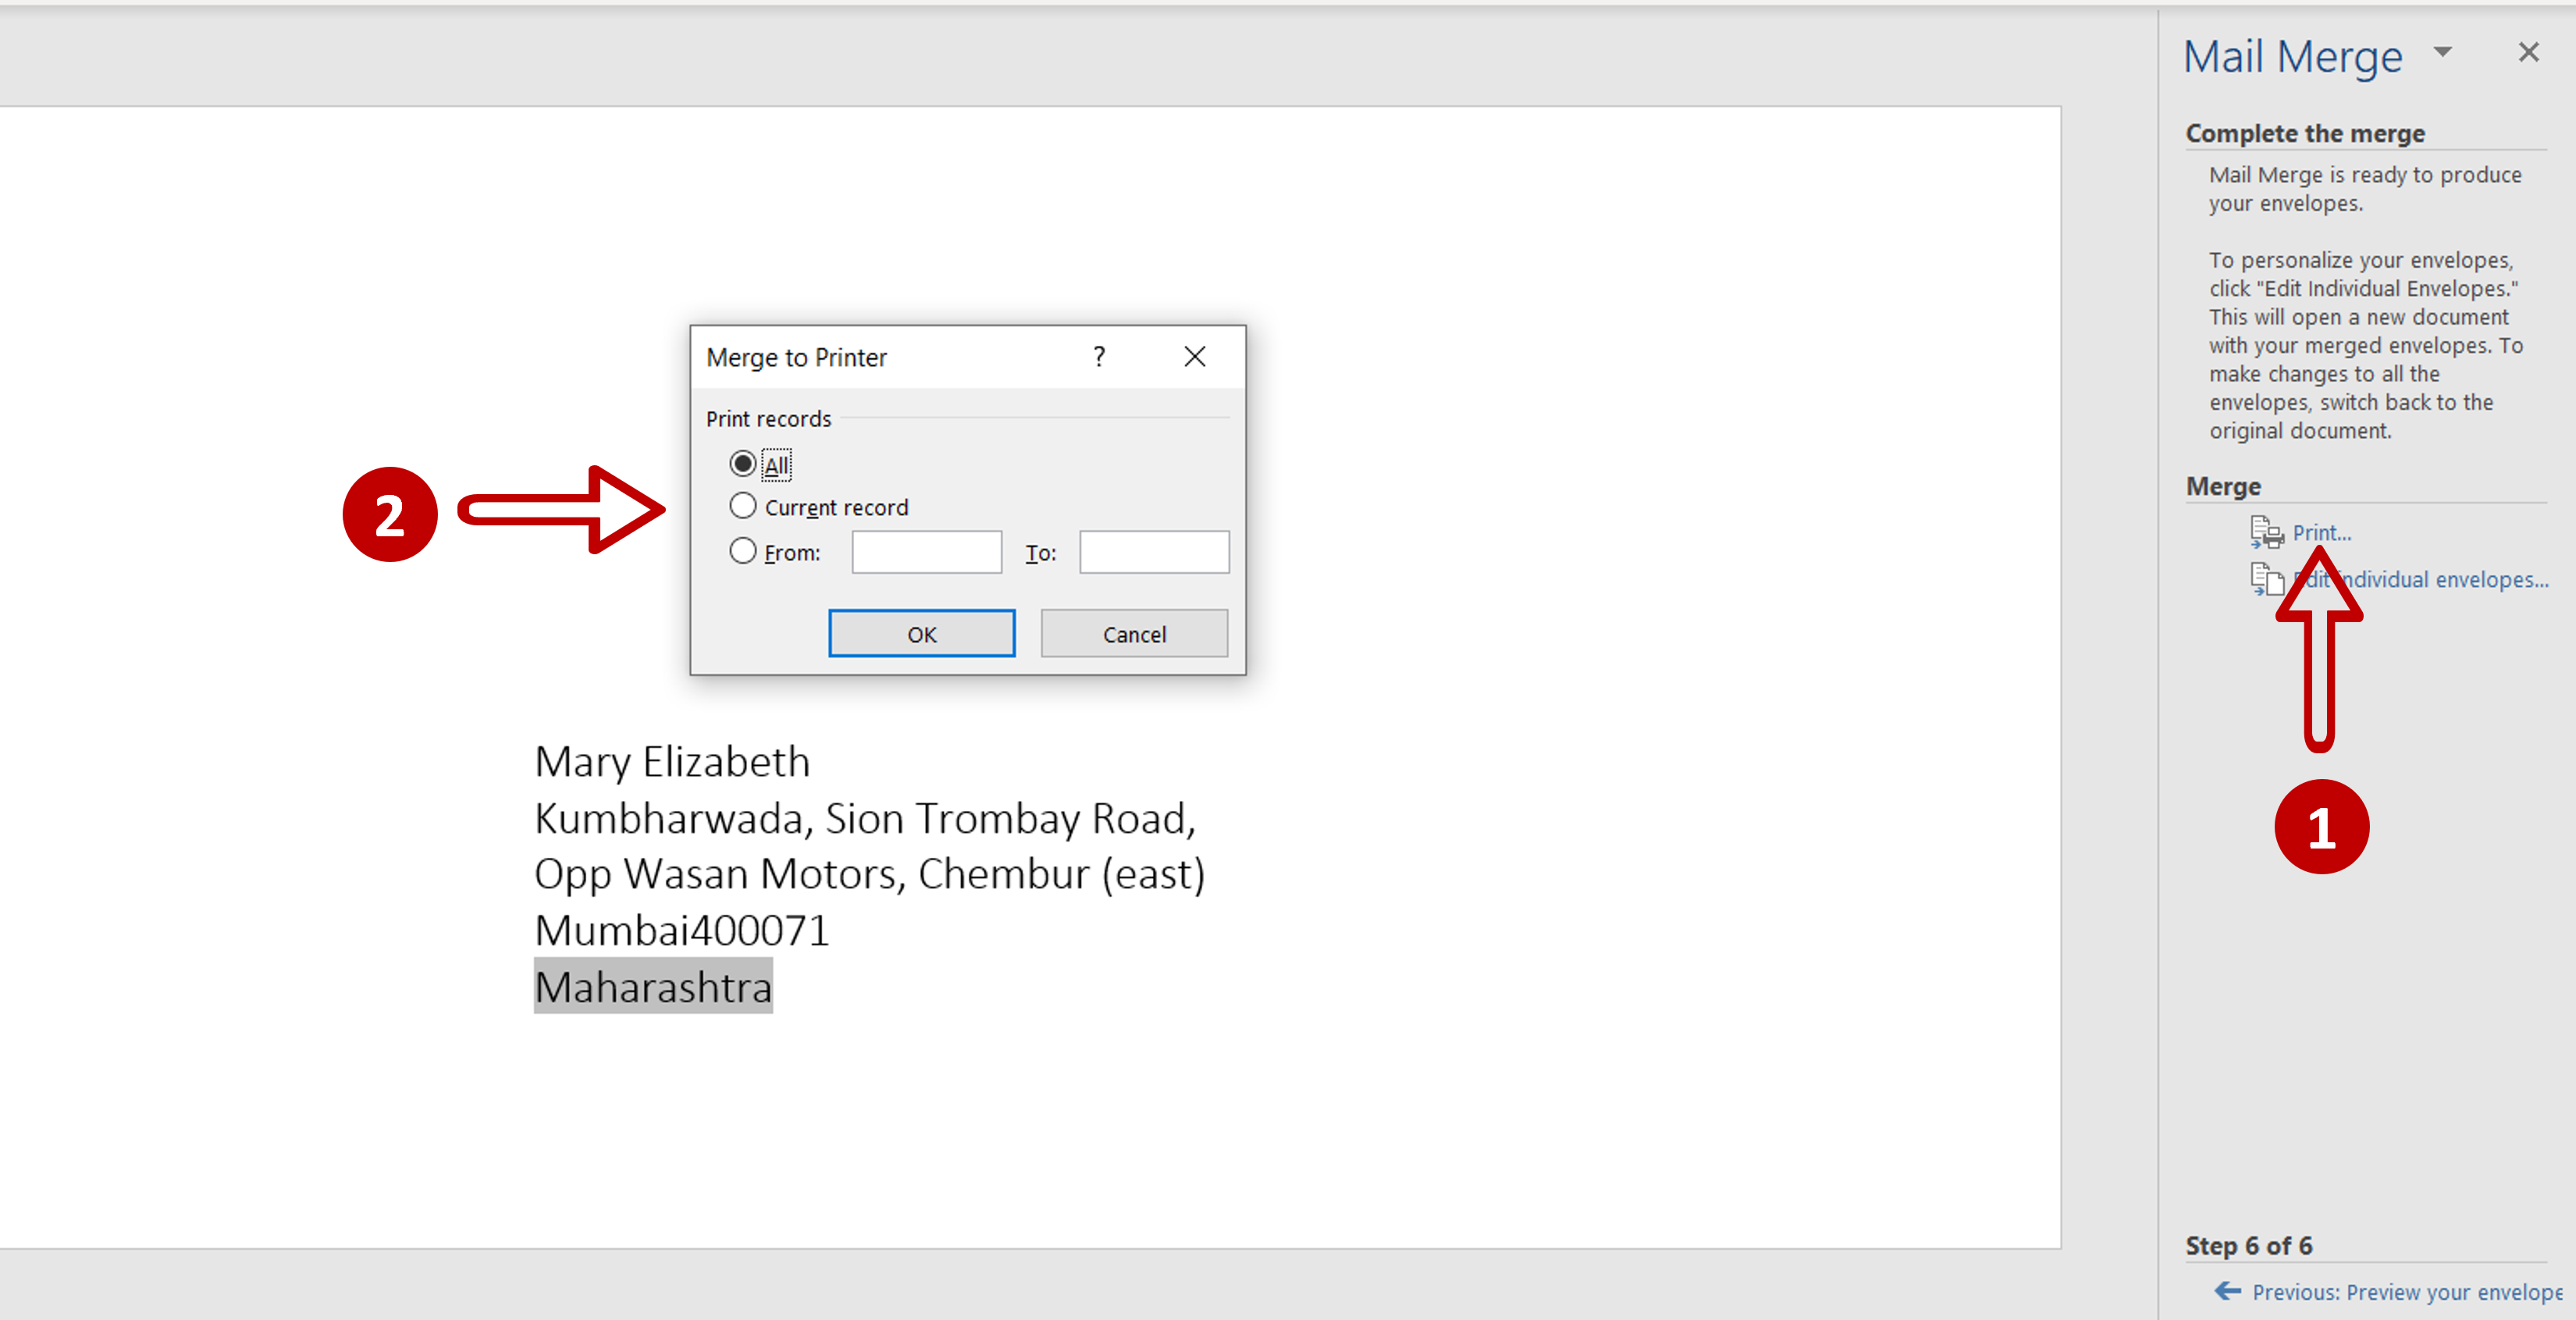
– Select Print to send the output to the printer
Note: Select Edit individual envelopes to save the output to a new Word document
– Choose whether to print all the records or only a subset
Step 13 – Choose the printing options

– Choose the printer
– Adjust the printing options or proceed with the default settings
– Click OK


