
How to Plot a Graph for an Equation in Excel
 By
SpreadCheaters
By
SpreadCheaters

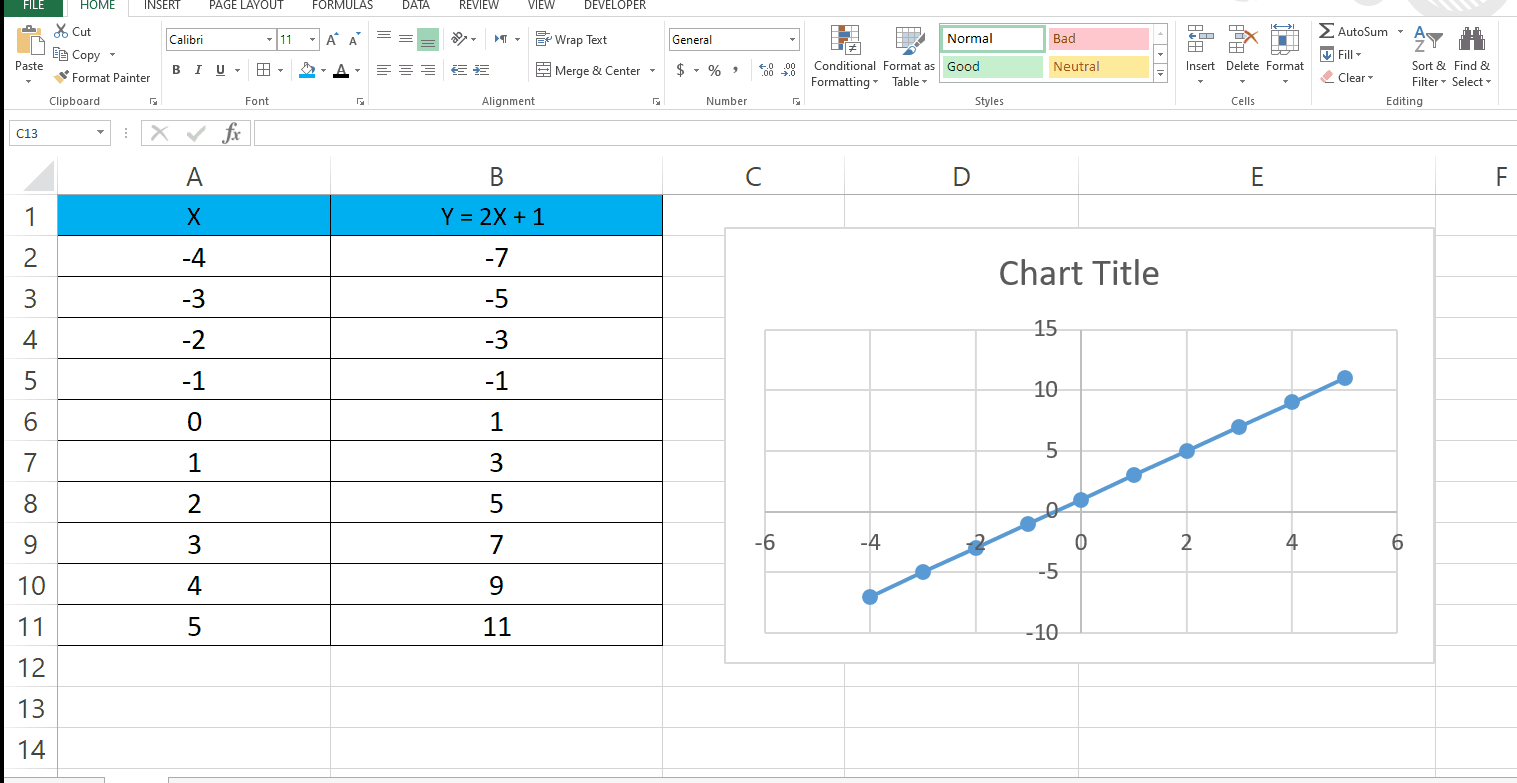
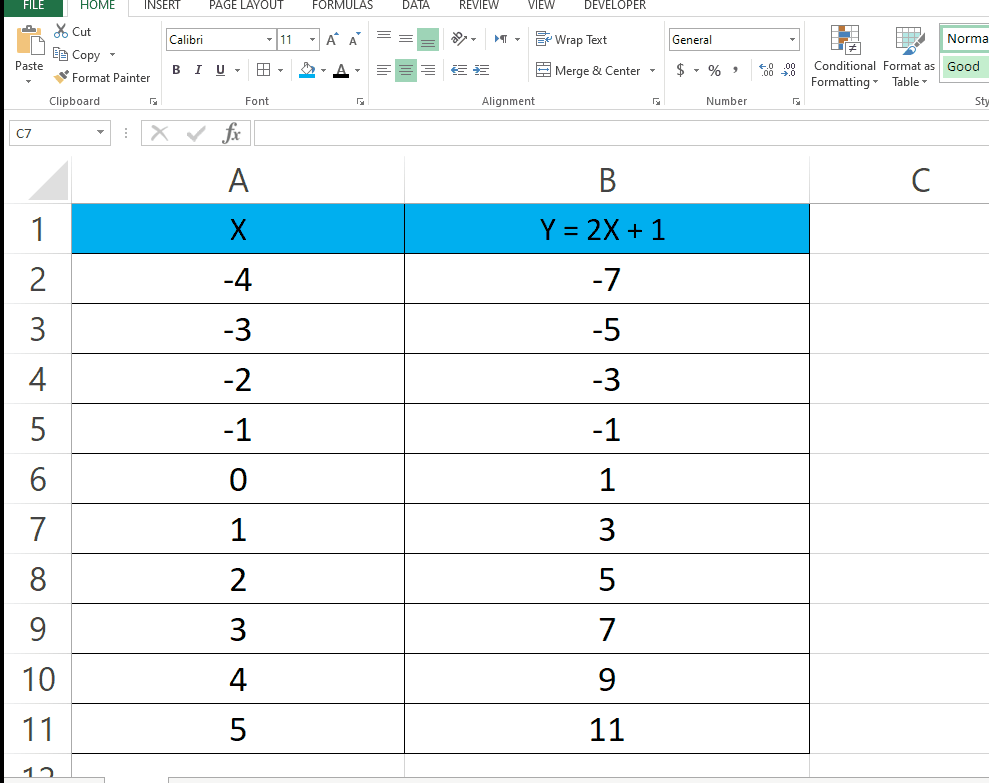
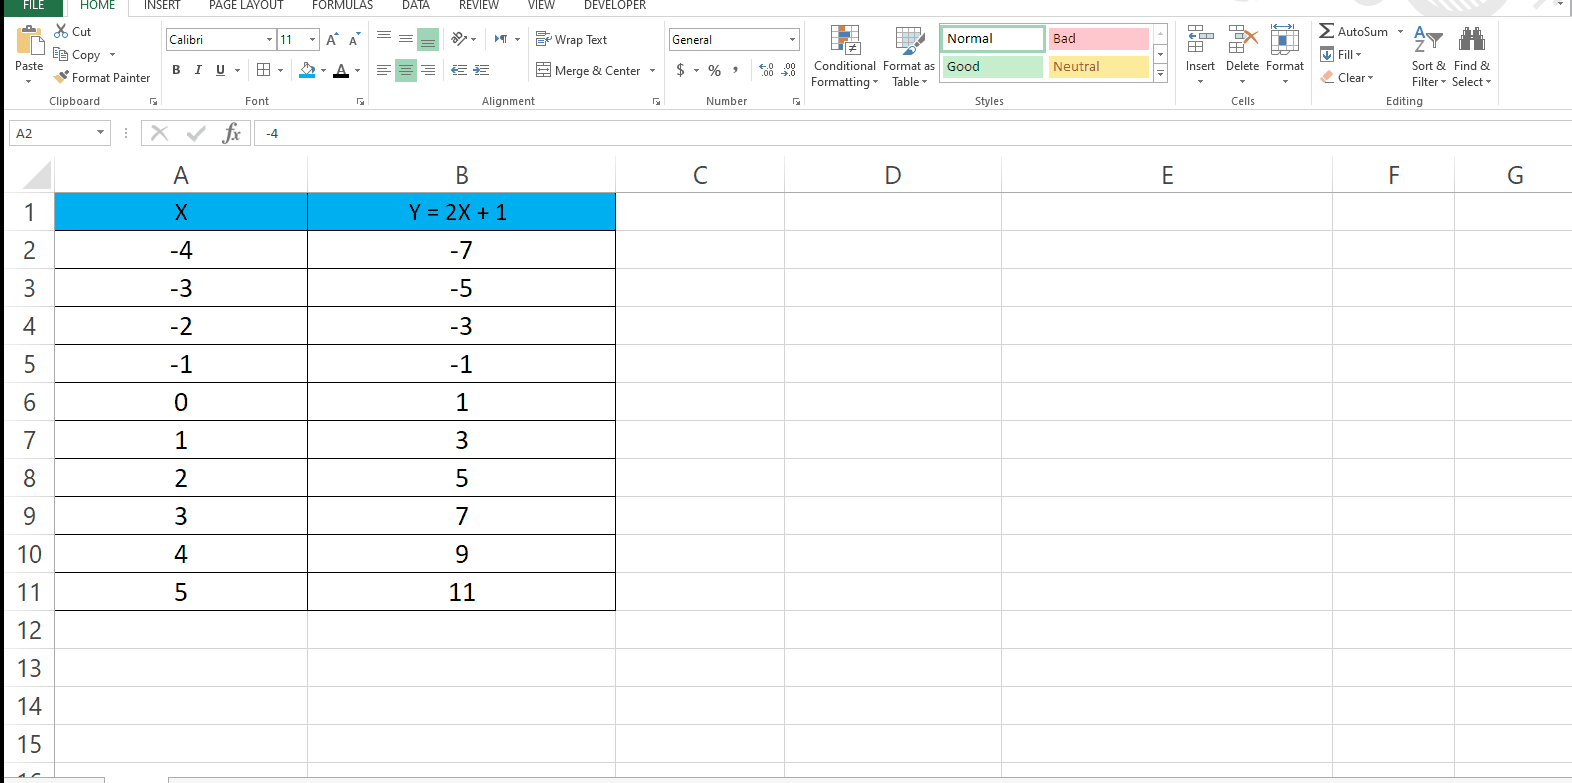
Here we have an equation Y = 2X + 1 of which we will be plotting a graph using excel. In our dataset we have X values and Y values (from equation). Steps to plot a graph for this Equation are given below, let’s first have a look at the Dataset above.
Graphing equations is a fundamental concept in mathematics, and Excel is a great tool for visualizing equations. Whether you’re a student or a professional, Excel can help you plot equations and better understand how they behave. In this tutorial, we’ll walk you through the steps to graph an equation in Excel.
Step 1 – Select the data for which you want a graph
– Click on the cell where you want to start selecting and drag it to the last cell.
Step 2 – Plot the Graph
– After selecting the data go to the Insert tab.
– In the Charts group choose the type of graph you want.
– In our case we used a Scatter plot.
Step 3 – You can choose different designs

– Once you’ve created the graph you can choose different designs available.
– First of all click on the graph.
– Go to the Design Tab and choose the design you want.


