
How to password protect an Excel File
 By
SpreadCheaters
By
SpreadCheaters
Excel provides a built-in feature to protect the files through passwords. When an excel file is locked with a password, it can’t be opened without providing the right password. In this tutorial we’ll learn how to add a password to excel file to protect it.
Excel is very widely used by many companies to maintain all types of data ranging from stock details, employee information, salary details, monthly budget details etc. This data might be very important to the company and the managers might not want to give access to the secret data files to anyone else. In this case, the manager would need to protect the file.
Step 1 – Go to File —> Info —> Protect Workbook —> Encrypt with Password
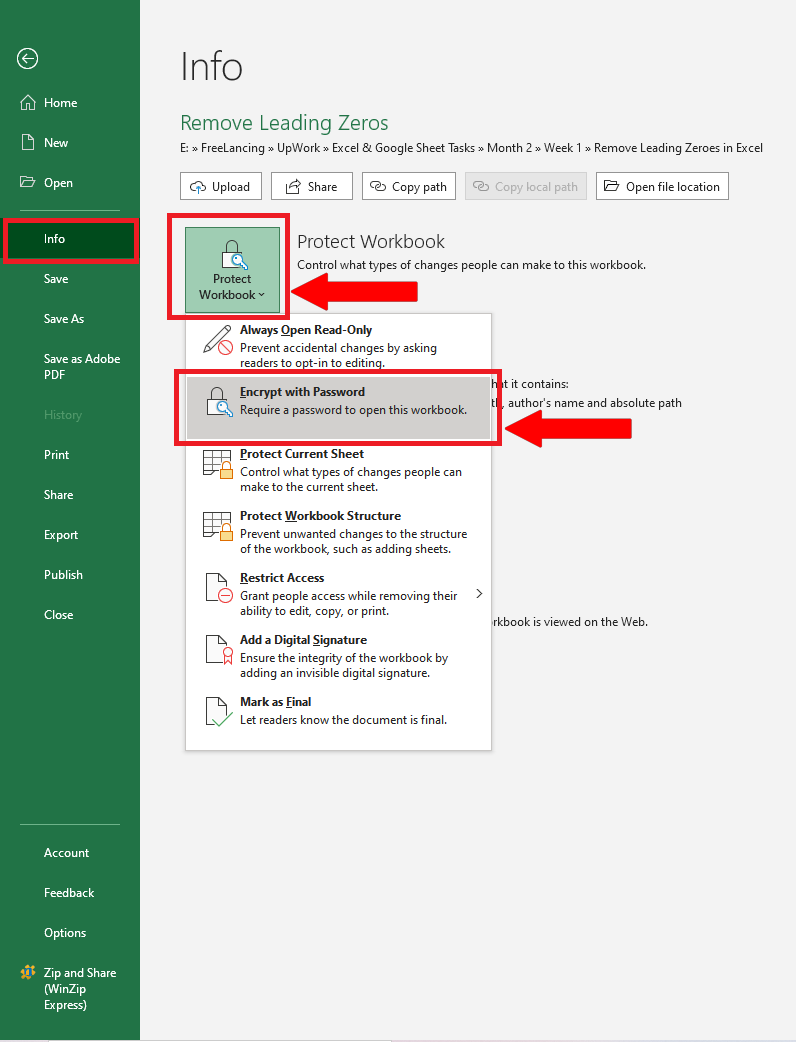
– The process is fairly simple to add a password to the excel file, so for this purpose click on the File menu.
– Then click on Info and then click on Protect Workbook then choose Encrypt with Password.
Step 2 – Choose a strong password

– When you click on the encrypt with password button a small dialog box will appear and will ask you to enter the password.
– Choose a strong password and remember it carefully, because if you forget the password then you won’t be able to open the file without it.
– Once you enter the password, you will be asked to re-enter the password. As soon as you enter the password the file will be protected and Excel will show that a password is required to open this file from now on.
Step 3 – Open the file with password
– Once the file is protected with a password, it can only be opened after provision of the correct password. Otherwise the file won’t open.


