
How to open an Excel file as read-only
 By
SpreadCheaters
By
SpreadCheaters
Page last updated:
24/11/2022 |
Next review date:
24/11/2024
You can watch a video tutorial here.
To protect the information in a file, it is possible to save it as a read-only file. This should be done whenever you are circulating a file that has sensitive information. To prevent viewers from intentionally or accidentally changing the data in the file, it is better to make the file read-only. The viewer will be able to change the data in a read-only file, but will not be able to save it to a new file. Changes will need to be saved to a new file. There are 2 ways in which a file can be opened as read-only.
Option 1 – Make the file read-only
Step 1 – Open the Info window

- Go to File > Info
Step 2 – Choose the read-only setting
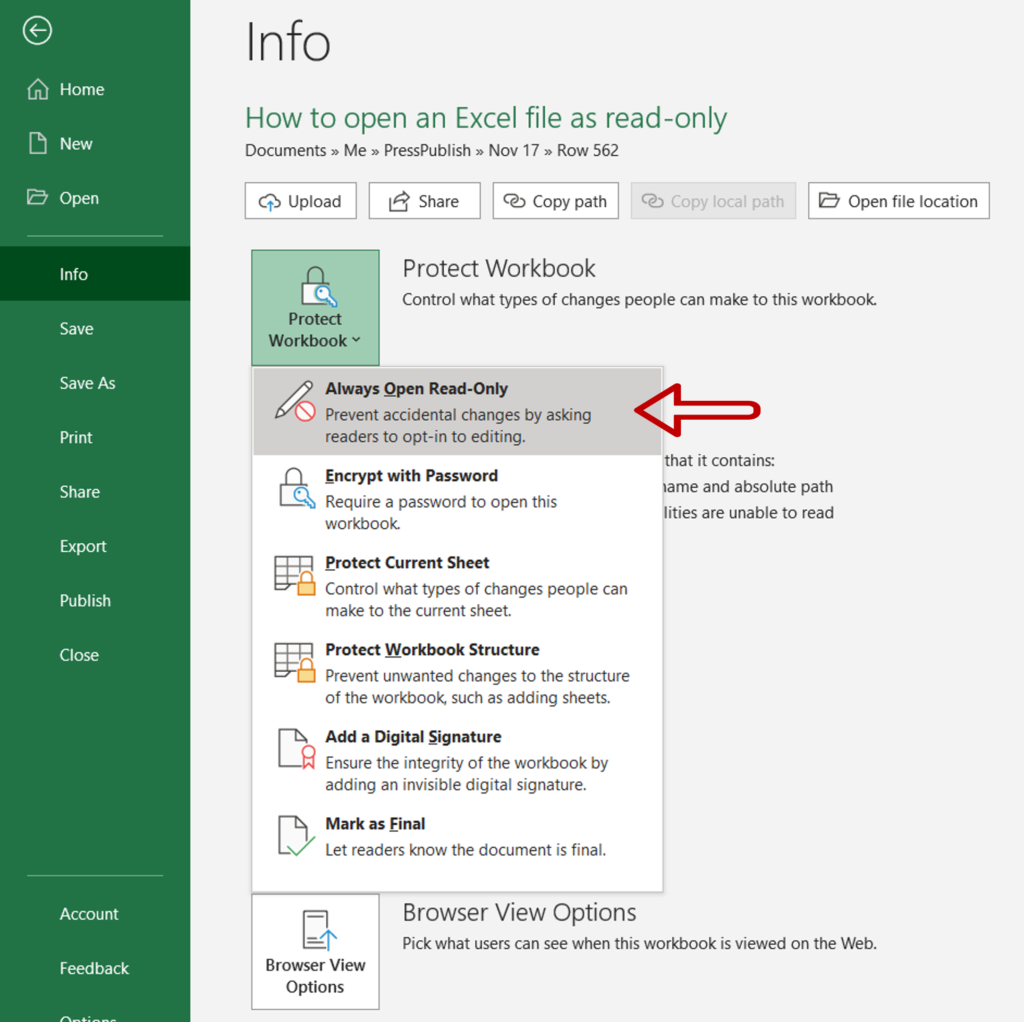
- Expand the Protect Workbook menu
- Click on Always Open Read-Only
Step 3 – Close the file
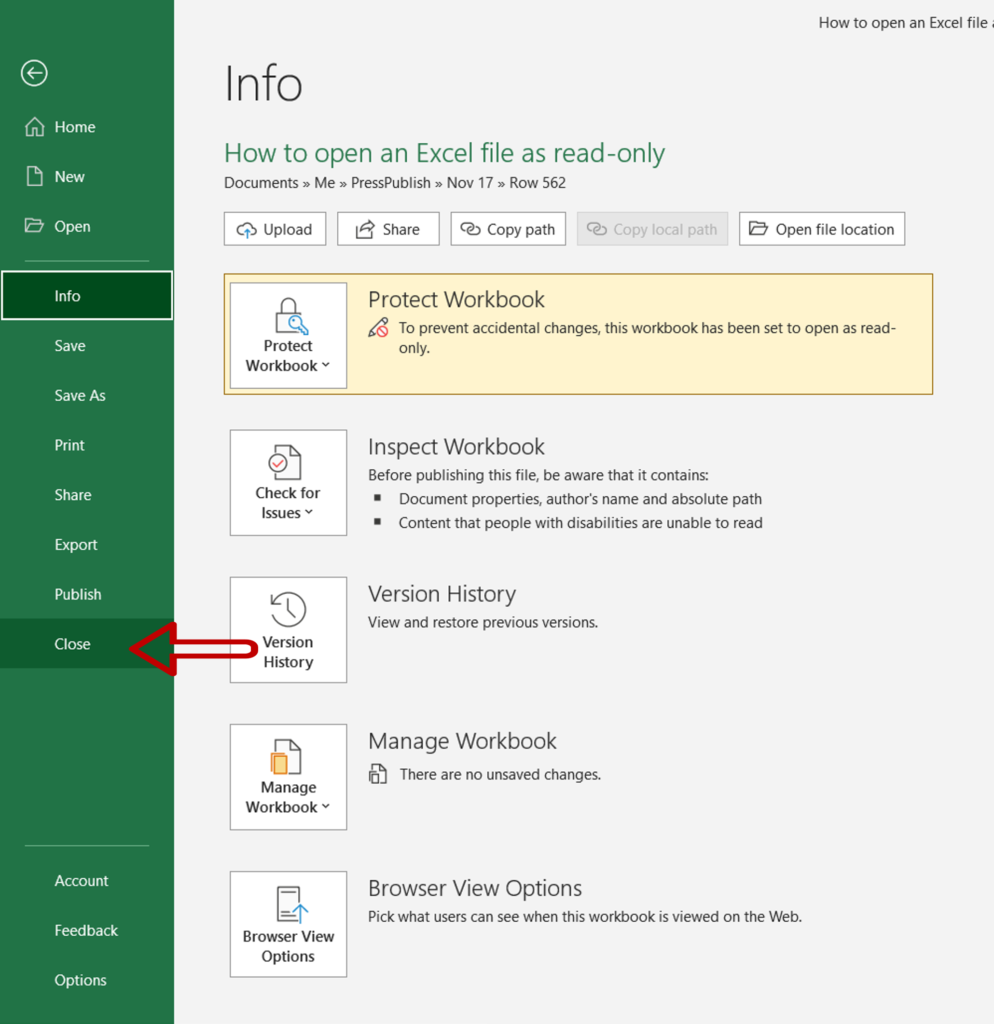
- Click Close to close the file
- Choose Yes when prompted to save the file
Step 4 – Open the file

- Double-click the file name to open it
- Click ‘Yes’ for the warning
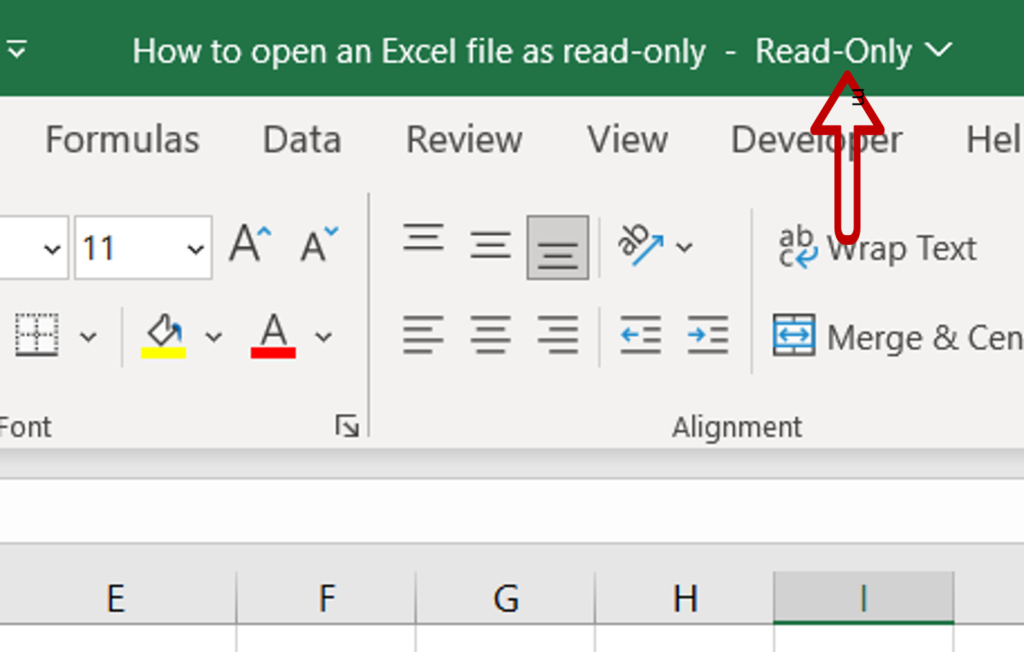
Step 5 – Check the file name
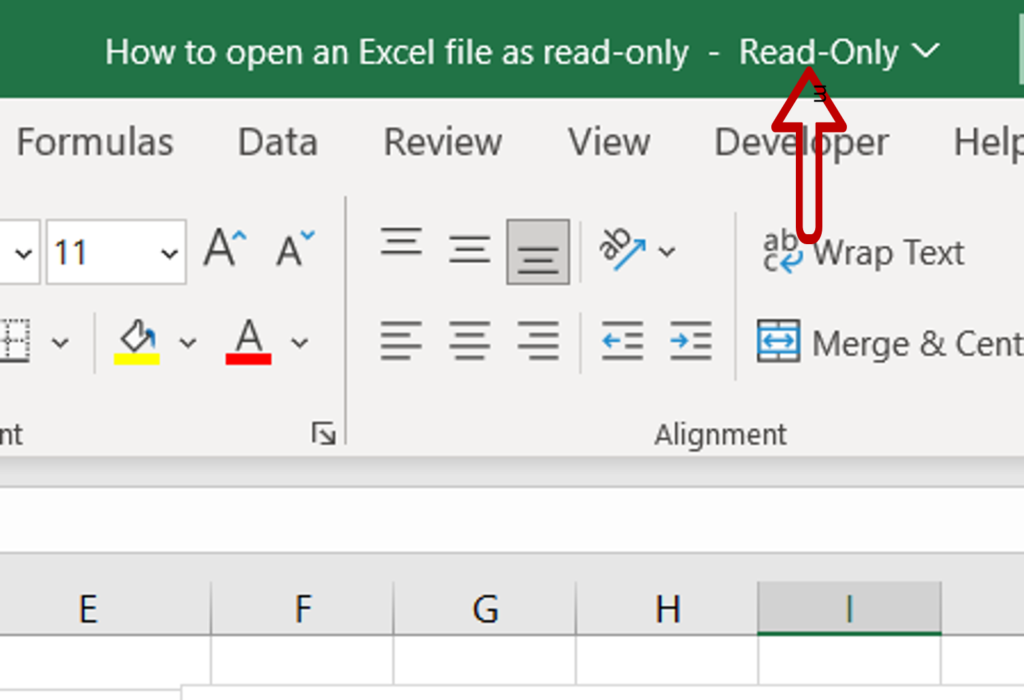
- The ‘read-only’ tag is added to the file name
Option 2 – Open as a read-only file
Step 1 – Choose the option to open a file

- From within the Excel application, go to File > Open
Step 2 – Open the file
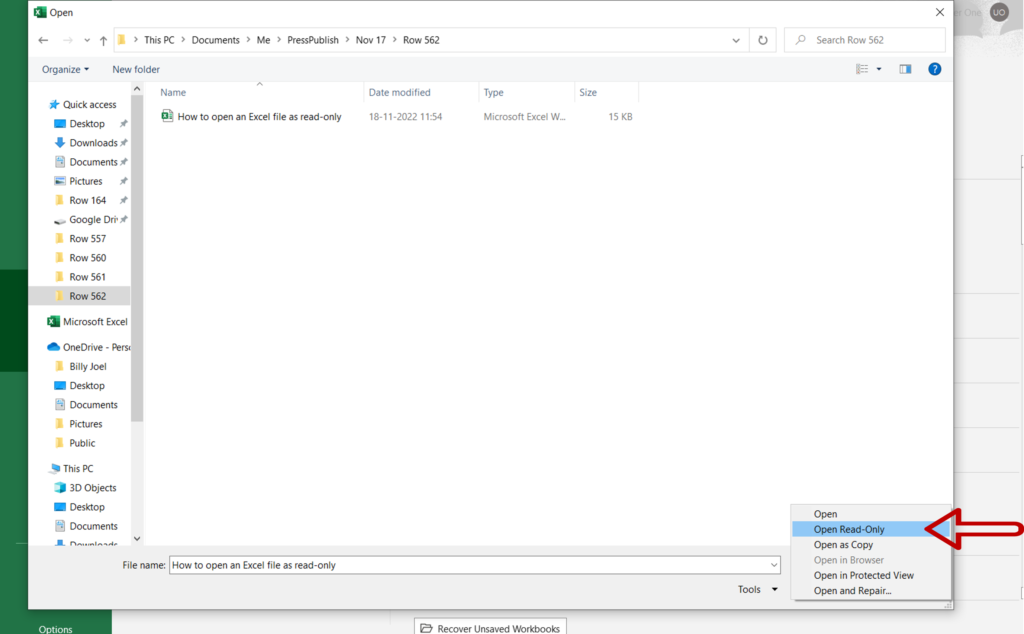
- Navigate to the file and select it
- Expand the menu adjoining the Open button
- Select Open Read-Only
Step 3 – Check the file
- The file is opened as a read-only file


