How to move rows up in Excel

Microsoft Excel is a very powerful tool for computing that contains rows and columns to manage the numeric data. It can carry billions of calculations on numeric values in a very short time. The data stored in excel has special symmetry in terms of rows and columns. Sometimes we need to shift the rows up and down to re-arrange the data to present it in a better way.
In this tutorial, we will learn how to move rows up in Excel. Here is a very simple method by which we can move rows up. Below are the steps;
Step 1 – Convert data into Table and shift rows

– Select the cell within your data range.
– Press hotkey Ctrl + T.
– A dialog box will appear, the first and last cell of the data range will be selected by default, you can change the data range here as per your condition and $ (dollar sign) used to get absolute value.
– Press OK.
– As you press the enter key. All the data will be converted into table.
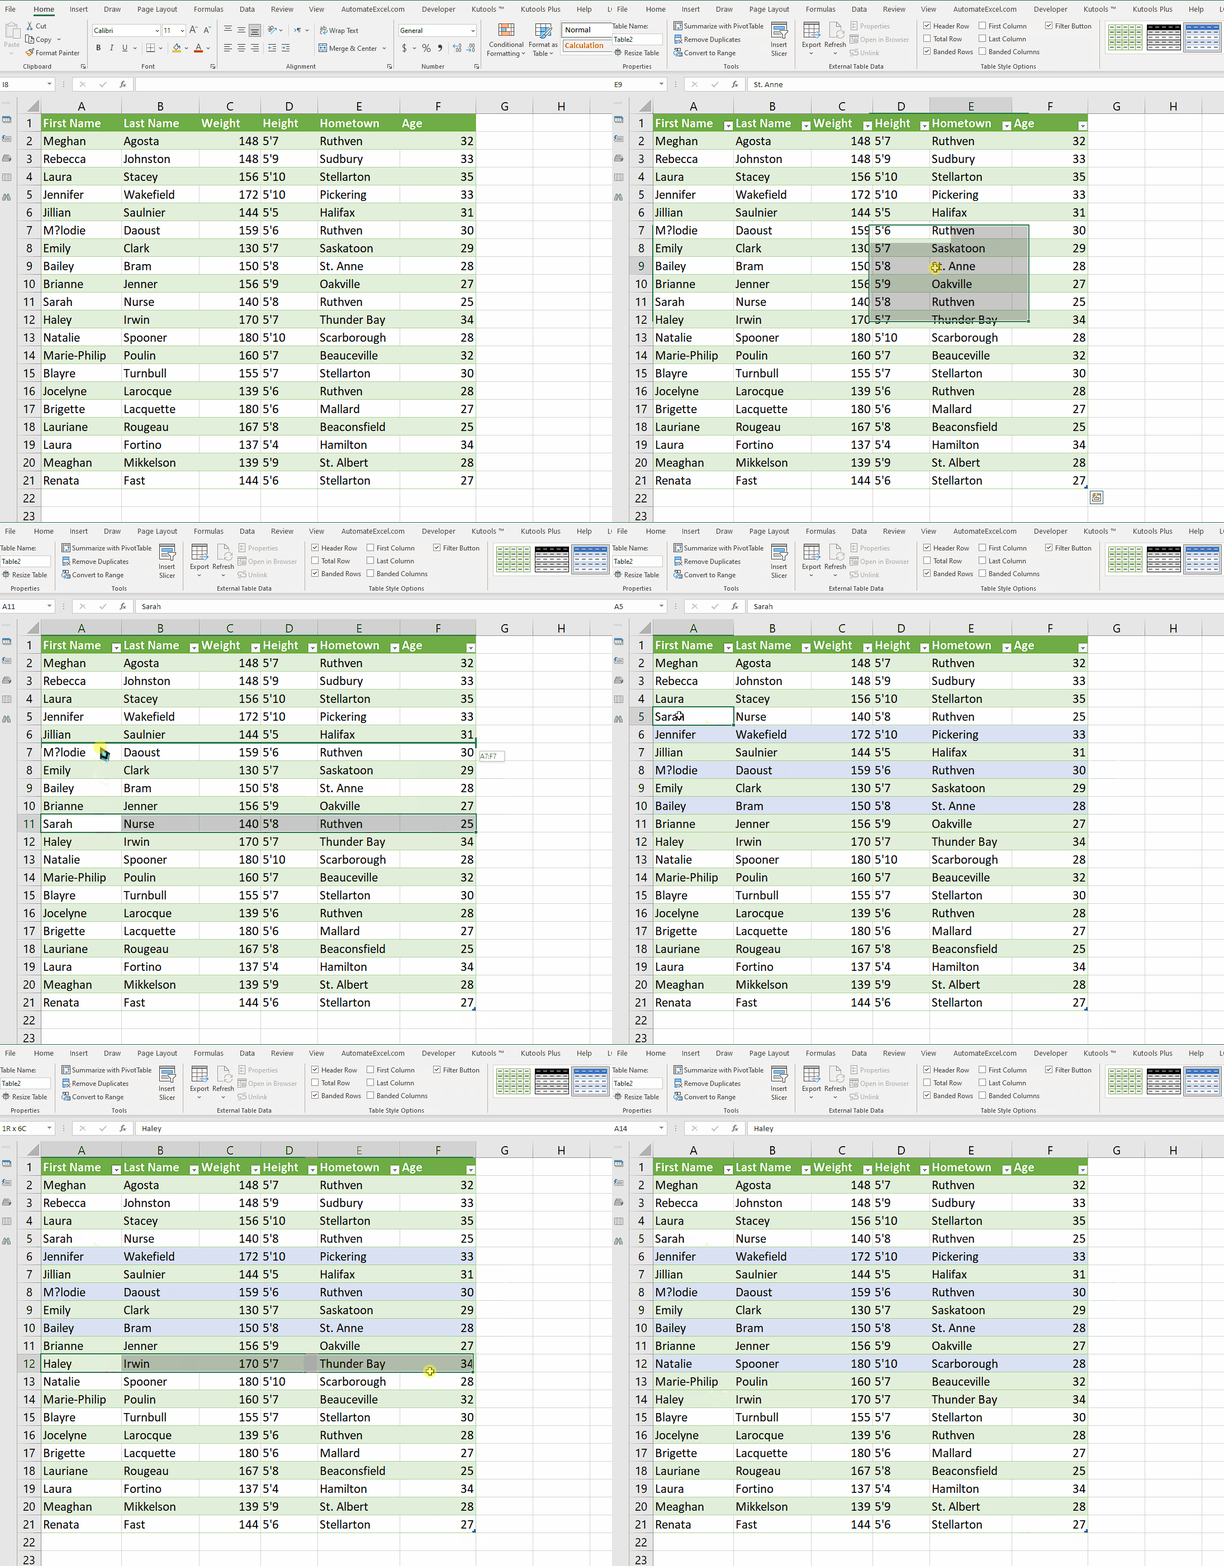
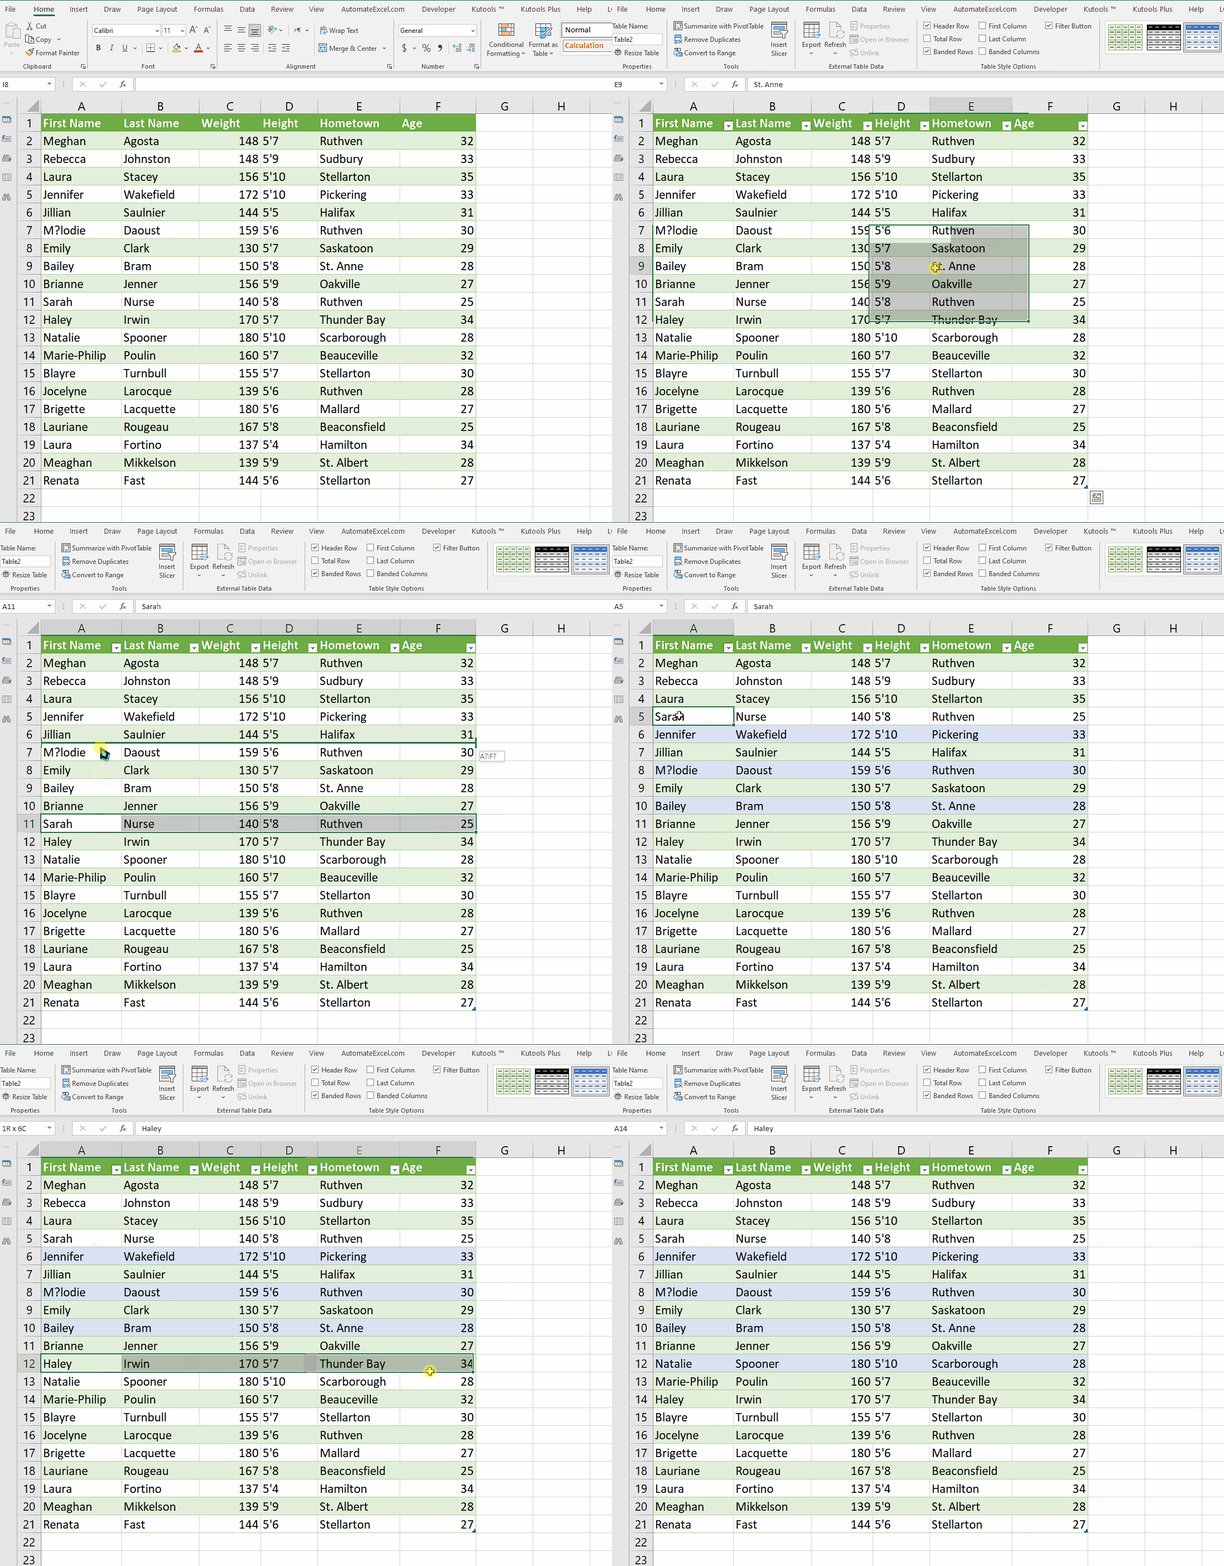
– Select the desired row by dragging the mouse over it.
– Press and hold shift key.
– Drag it to the edge selection.
– Click with the mouse and drag it up till your desired place.
– Release the mouse.
Above is an animation as an example.
Resultantly, we have been shifted rows up in Excel.


