How to move a row in Excel
You can watch a video tutorial here.

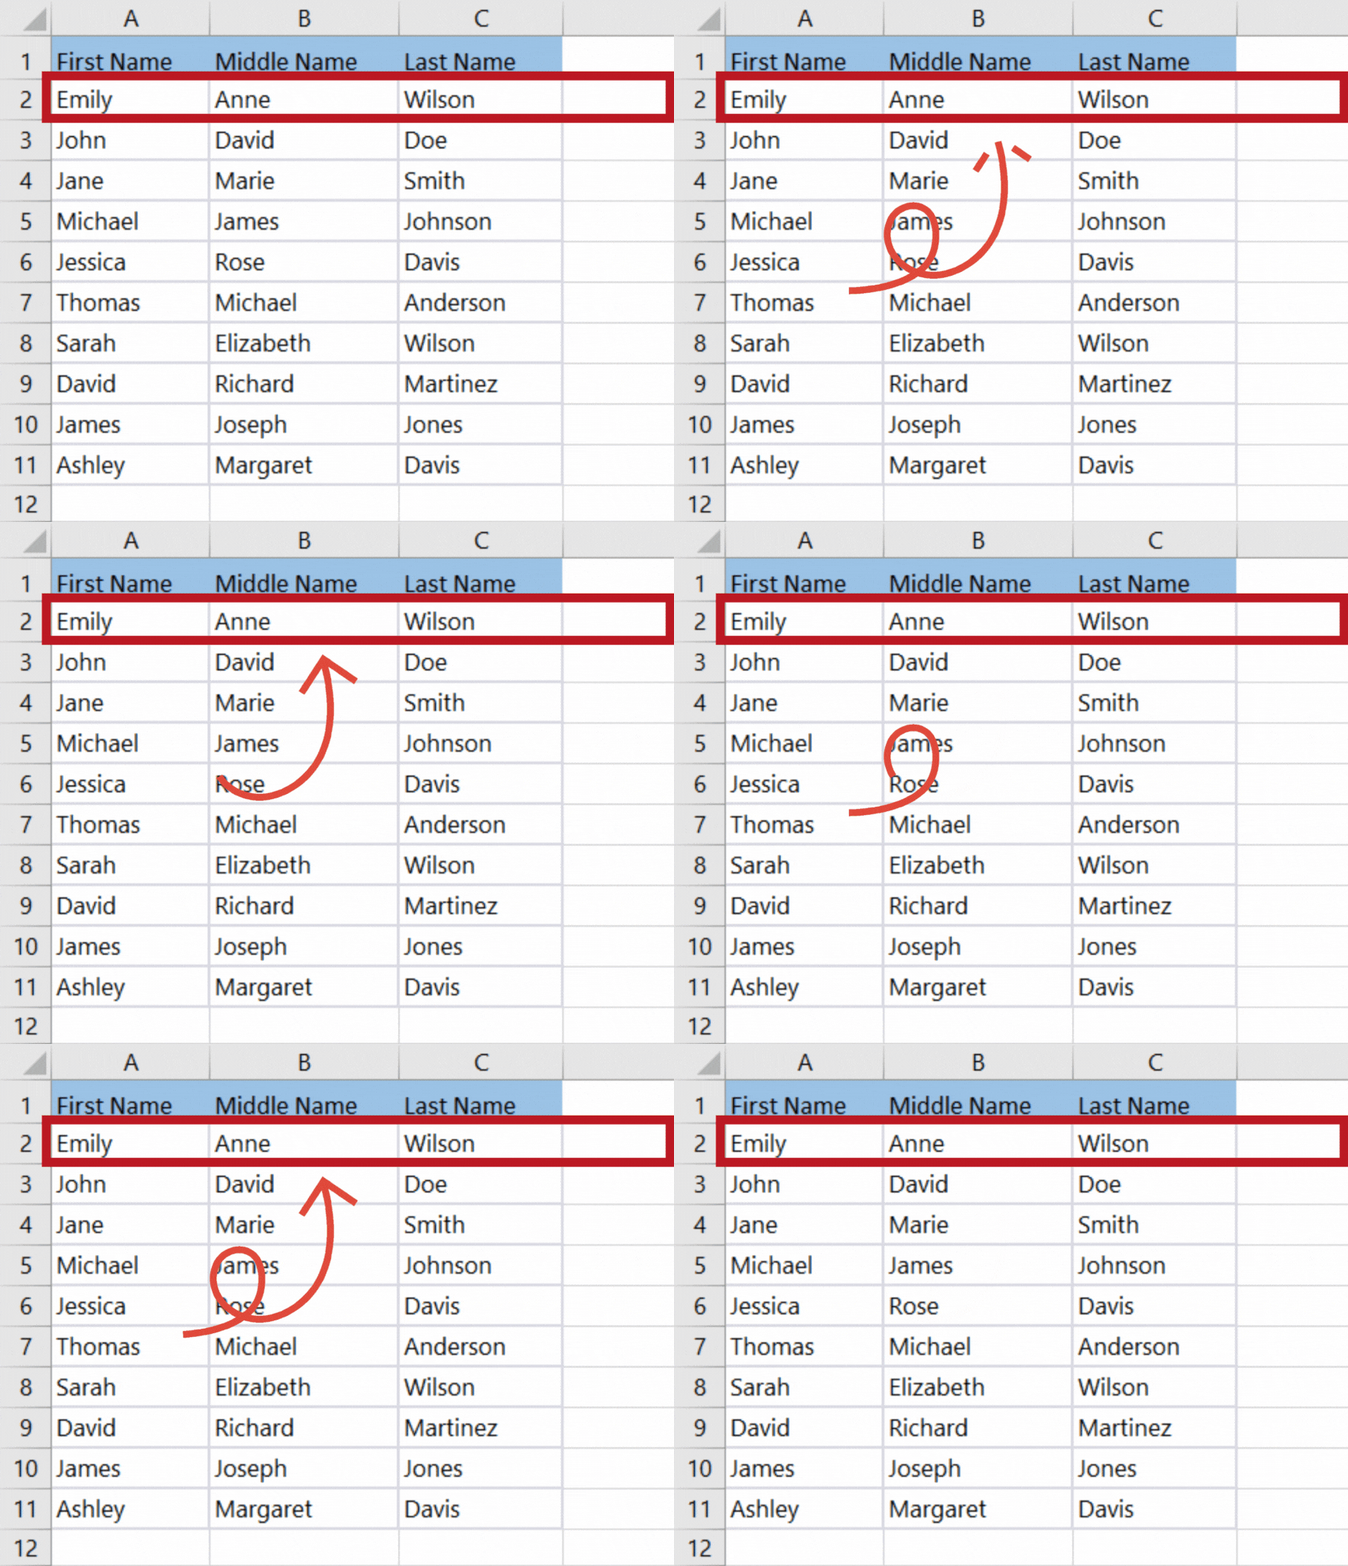
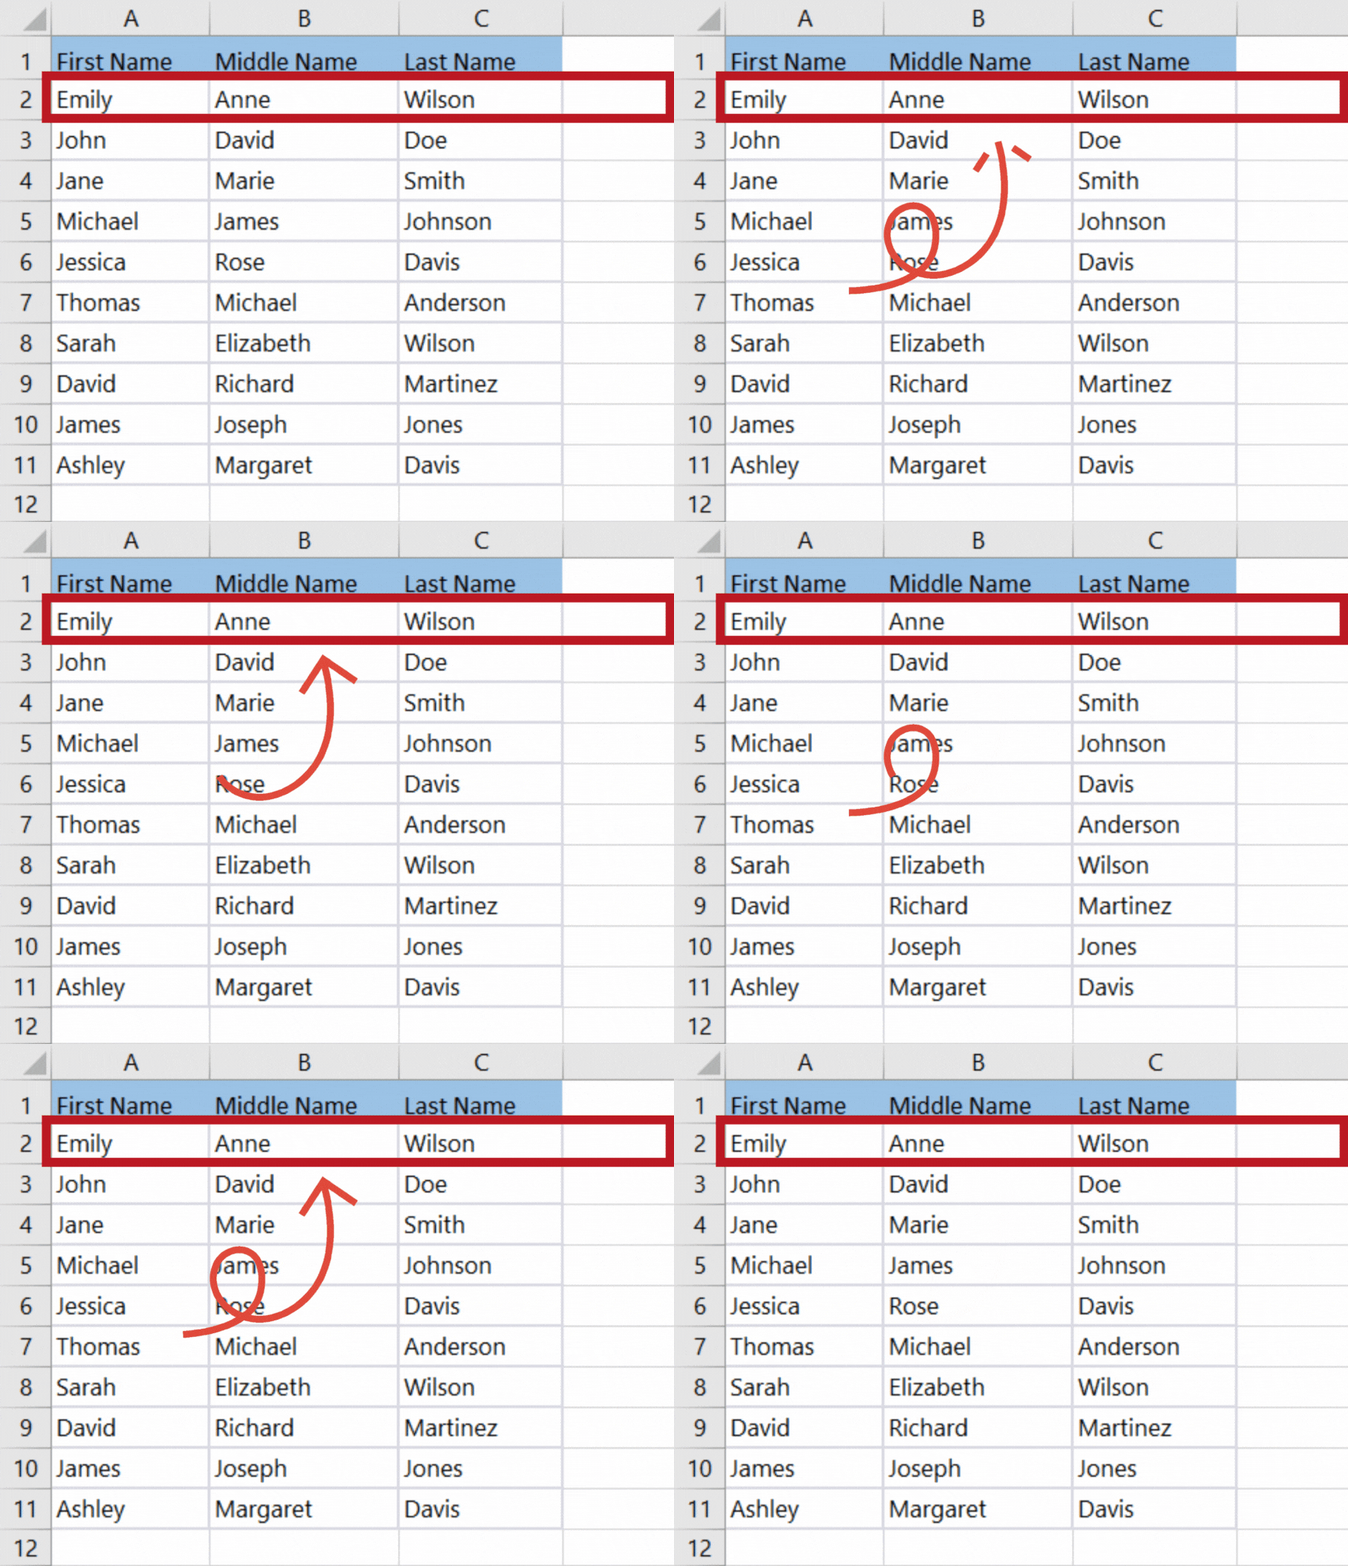
In this step-by- step tutorial, you will learn how to move a row in Excel. Here we have a data set containing first, middle and last names of ten people. We want ‘Emily Anne Wilson’ to appear on the top so, we’ll move that row to the top of the data set see above as we did in the below given steps:

The Microsoft Office productivity software package includes a spreadsheet programme called Microsoft Excel. Spreadsheets are collections of data arranged in rows and columns, and they are used to produce and manage them. You can do a variety of things with Excel, including organizing data, doing computations, making charts and graphs, and automating repetitive operations. You can also format the rows and columns and can perform different actions on them.
Step 1 – Select the row

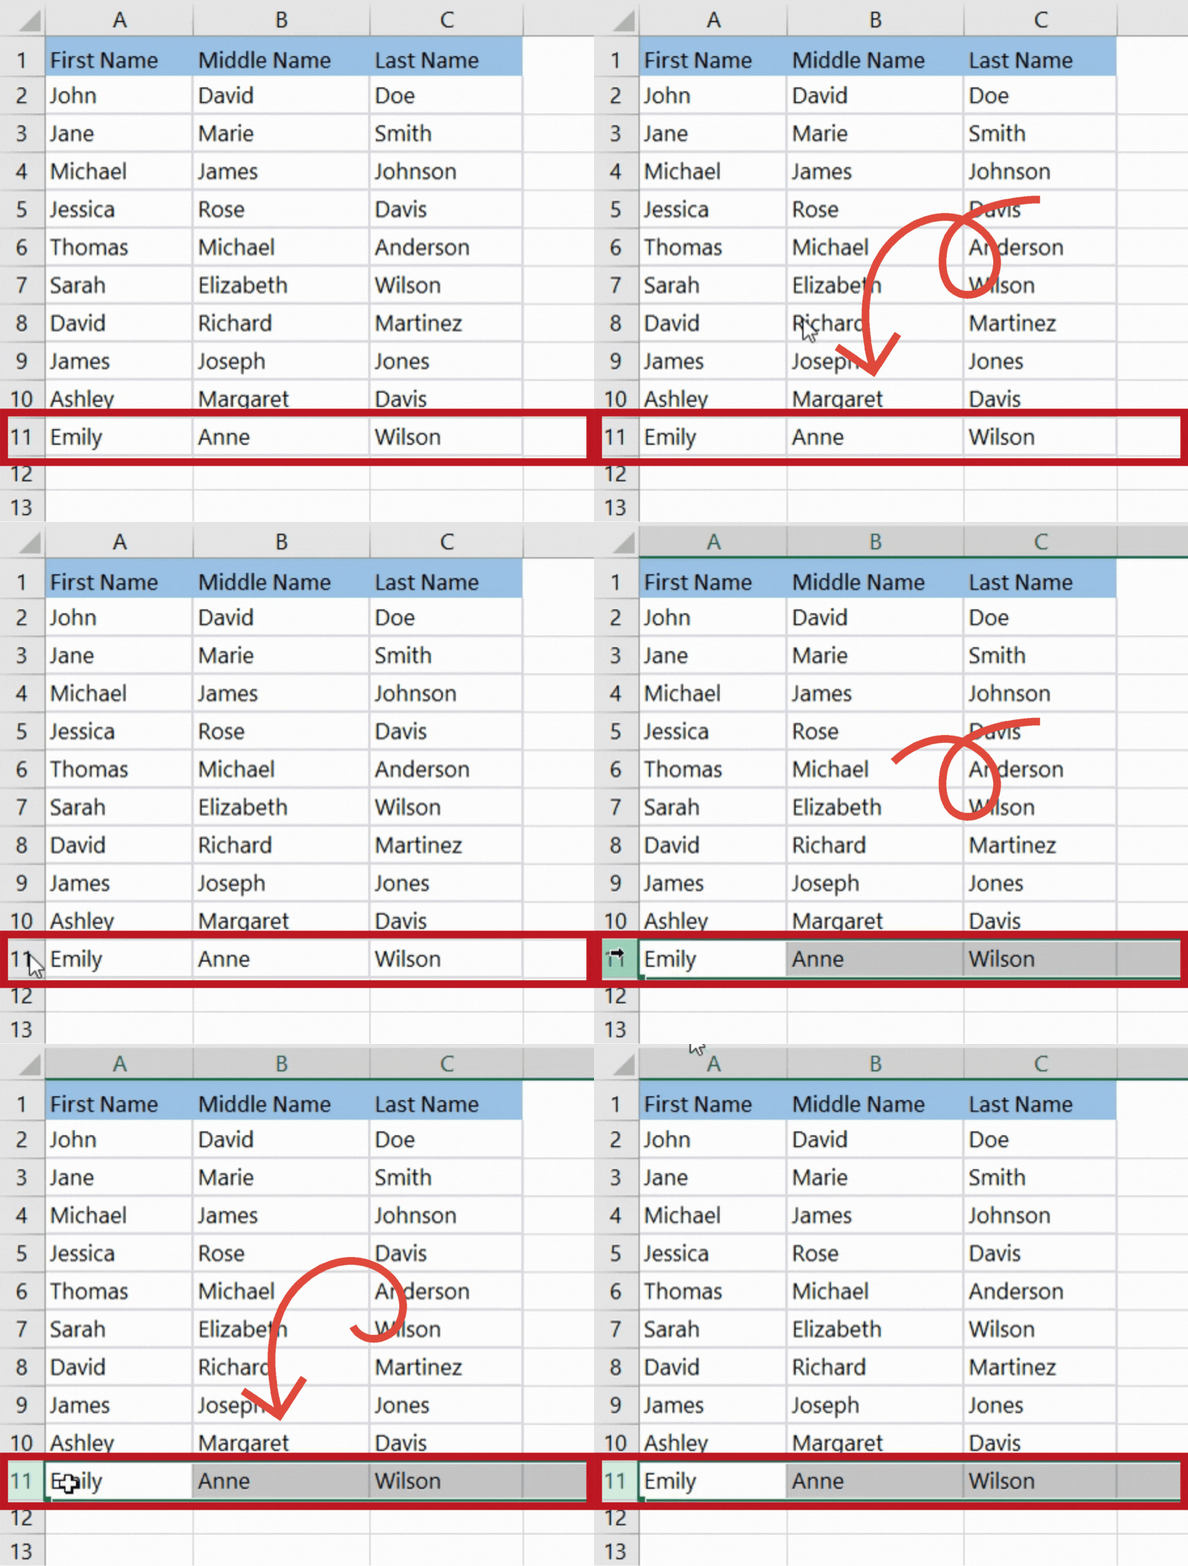
– Select a row to move.
– In our case it’s row number ‘11’
– A green border will surround the selected row.
Step 2 – Drag the selected row to the desired location

– After selecting the row, you want to move.
– Move the cursor to the side of the green border, the will change to a “” icon.
– Now, hold the ‘SHIFT’ button and move the selected row by dragging it to the desired location.
– Drop the row, and the row will be moved below the green line. All the previous content will be shifted to the new row.
– The row 11 containing first, middle and last name of ‘Emily Anne Wilson’ will be moved to the top.
Step 3 – The row will be moved to its new location

– Dragging the row, will move the row to the new location as a whole.
– In our case, the row ‘11’ is now moved to the top and its new row number is ‘2’.
In this step-by-step tutorial, you have learned to move a complete row to a new location with-in an Excel sheet. In this method, first we selected the row and then dragged it to the desired new location while holding the SHIFT button through-out.


