How To Merge Cells in Excel Shortcut
Are you tired of manually merging cells in Excel? Well, there’s good news! Excel provides a handy shortcut that enables you to merge cells with just a few keystrokes. This time-saving technique allows you to seamlessly combine cells and create a cleaner, more professional look for your spreadsheets. Join us as we delve into the step-by-step process of using the merge cells shortcut in Excel.
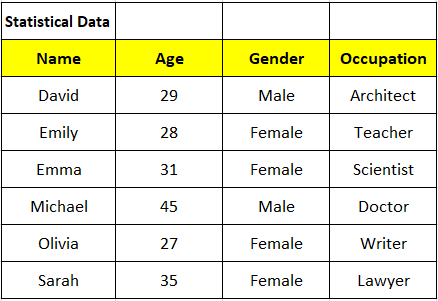
Let’s learn these with the help of the following dataset.

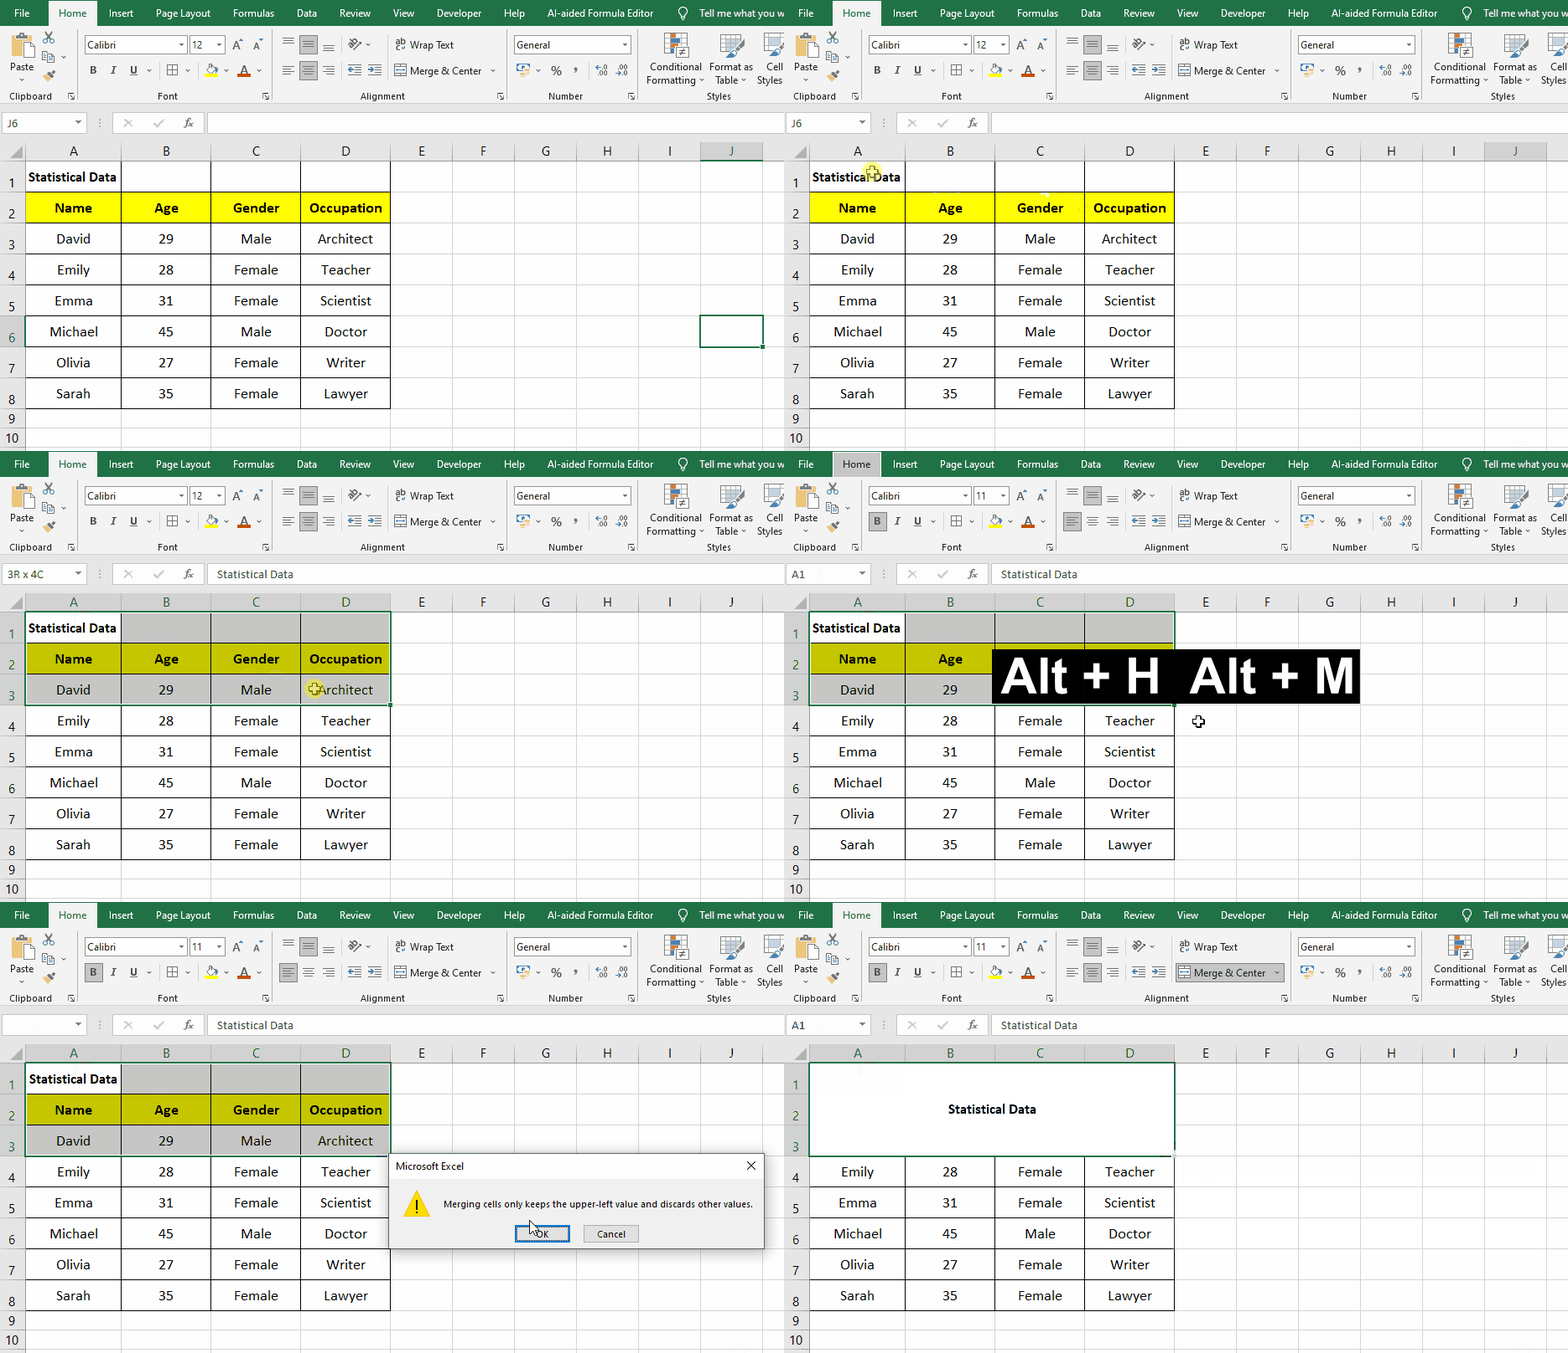
Method 1 – Merge Cells Using Merge & Center Shortcut Key
Merge and Center is a formatting feature in Excel that allows you to combine multiple cells into a single cell and center the content within the merged cell. When you merge cells using this feature, the data from the original cells is combined, and the resulting cell spans across the merged range.
The Merge and Center option is commonly used for creating headings or titles that span multiple columns or rows in a spreadsheet. It helps to improve the visual layout and organization of data by consolidating information into a single, prominent cell.
By default, when you merge and center cells, the content within the merged cell is horizontally and vertically centered. This ensures that the text, numbers, or other data in the merged cell are visually aligned in the middle.
Step 1 – Select The Cells

- Select the cells that you want to merge and center. You can do this by clicking and dragging the mouse cursor over the cells or by using the arrow keys to navigate to the desired cells.
Step 2 – Press The Shortcut Key

- Once the cells are selected, press and hold the “Alt” key on your keyboard.
- While still holding the “Alt” key, press the following keys in sequence: “H”, “M”, “C”. Release the keys after pressing them.
- The selected cells will now be merged into a single cell, with the contents aligned to the center.
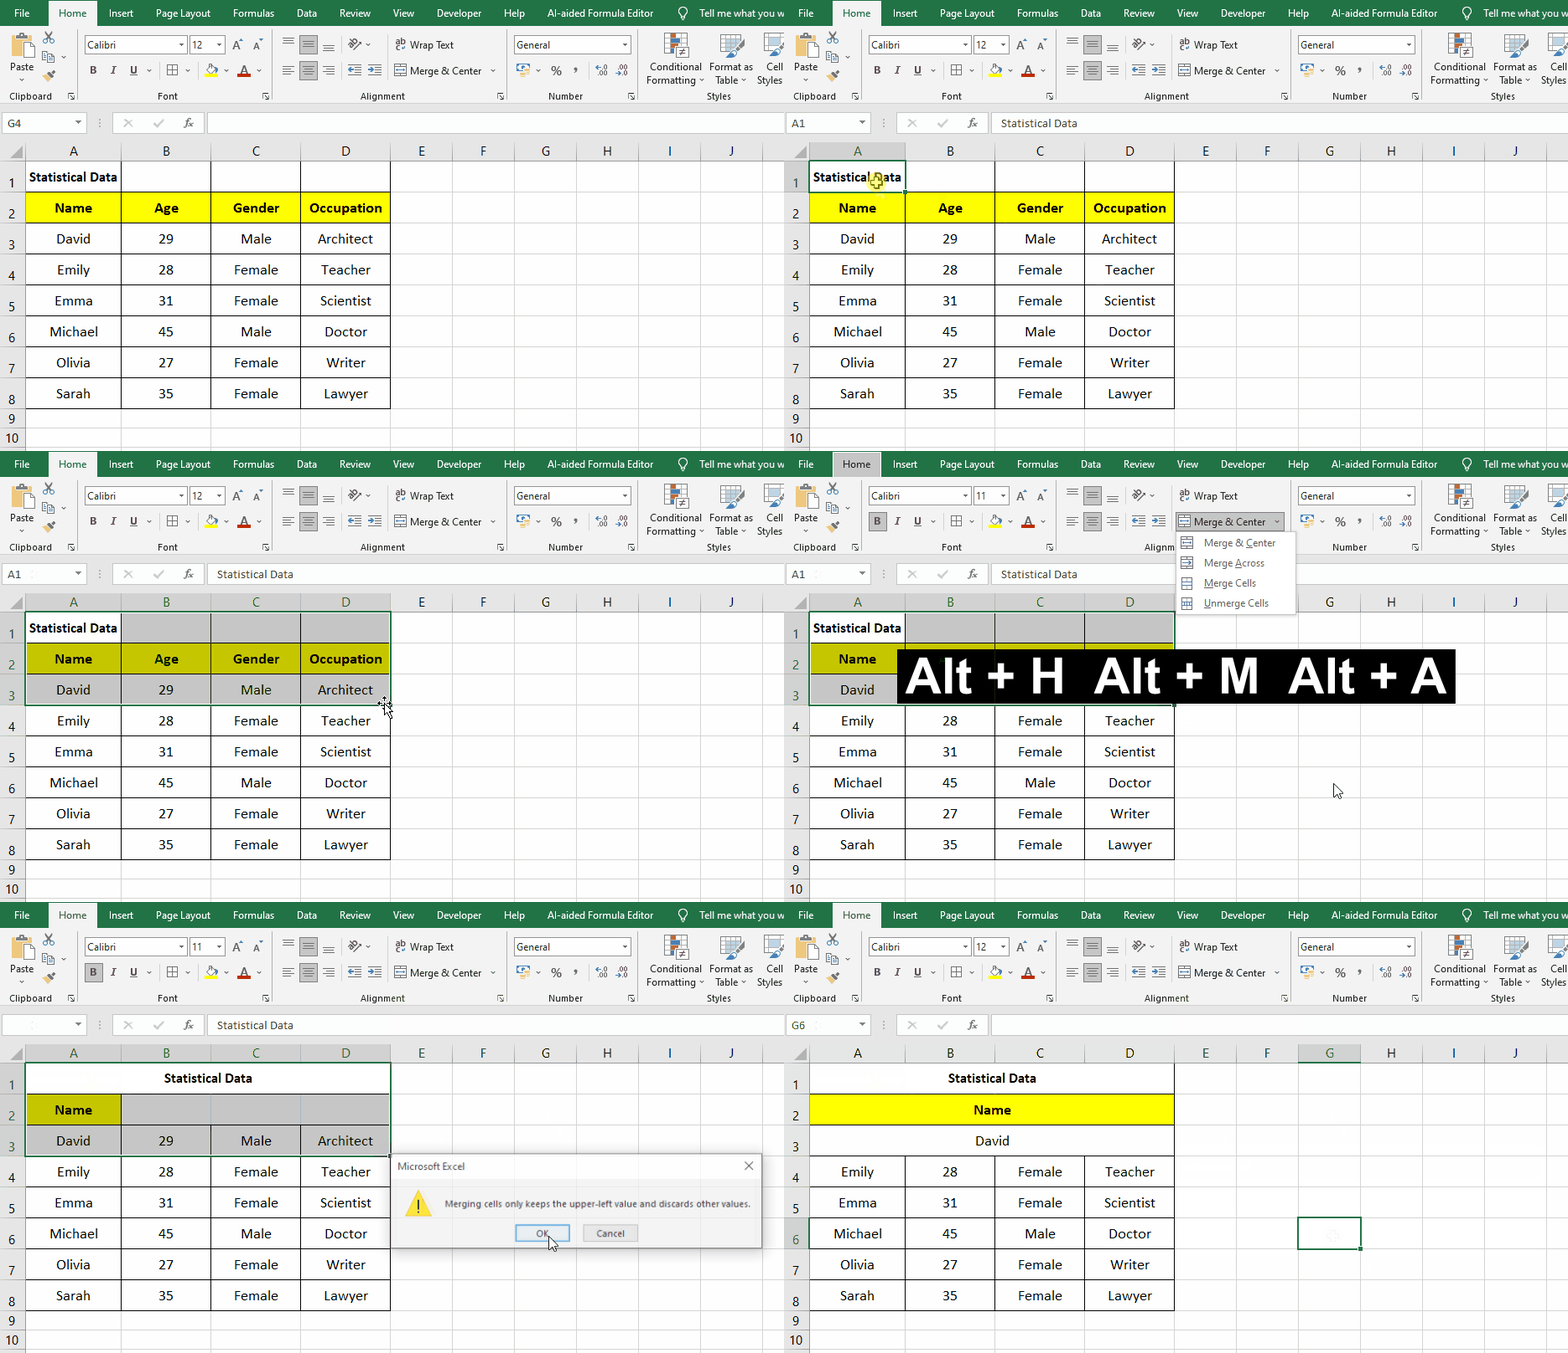
Method 2 – Merge Cells Using Merge Across Shortcut Key
Merge Across is a formatting feature in Excel that allows you to merge cells horizontally within a row while leaving other rows unaffected. It combines the selected cells into a single row, extending the width of the merged cell across the selected range.
When using “Merge Across,” the content of the first cell in the selection is preserved, and the remaining cells in the horizontal range are discarded. The resulting merged cell will have the width of all the original cells combined.
This feature is particularly useful when you want to create headings or labels that span multiple columns in a row. It helps to visually organize and present data by consolidating information into a single cell, effectively widening the column for the merged content.
Step 1 – Select The Cells

- Select the cells that you want to merge and center. You can do this by clicking and dragging the mouse cursor over the cells or by using the arrow keys to navigate to the desired cells.
Step 2 – Press The Shortcut Key

- Once the cells are selected, press and hold the “Alt” key on your keyboard.
- While still holding the “Alt” key, press the following keys in sequence: “H”, “M”, “A”. Release the keys after pressing them.
- The selected cells will now be merged into a single cell, with the contents aligned to the center.
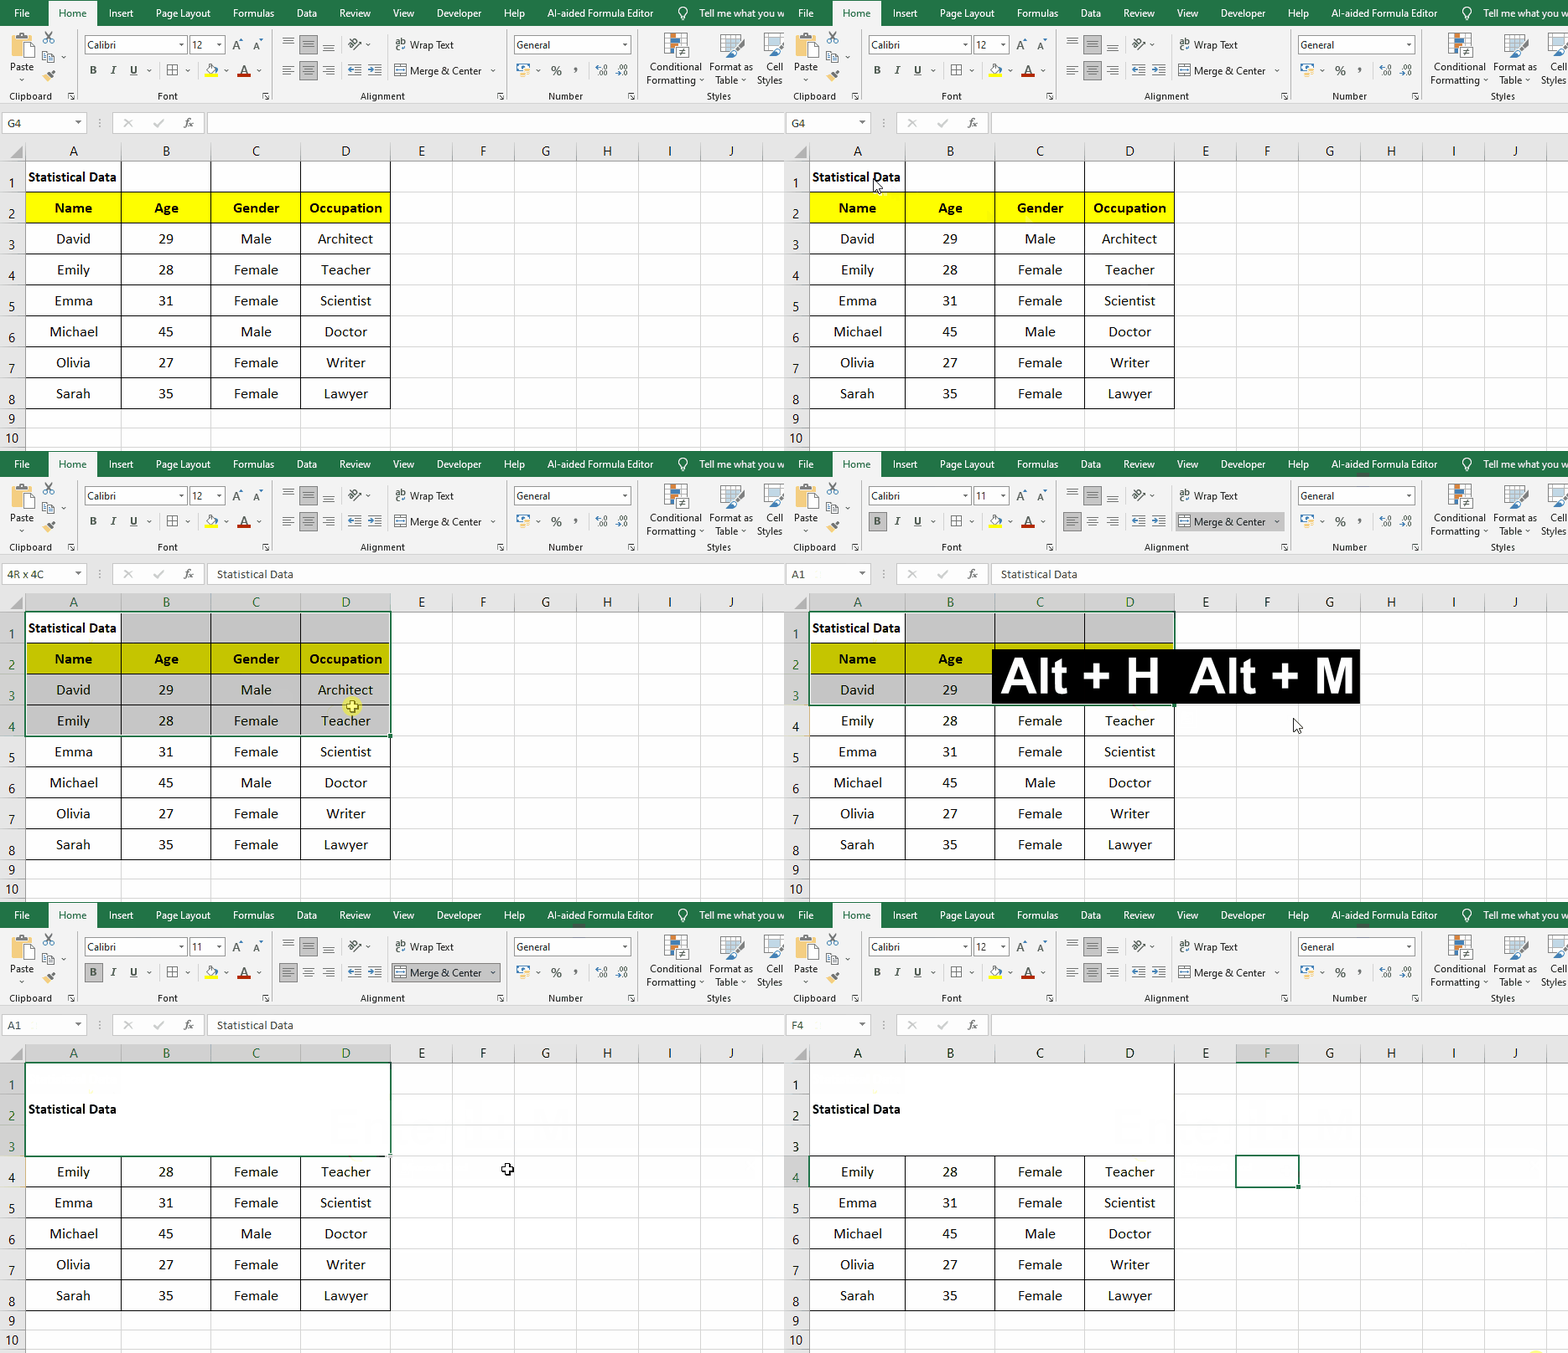
Method 3 – Merge Cells Using Merge Cells Shortcut Key
“Merge Cells” is a formatting feature in Excel that allows you to combine selected cells into a single, larger cell. When you merge cells, the contents of the upper-left cell in the selection are preserved, and the contents of the other cells are discarded.
The merged cell occupies the space of the original selected cells, resulting in a larger cell with a combined width and height. The purpose of merging cells is often to create a visually unified representation or to simplify the layout of data within a worksheet.
By merging cells, you can create titles, headers, or labels that span multiple adjacent cells. This can help improve the organization and clarity of your data, especially when working with tables or reports.
Step 1 – Select The Cells

- Select the cells that you want to merge and center. You can do this by clicking and dragging the mouse cursor over the cells or by using the arrow keys to navigate to the desired cells.
Step 2 – Press The Shortcut Key

- Once the cells are selected, press and hold the “Alt” key on your keyboard.
- While still holding the “Alt” key, press the following keys in sequence: “H”, “M”, “M”. Release the keys after pressing them.
- The selected cells will now be merged into a single cell, with the contents aligned to the center.


