
How to make Excel cells square
 By
SpreadCheaters
By
SpreadCheaters
You can watch a video tutorial here.
Excel is a spreadsheet application in which the page is laid out as rows and columns. Each row and column have a default height and width. The default width of the column is greater than the height of the row so each cell is rectangular. You may want to make each cell square instead of rectangular. For example, you may want to draw a graph without using data and the charting tools of Excel. For this, you need a grid of squares instead of rectangles. The problem is that the scale used to define the column width is not the same as the scale used for the row height so you cannot just change the column width and the row height to the same number. Here we will see how to make each cell square.
Step 1 – Switch to the Page Layout view
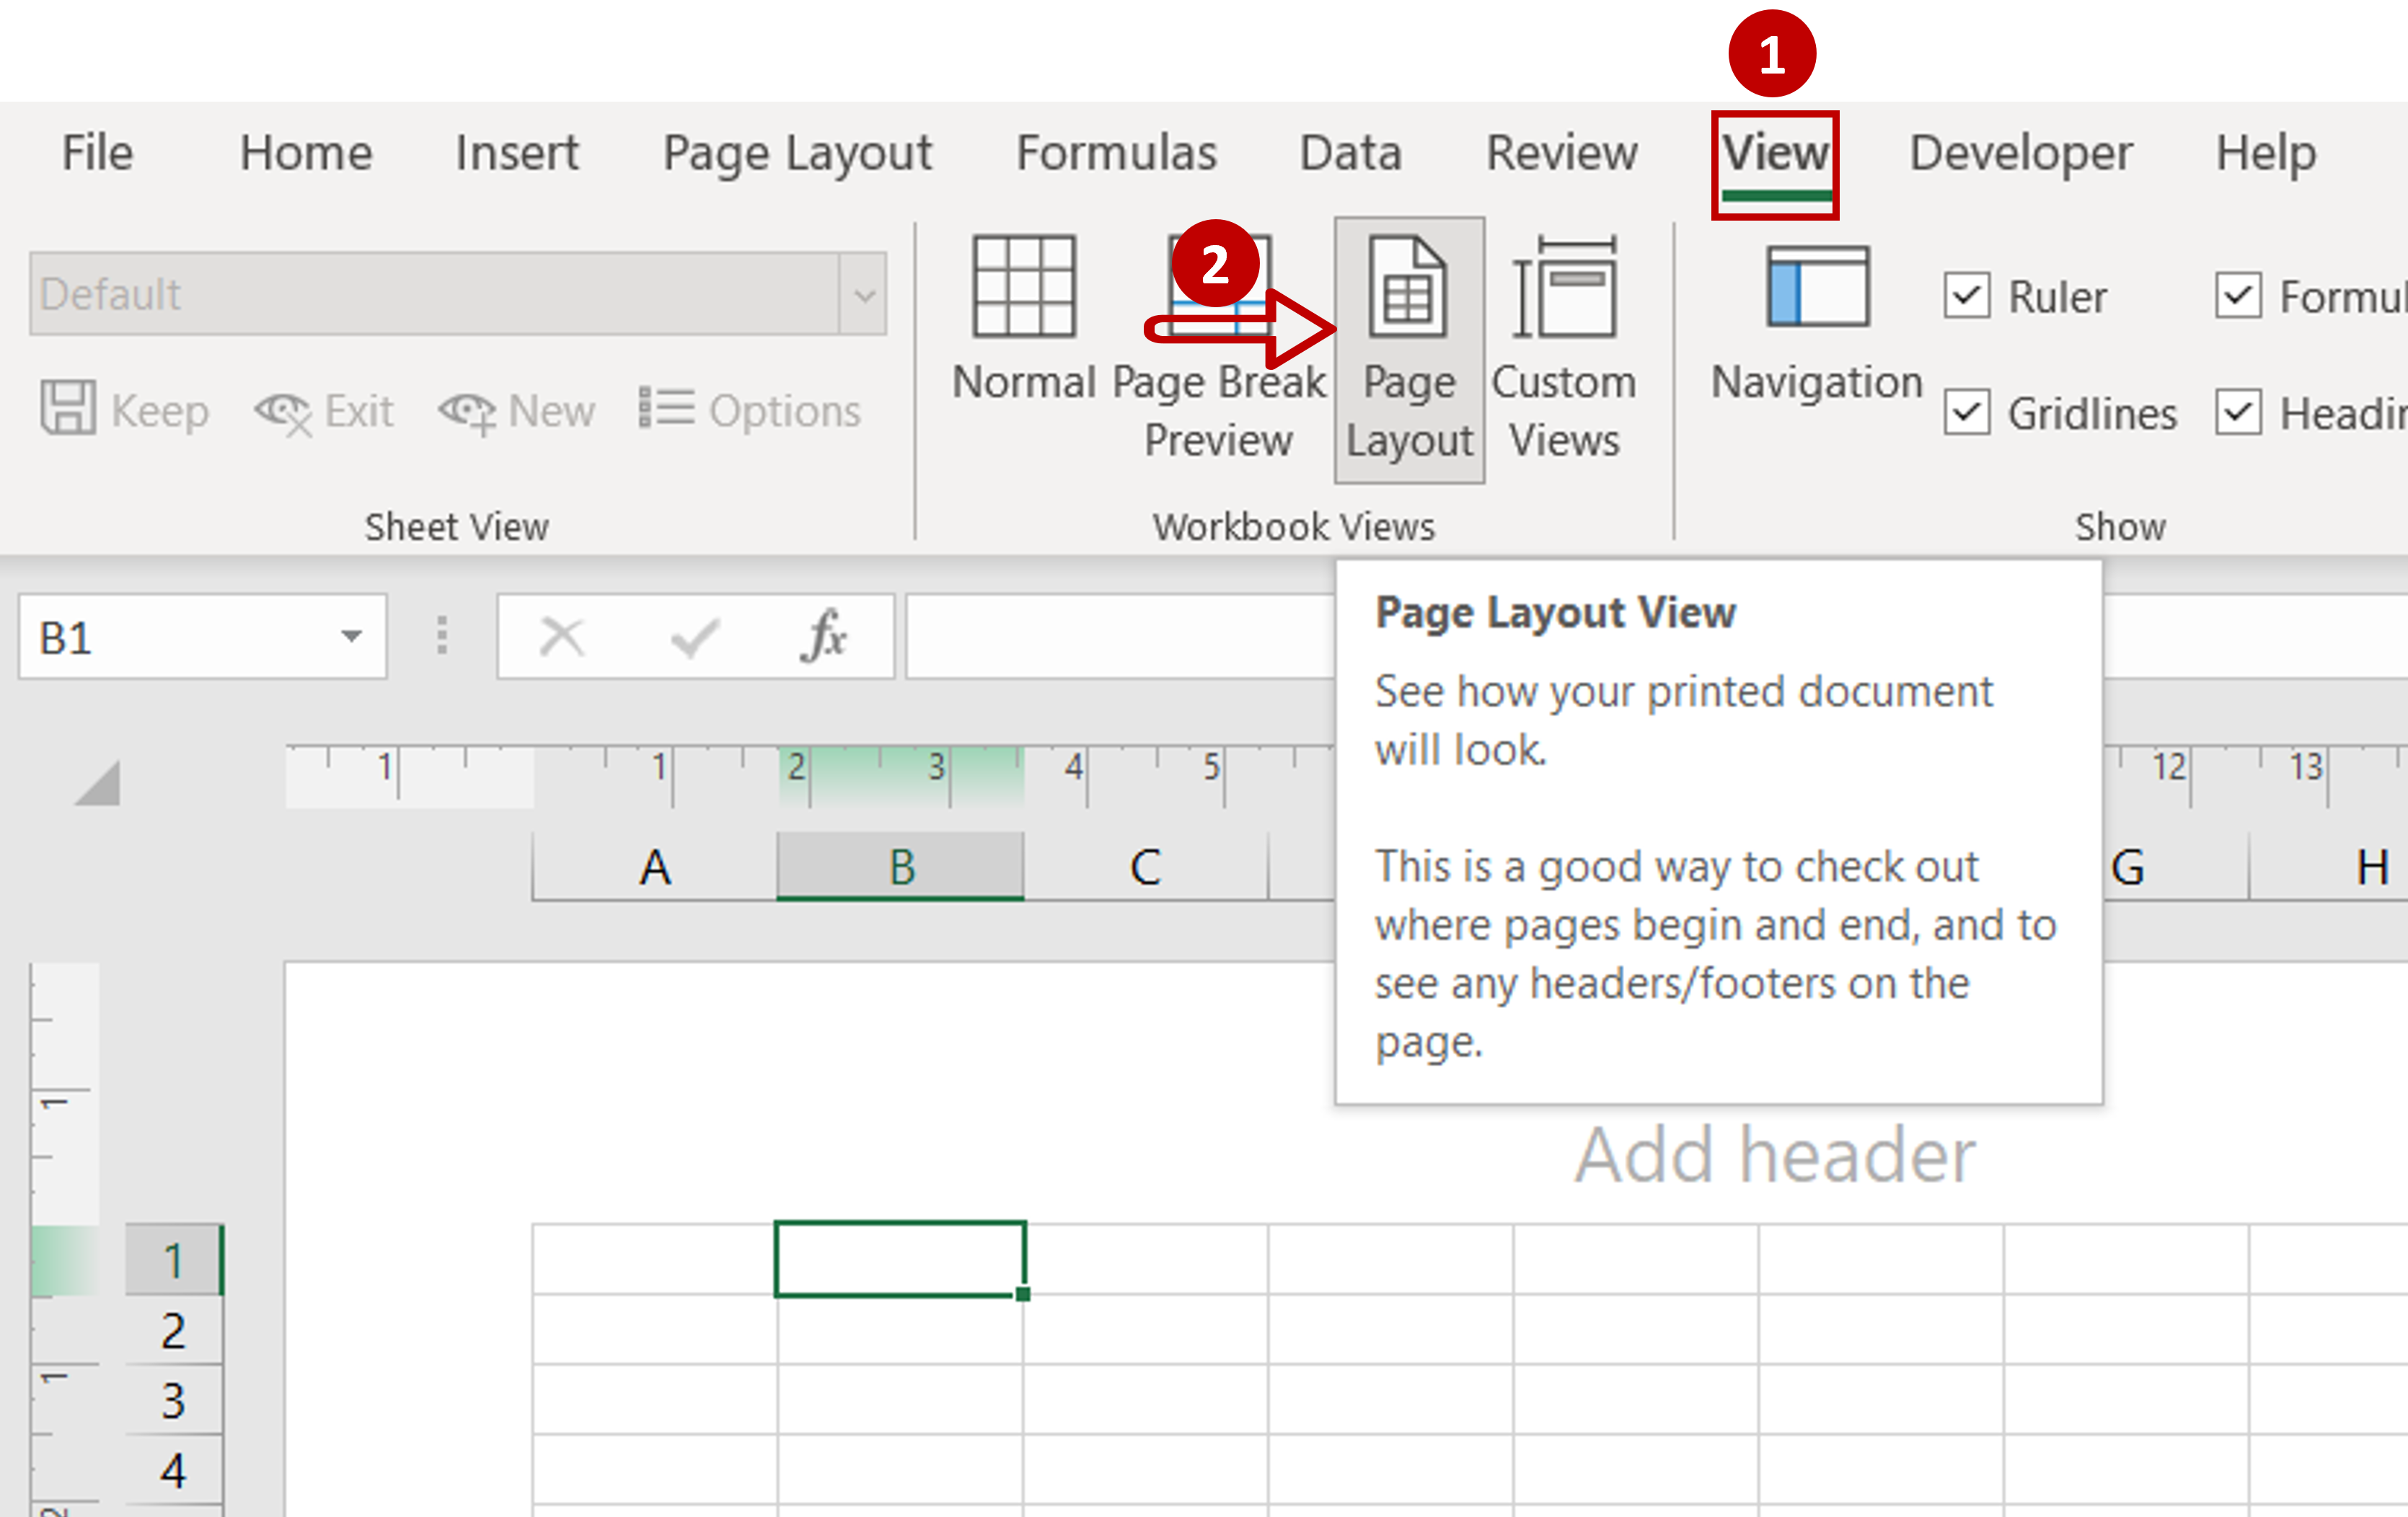
– Go to View > Workbook Views
– Click Page Layout View
Step 2 – Open the Column Width box
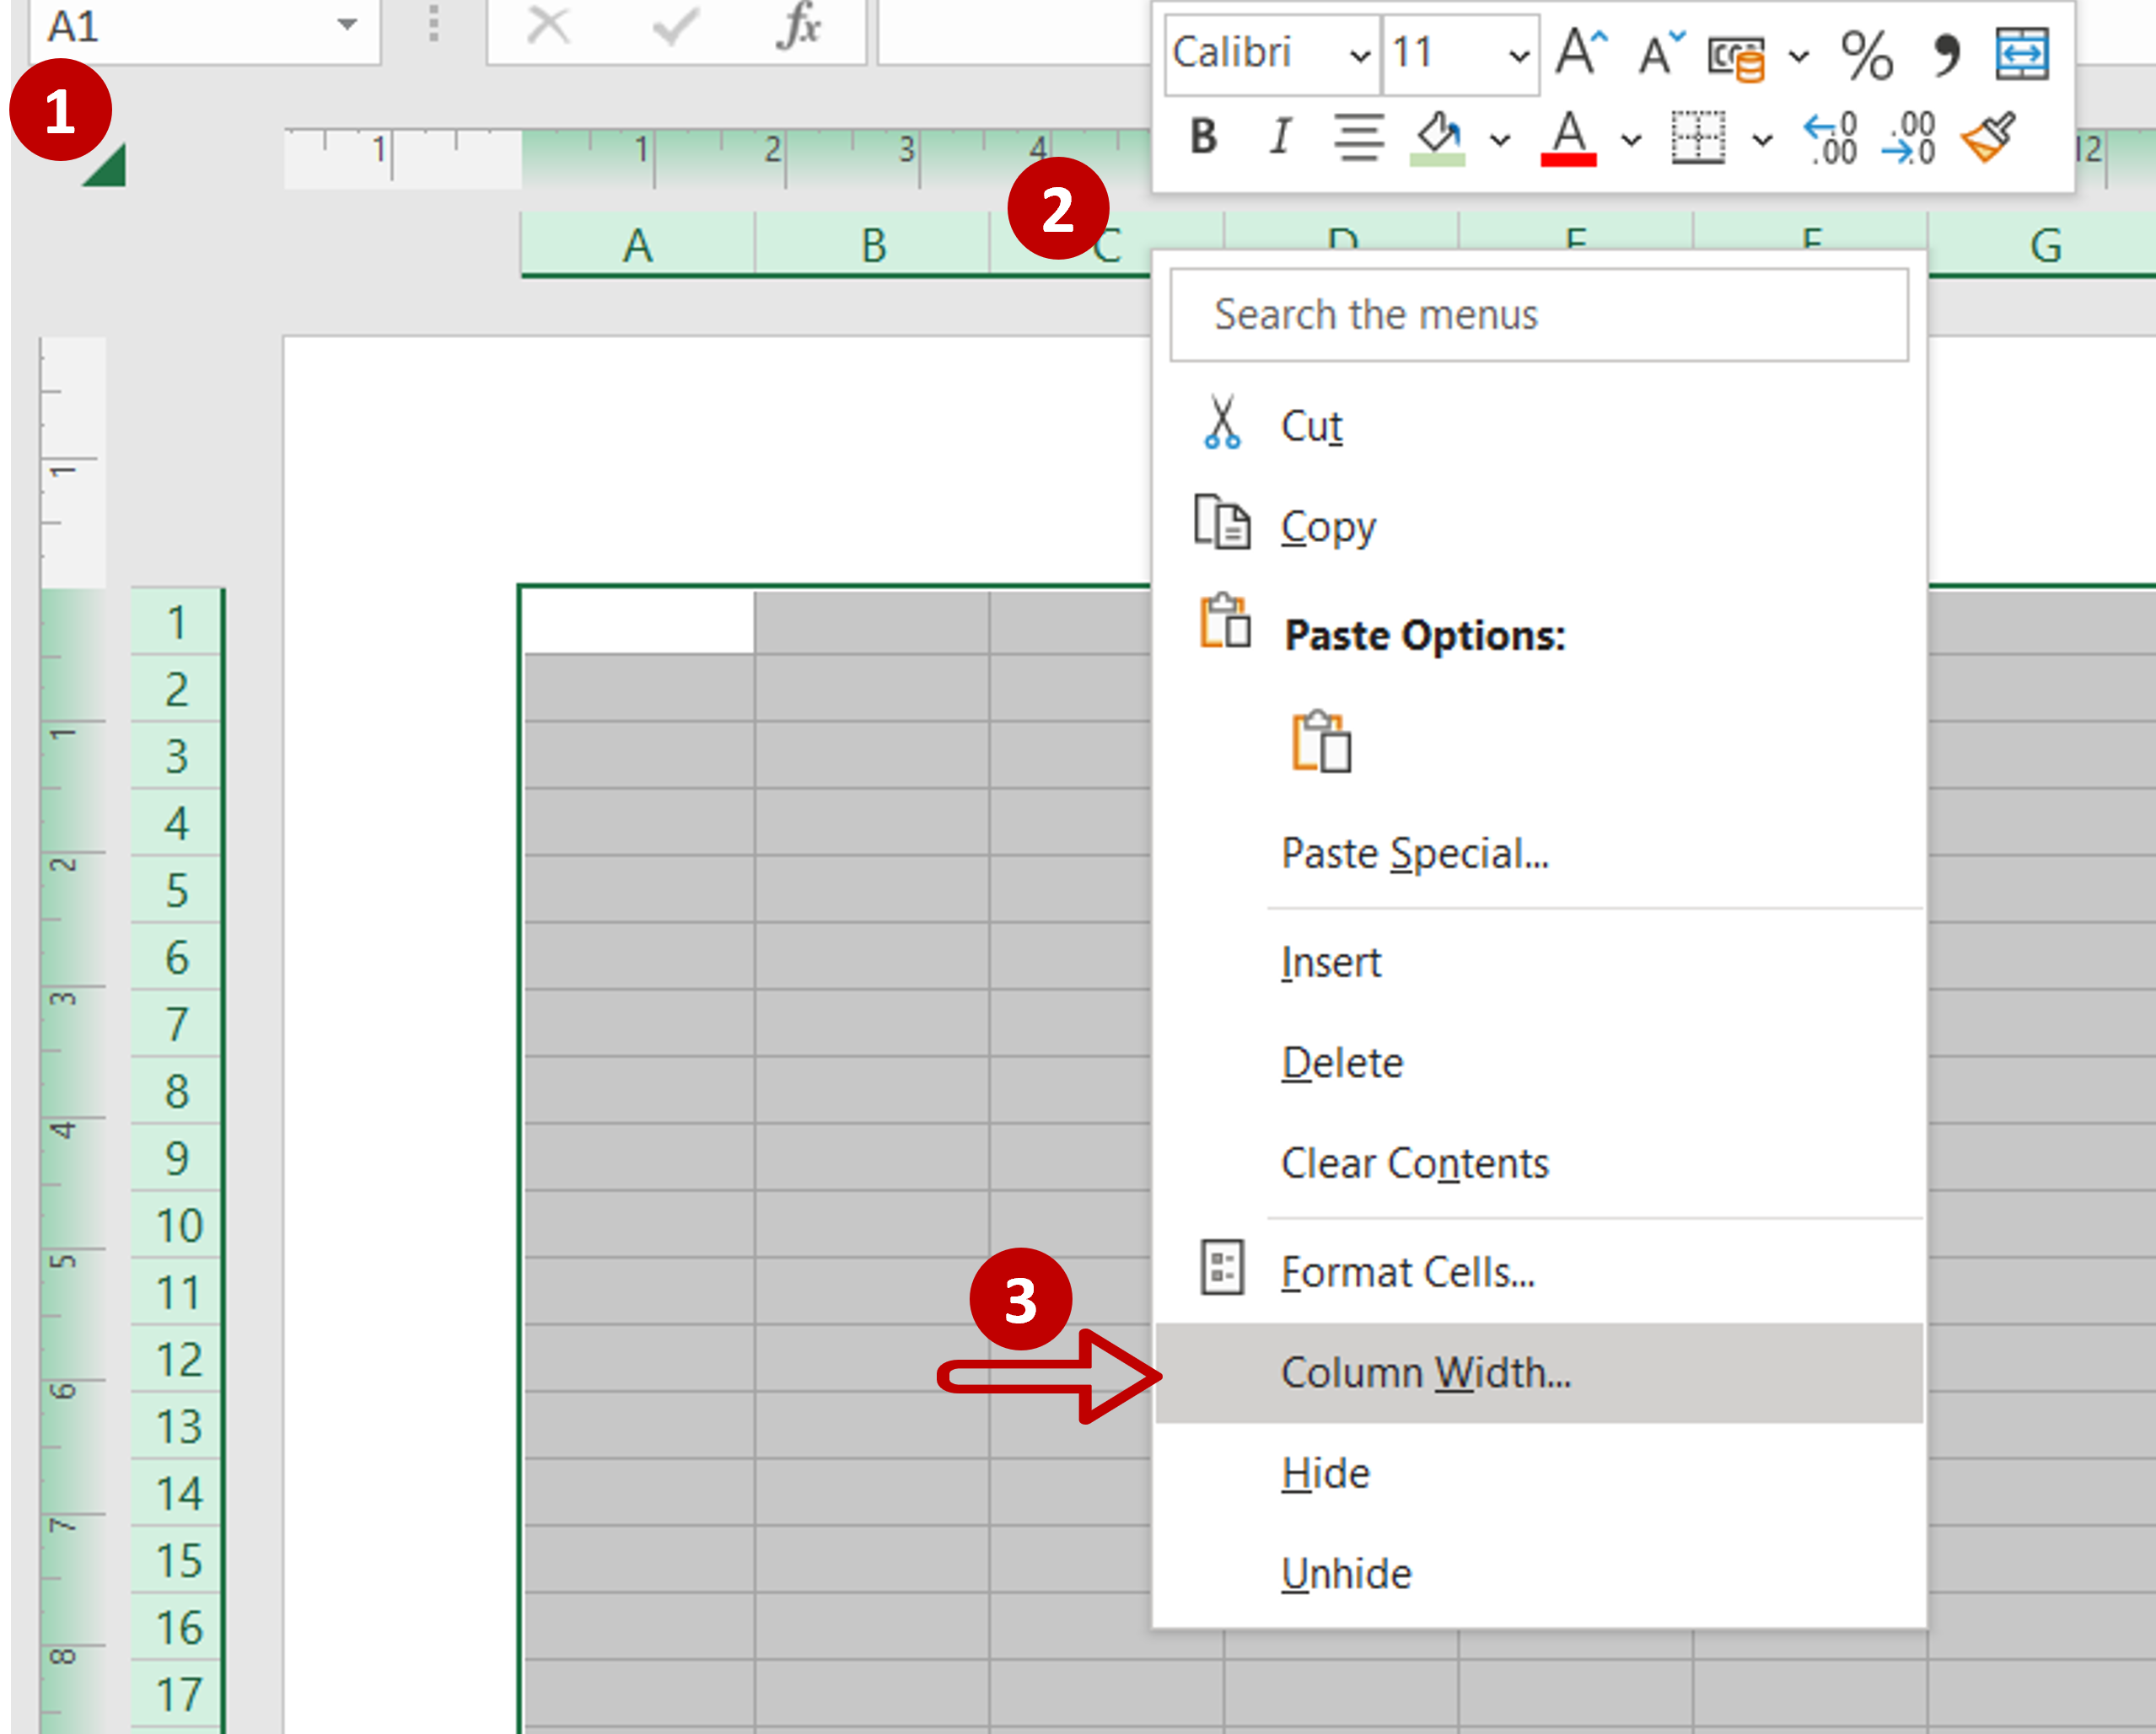
– Select the entire sheet by clicking in the top left corner
– Position the pointer on any column header
– Right-click and select Column Width
Step 3 – Enter the width for the column
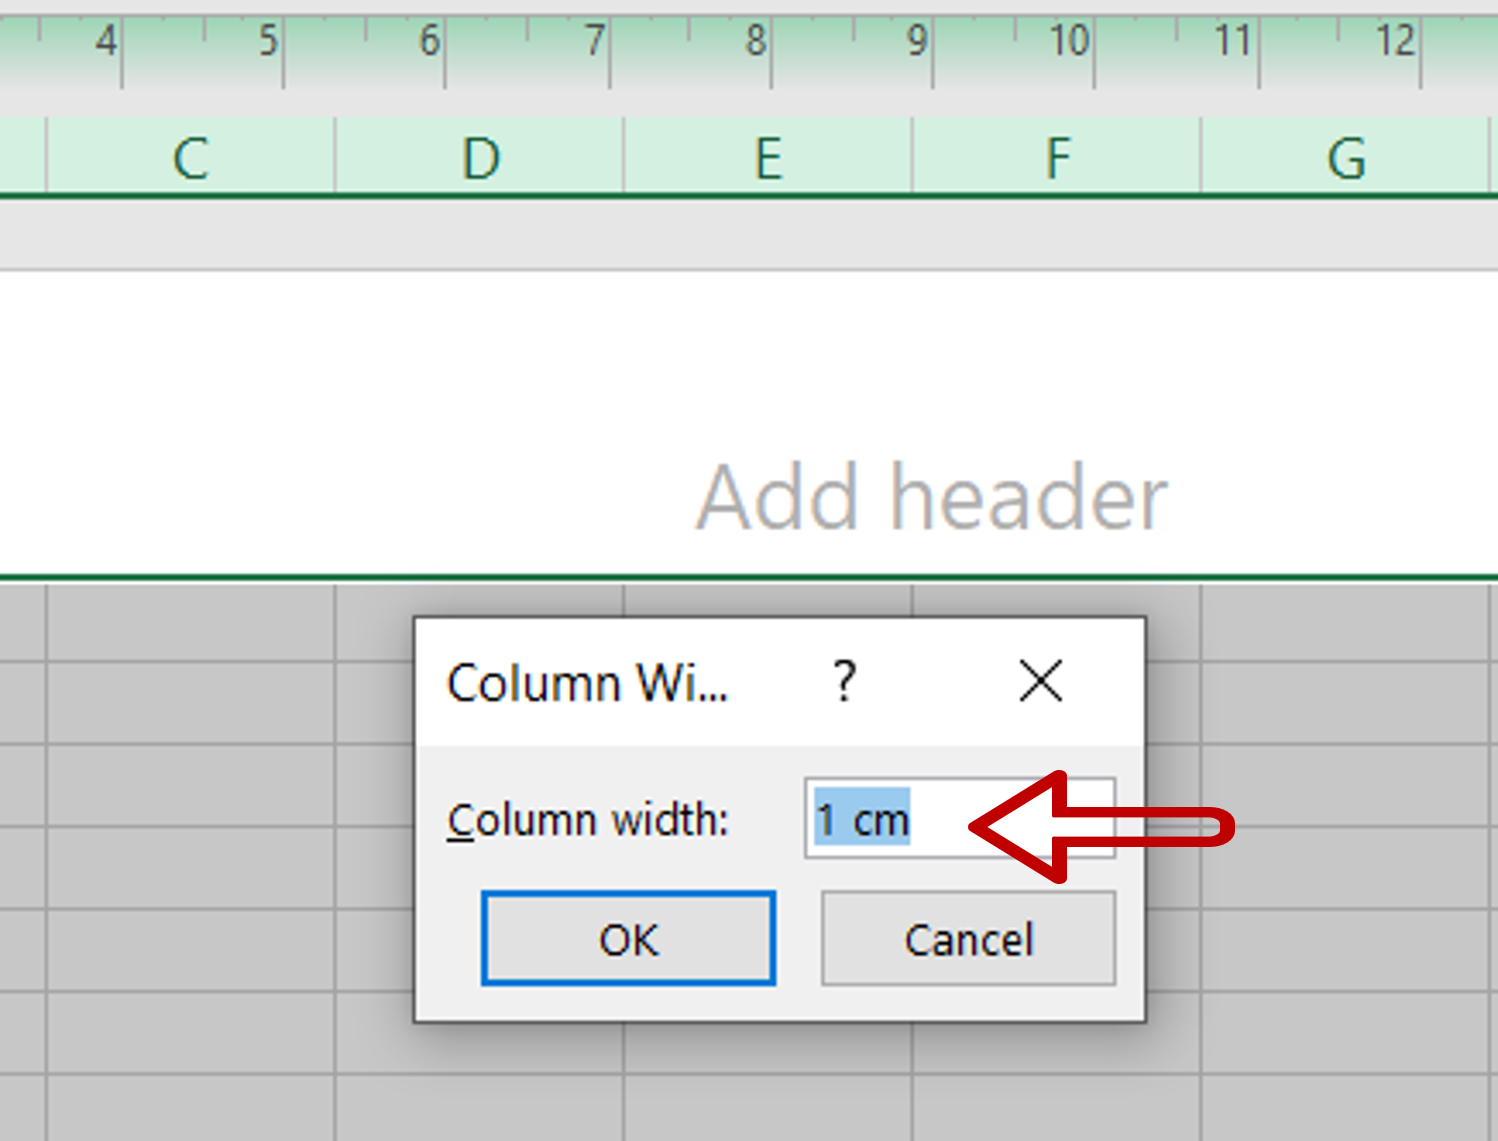
– The scale for the column width is given in centimeters
– Enter: 1 cm
– Click OK
Step 4 – Open the Row Height box
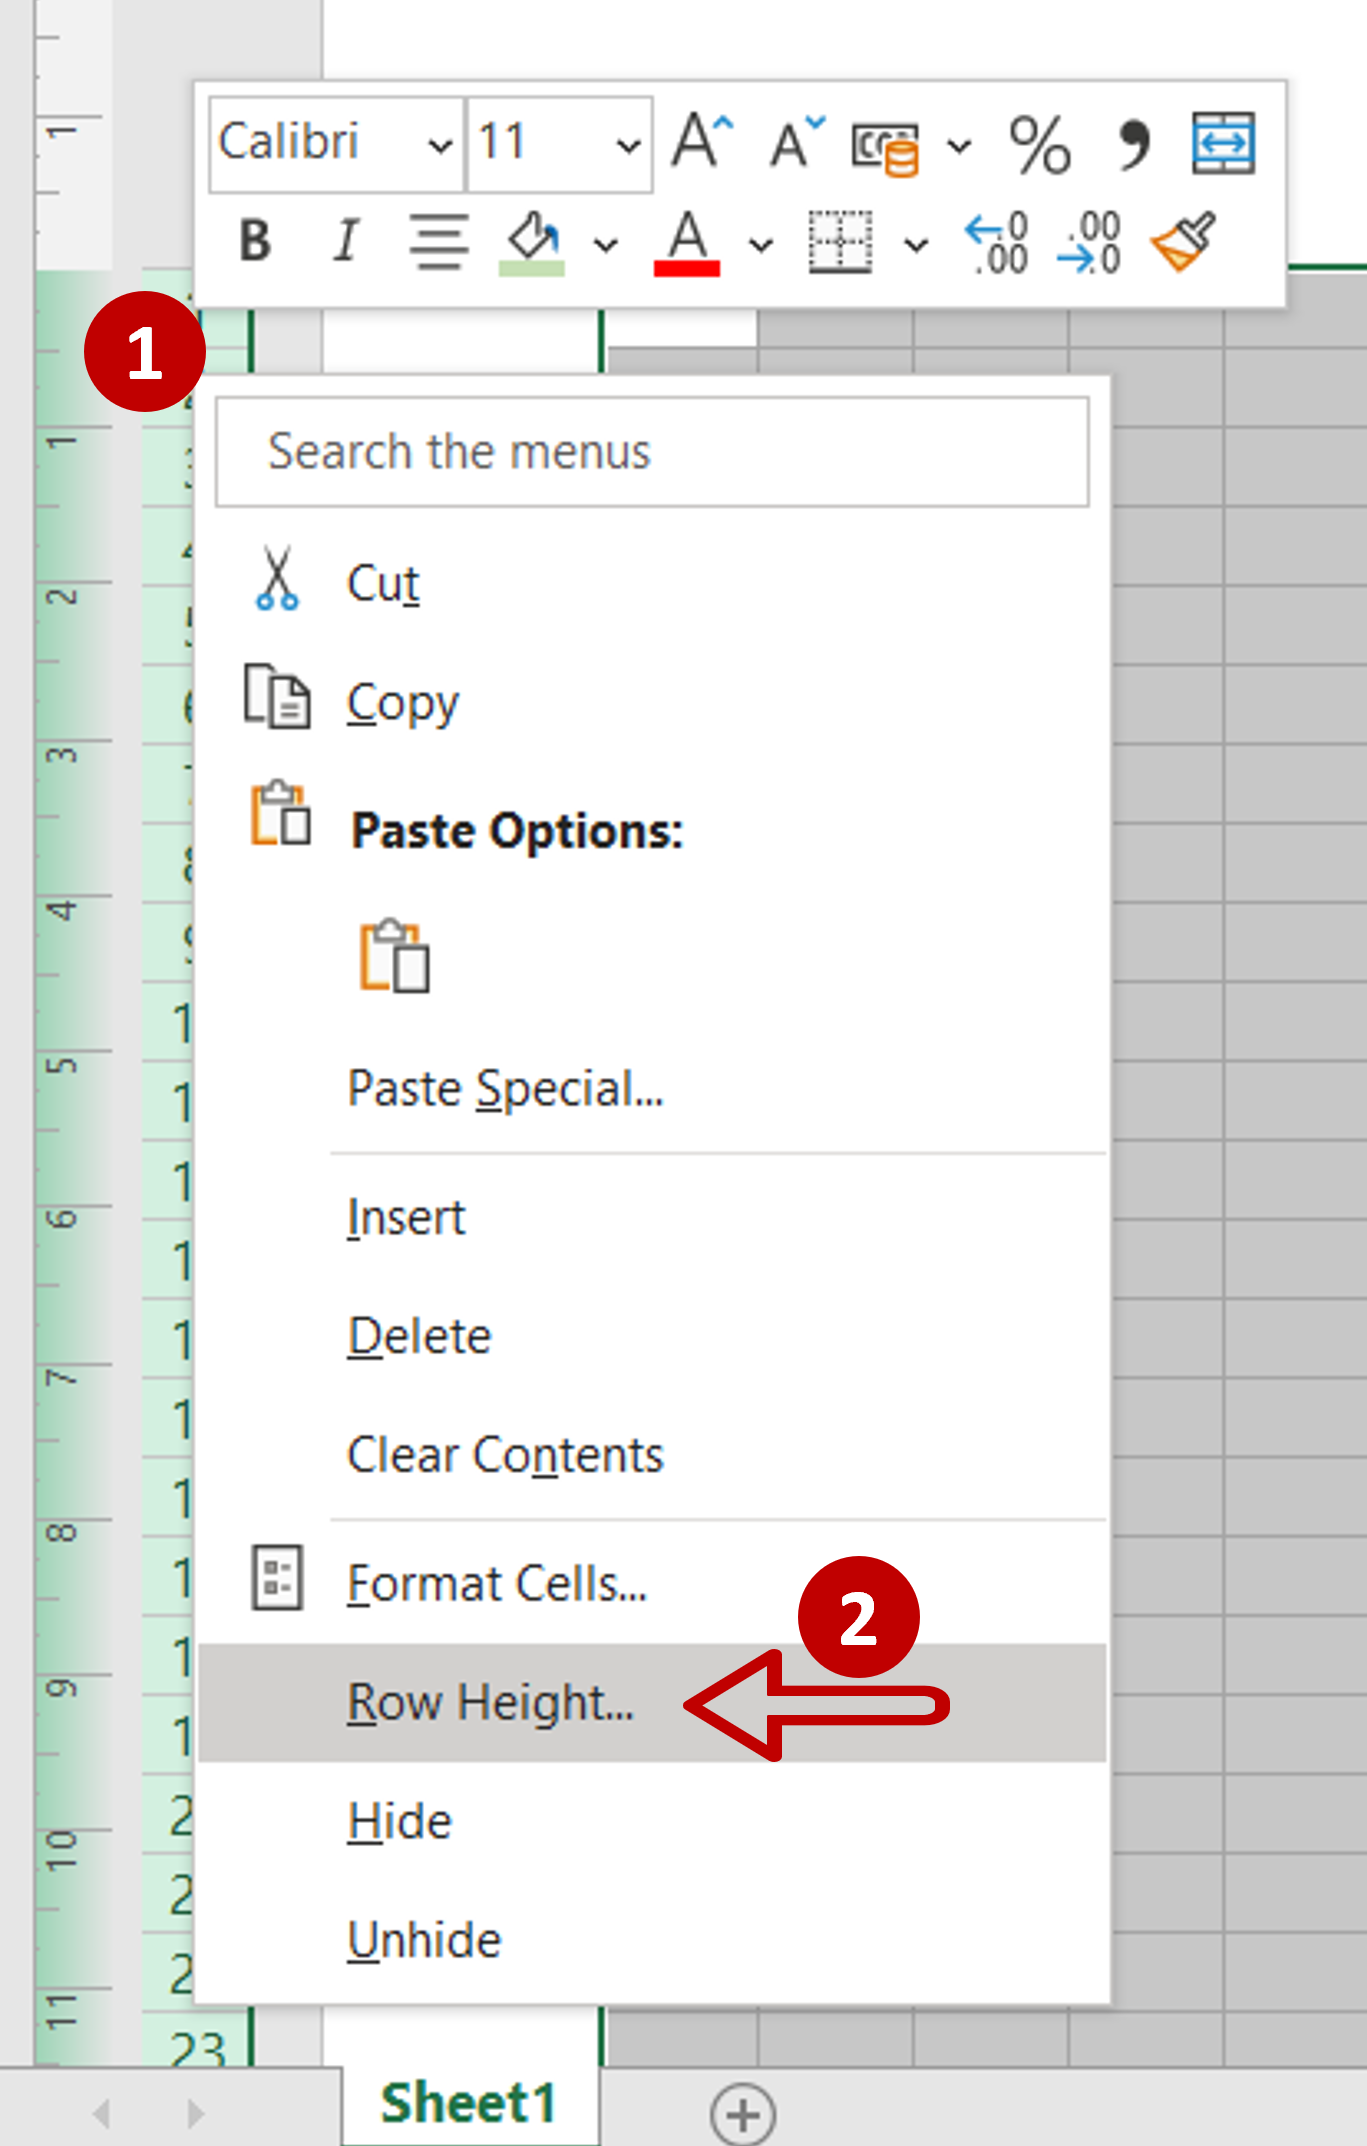
– Position the pointer on any row number
– Right-click and select Row Height
Step 5 – Enter the height for the row
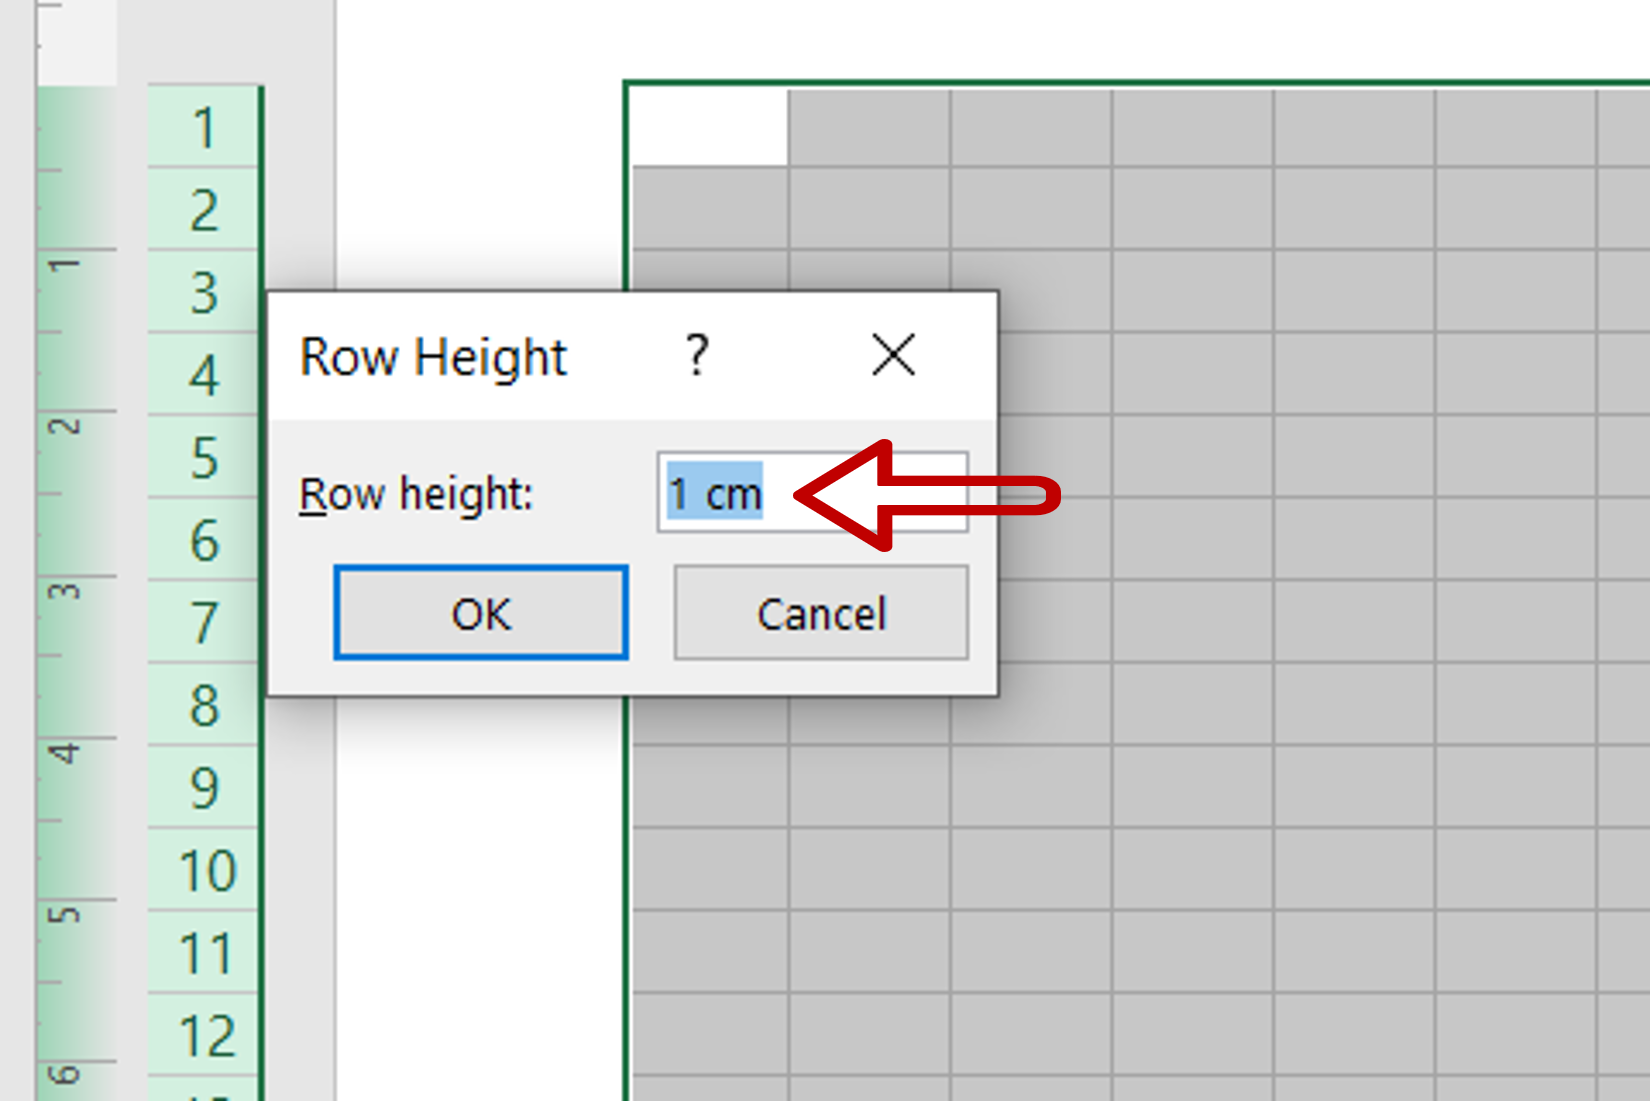
– The scale for the row height is given in centimeters
– Enter: 1 cm
– Click OK
Step 6 – Switch to Normal View
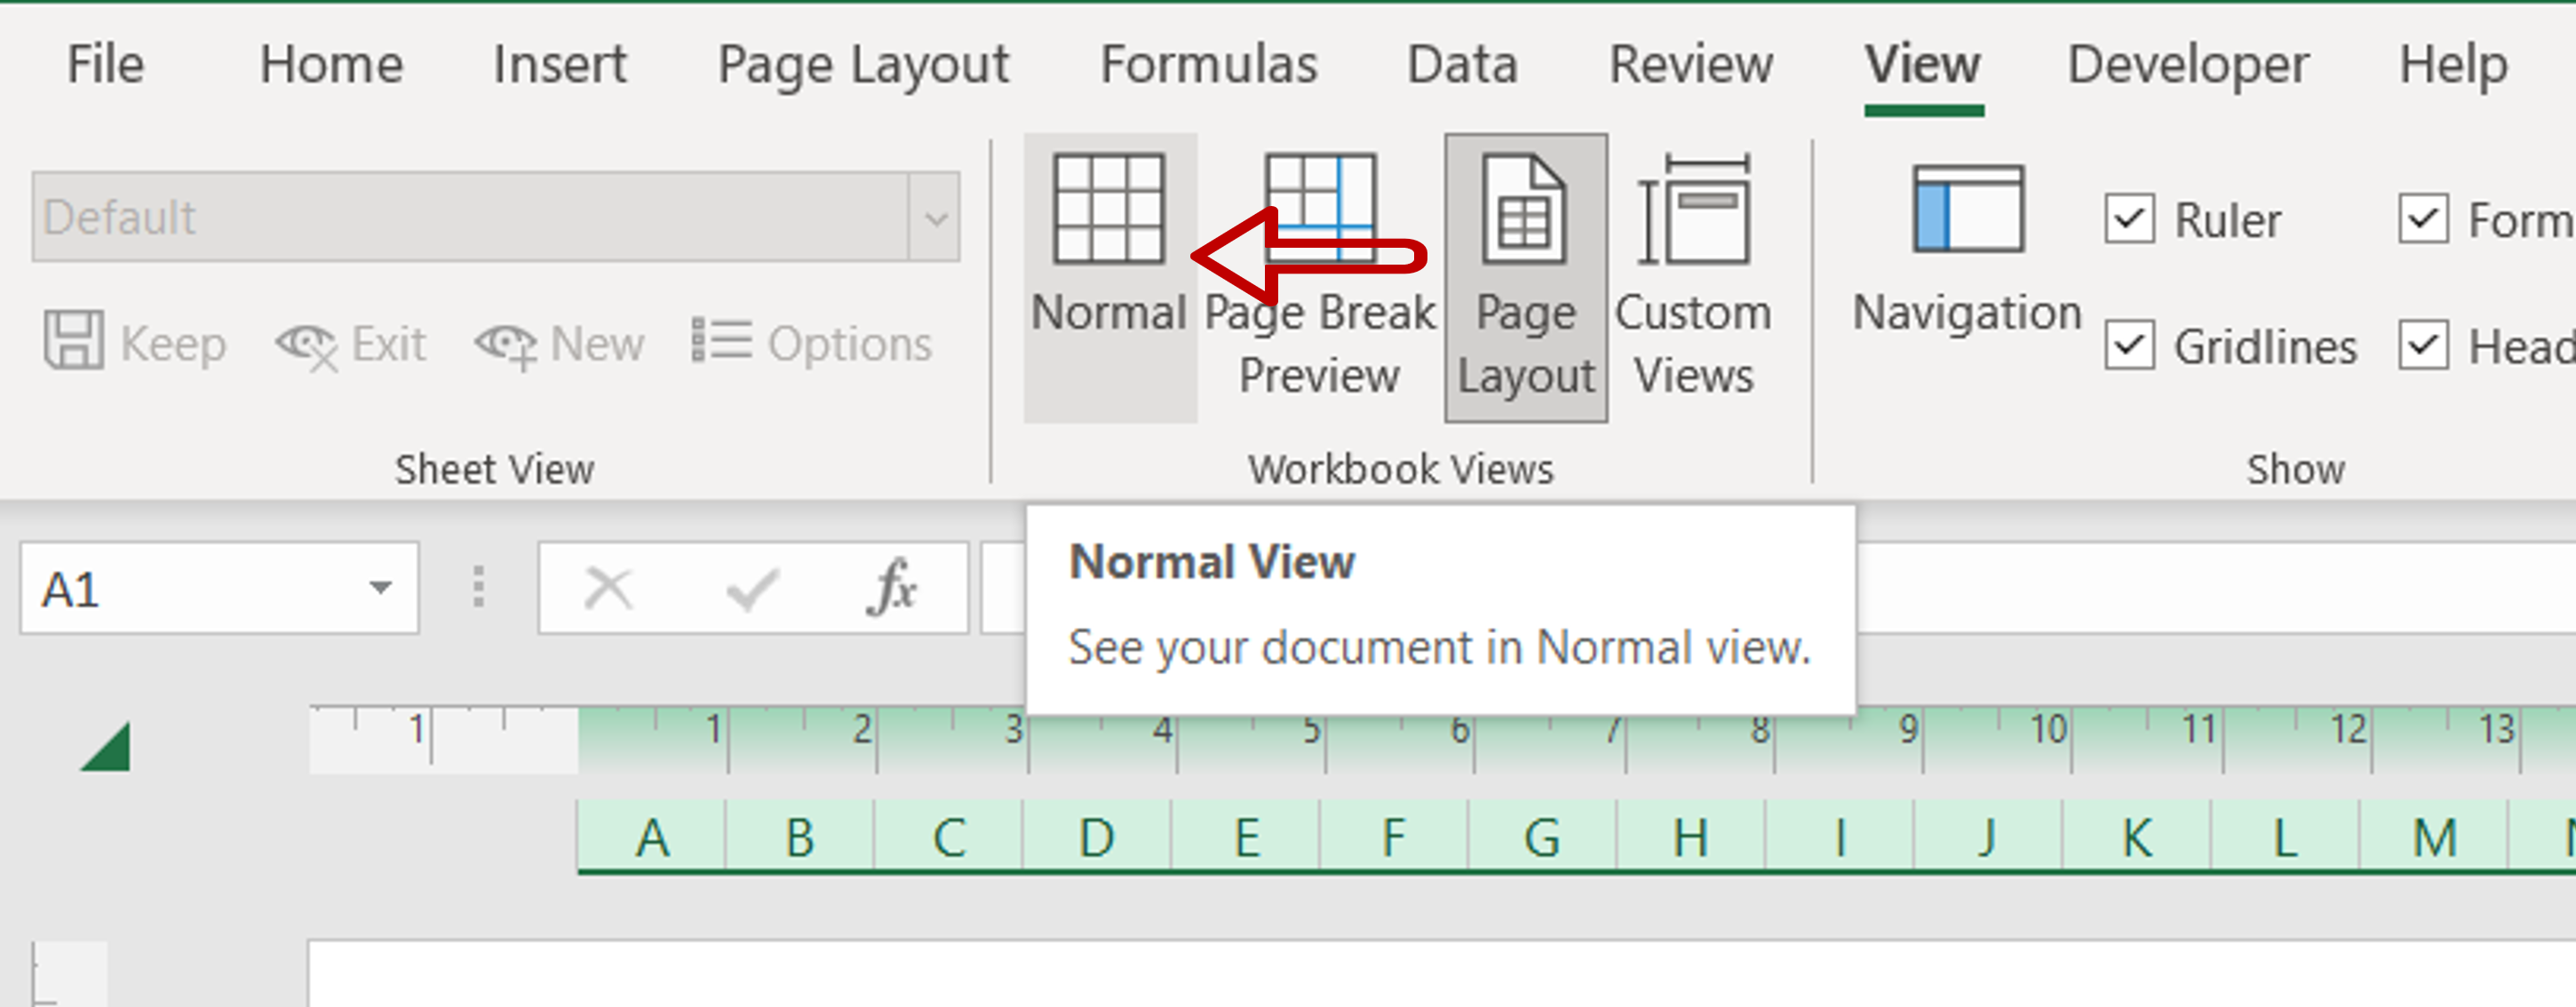
– Click the Normal View button on the ribbon
Step 7 – Check the result

– The worksheet cells are now square


