
How to make a schedule in Excel
 By
SpreadCheaters
By
SpreadCheaters
Page last updated:
12/01/2023 |
Next review date:
12/01/2025
You can watch a video tutorial here.
The spreadsheet format of Excel lends itself to creating different types of lists and trackers. One tracker that is used both professionally and personally is a schedule. Microsoft Office provides templates that you can use or you can custom-build your schedule.
Option 1 – Create your schedule
Step 1 – Create the columns
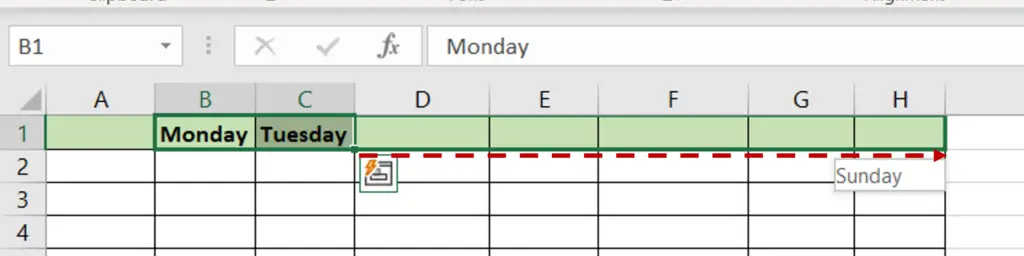
- Define the columns to be the days of the week
- Type the first 2 days and drag the fill handle to populate the remaining days
Step 2 – Create the rows
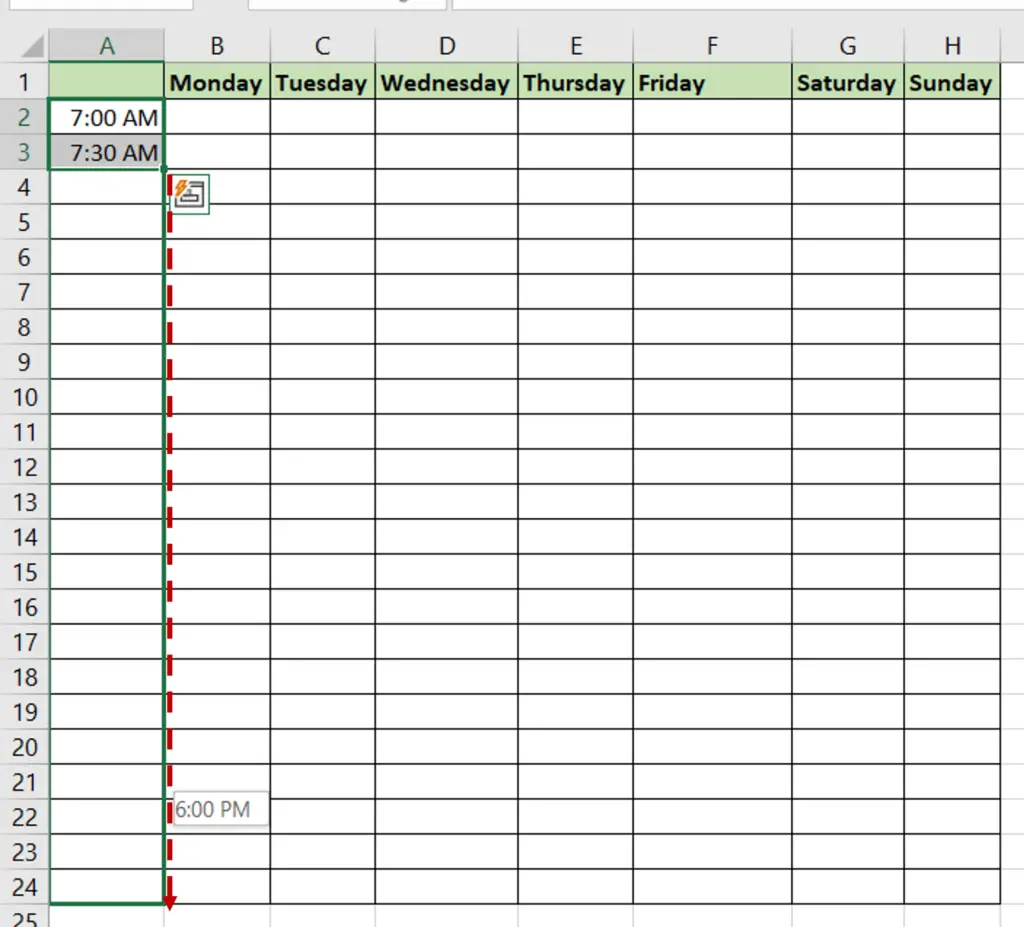
- Define the rows to be the time slots
- Type the first 2 values and then drag the fill handle to populate the rest of the time slots
Step 3 – Evenly space the columns
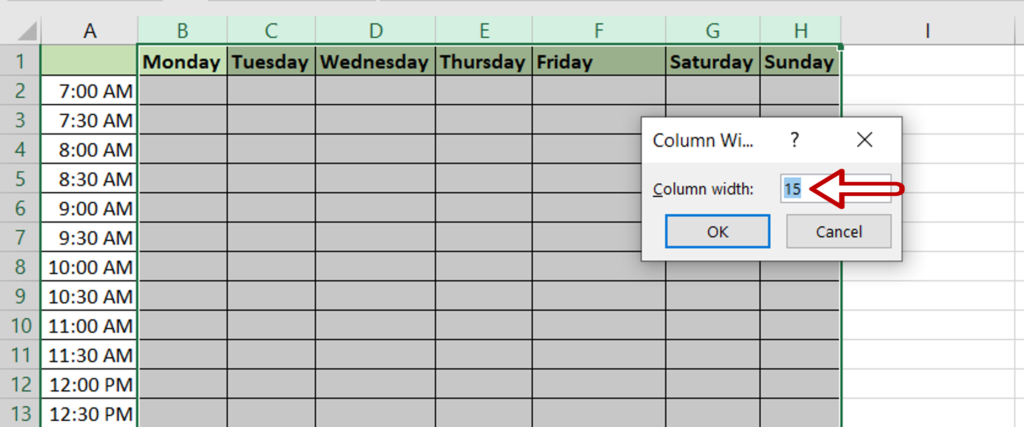
- Select the columns
- Right-click and select Column Width from the context menu
- Enter 15 for the column width
Step 4 – Enlarge the rows
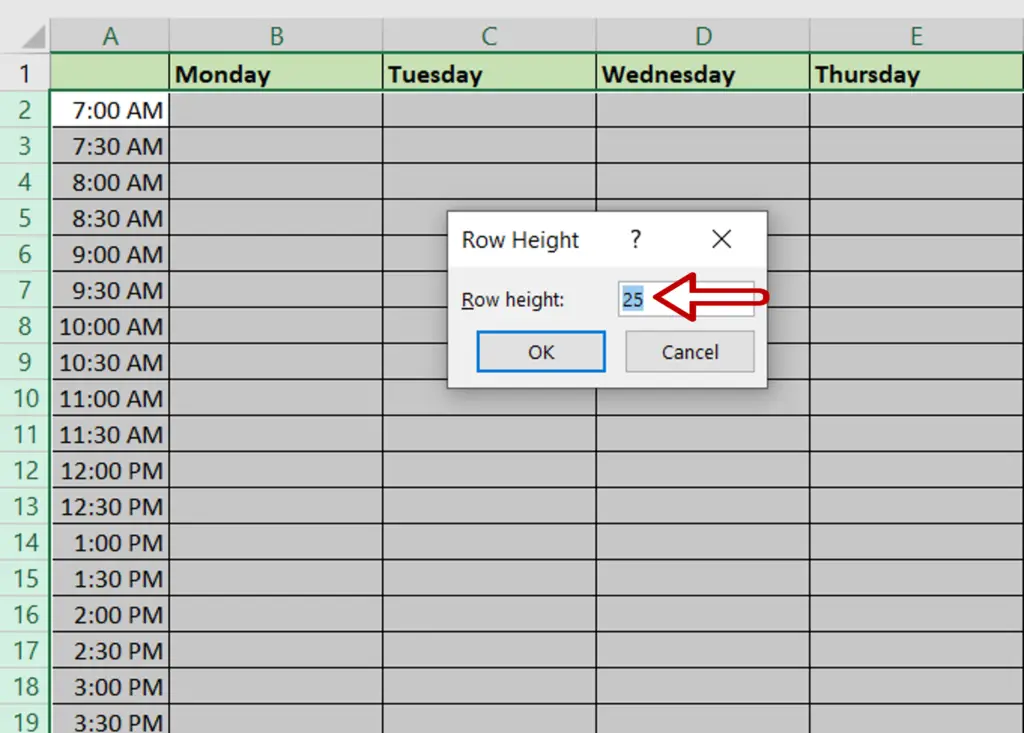
- Select the rows
- Right-click and select Row Height from the context menu
- Enter 25 for the row height
Step 5 – Fill in the schedule
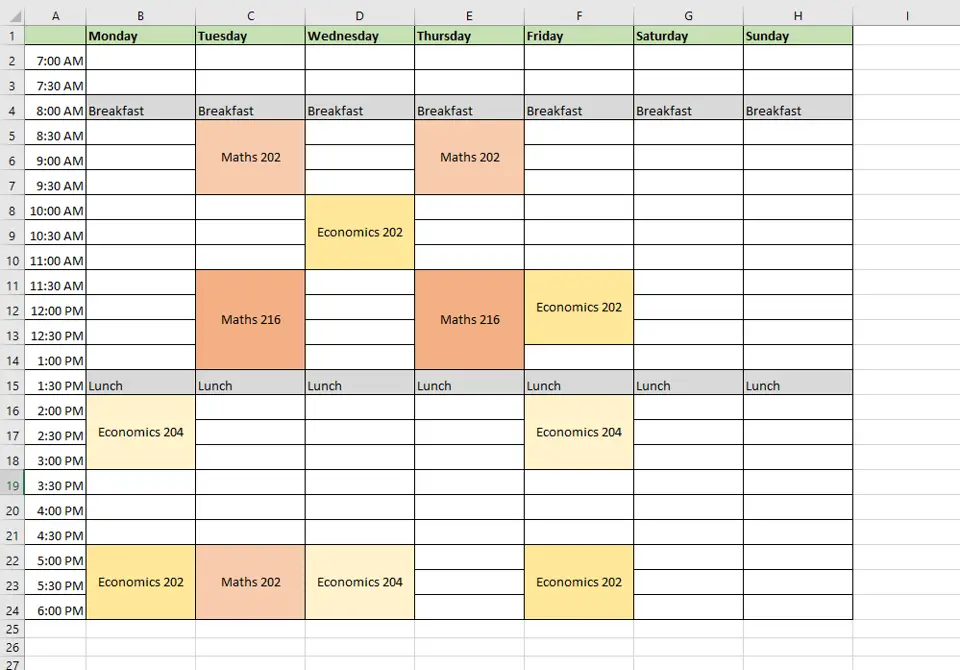
- Fill in the items for the schedule in the appropriate time slots
- Where an item spans more than one time slot, merge the cells by selecting the cells and using the merge and alignment options from Home > Alignment
- Color code the cells using the Fill Color option from Home > Font
Option 2 – Use a template
Step 1 – Find the template
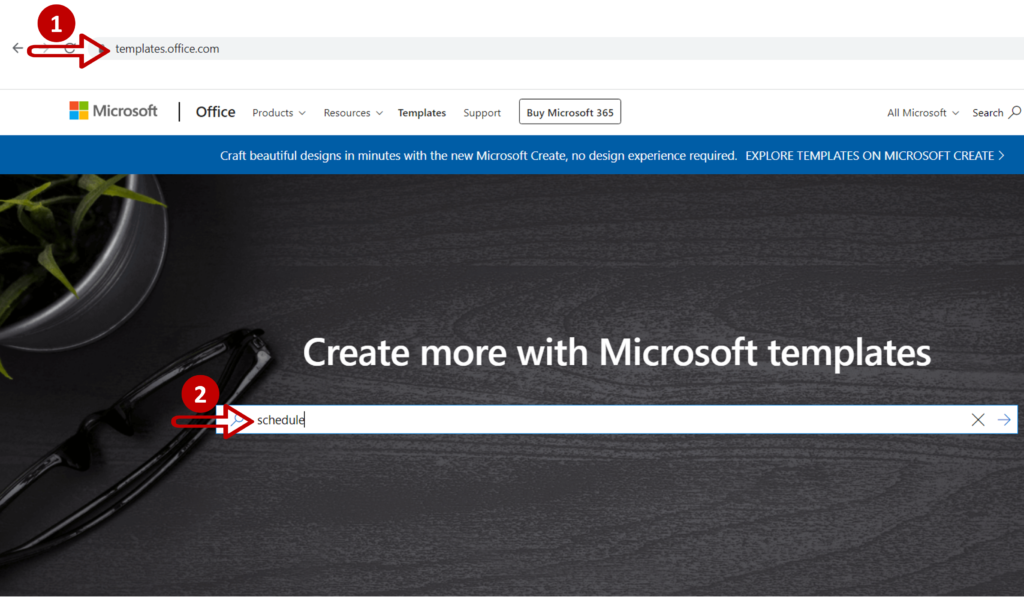
- Go to https://templates.office.com/
- Type ‘schedule’ in the Search box
- Press Enter
Step 2 – Choose a template
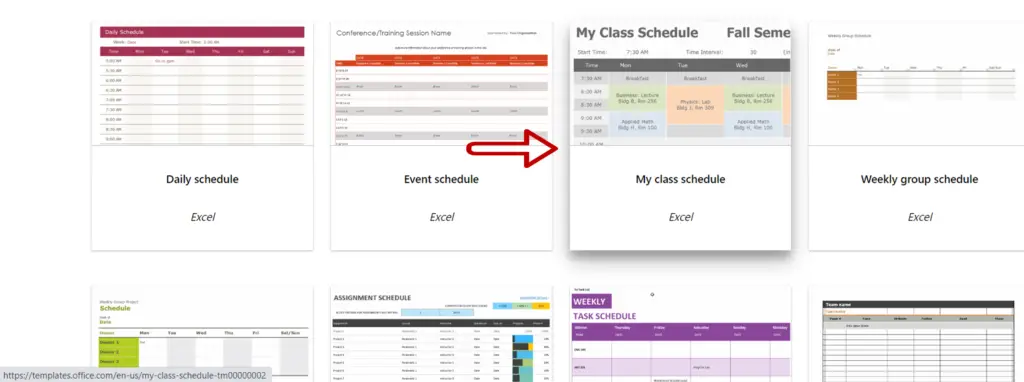
- Select the ‘My class schedule’ template
Note: Certain templates are available only for Microsoft 365 subscribers
Step 3 – Download the template
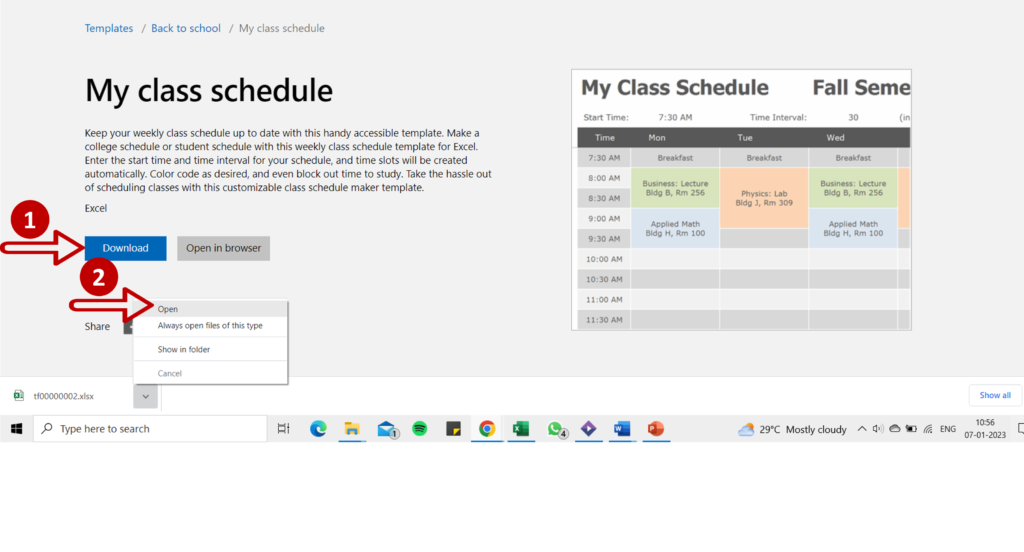
- Click Download
- After the file has been downloaded, click on the up arrow to expand the menu
- Click Open
Step 4 – Enable the file for editing
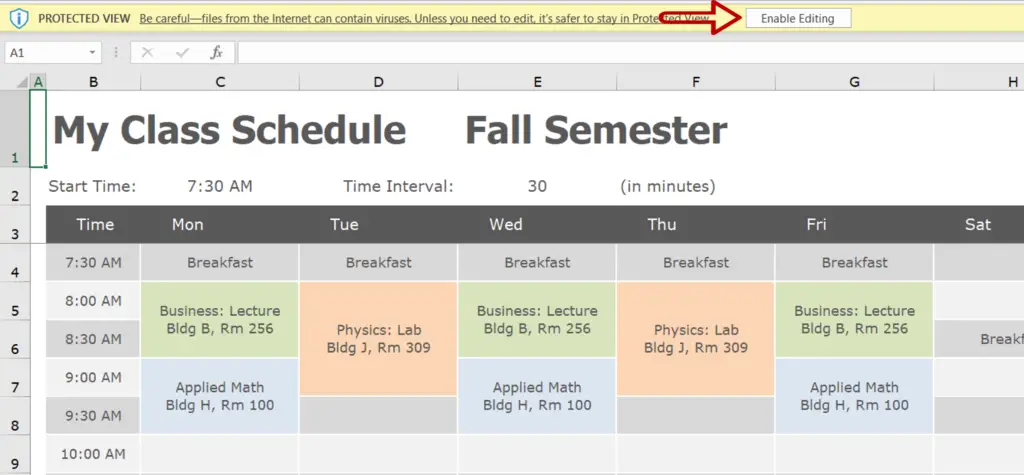
- Click the Enable Editing button to use the sheet
Step 5 – Use the schedule
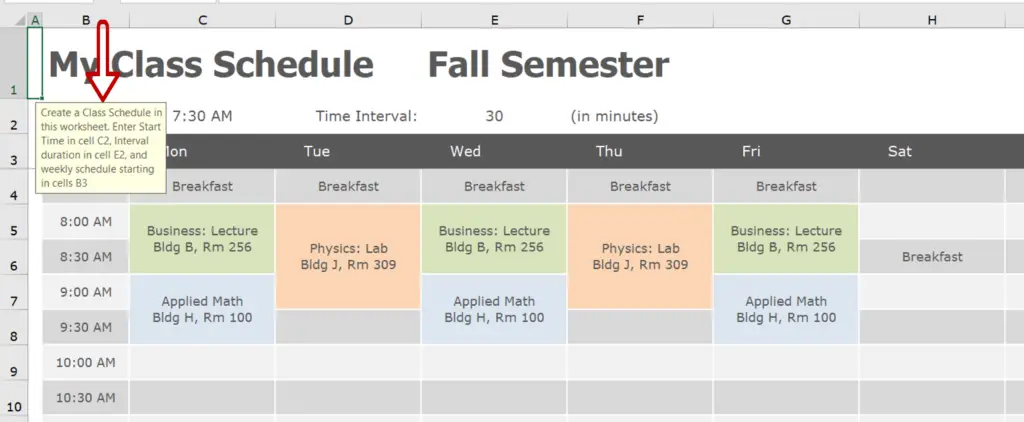
- Follow the instructions to use the schedule


