
How to lock tabs in Excel
 By
SpreadCheaters
By
SpreadCheaters
You can watch a video tutorial here.

Worksheets are also known as tabs due to the way they are arranged. To prevent users from making changes to an Excel sheet, the creator of the sheet can protect it by locking the worksheet. In a workbook with multiple sheets, you may also want to also lock the tabs so that they cannot be deleted. To do this you can lock the workbook.
Step 1 – Protect the sheet
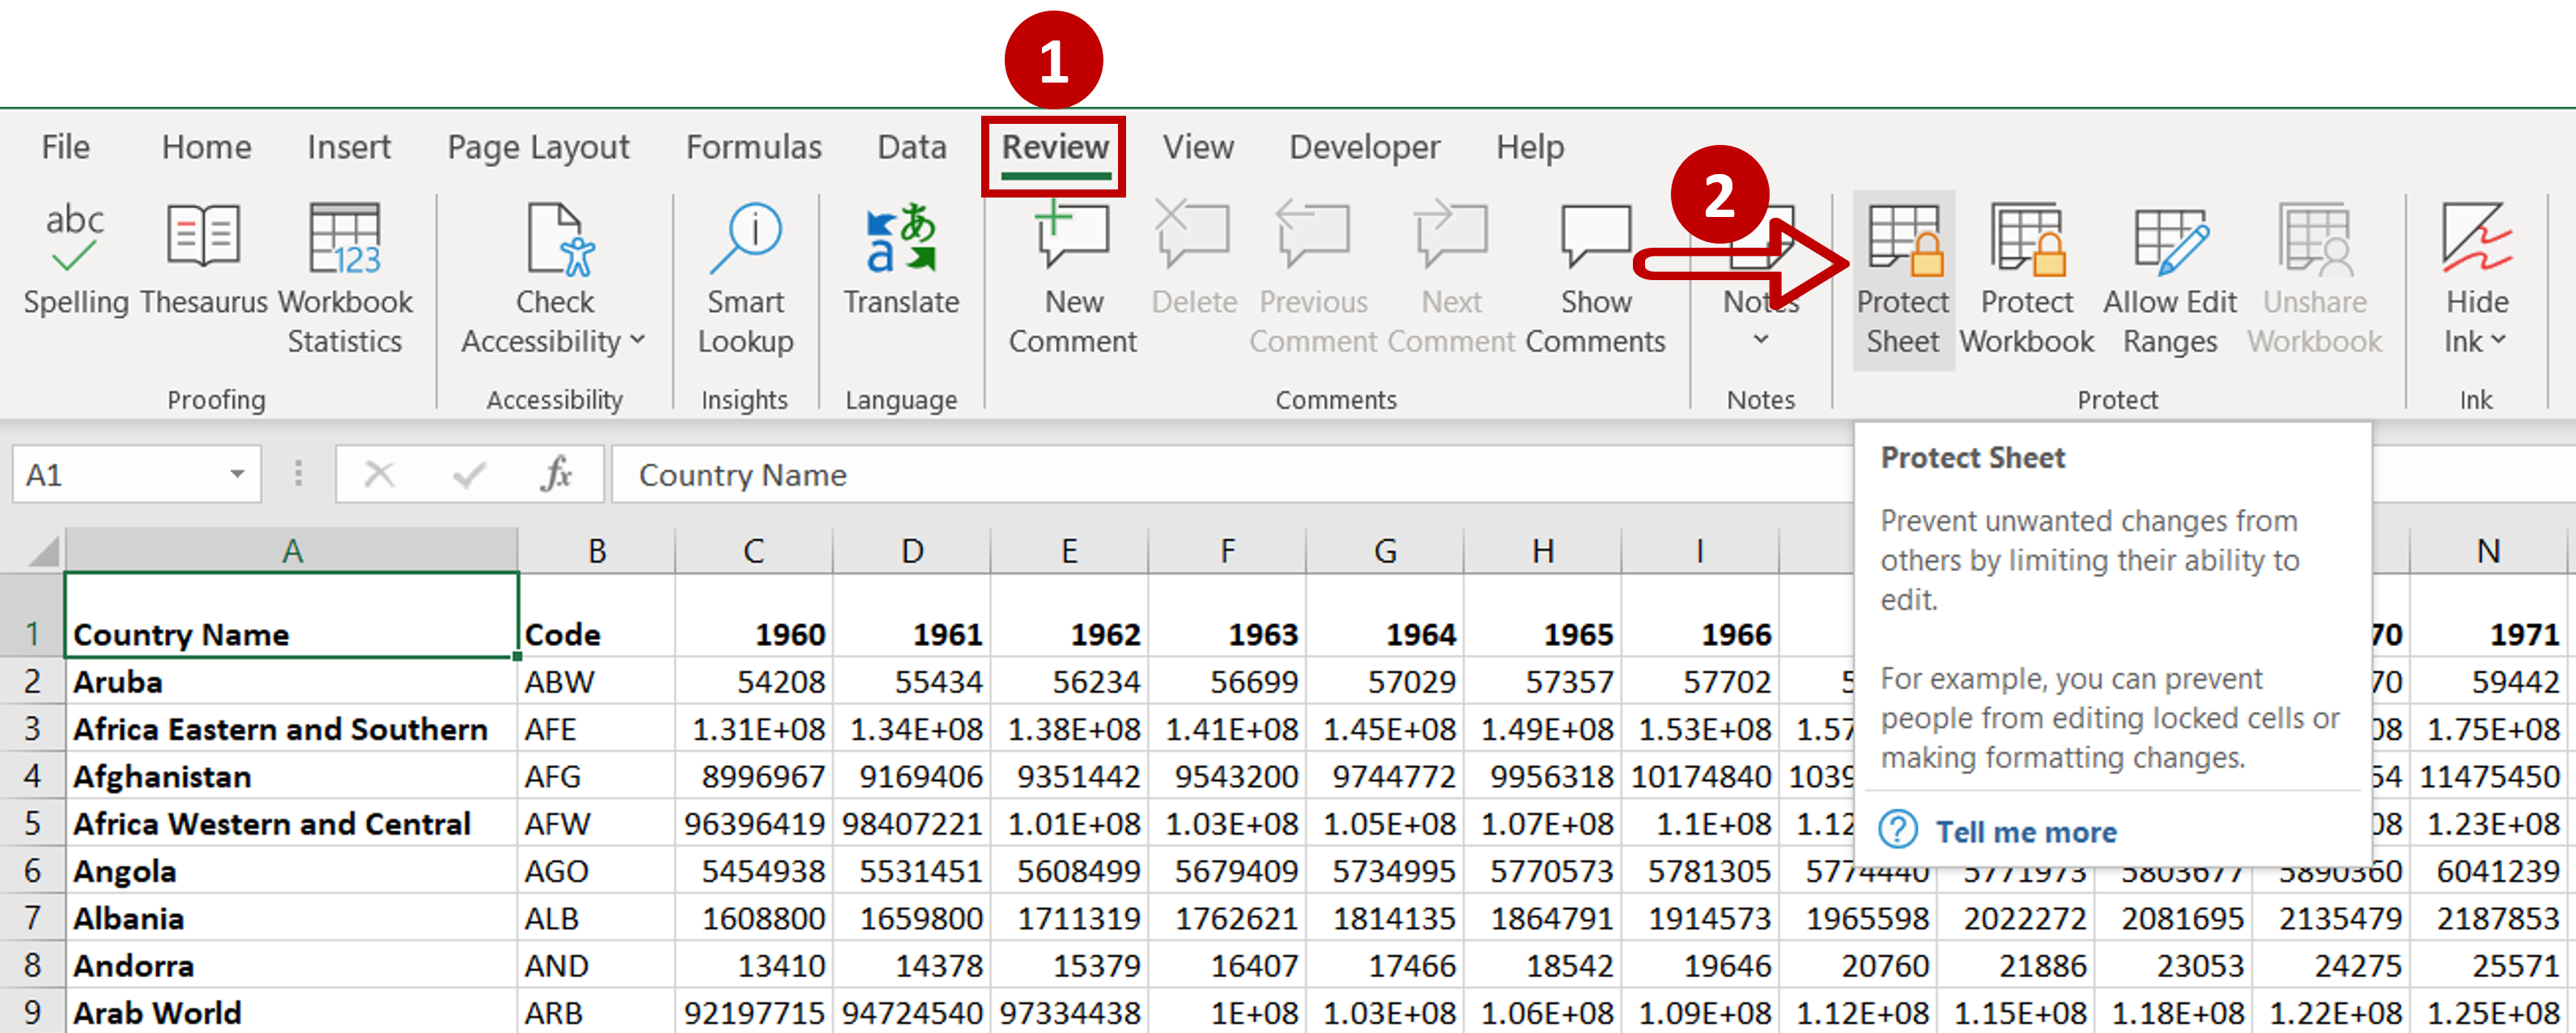
– Go to Review > Protect
– Click the Protect Sheet option
Step 2 – Enter the password
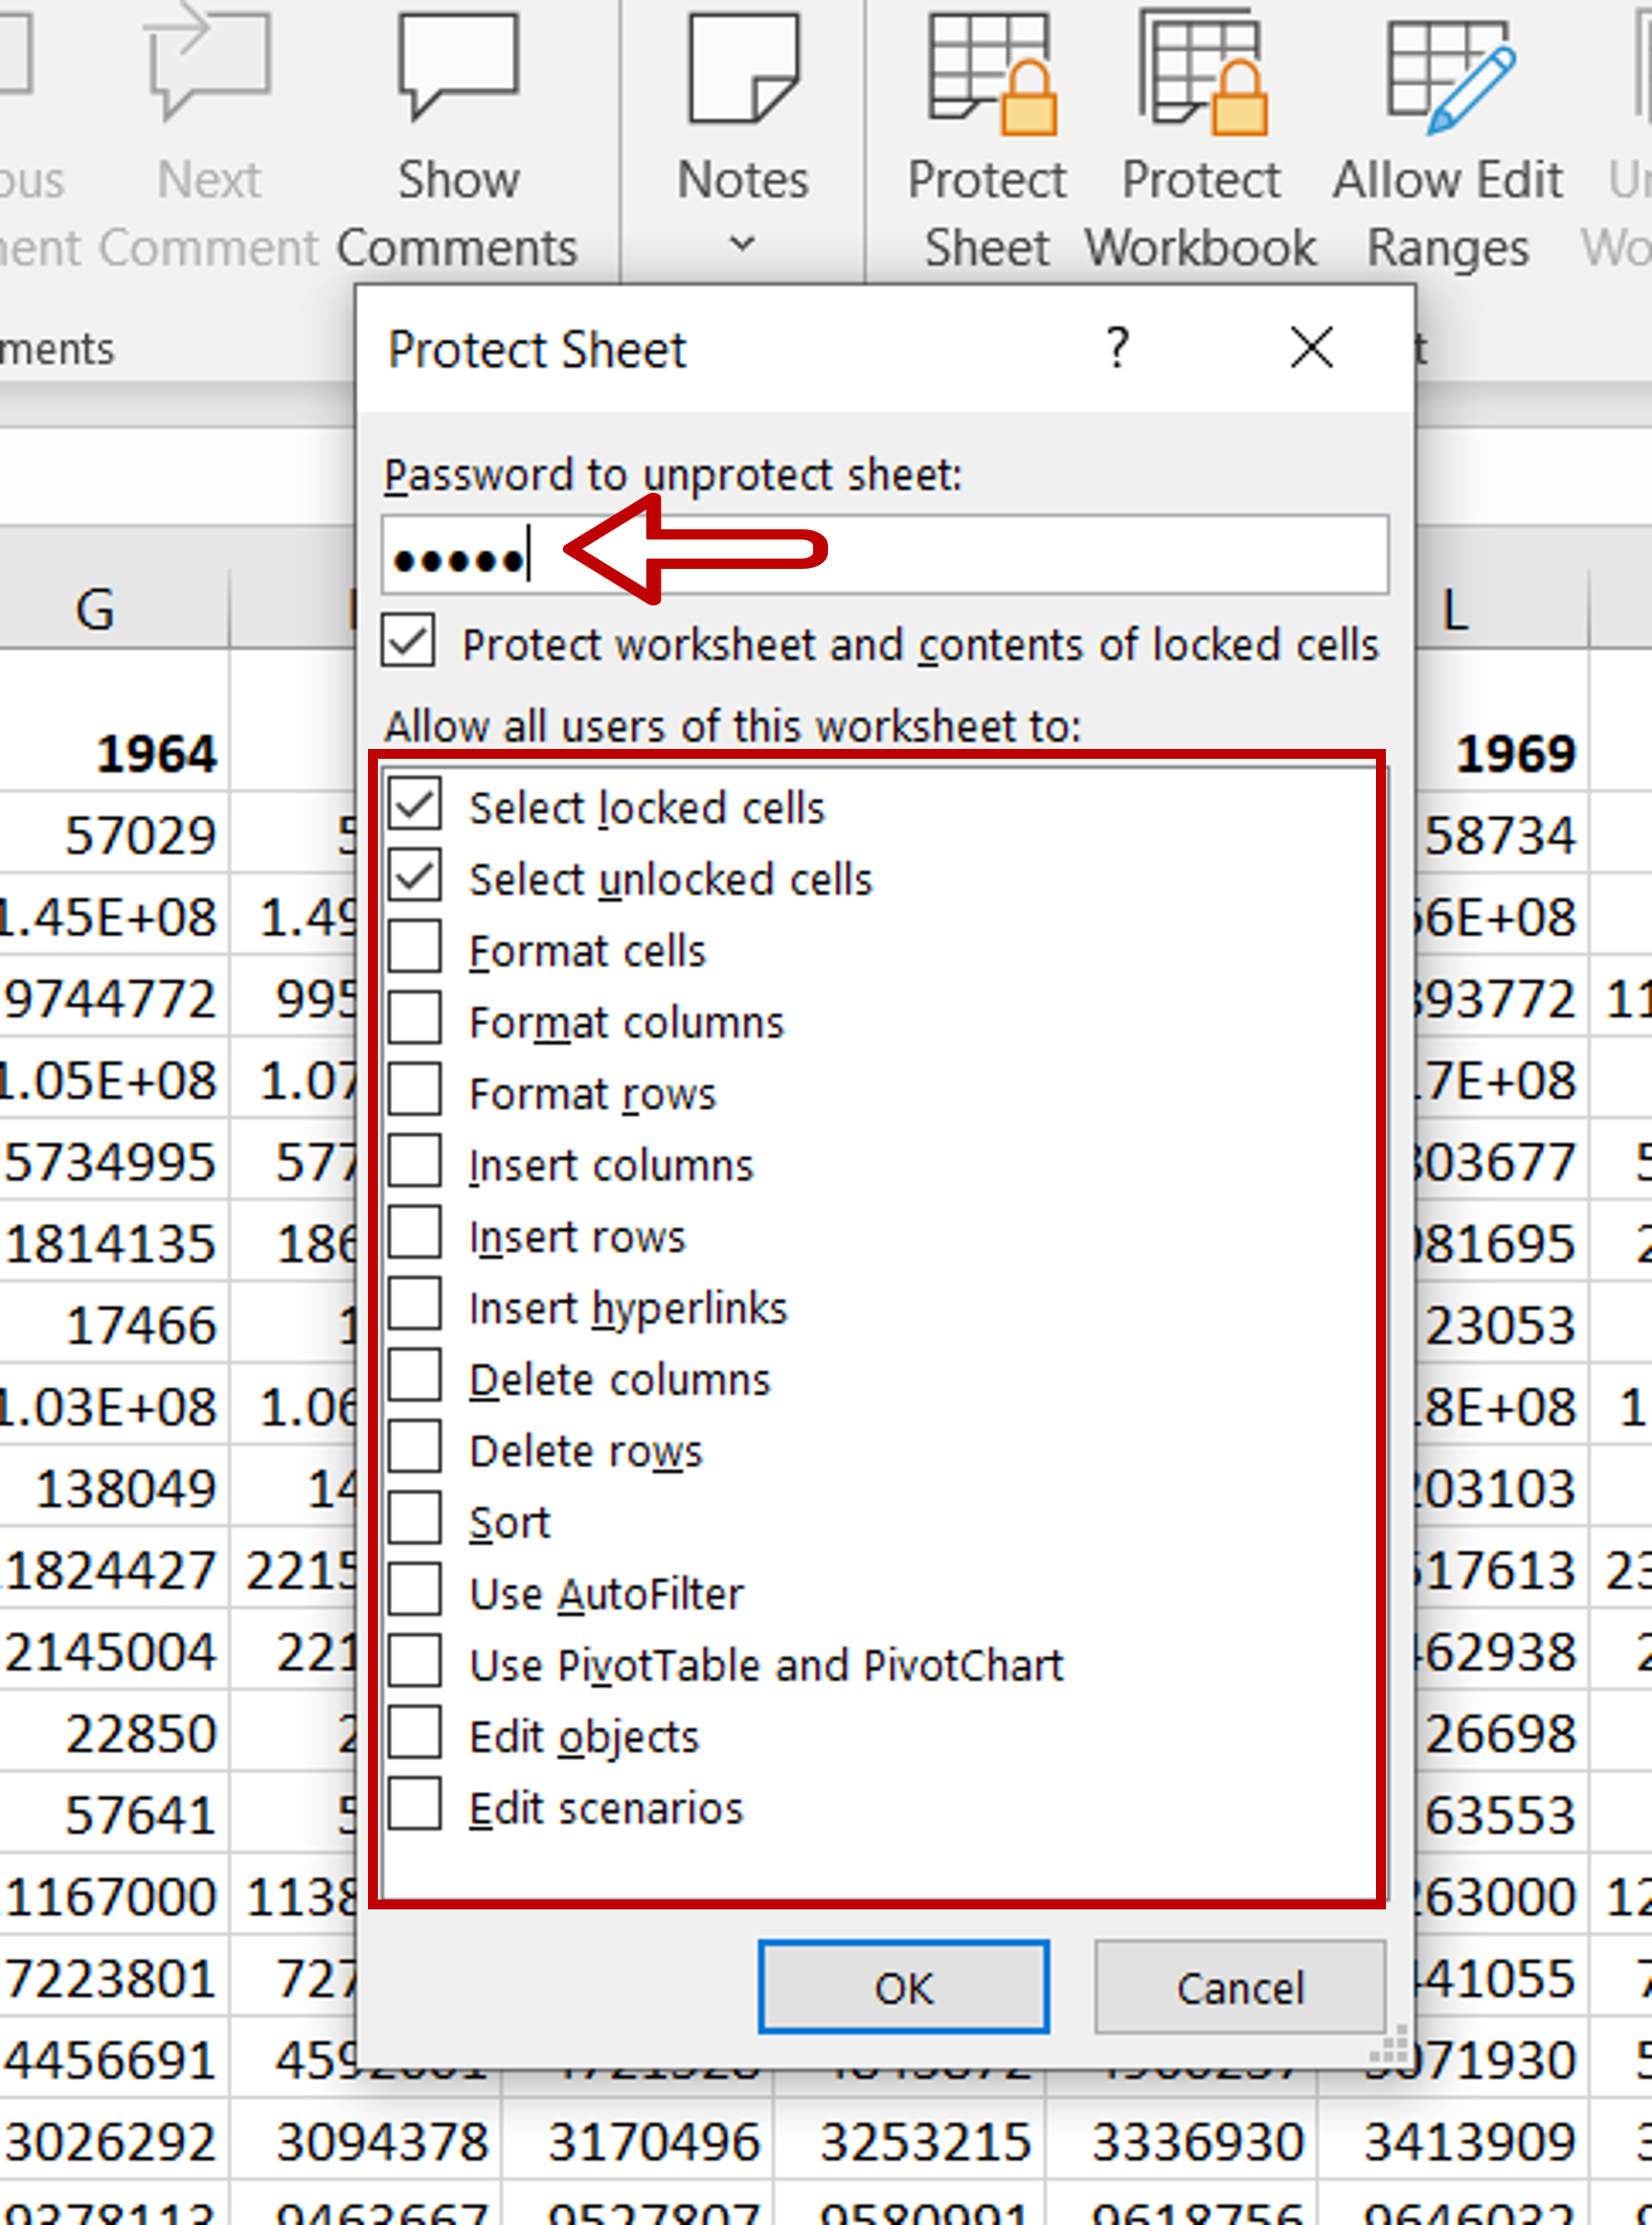
– Add a password for the sheet
– If you want, you can also set the permissions for users of the worksheet or you can keep the default settings
– Click OK
Step 3 – Confirm the password
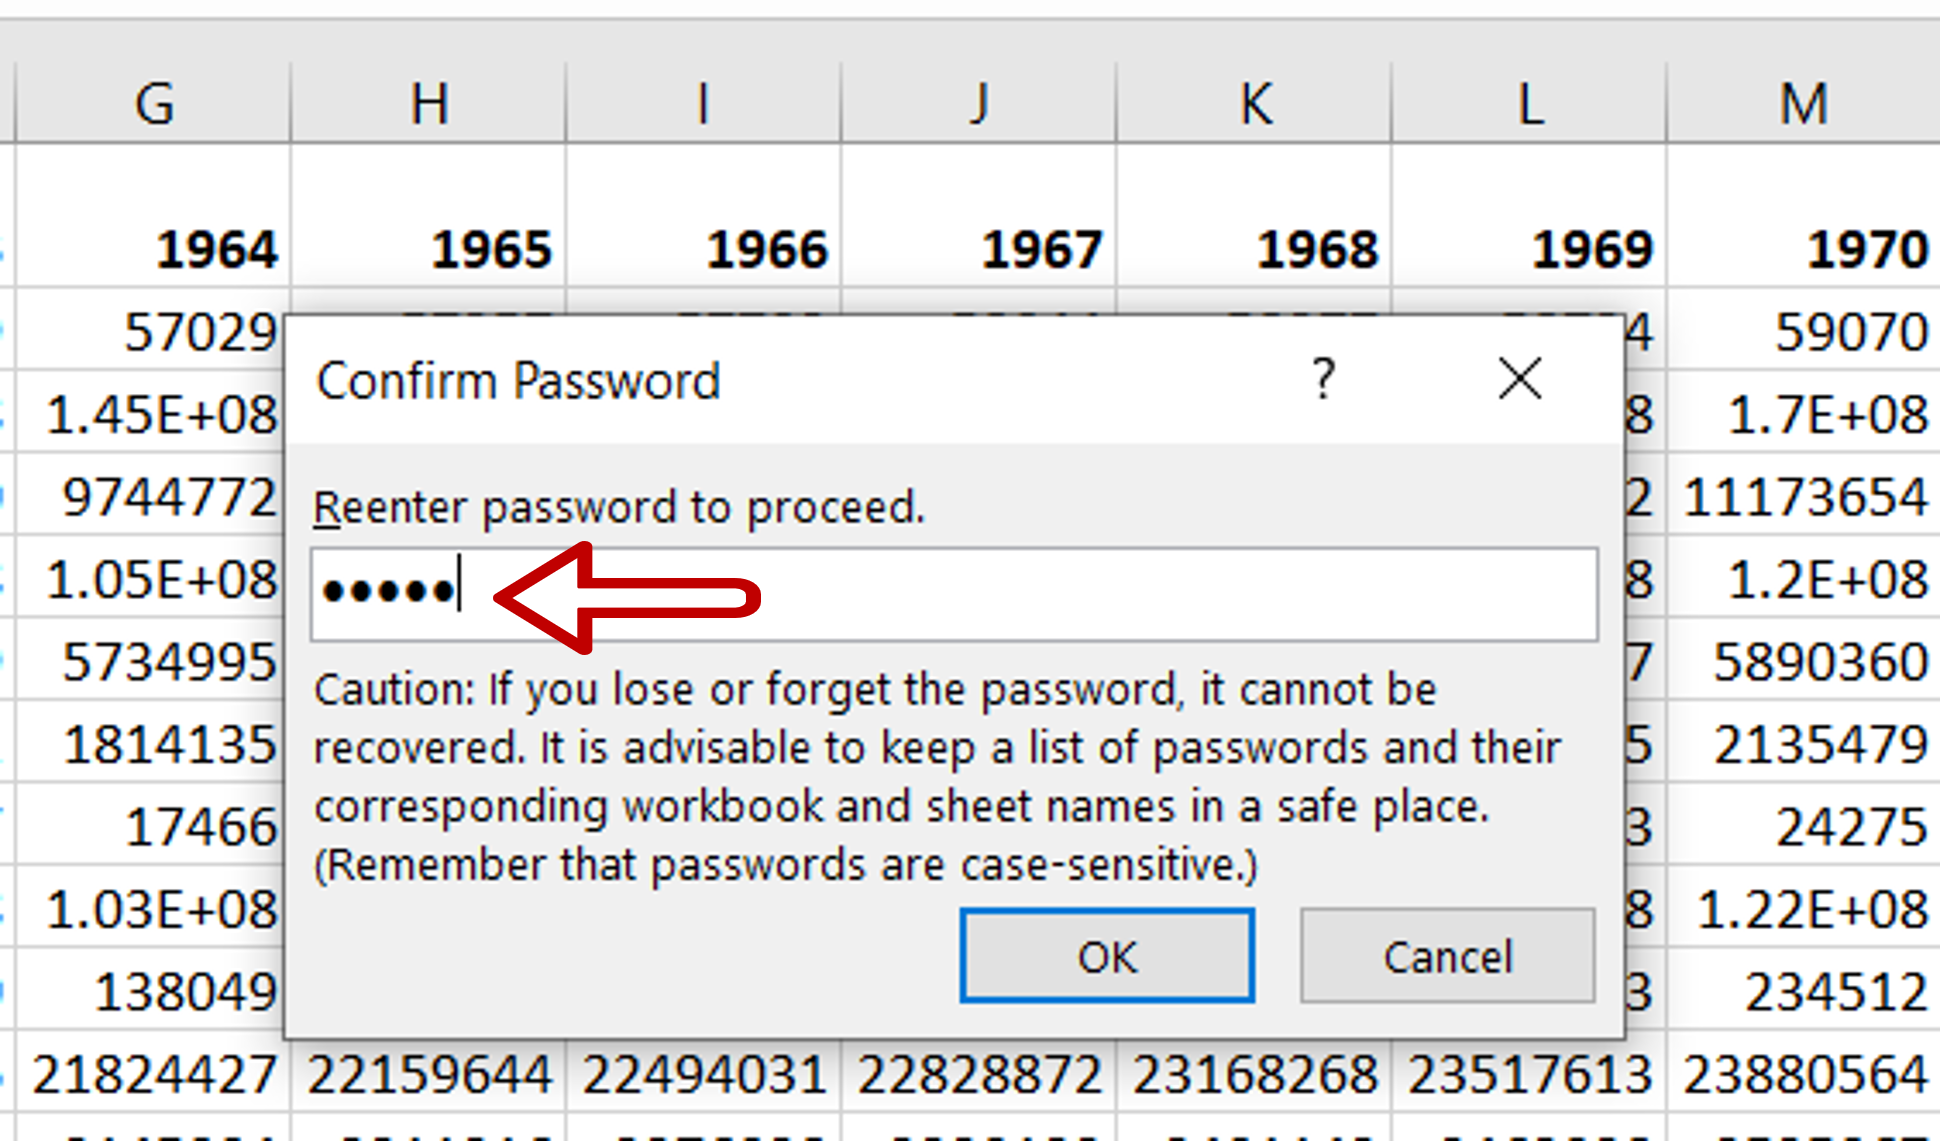
– Re-enter the password in the Confirm password pop-up
– Click OK
Step 4 – Check that the sheet is locked
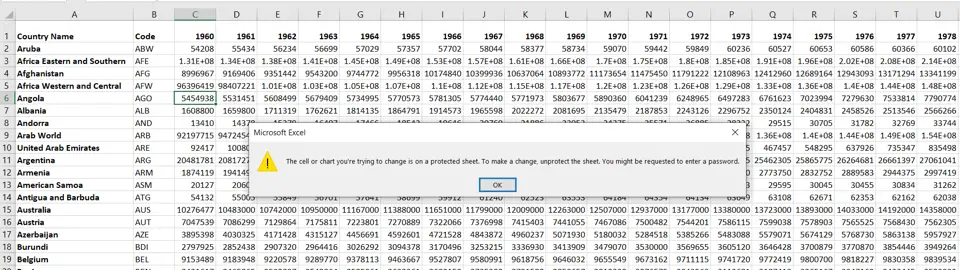
– Attempt to edit one of the cells on the worksheet
– An error message will be displayed
Step 5 – Lock the workbook

– Repeat steps 1 to 4 above for each tab that is to be locked
– Go to Review > Protect
– Click Protect Workbook
– In the box, click OK
Step 6 – Check that the tab is locked
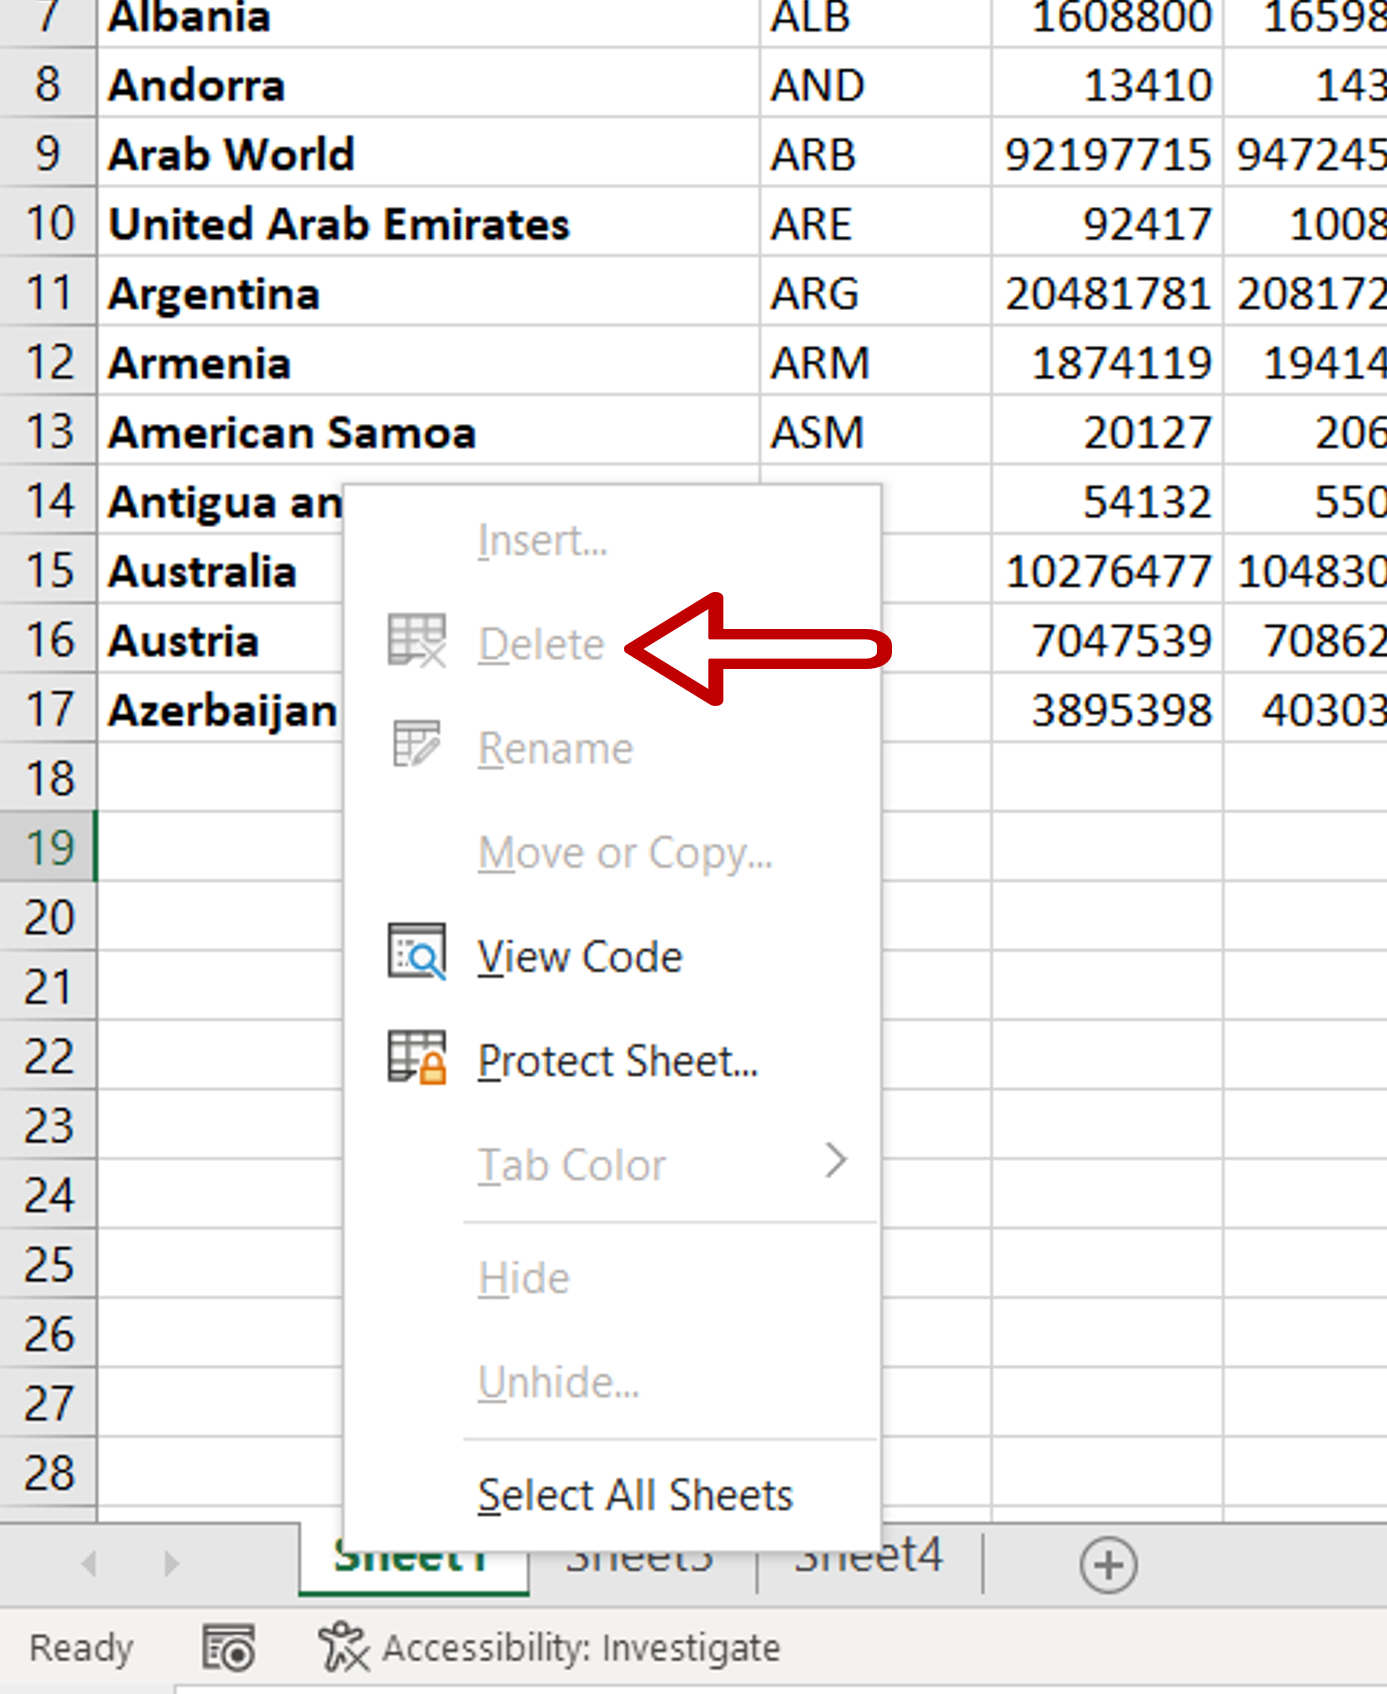
– Select a tab and right-click
– The Delete option is disabled


