
How to lock formulas in Excel without protecting Sheet
 By
SpreadCheaters
By
SpreadCheaters
Page last updated:
28/02/2023 |
Next review date:
28/02/2025
When you want to protect the contents of an Excel file, the most common approach is to protect the worksheet(s) with a password. However, this can be problematic if you want to share the file with others but only want to protect certain cells or ranges of cells. Fortunately, there are a few methods you can use to protect the contents of your Excel file without having to protect the worksheet itself.
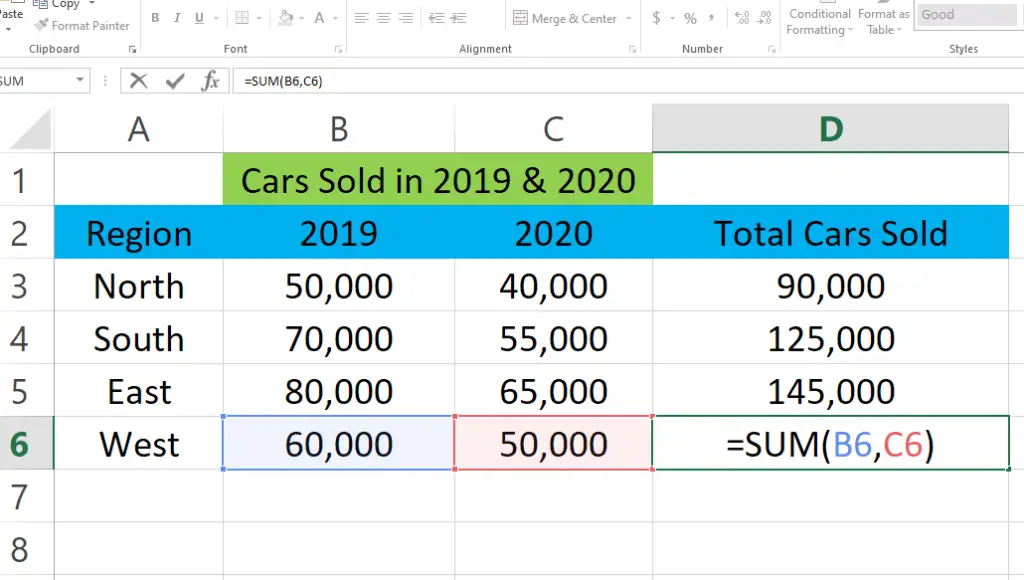
Here we have a dataset which contains cars sold in different regions in 2019 and 2020 also total cars sold in these two years. We will be locking the Sum formula used in Total cars sold cell without protecting the sheet using two different methods by following the steps below but first let’s have a look at the dataset above.
Method 1 – Protecting the cells.
Step 1 – Format the cells with formula.
- Select the cells you want to lock.
- Right click and a menu will open, select Format Cells.
- In the Protection tab check the Locked check box.
Step 2 – Protect the cells.
- Go to the Review tab.
- Click on Protect Sheet.
- Make sure Select locked cells and Select unlocked cells checkboxes are checked.
- Type in your password which will be used when you want to unprotect the cells.
- Confirm your Password!
Method 2 – Data Validation.
Step 1 – Open Data Validation menu.
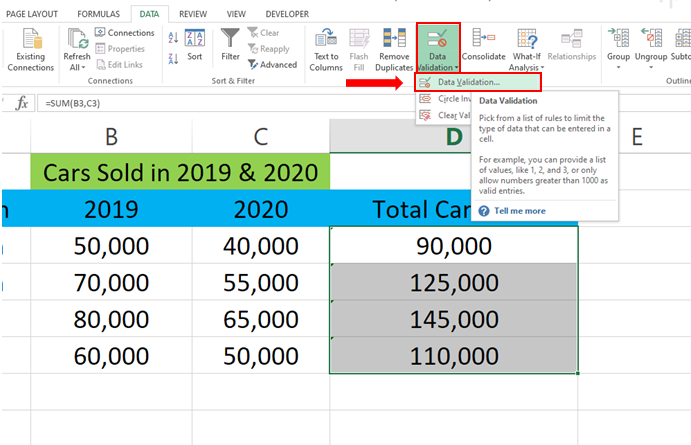
- Select the cells with formulas.
- Go to the Data tab.
- Open drop down menu of Data Validation in Data Tools group.
- Click on Data Validation.
Step 2 – Apply Data Validation.
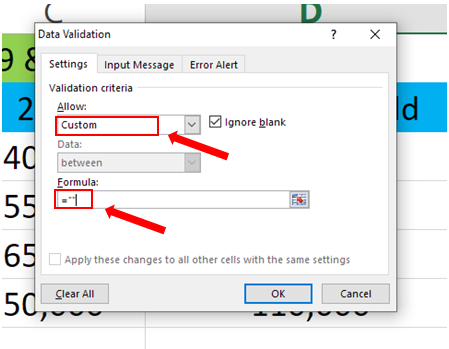
- In the Settings tab below Allow choose Custom from the drop down menu.
- In formula box type =””.
- Click OK.
Step 3 – Try adding something else in the cells with formula.
- When you try to add something else in the cell, it will display an error menu.
- This means your formulas are protected now and can’t be changed.


