
How to insert table in Excel
 By
SpreadCheaters
By
SpreadCheaters
Excel provides a very simple and easy to use method to convert any data set into an Excel table which can then be used as a database.
Let’s learn how to do it step by step.

Tables in Excel are a great way to arrange the data. In fact using tables we can create proper databases in Excel. When we use tables in Excel then the columns become Fields and rows become the Records.
Step 1 – Click anywhere in the data set

– If you already have a data set that you wish to convert into a table then click anywhere inside a cell as shown in the figure above.
Step 2 – Open Create Table dialog box by pressing CTRL + T
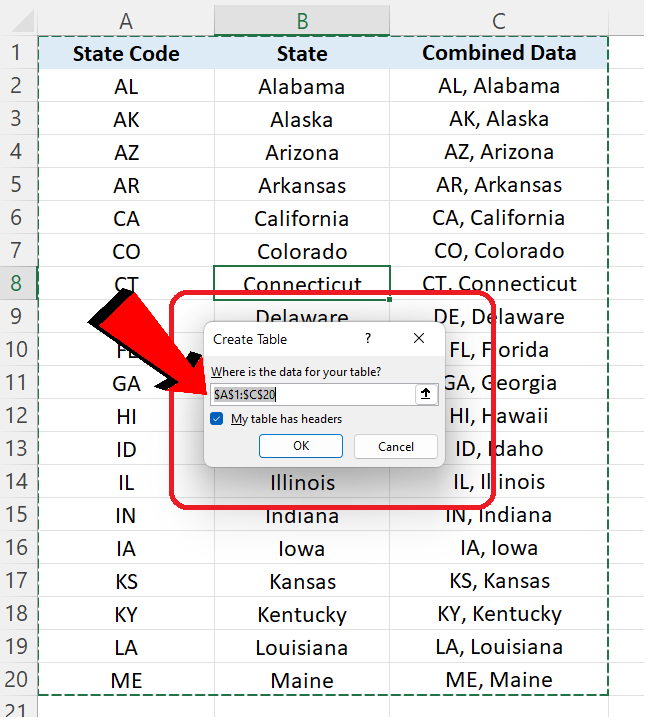
– Now press the special shortcut keys CTRL + T
– A new dialog box will appear. It will show you the data range that will be converted into a table. At this point you can change the table range or can leave it as it is if you are satisfied with the selection range.
– It will also ask you to check if your data has headers. As in the data set we used, the headers are available so we will keep that option checked as shown in the figure above.
Step 3 – Convert the data into Excel Table
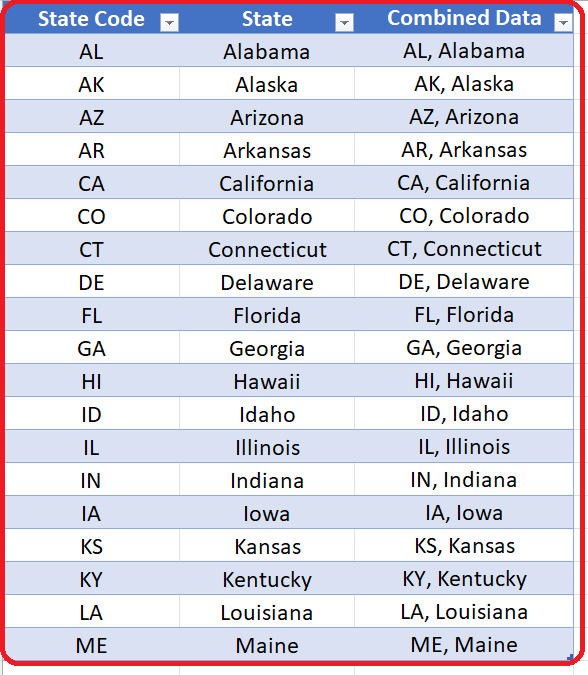
– After finalizing the data range and mentioning that our data set has headers just press the OK button.
– Your data set will be converted into an Excel table and the colors of the cells will automatically be changed into alternating blue color by default as shown above.


