
How to insert rows in Excel
 By
SpreadCheaters
By
SpreadCheaters
Page last updated:
16/11/2022 |
Next review date:
16/11/2024
You can watch a video tutorial here.
Spreadsheets in Excel are organized as columns and rows. When working in Excel, you may need to insert rows into a table or a piece of text that you are typing.
Option 1 – Select cells
Step 1 – Select a cell
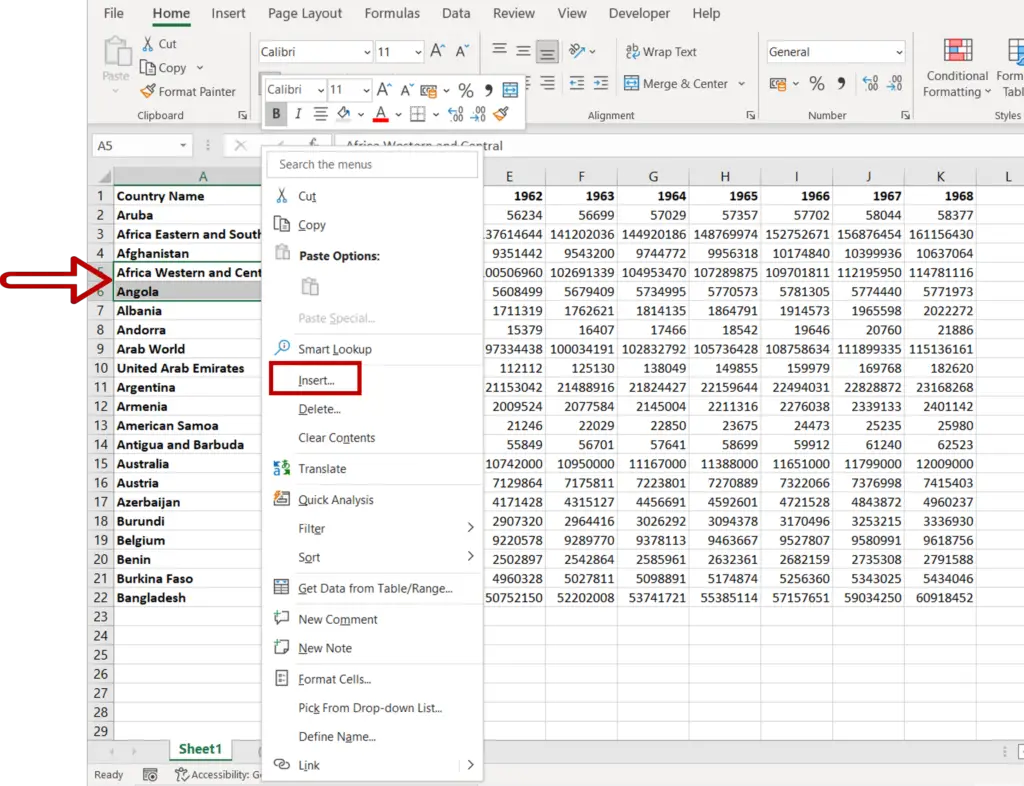
- Select the cell or cells at the location where the row or rows are to be inserted
Note: The number of cells selected should match the number of rows to be inserted e.g. 1 cell for 1 row, 2 cells for 2 rows and so on
- Right-click to display the context menu and select Insert
OR
Go to Home > Cells > Insert > Insert Sheet Rows
Step 2 – Choose the insert option
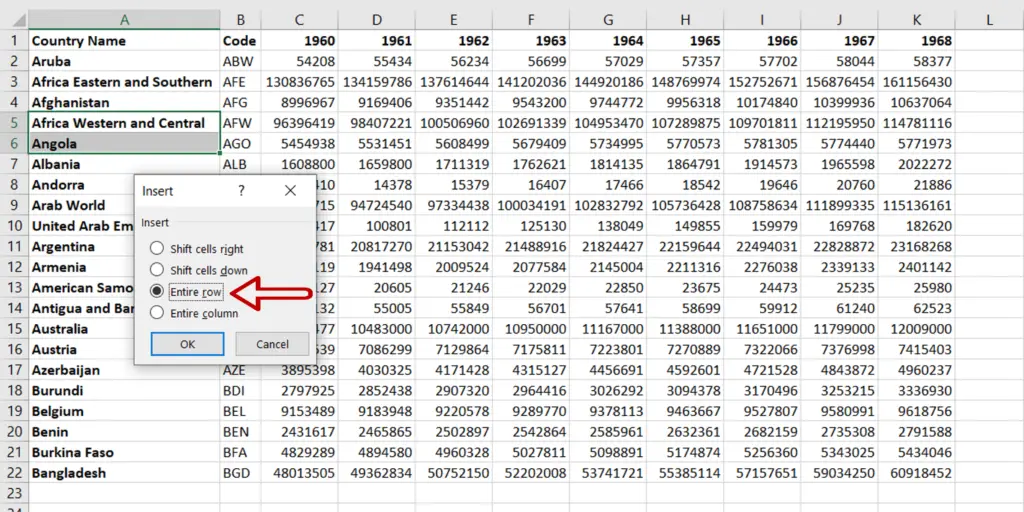
- Select Entire row
- Click OK
Step 3 – View the result
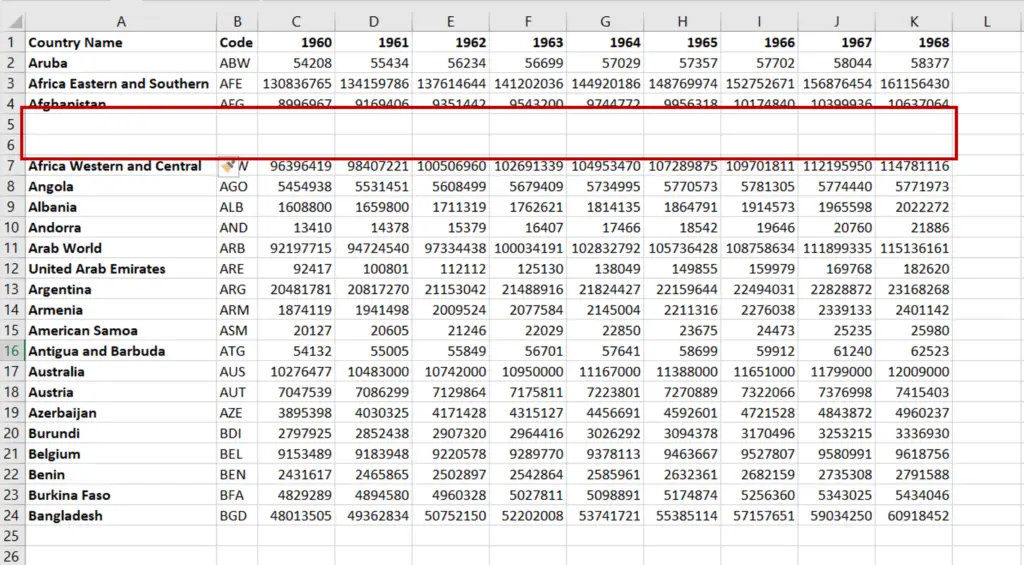
- Rows have been inserted
Option 2 – Select rows
Step 1 – Select the rows
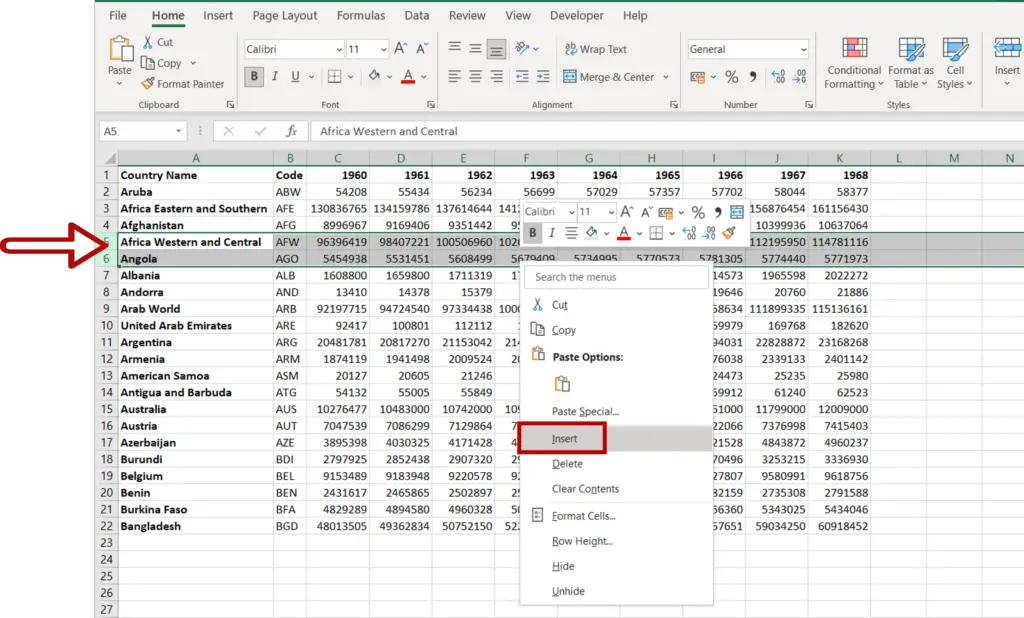
- Select a row or rows at the location where the row or rows are to be inserted by clicking on the row number
Note: To select multiple rows, click the row number and drag the cursor down. Alternatively, click the row header, press the Shift key and press the Down Arrow
- Right-click to display the context menu
- Select Insert
Step 2 – View the result

- Rows have been inserted


