
How to insert page break in Excel
 By
SpreadCheaters
By
SpreadCheaters

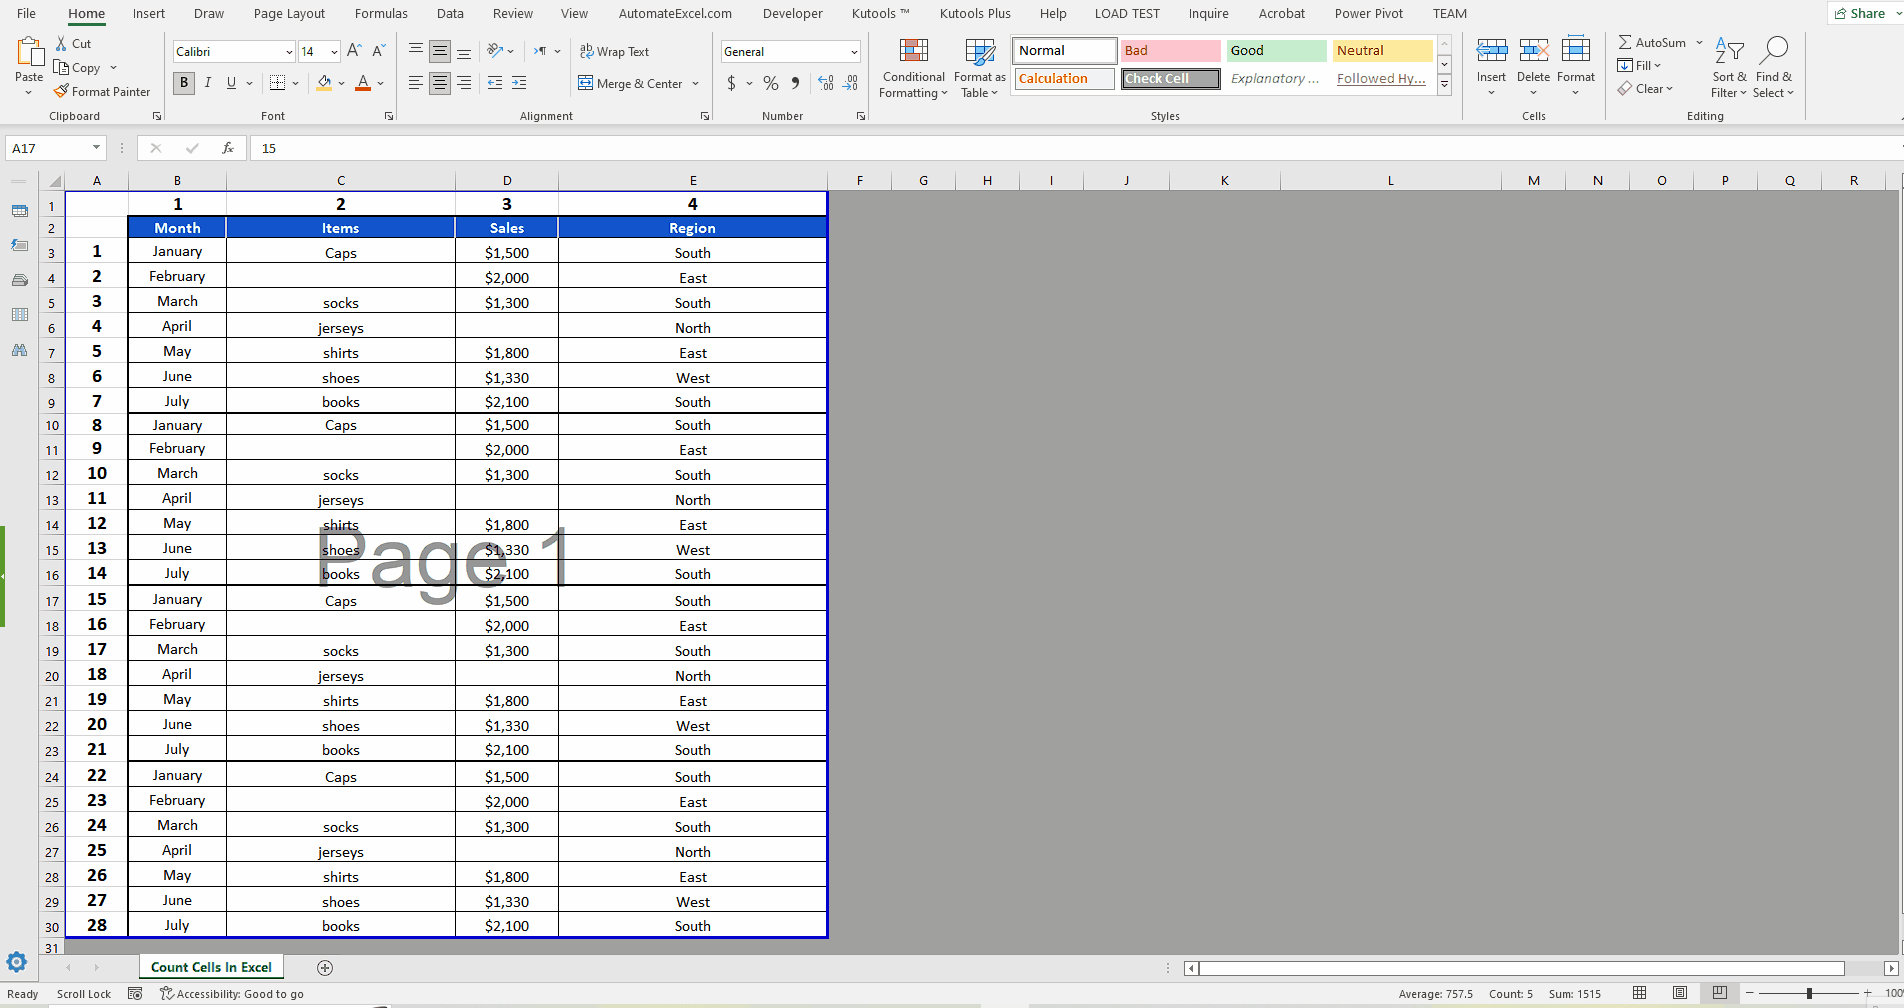
In this tutorial, we’ll learn how to manually insert page breaks in Excel manually by choosing the number of rows to be printed on one page ourselves. The current dataset has 28 rows and all are getting printed on a single page. We will insert a page break manually to divide the content to two pages.
While printing the spreadsheet in Excel, if you like to control which content goes on one page and what gets printed on the next page, and so on then you will have to manually insert a page break in between the pages.
Step 1 – Select the row above which you wish to insert page break
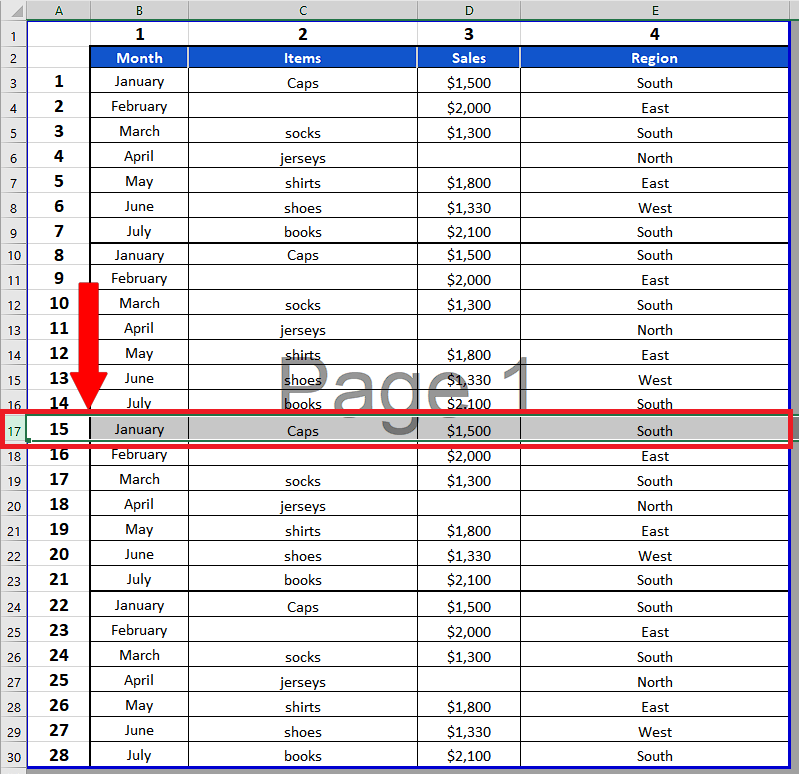
– First of all, select the appropriate row in the sheet. The page break will be inserted before the selected row. In our dataset we’ll choose the 17th row against Sr. # 15 so that our data is divided equally on both pages.
Step 2 – Click on the Page Layout tab on Main Menu
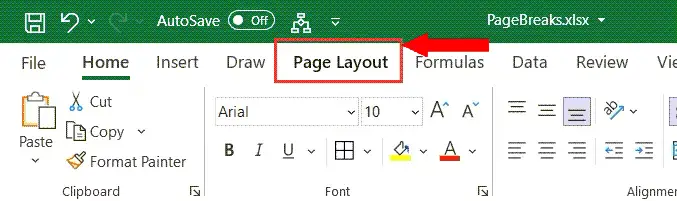
– In Excel’s main menu, click on the Page Layout tab.
Step 3 – Click on the Breaks drop down options
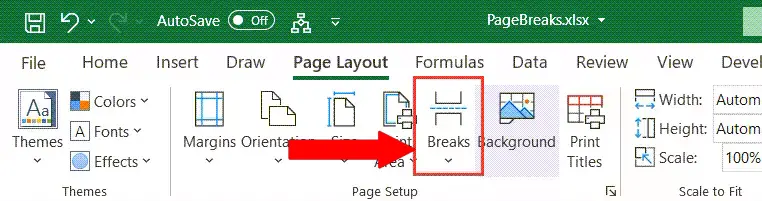
– Now click on the Breaks drop down options arrow.
Step 4 – Click on the Insert Page Break option
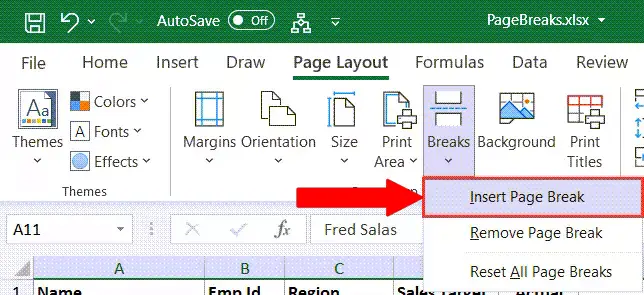
– Now click on the Insert Page Break option.
Step 5 – Page Break View will show the page break

– After clicking the Insert Page Break in the previous step, the page break will be inserted in the spreadsheet.
– If you are already in Page Break View then the page break will be visible instantly, otherwise switch to this view by choosing this option from the bottom right corner of the spreadsheet.


