
How to Insert Excel Table into PowerPoint
 By
SpreadCheaters
By
SpreadCheaters
If you’re giving a presentation and need to showcase data, using an Excel table can be an effective way to do so. However, simply copying and pasting an Excel table into your PowerPoint presentation can often result in formatting issues and make the table difficult to read. In this article, we’ll show you step-by-step how to properly insert an Excel table into PowerPoint so that it looks professional and is easy for your audience to understand.
Before we dive in, it’s important to note that there are a few different ways to insert an Excel table into PowerPoint. Depending on your specific needs and preferences, you may choose to use one method over another. However, the steps we outline below will cover the most common and reliable methods for inserting an Excel table into PowerPoint.
So, whether you’re a seasoned PowerPoint user or new to the software, read on to learn how to insert an Excel table into your presentation with ease.
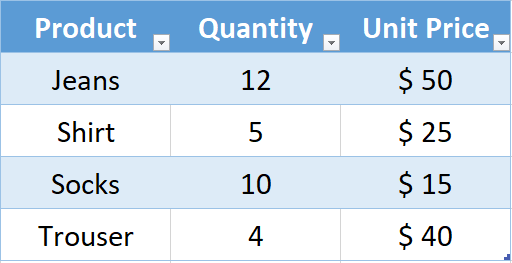
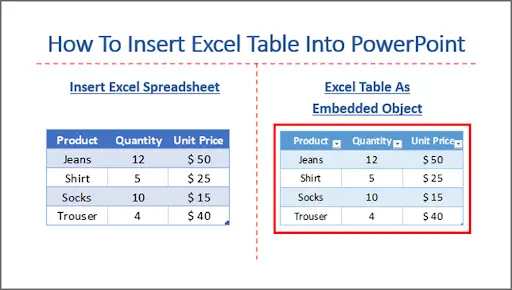
Suppose we have the following table shown above & we want to insert this in PowerPoint.
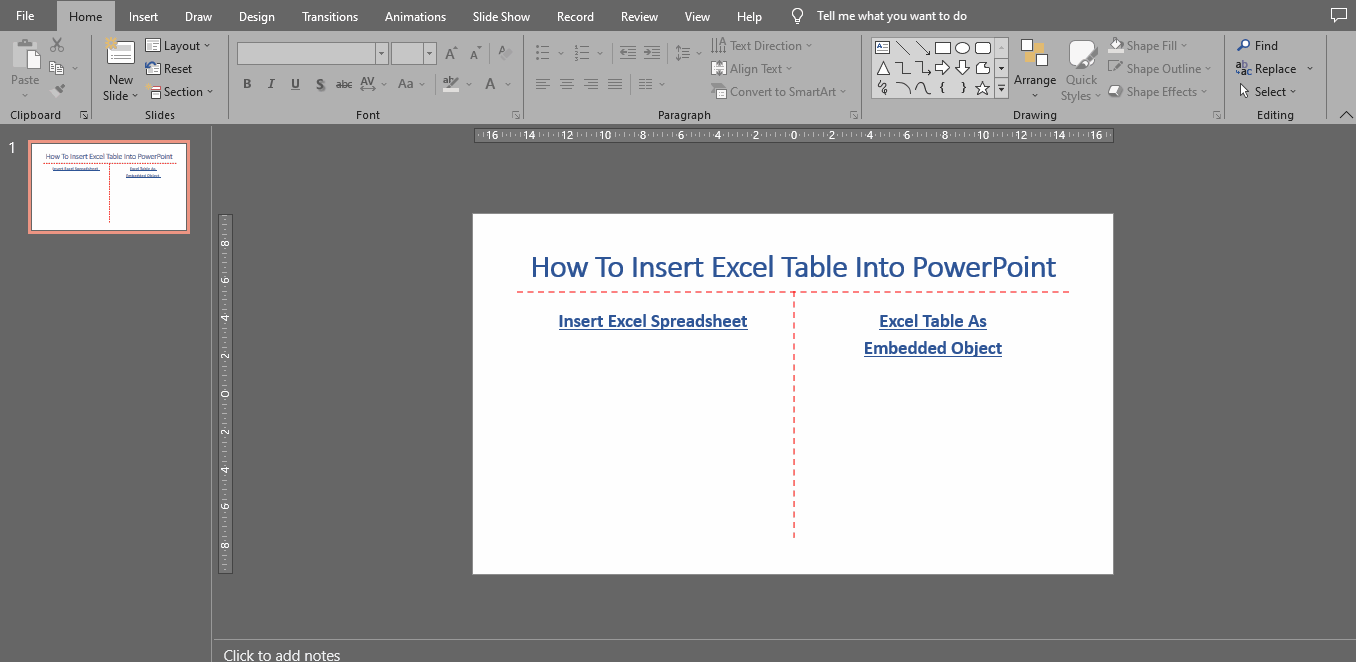
Method 1 – Insert Excel Spreadsheet
Step 1 – Go To Insert Tab
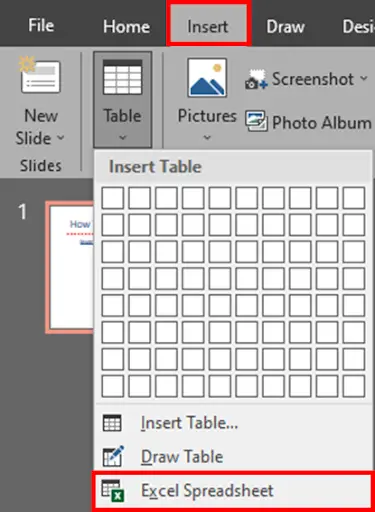
- Open your Powerpoint file & select the slide where you want to insert the Excel table.
- Go to the insert Tab, click on the Table button & select Excel Spreadsheet.
Step 2 – Create Spreadsheet Object
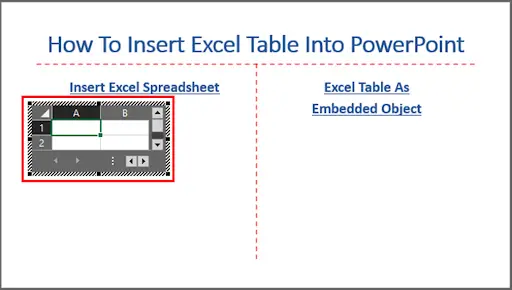
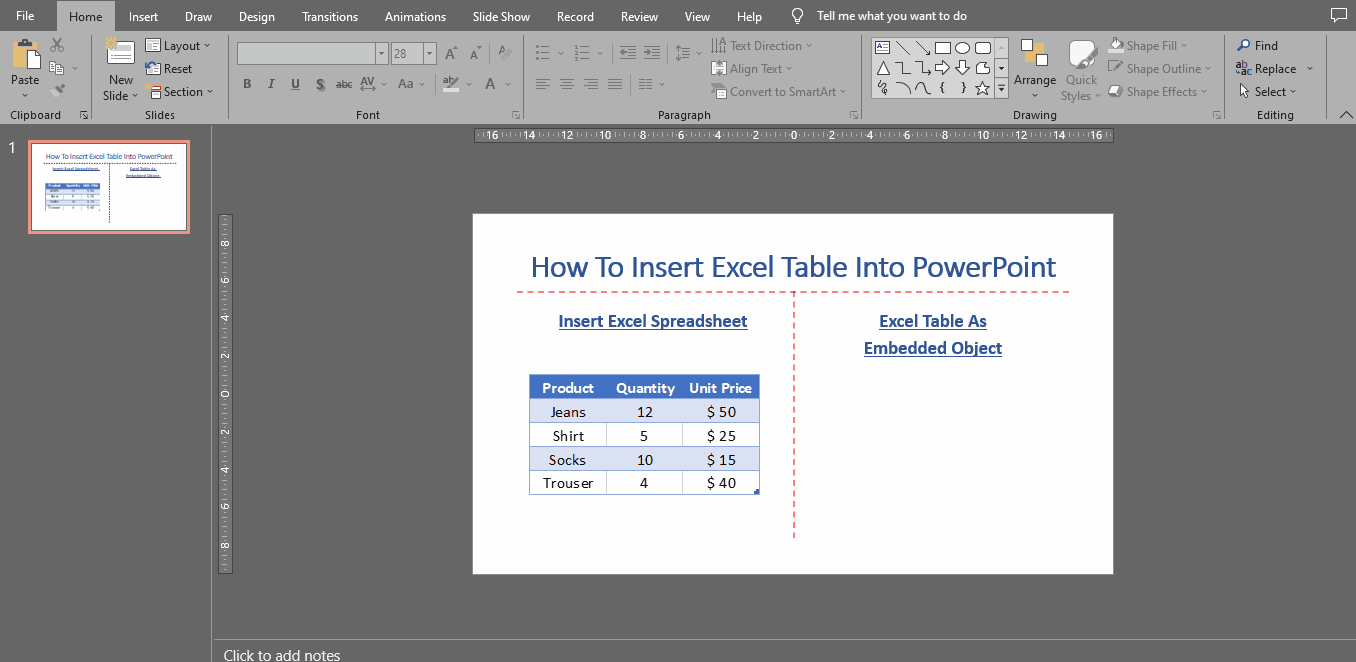
- A Spreadsheet will be inserted into your slide.
Step 3 – Insert Data
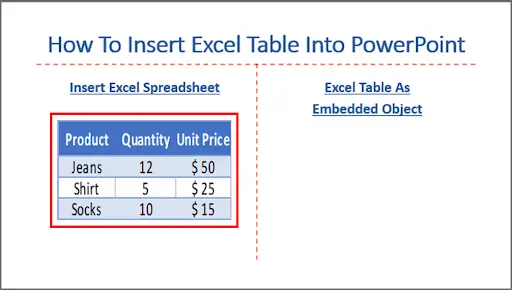
- Copy paste an already prepared table from excel in the spreadsheet or you can make your table just like MS Excel here.
Step 4 – Excel Spreadsheet Inserted
- When you insert the table, a Table Design tab will appear in the list of main tabs.
- From the options in this tab you can edit, resize and recolor the spreadsheet object according to your requirement & space, as shown above.
- Click anywhere in the slide to close the spreadsheet.
Method 2 – Insert Excel Table As Embedded Object
Step 1 – Go To Insert Tab

- Open your Powerpoint file & select the slide where you want to insert the Excel table.
- Go to the insert Tab, under the Text group click Object button.
Step 2 – Insert Object
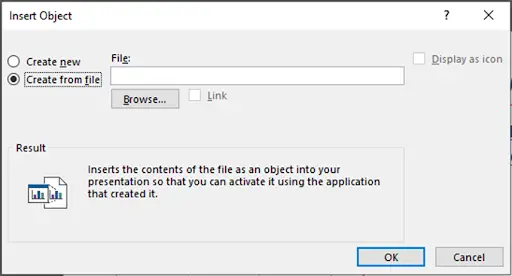
- Insert object screen will appear on your screen.
Step 3 – Locate & Link Excel File

- Select Create From File option, click browse button to locate your excel file.
- If you look closely, there is a check box to link the excel sheet. If you check mark the box, it means that whenever changes are made in the excel file, they will be updated in the object next time when you open the powerpoint slide (it’s optional).
- Leaving this check box blank will not link the excel file with powerpoint & the changes will not reflect in presentation.
- We will link our file & click the OK button.
Step 4 – Resize The Object
- Resize the object & place it on the slide.
Step 5 – Excel Table Inserted
- This is another way Excel table can be inserted in PowerPoint.


