
How to insert Excel in Powerpoint
 By
SpreadCheaters
By
SpreadCheaters

Powerpoint offers a very interesting way to insert excel. We can cater to this problem statement by using the insert option. We can perform the below mentioned way to insert excel in Powerpoint:
We’ll learn about this methodology step by step.
To do this yourself, please follow the steps described below;
Step 1 – Powerpoint slide
– Open the desired Powerpoint slide where you want to insert excel file
Step 2 – Insert option
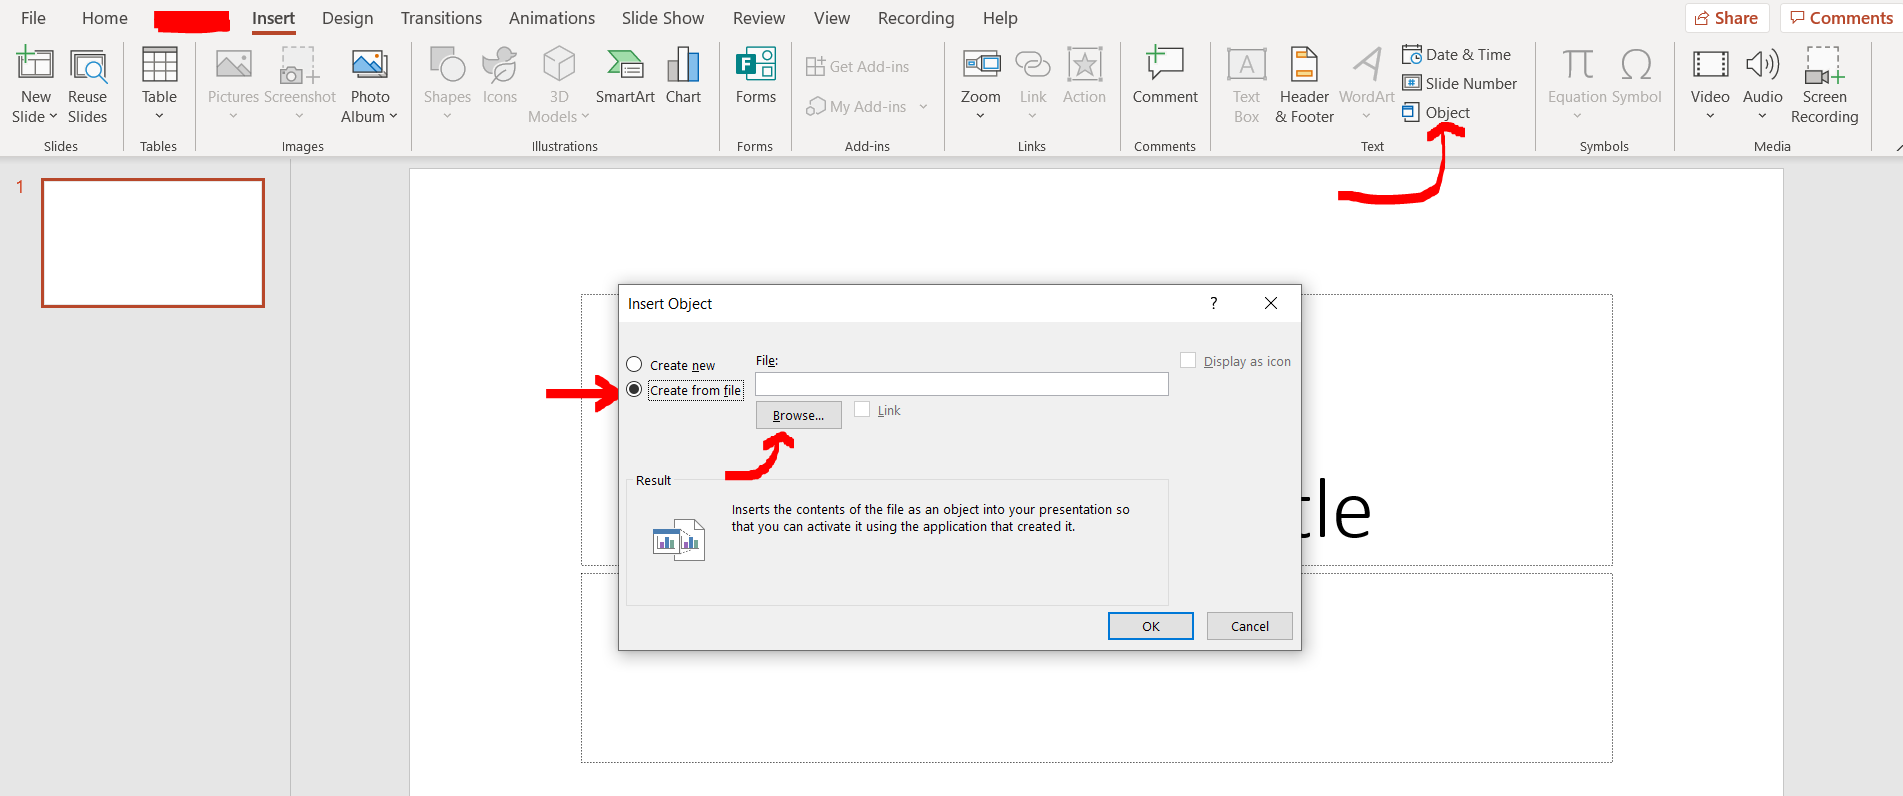
– Now click on “Object” under the “Insert” option. An “Insert Object” dialogue box will appear, click on “Create from file” and then click the “Browse option”
Step 3 – Browse option
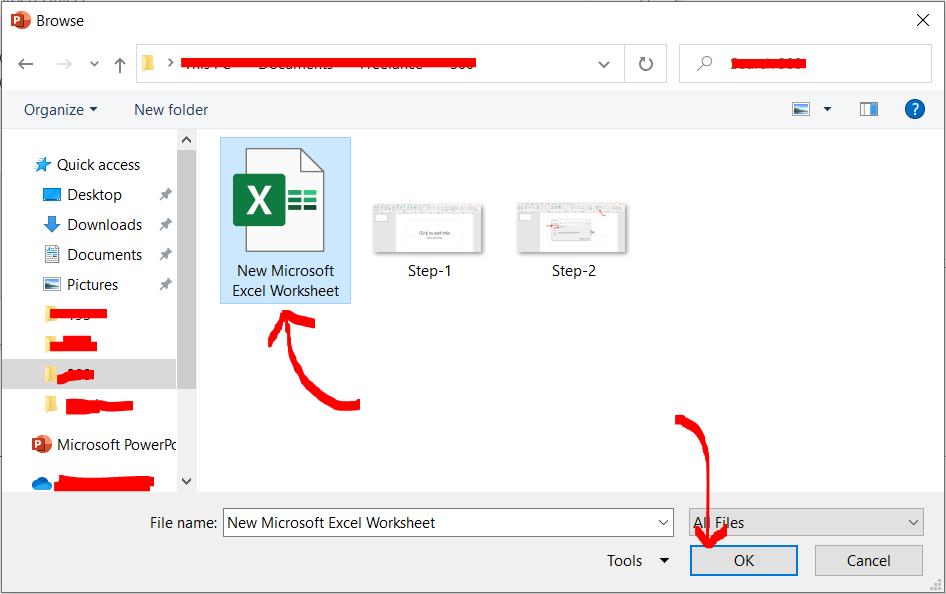
– Now a dialogue box will appear, navigate to the folder where you have kept your excel file, select it, and then click “OK”.
Step 4 – Insert object final option
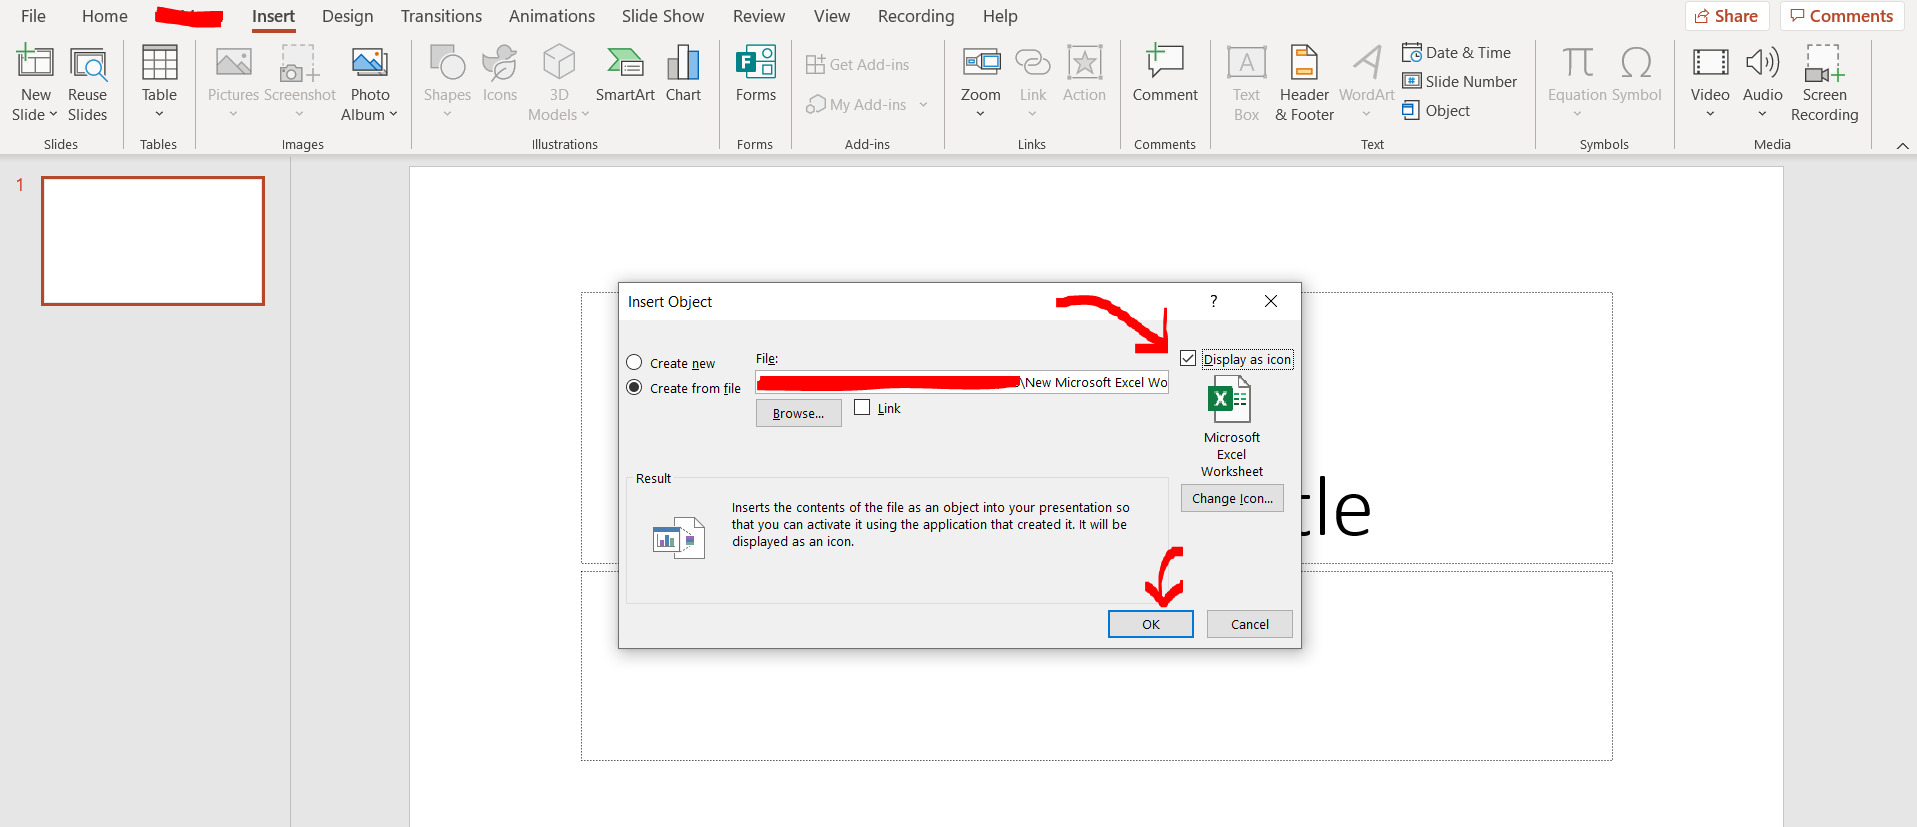
– Now check the “Display as icon” and then click OK on the Insert object dialogue box. (Note the path to your excel file must have been appeared in the blank space now)
Step 5 – Excel inserted
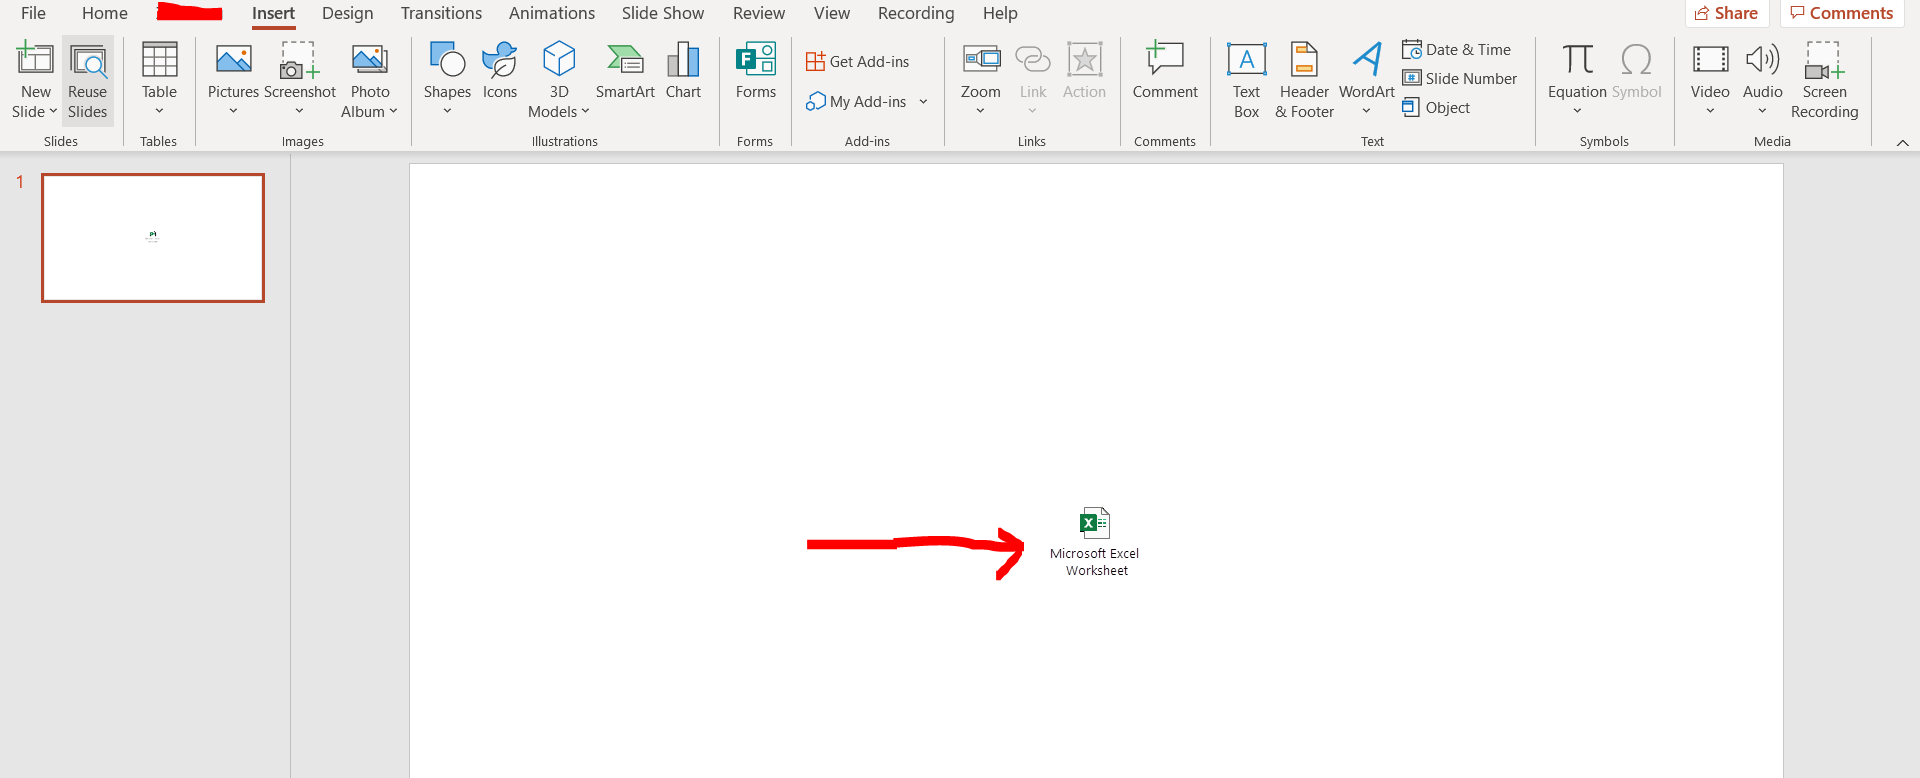
– We can see that the excel file has been inserted in Powerpoint.


