How to insert an Excel file into Powerpoint
You can watch a video tutorial here.
Excel sheets provide many numerical and computation functions that may be difficult to replicate in other applications such as Powerpoint. When making a presentation that draws on calculated data from Excel, it is better to either include the Excel file in the presentation or use Excel within Powerpoint.
Option 1 – Create a new Excel file
Step 1 – Open the Insert Object window
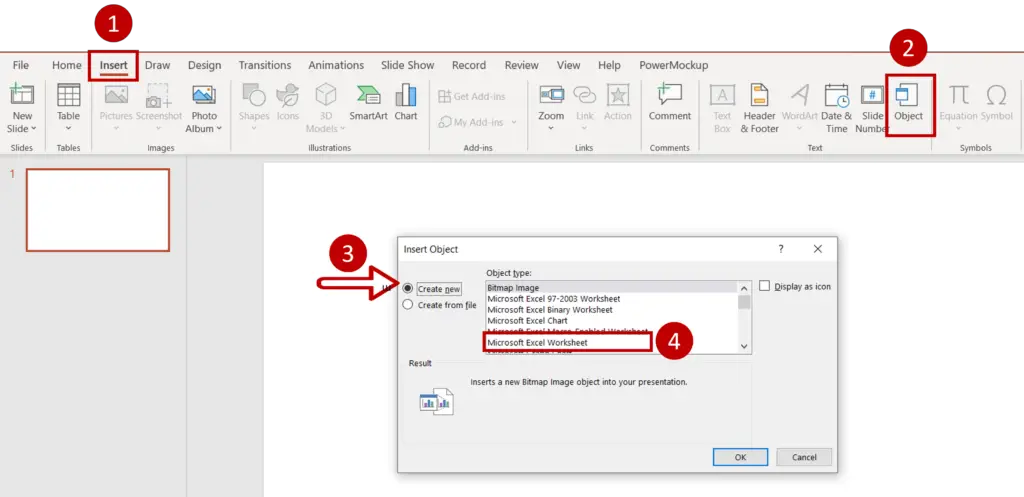
- Go to Insert > Text > Object
- In the window that opens choose to Create new
- Select Microsoft Excel Worksheet as the Object Type
Step 2 – Enter data in the Excel sheet
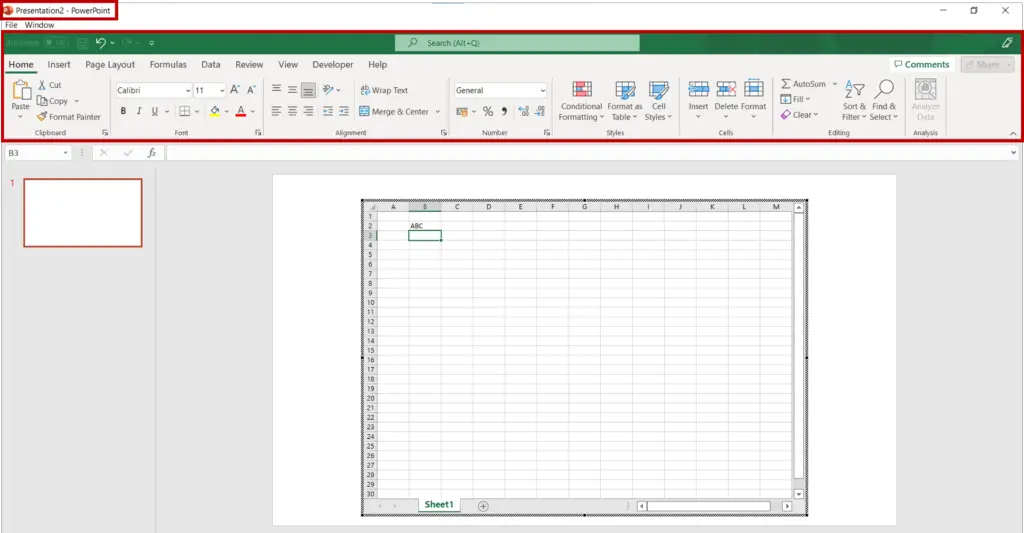
- An Excel sheet opens within Powerpoint with all the Excel functionality accessible
- Enter data in the excel sheet
Step 3 – View the result
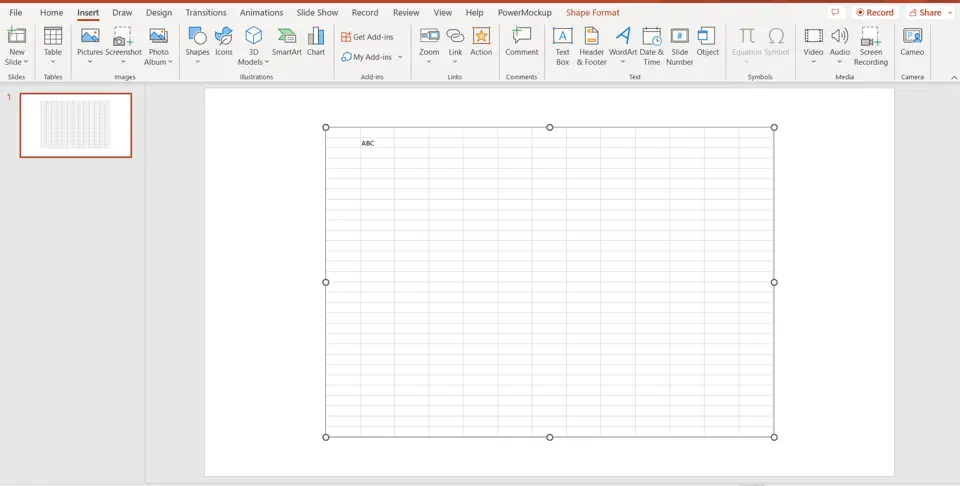
- Double-click on the worksheet to edit it
Option 2 – Embed an Excel file in Powerpoint
Step 1 – Open the Insert Object window
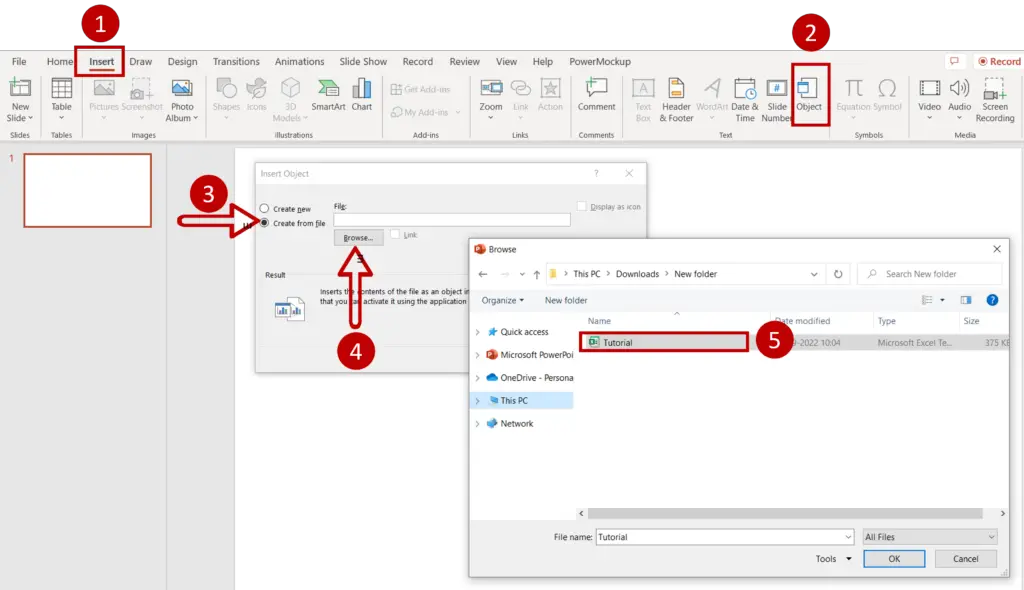
- Go to Insert > Text > Object
- In the window that opens choose to Create from file
- Click Browse
- Choose the file from the directory and click OK
Step 2 – Choose the options for embedding
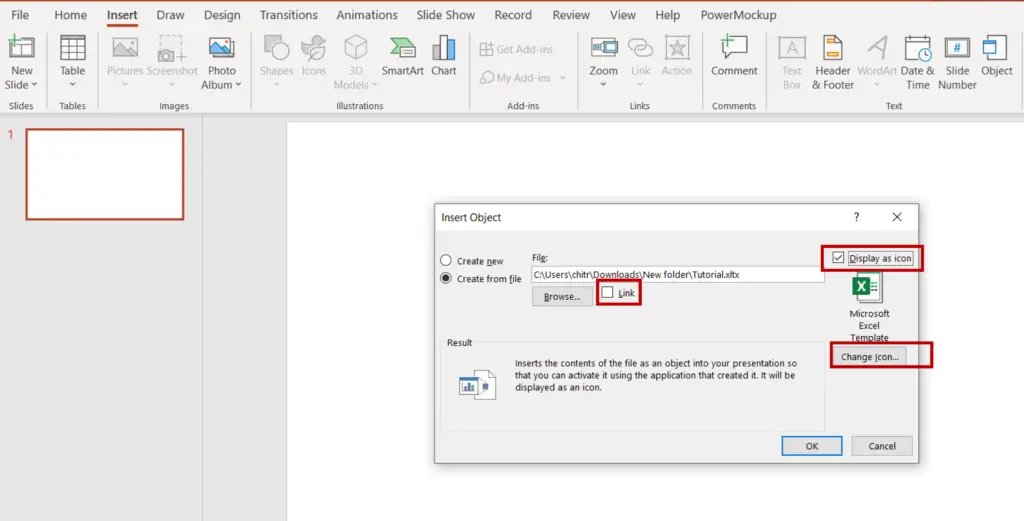
- Select Link if you want to create a link to the file instead of embedding the file in the slide Note: This option creates a smaller file but the source Excel file has to always be available with the Powerpoint file
- Choose Display as icon to show the file in the form of an icon instead of as the entire file
Note: This is usually a better option as the icon occupies less space
Step 3 – View the result
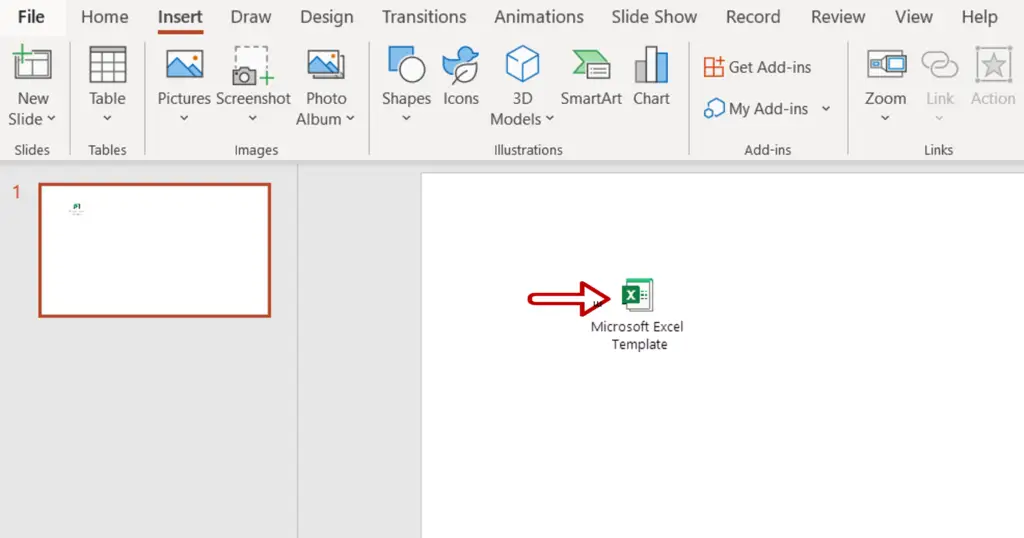
- Double-click on the icon to open the file


