
How to insert a text box in Excel
 By
SpreadCheaters
By
SpreadCheaters
You can watch a video tutorial here.

Sometimes we have to add annotations to provide more information about the data present in Excel. In this situation we can use text boxes to annotate the data.
This is a very simple procedure so follow along the steps mentioned below to insert the text box in Excel.
Step 1 – Locate the Insert Tab
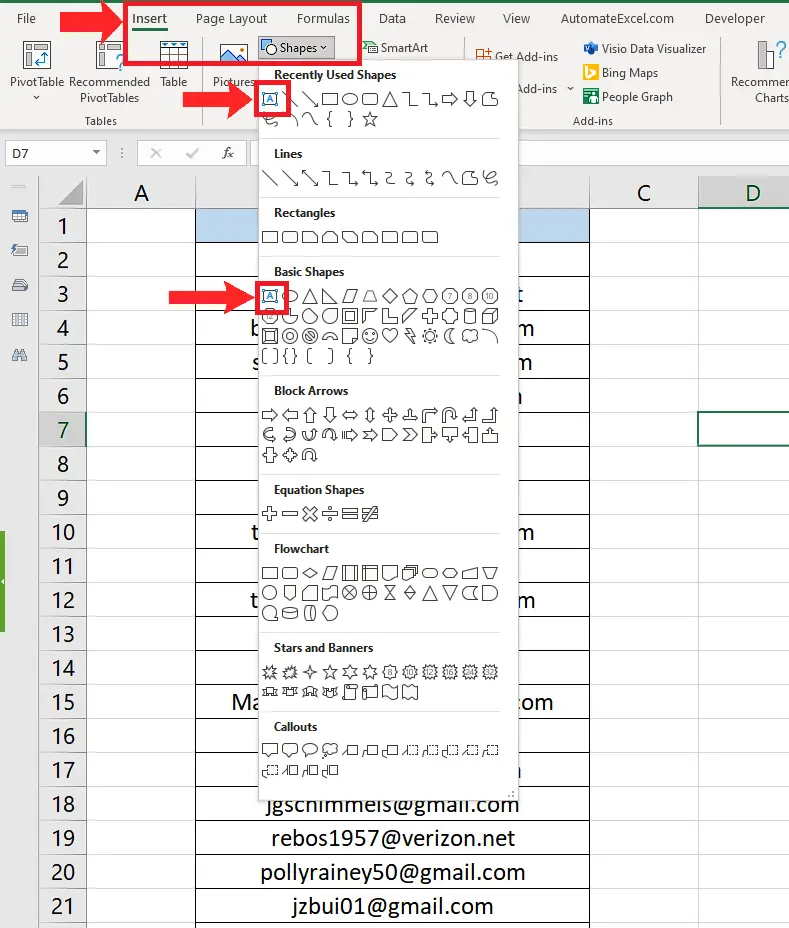
– In your Excel workbook, locate the Insert tab and then go to the Illustrations group.
– Then click on shapes and there you can find the textbox option both in Recently used Shapes and Basic Shapes as shown in the figure below;
Step 2 – Insert the textbox into Excel

– You can choose to insert the textbox from both Recently used Shapes or Basic Shapes.
– Just click on either of those and then move the mouse over to the worksheet area. Click anywhere you wish to draw the textbox and drag the mouse. When you release the mouse a textbox will be inserted in the worksheet and you will see the cursor blinking inside so that you can also type in any text inside the textbox as shown in the figure below.
So this is how you can insert the textbox in MS Excel.


