
How to go to row in Excel.
 By
SpreadCheaters
By
SpreadCheaters
Going to a specific row in Excel is crucial for efficient data analysis, data entry, and editing. It saves time and effort by allowing targeted analysis and accurate editing without the need to scroll through the entire spreadsheet. Navigating to specific rows enables data validation, error checking, sorting, and filtering, and promotes accurate and organized data analysis.
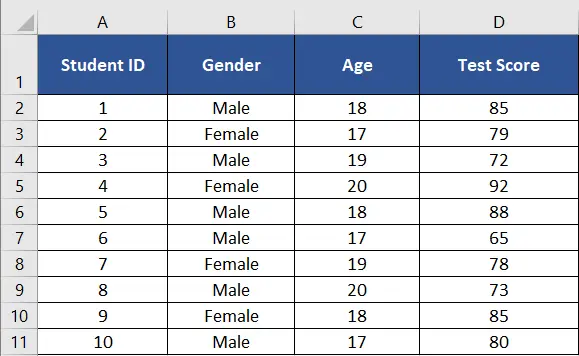
The provided dataset contains information on the performance of 10 students, including their Student ID, Gender, Age, and Test Score. The dataset encompasses a mix of male and female students with ages ranging from 17 to 20 years. The Test Score column represents the scores obtained by the students on a particular assessment, ranging from 65 to 92. This dataset allows for the analysis and exploration of factors such as gender, age, and their potential influence on the student’s test scores.
Method – 1 Go to a specific row in a worksheet with Name Box
Step – 1 Go to the Name Box
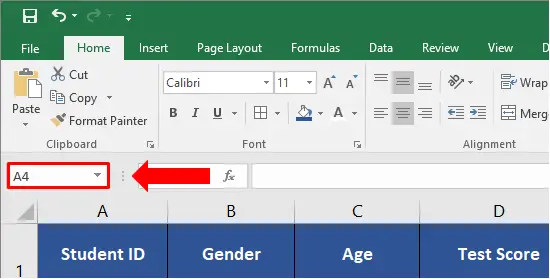
- Go to the Name Box beside the formula bar.
- Type the cell address of the row which you want to jump to directly, for example, I will input the A4 into the Name Box to go the row 4.
Step – 2 Enter row number
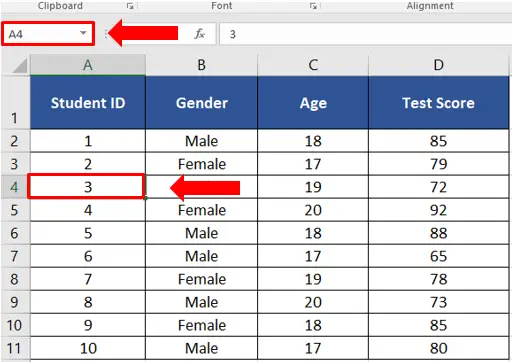
- After you have typed the row number press Enter.
- You will be directed to the specific Row number.
Method – 2 Go to a specific row in a worksheet with Go To command
Step – 1 Open Go To dialogue box
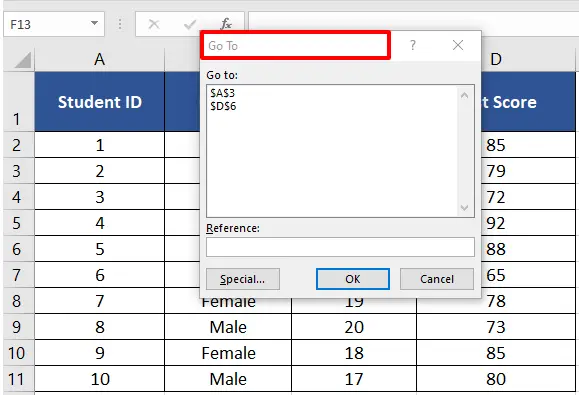
- Except for the Name Box, you can also apply the Go To command to solve this task.
- Hold down the Ctrl + G keys to open the Go To dialog box.
Step – 2 Enter the row number
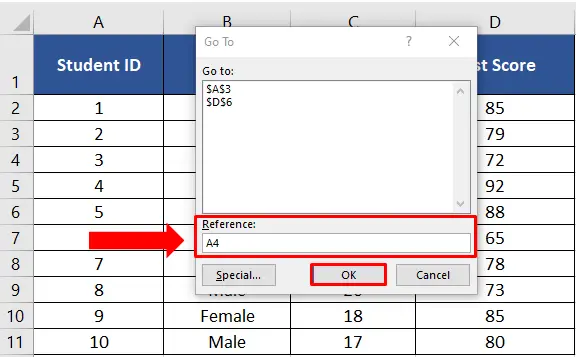
- In the dialog, type the cell address which you want to go to into the Reference text box.
- Then click OK button, and the worksheet will navigate to the specific row immediately.
Conclusion:
Overall, going to a specific row in Excel enhances productivity, accuracy, and efficiency when working with data, allowing you to focus on relevant information, perform analysis, and make informed decisions.


