How to force Excel to open CSV files with data arranged in the column
Opening CSV files in Excel is a common task for data analysis and manipulation. However, Excel typically assumes that the data in a CSV file is arranged in rows by default. What if your CSV file has data organized in columns? In this blog post, we will explore how to force Excel to open CSV files with data arranged in columns, ensuring accurate import and preserving the intended structure of your data.
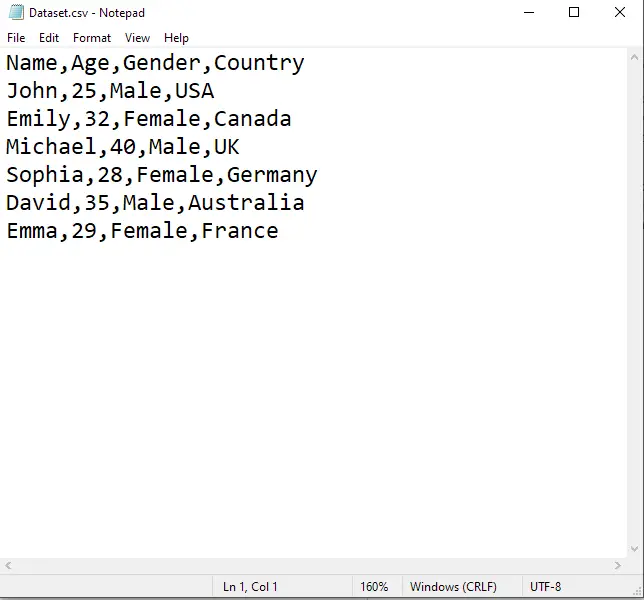
Here we have a CSV file that contains four columns Name, Age, Gender, and Country. In this CSV data is arranged in the form of columns. In this tutorial, we will learn how a CSV file is opened in Excel with data arranged in columns. Let us have a look at the CSV dataset.
Method – 1 Text Import Wizard through From Text option
Step – 1 Locate From Text option in Data Tab
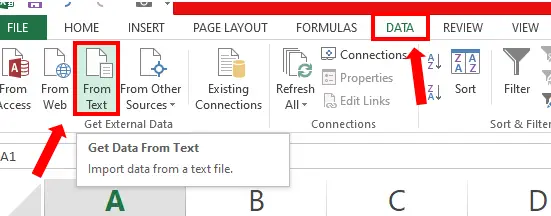
- Click on the Data tab on the ribbon.
- Click on From Text located in the Get External Data group.
Step – 2 Import the CSV file.
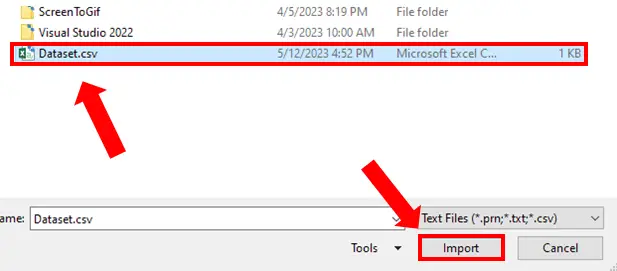
- After you click on the From Text, select the CSV file.
- Then click on Import.
Step – 3 Text Import Wizard settings.
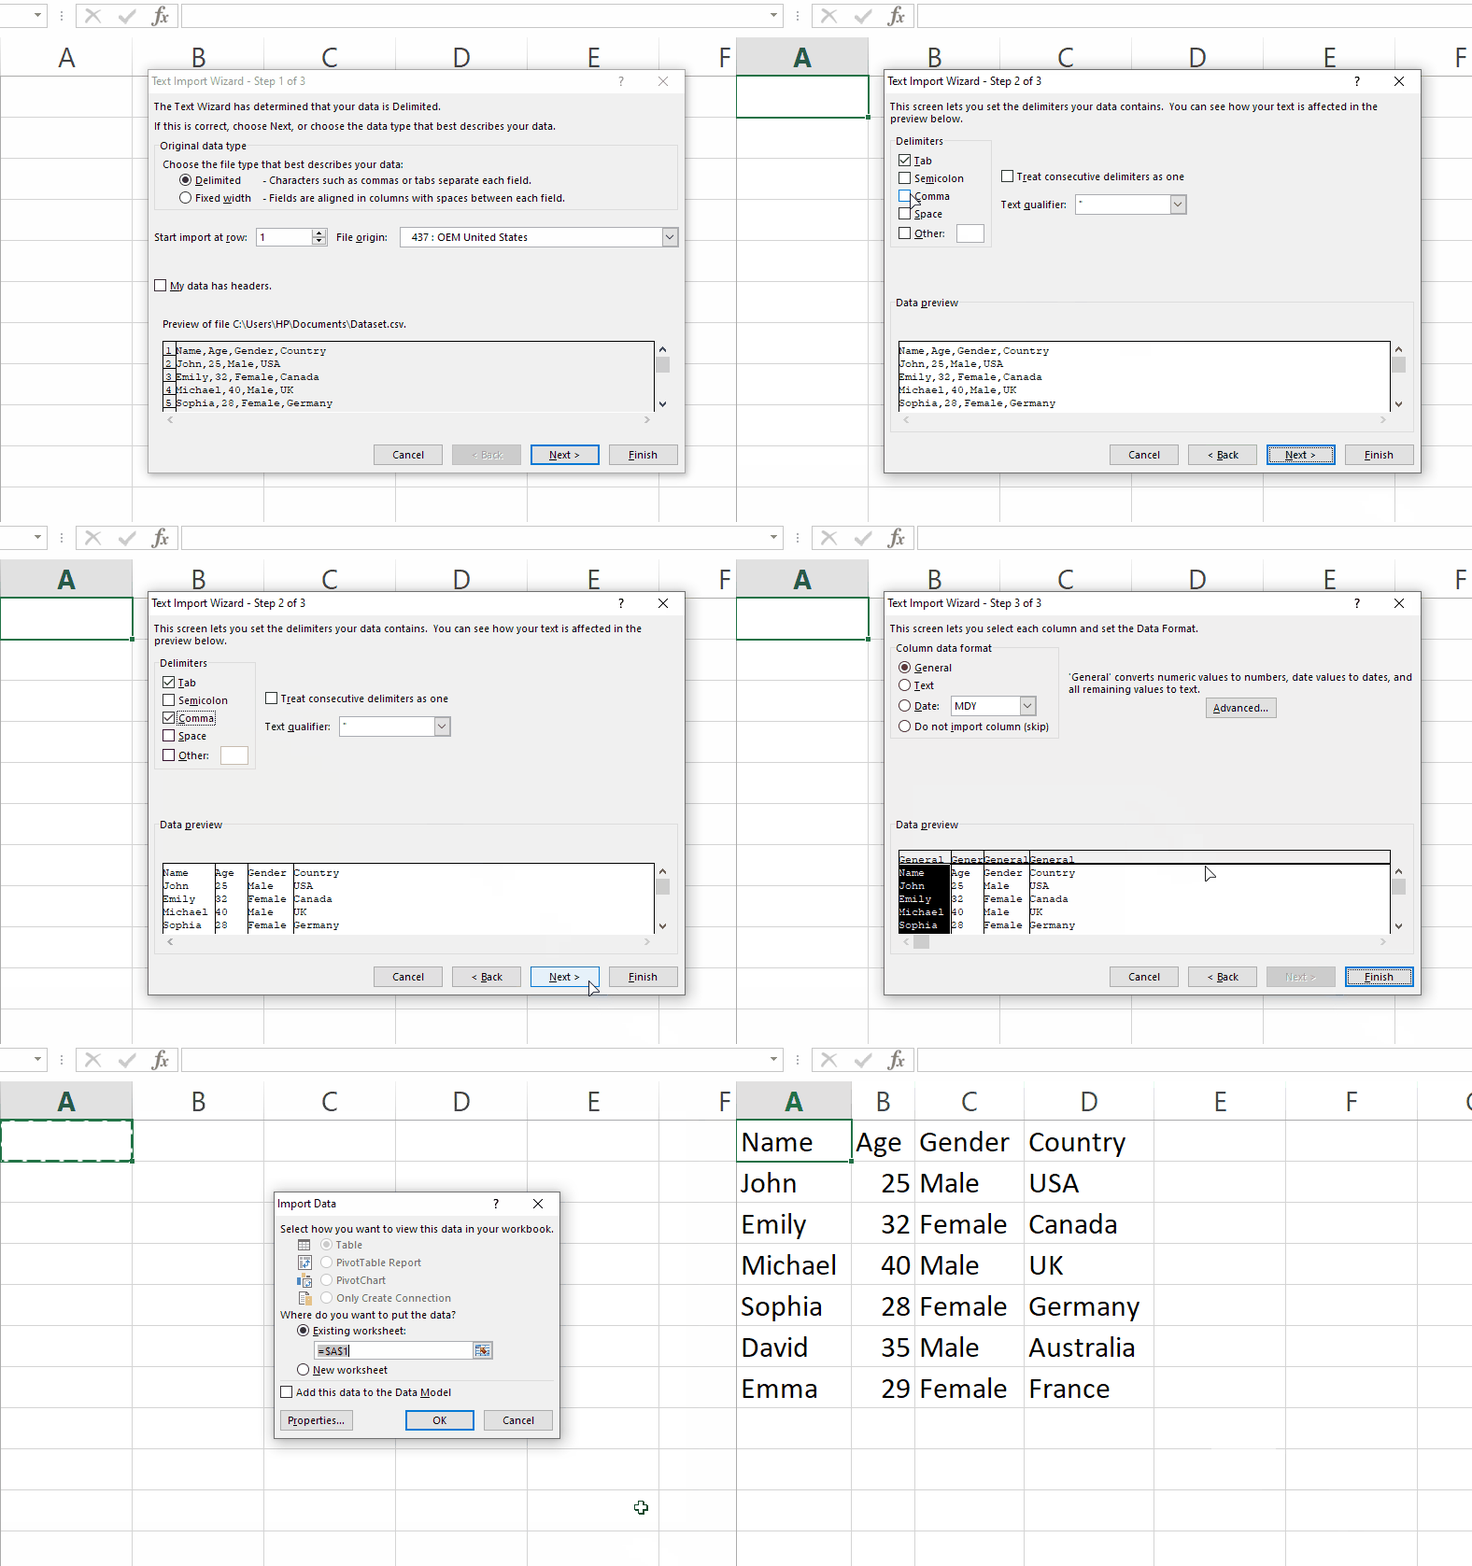
- In Text Import Wizard – Step 1 of 3 menu click Next.
- Text Import Wizard – Step 2 of 3 In the Delimiters, check the checkbox for Comma.
- Click on Next.
- Text Import Wizard – Step 3 of 3 Click on Finish.
Method – 2 Using Text to Columns
Step – 1 Copy the CSV dataset.
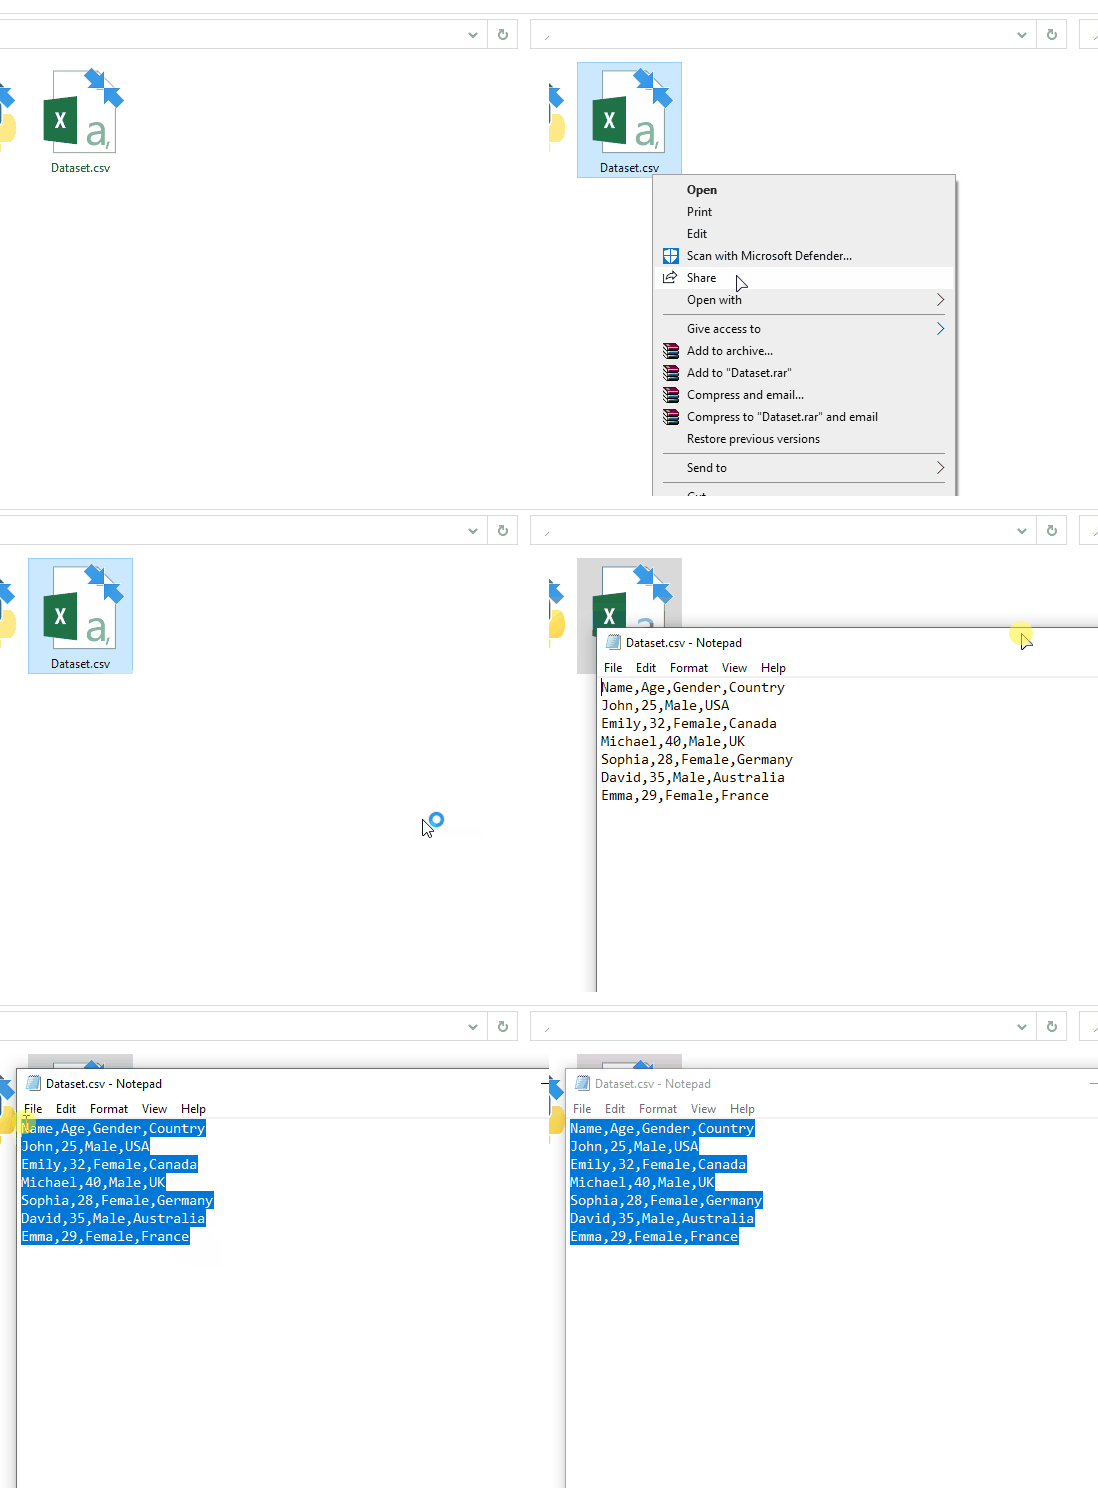
- Locate the CSV file in the folders.
- Right-click on the file and in the side menu of Open with click on Notepad.
- Copy the dataset by selecting the whole data then after right-clicking on it and choosing Copy or simply press Ctrl + C to copy the selected Data.
Step – 2 Pasting in Excel.
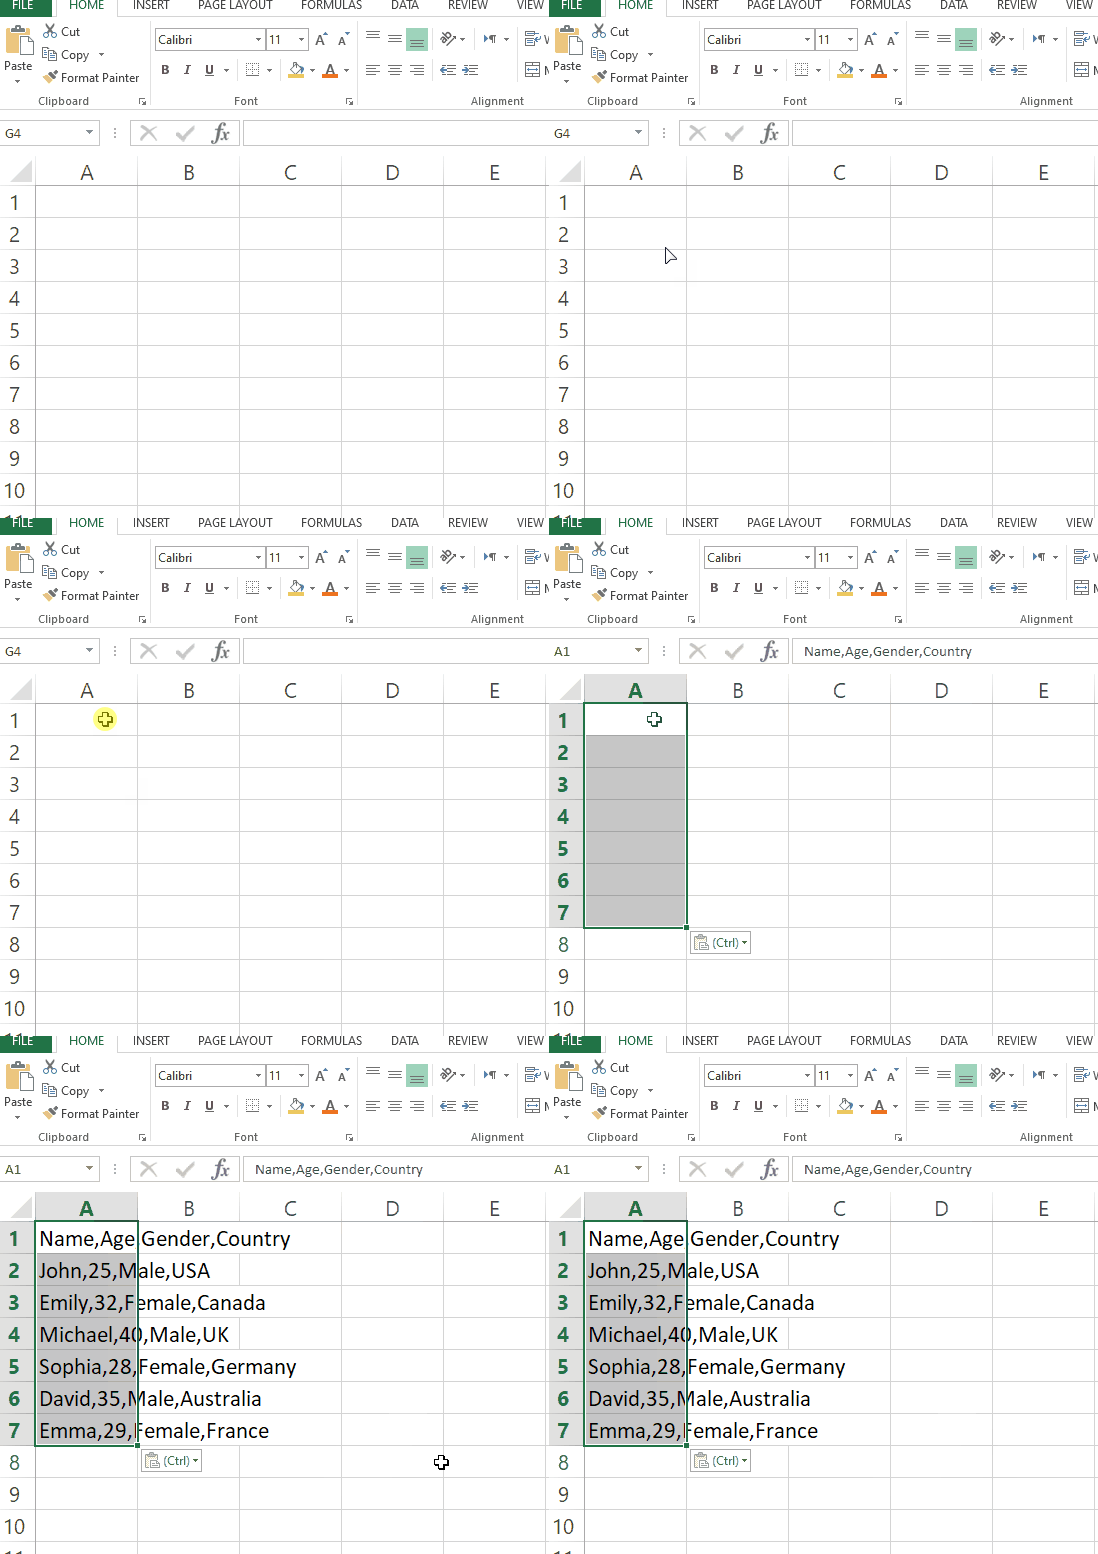
- After you copy it open Excel.
- Press Ctrl + V or go to Clipboard group in the Home tab then in the drop-down menu of Paste, click on Keep Text Only (T) logo.
Step – 3 Converting it from text to column.
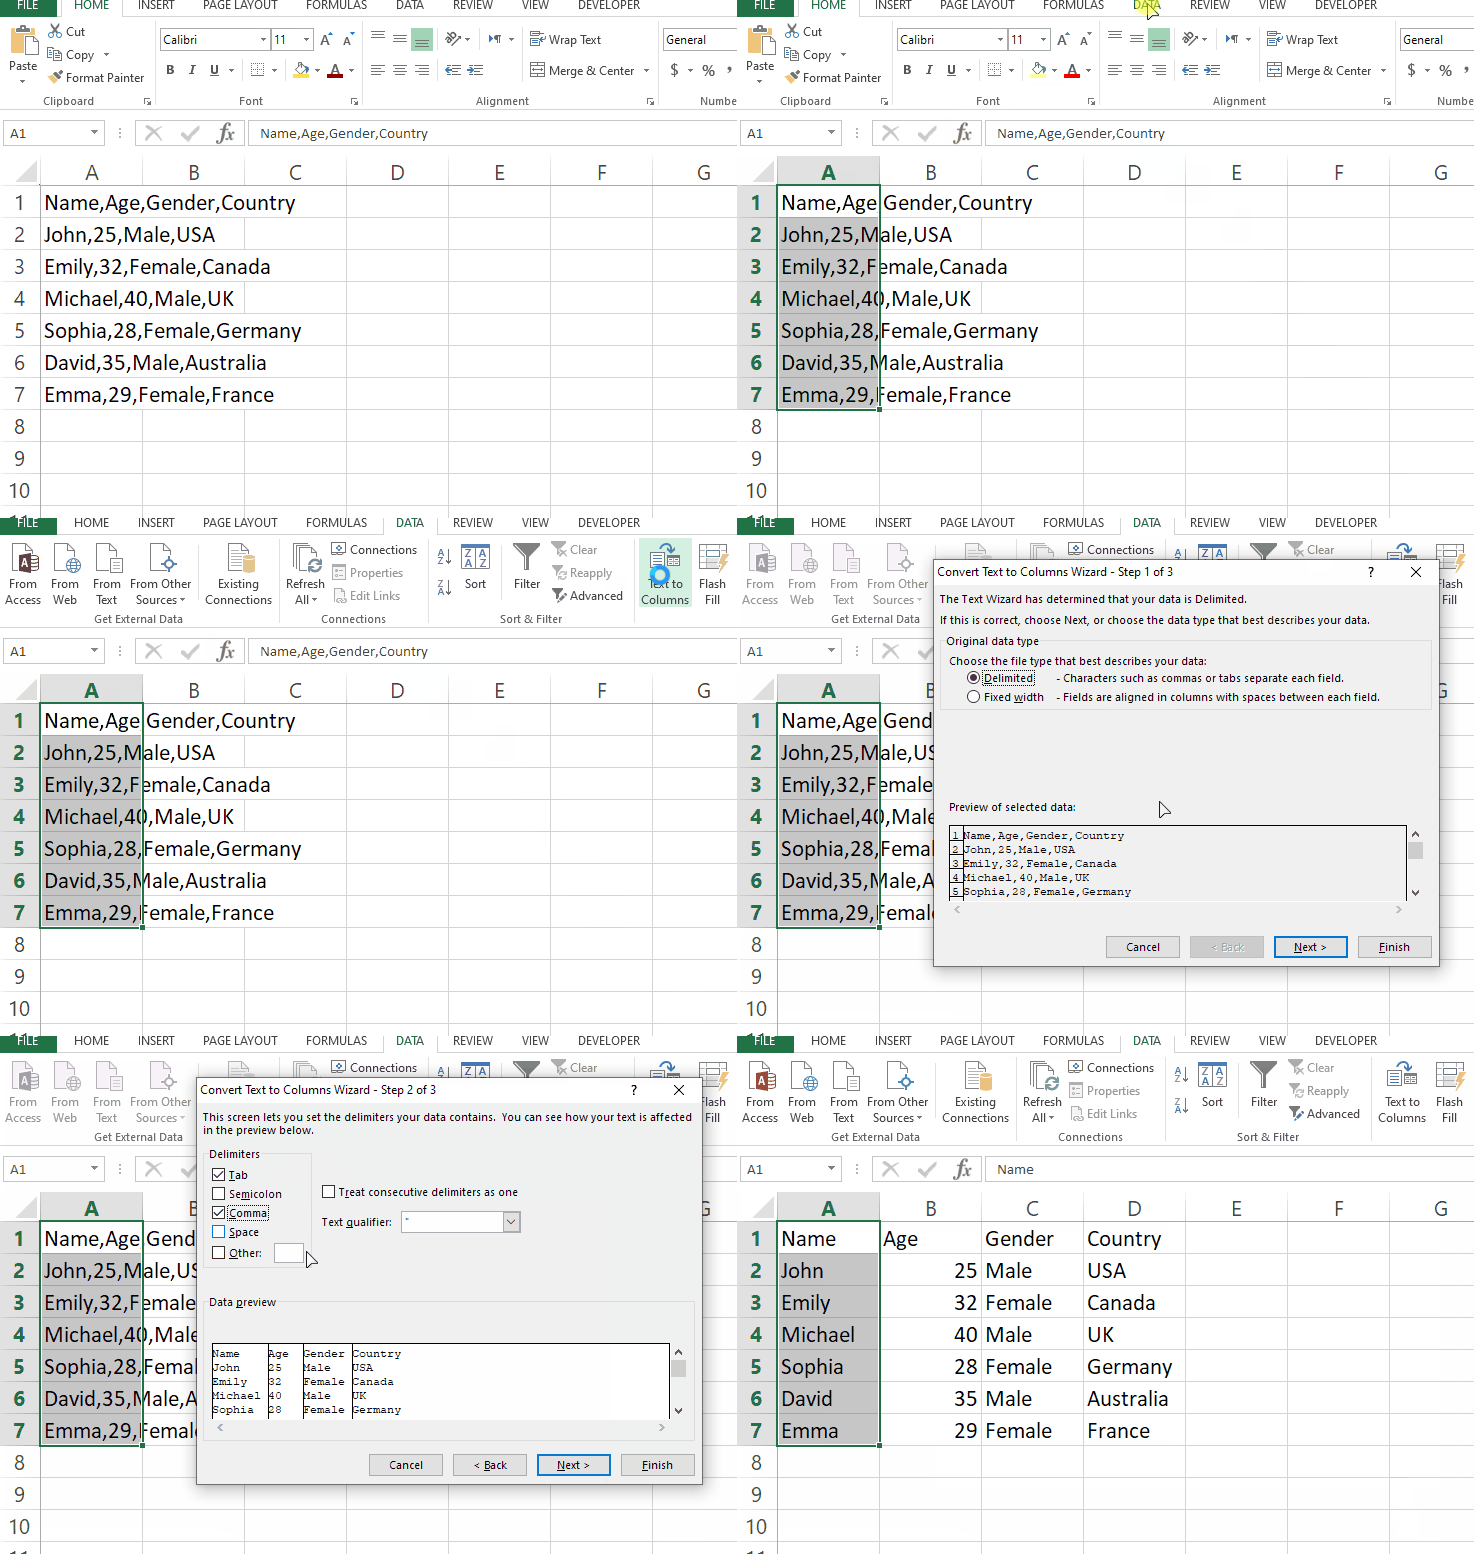
- Select the first column then open the Data tab.
- In the Data Tools group click on the Text to Columns option.
- This will open the Text Import Wizard menu.
- Make sure the Delimited option is checked in Text Import Wizard – Step 1 of 3 then click Next.
- In Text Import Wizard – Step 2 of 3 check the Tab and Comma option and click Next.
- In Text Import Wizard – Step 3 of 3 menu click Finish.


